 Free shipping on orders over £29,85

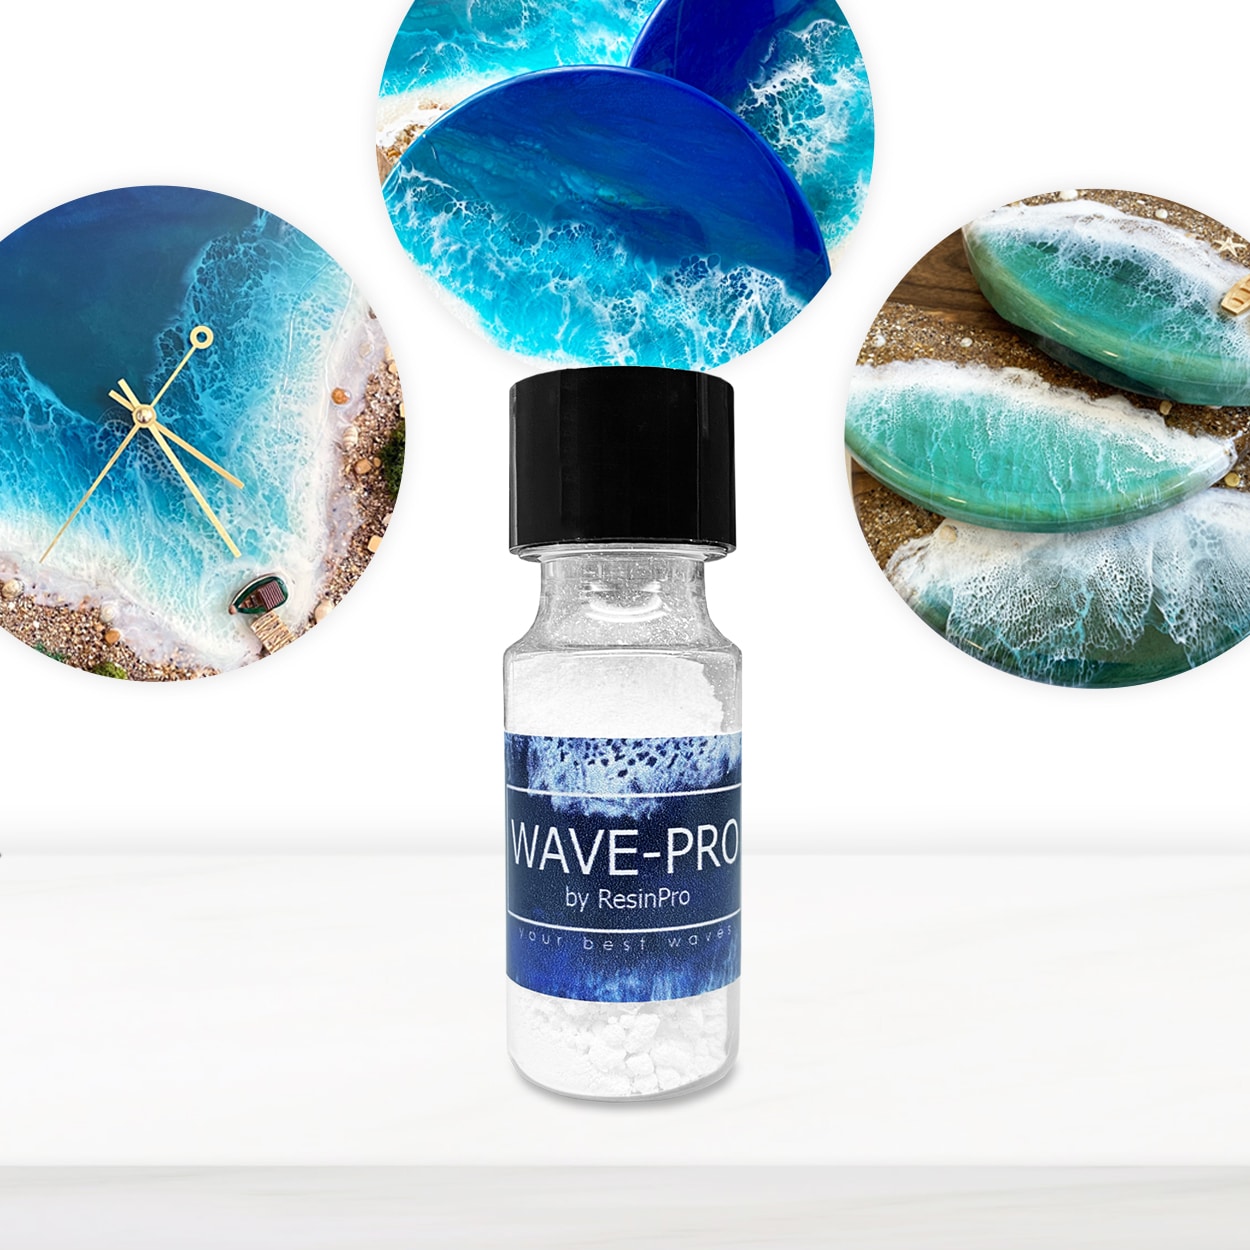
← Back to How to create a sea wave effect with epoxy resin?
Creating realistic wave effects in epoxy resin is a popular technique for artists aiming to capture the dynamic energy of the sea. With the right materials and careful steps, anyone can achieve beautiful, natural-looking ocean waves in their resin artwork.
Essential Materials for Wave Effects
To craft authentic wave textures, select a pourable, high-viscosity epoxy resin to help retain cellular details and sharp lines. A specialised pigment additive such as Wave-Pro physically disperses the resin, forming soft, realistic sea foam and dynamic cell patterns without relying on heat guns. For truly oceanic colours, opt for a marine dye set designed for resin, which offers pre-mixed shades of blues and greens that replicate the sea’s depth and vitality.
- High-viscosity epoxy resin
- Wave effect pigment additive
- Marine-inspired resin-safe dyes
- Sturdy base (like wood panels or canvas)
Steps to Create Wave Patterns
Begin by pouring coloured resin for your base ocean tones. Once the initial layer is levelled, use a white-tinted resin, enhanced with your chosen wave additive, to outline your wave lines and foam. Manipulate the resin gently with sticks or tilting, allowing the additive to react and form lacy effects. Unlike other methods, a quality additive removes the need for torches, making the process both safer and easier to control.
When Wave Creation Techniques Matter Most
Wave effects are ideal in projects such as beach-themed coasters, wall art, and serving trays, where natural movement and fine details transform the finished piece. Using a complete kit—such as “Sea” – Resin Kit for Creating Ocean Art—ensures all materials work seamlessly together for maximum impact.
Related products
Related guides
Mastering the art of wave creation in epoxy resin not only enhances the realism of your ocean scenes but also adds a unique touch to your artwork. Explore more about sea wave resin effects and techniques in our main epoxy resin wave art guide.