 Free shipping on orders over £29,85

How do you colour resin?
Achieve vivid transparent or opaque hues in your resin art


Bringing vibrant colour to your resin opens up endless creative possibilities, from dazzling art pieces to subtle tinted jewellery and functional decor. This guide walks you through the essentials for safely and beautifully colouring resin, so you can achieve eye-catching transparent, translucent, or rich opaque results every time.
What You’ll Need
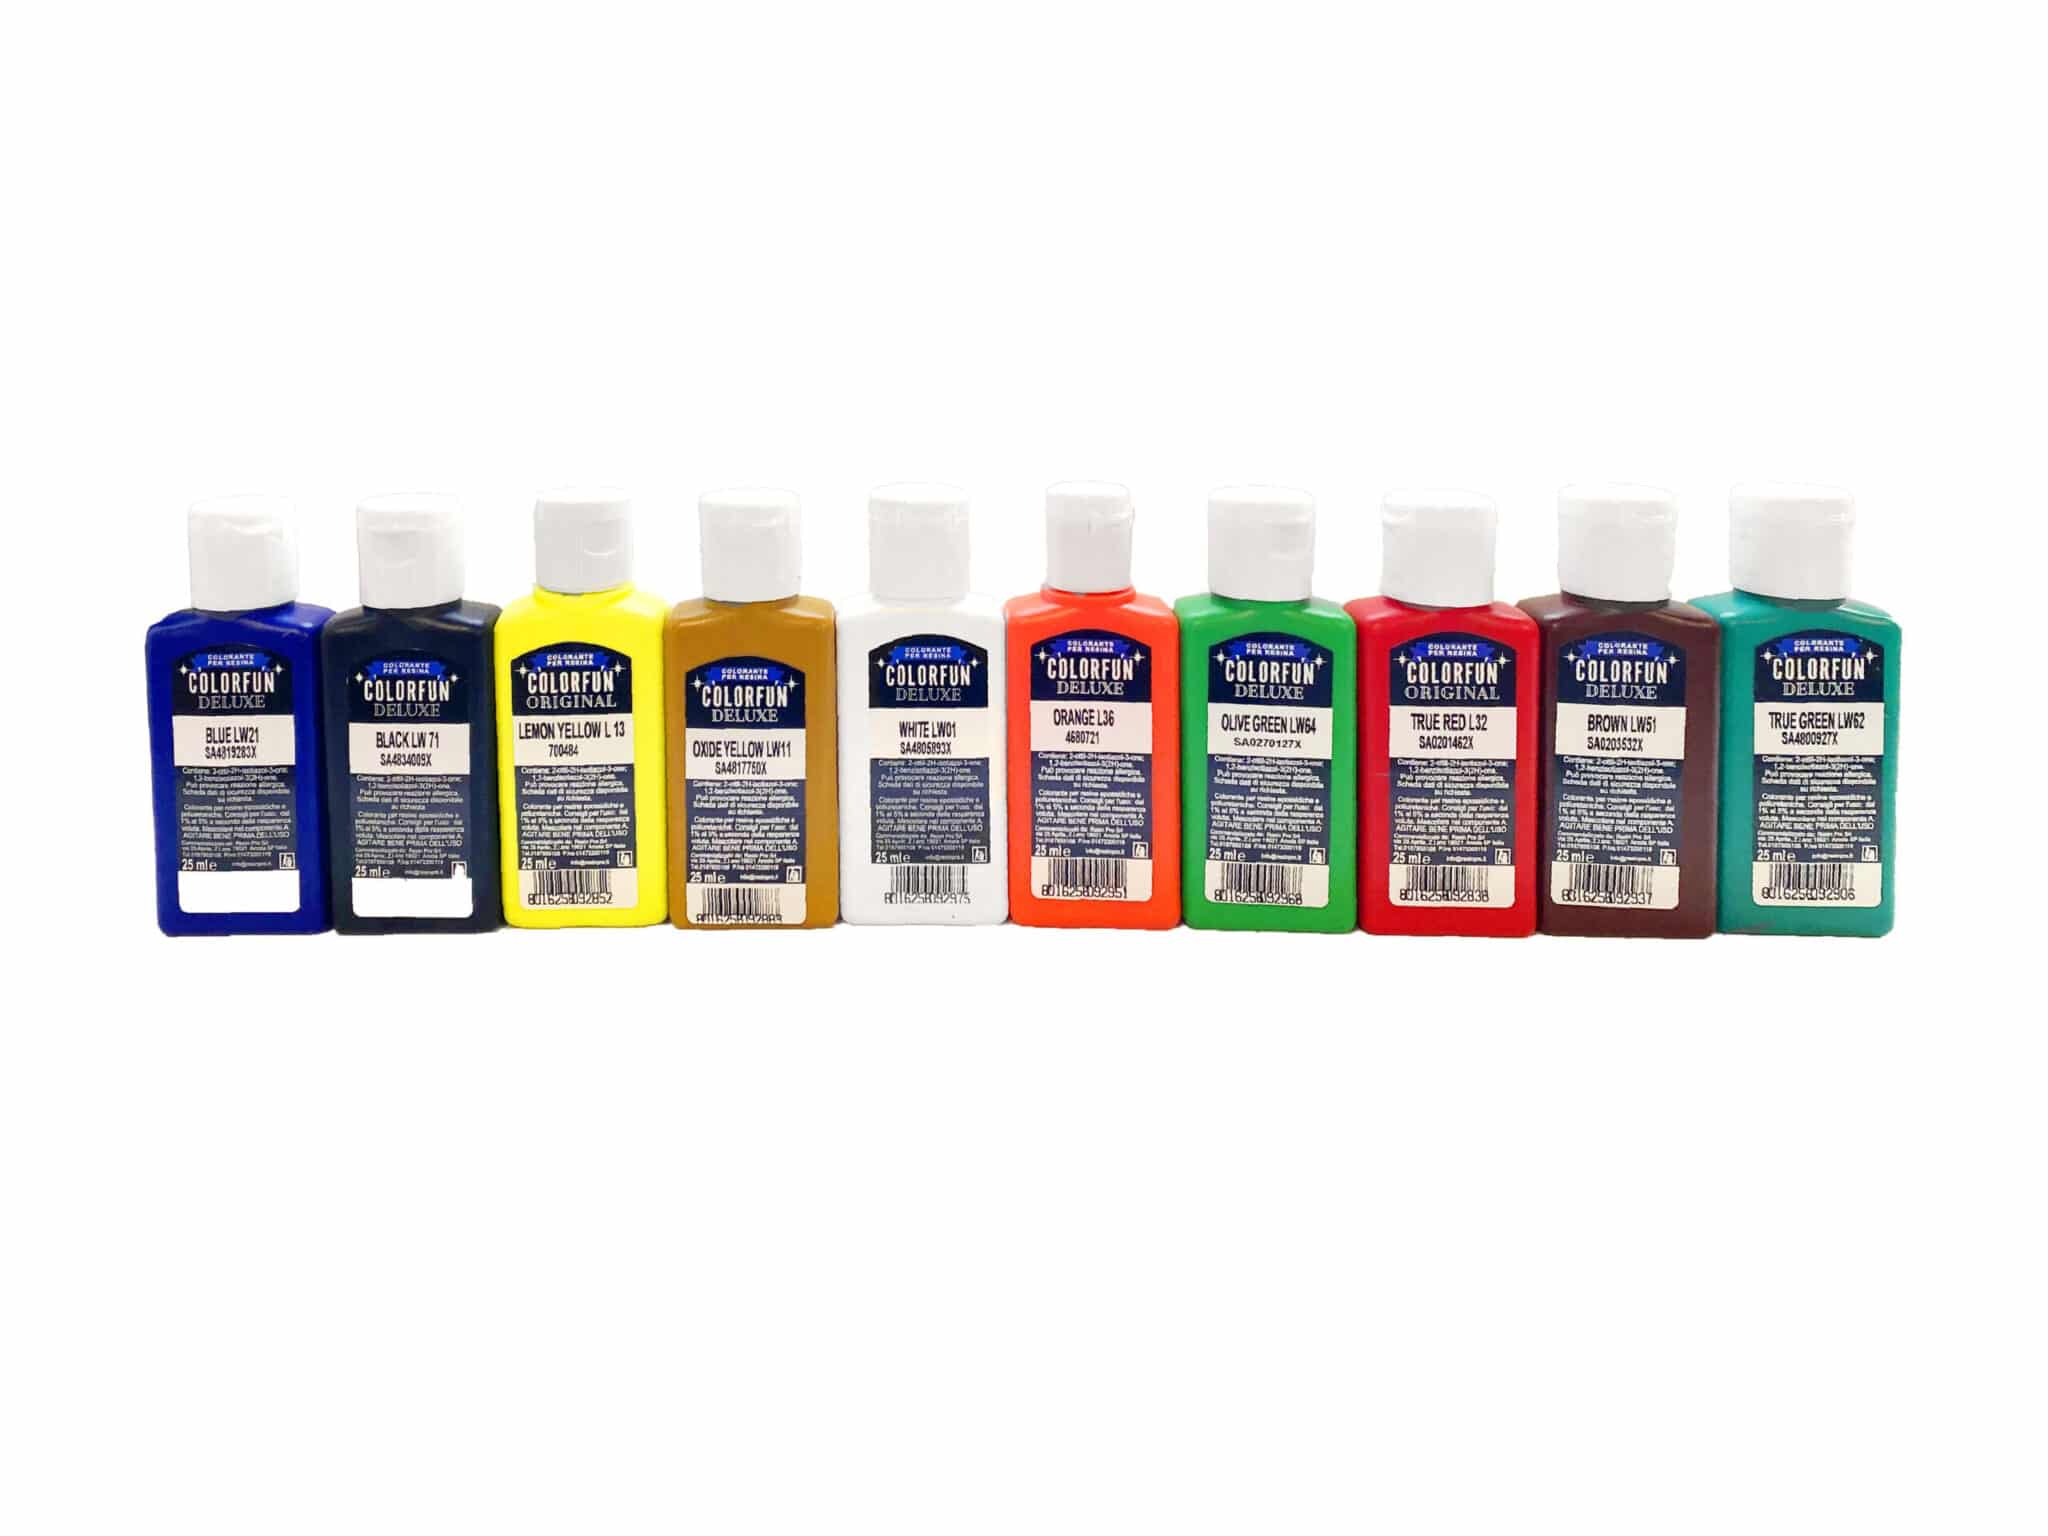
- “Colourfun Set” – Liquid Epoxy Resin Colourant Set for Solid Colour Effects: A set of concentrated pastes designed for vivid, translucent, or opaque results in epoxy resin.
- “Magic Crystal” – Transparent Resin Colour 45ml: Adds glass-like transparency and vibrant colour for crystal-clear effects.
- “Colourfun” – Liquid Epoxy Resin Colourant 25-100ml – High coverage: Liquid colourant offering control from deep opaque to translucent hues.
- “Magic Crystal” – Set of 5 Transparent Colourants, 5 x 45ml: Set of transparent colourants for consistently clear crystal resin.
- Protective gloves and apron
- Mixing sticks and disposable cups
- Clean, dust-free workspace
- Resin system (epoxy or UV, as compatible with your chosen colourant)
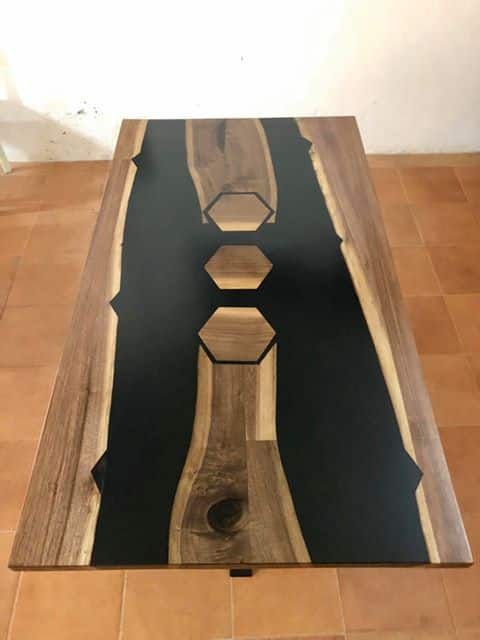
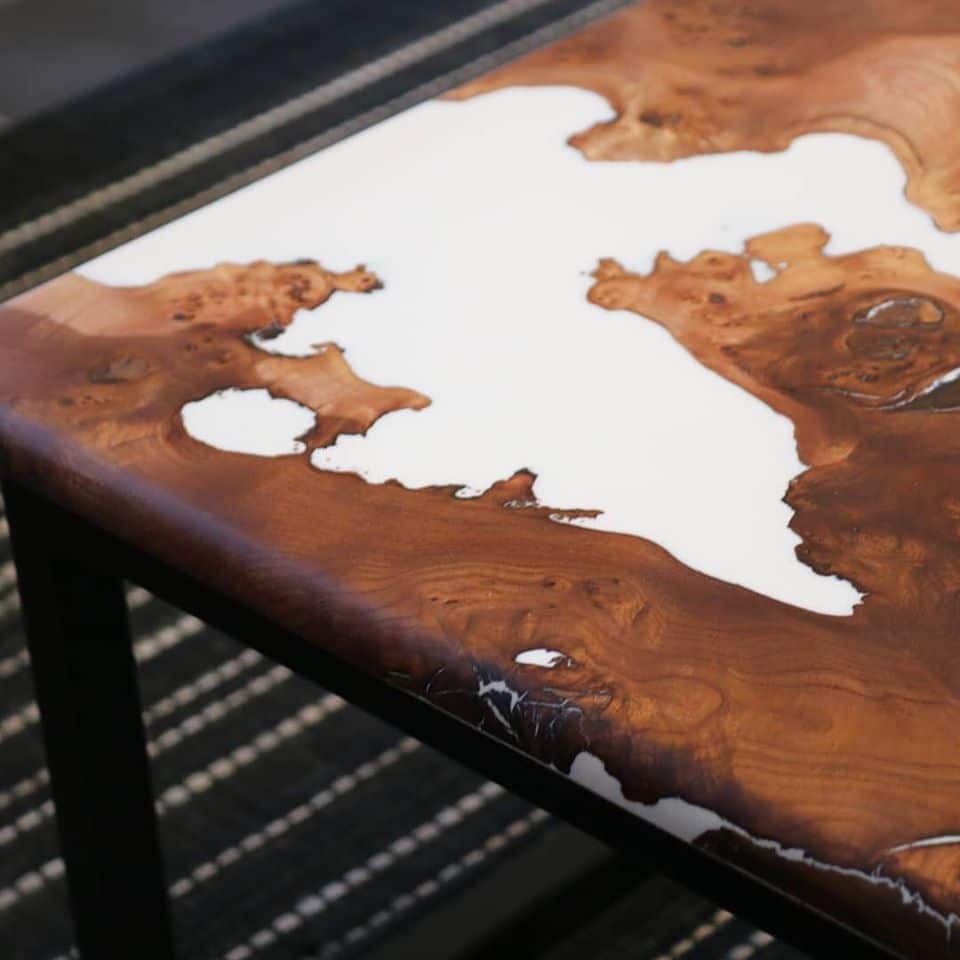
See Vivid Resin Colours in Action
Get inspired by real project photos showing how various translucent and opaque colourants work within resin. Notice how effects can vary depending on thickness, layering, or blend.
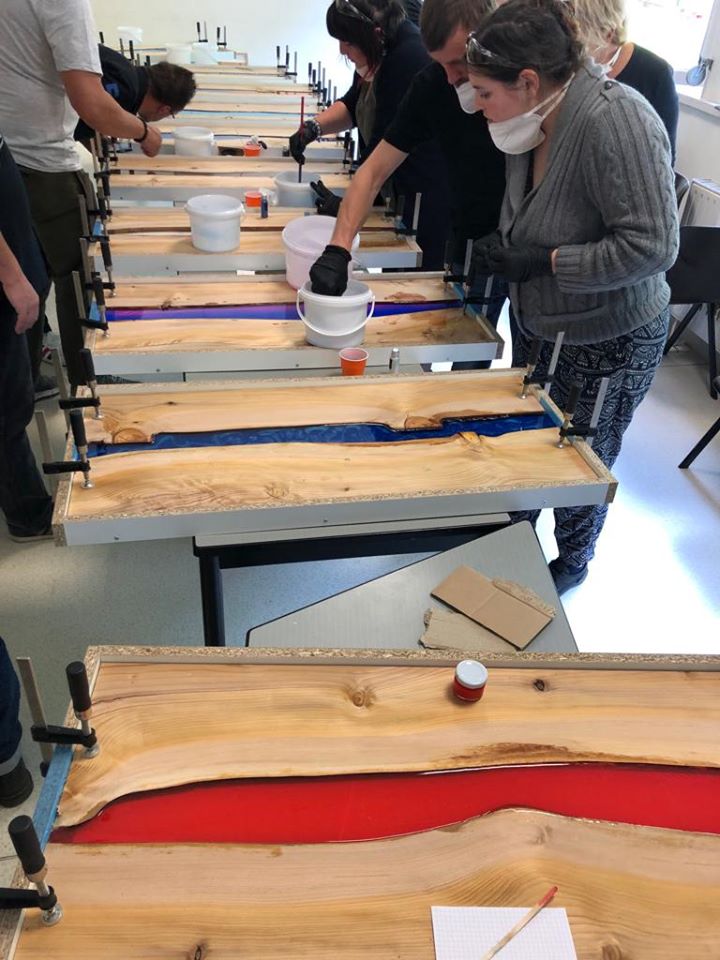
Step 1: Prepare Your Resin and Workspace
Start by setting up a clean, organised workspace free from dust and moisture, as these can impact the final appearance and clarity of your resin. Wear gloves and an apron to prevent stains and protect your skin. Lay out all your colouring tools and ensure your resin system is ready for mixing. Work in a well-ventilated area, and keep your equipment scrupulously clean to avoid contamination or unwanted colour mixing.
Step 2: Select and Measure Your Colourant
Choose a colourant compatible with your resin system and desired effect. For clear, glass-like tones ideal for jewellery or geode art, opt for a transparent option such as the “Magic Crystal” – Transparent Resin Colour 45ml or the “Magic Crystal” – Set of 5 Transparent Colourants, 5 x 45ml. When aiming for deeper, more opaque finishes, a concentrated product like the “Colourfun” – Liquid Epoxy Resin Colourant 25-100ml – High coverage or the “Colourfun Set” – Liquid Epoxy Resin Colourant Set for Solid Colour Effects is best. Always start with a minimal amount—just 1–5% colourant by weight. Add more only if you want a stronger effect. Always measure your colourant carefully to avoid oversaturation, which can affect curing or the resin’s mechanical properties.
Step 3: Mix Until the Colour is Even
Pour the resin part A and part B according to your product’s instructions, then add the measured colourant. Using a mixing stick, stir slowly and thoroughly for an even result. Fast or vigorous mixing can introduce air bubbles and streaks, so take your time. Scrape the sides and bottom of your mixing vessel to ensure the colour is fully dispersed. Inspect the mixture in good light for any unblended pigment or cloudiness, especially when working with transparent tints.
Step 4: Pour and Finish with Care
Once your resin is fully mixed and evenly coloured, pour it into your prepared mould, surface, or project. Seal your work area and wear gloves to protect skin from stains. To achieve gradients or layered colour effects, pour in stages, letting each layer set slightly before adding the next. Work in thin layers to better control the colour effect and reduce the risk of pigment sinking or bleeding. Allow the resin to cure undisturbed per your product’s instructions.
Tips, Mistakes, and Troubleshooting
Take note of these practical tips: Transparent colourants show best in thicker sections of resin, while pastes and high-coverage liquids suit thin or patterned pieces. Avoid exceeding the recommended colourant percentage, which can soften cured resin or cause uneven setting. If colours appear cloudy, check for unmixed pigment or try adding resin in thinner layers. Unwanted specks or swirls often result from rushed mixing, so patience is key. Experiment with tiny test batches to perfect your colour mix before committing to a major artwork.
Explore Creative Resin Colour Applications
Find examples of coloured resin in finished jewellery, geode art, table pours, and sculpted decor. See the difference between transparent and solid colour techniques.
- "Colourfun Set" – Liquid Epoxy Resin Colourant Set for Solid Colour EffectsPrice range: £13.45 through £48.15Colourfun Set offers intense, translucent colour pastes designed for epoxy resin projects, suitable for creating strong colour effects and blends.
 "Magic Crystal" – Transparent Resin Colour 45ml£4.65"Magic Crystal" Transparent Resin Colour 45ml allows resin artists to create clear, vibrant coloured effects suitable for geodes and jewellery…
 "Colourfun" – Liquid Epoxy Resin Colourant 25-100ml – High coveragePrice range: £3.65 through £9.85Liquid epoxy resin colourant suitable for vibrant or translucent effects in resin art, compatible with the Resin Pro range.
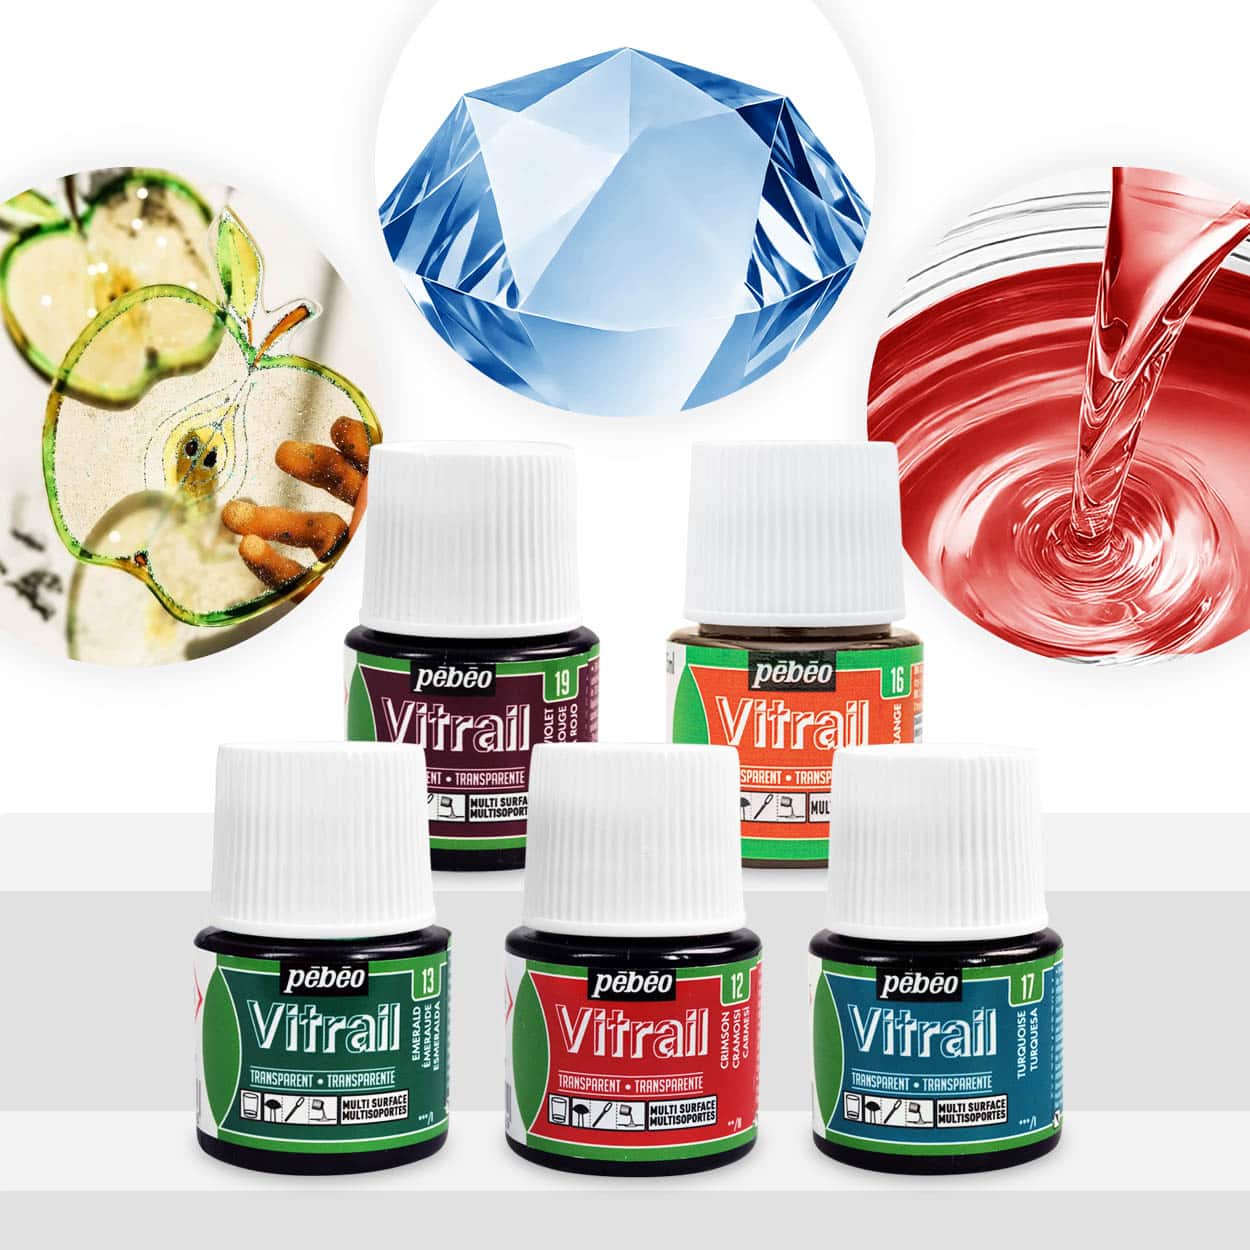 "Magic Crystal" – Set of 5 Transparent Colourants, 5 x 45ml£18.85"Magic Crystal" set offers transparent colourants suitable for custom resin crystals with clear colours.
Frequently Asked Questions
How much colourant should I add to my resin mixture?
Usually, add only 1–5% colourant by weight for best clarity and curing. Too much pigment can affect resin strength and finish.
How do I choose between transparent and opaque colourants for resin?
Transparent colourants give a glass-like effect; opaque types provide strong, solid coverage. Pick based on your desired end result.
How do I prevent bubbles and patchy colour when mixing resin?
Stir slowly and scrape the vessel sides. Mix thoroughly for even dispersion and minimise trapped air.
Can I blend different resin colourants together for unique shades?
Yes, most liquid and paste colourants can be blended to create custom hues. Test on small batches first.
Why does my coloured resin sometimes appear cloudy or have streaks?
Cloudiness often indicates unmixed pigment or excessive colourant. Stir thoroughly and don’t over-add dyes.
What’s the best colourant for making resin jewellery?
Transparent colourants are ideal for jewellery, creating clear, gemstone-like effects when used sparingly.