 Free shipping on orders over £29,85

How do you colour epoxy resin for painting?
Achieve vibrant and unique effects in your resin art projects


Colouring epoxy resin is a fantastic way to elevate your painting projects, adding depth, vibrancy, and endless creative possibilities. Whether you’re aiming to produce bold, opaque artwork or create glass-like transparent effects, mastering the technique of colouring resin opens new doors for artists and crafters alike. This guide walks you through the essential steps to achieve flawless, professional-looking results every time.
What You’ll Need
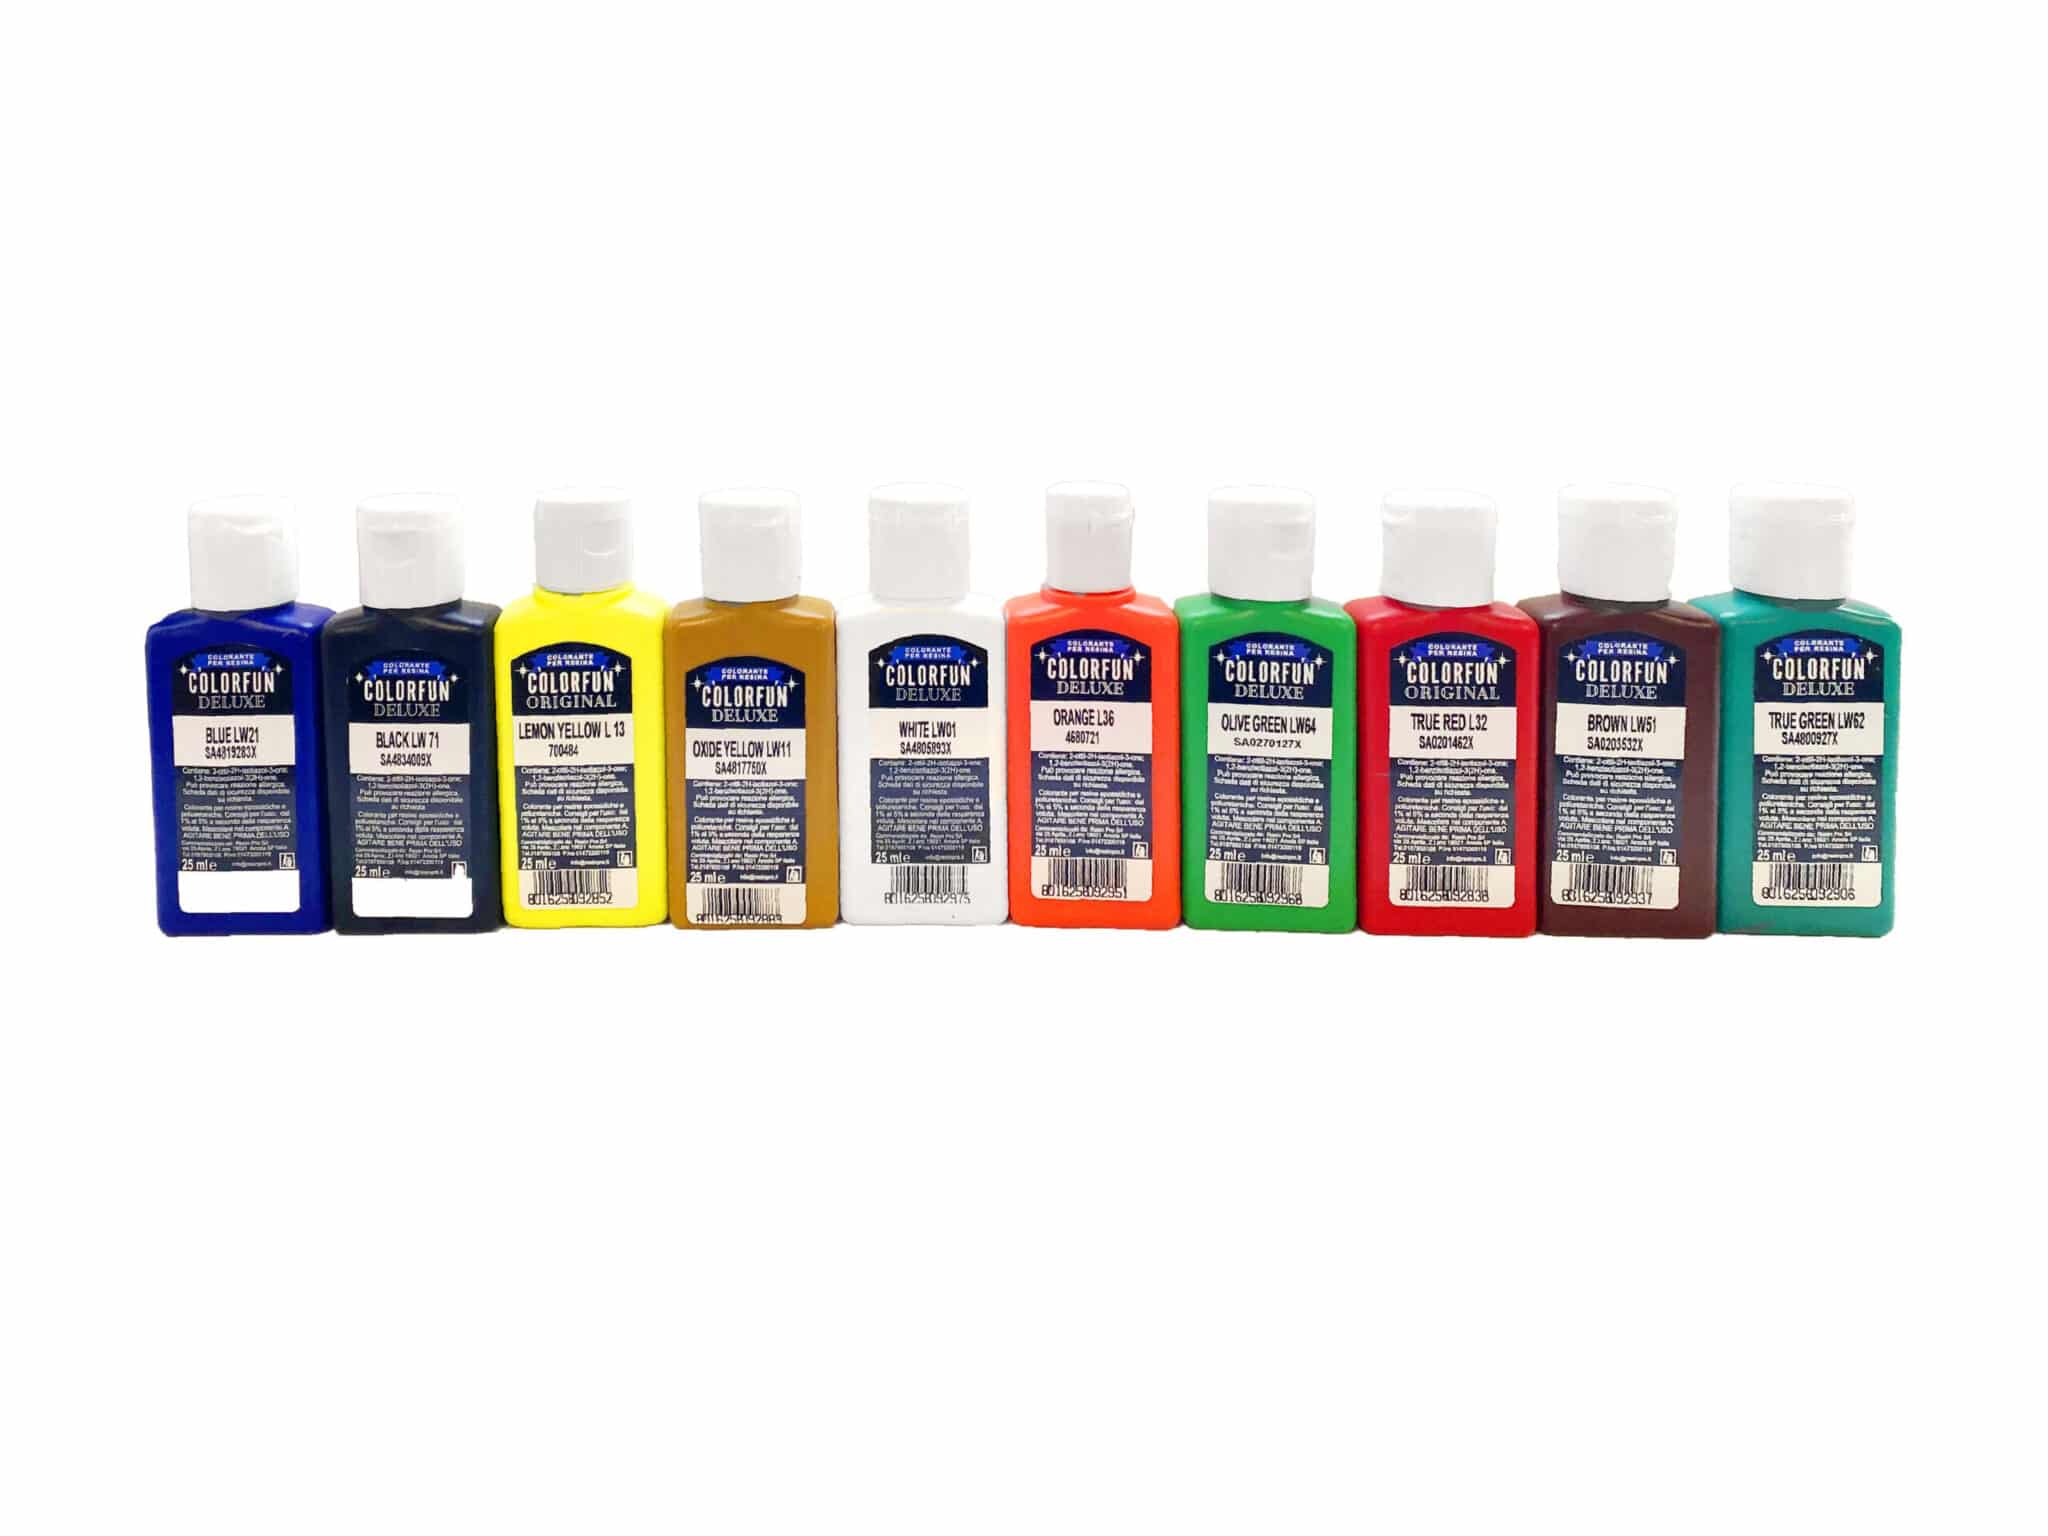
- “Colourfun Set” – Liquid Epoxy Resin Colourant Set for Solid Colour Effects – Liquid pastes for vivid, solid or gradient colour effects.
- “Colourfun” – Liquid Epoxy Resin Colourant 25-100ml – High coverage – Individual liquid colourant for custom shade blending.
- “Magic Crystal” – Transparent Resin Colour 45ml – For intense, transparent or jewel-like resin shades.
- “Marine Palette” – Set of Dyes for Ocean Art, Epoxy Resin, and Beach Effects – Ideal for ocean and beach-inspired resin painting.
- Epoxy resin and hardener (matched for your project)
- Mixing cups and stirrers
- Disposable gloves and safety goggles
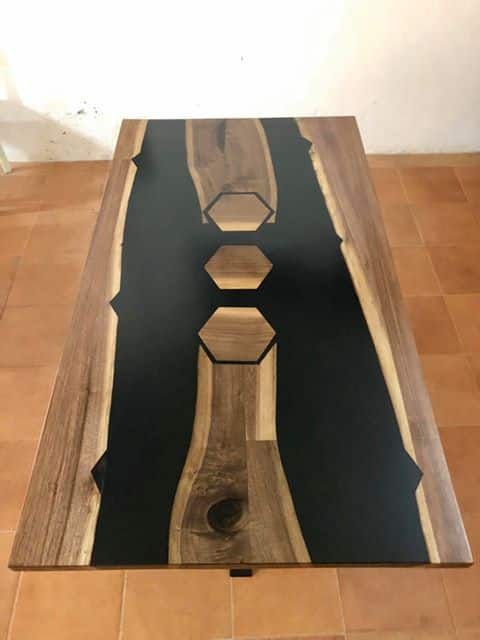
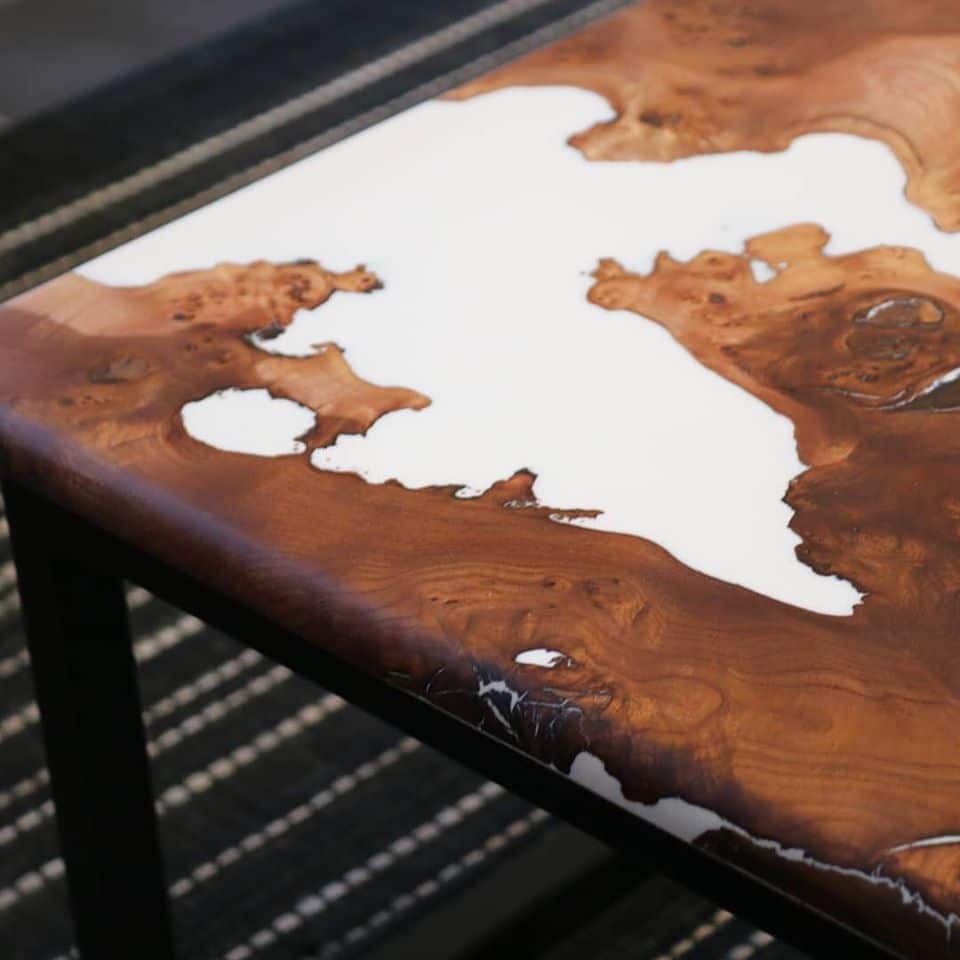
Inspiration: Coloured Epoxy Resin Artworks
Explore a gallery of resin paintings and art pieces where unique colour effects bring artwork to life. Notice how both vivid and subtle blends add dimension and movement to each piece. The right approach to colouring resin opens up vast creative opportunities.
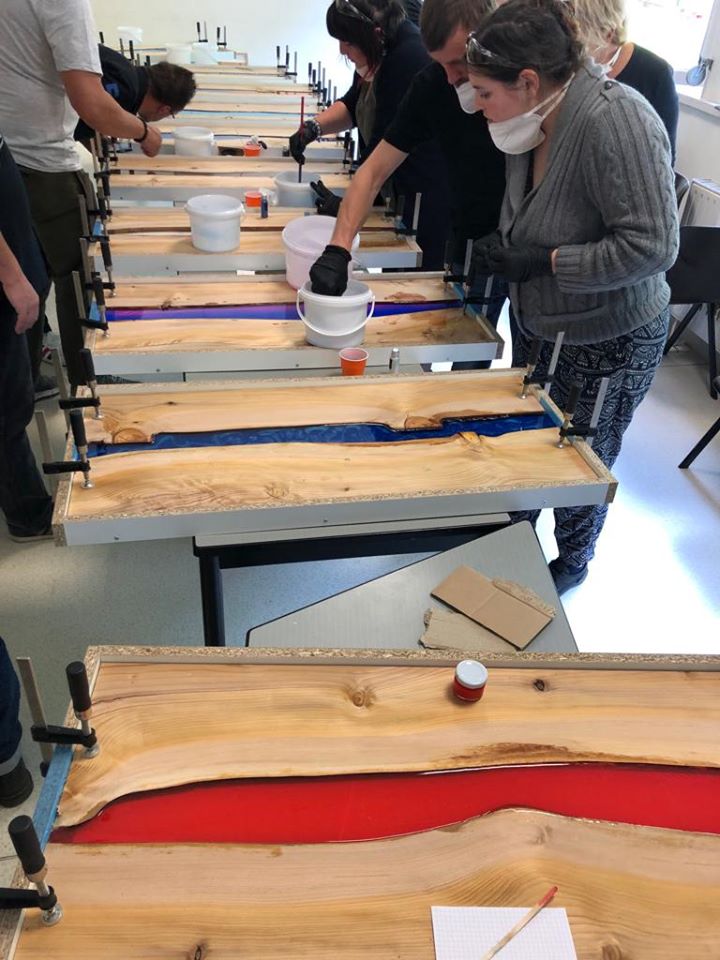
Step 1: Prepare Your Workspace and Materials
Work in a dust-free, well-ventilated area to prevent contamination and fumes. Lay down protective sheeting over your surfaces and set out all required materials before mixing resin. Wear appropriate gloves and safety goggles to ensure your safety and avoid skin contact with resin or pigments.
Organise your chosen colourants, epoxy resin, hardener, and all tools. Any spills or premature mixing at this stage can lead to unwanted effects in your painting, so double-check that everything is ready for a smooth workflow.
Step 2: Measure and Mix the Epoxy Resin
Accurately measure resin and hardener according to your product instructions (typically by weight or volume). Inaccurate ratios can cause curing failures or tackiness. Mix resin and hardener thoroughly, scraping your mixing cup’s sides and base to achieve a uniform blend – usually for two to three minutes.
If you’re preparing multiple colours, divide your mixed resin into smaller cups before moving to the next step. Avoid mixing more resin than you can use within its working time.
Step 3: Add Your Chosen Resin Colourant
Add colourant gradually to the mixed resin. Start with a small amount and increase as needed, because pigment strength varies between products. For bold, opaque effects use a colour paste such as Colourfun Set, or try Colourfun Liquid Colourant for blending subtle tones. If you want clear, glass-like effects for geodes or jewellery art, Magic Crystal Transparent Resin Colour gives vivid, see-through results. Discover oceanic blends with the Marine Palette Dyes for seaside painting projects.
Stir gently to avoid air bubbles, scraping the sides to distribute colour evenly. Test shades by placing a small drop on a white surface. Remember, a little goes a long way – excess pigment may affect curing and resin clarity.
Step 4: Apply and Cure the Coloured Resin
Once coloured, pour or paint the coloured resin as desired onto your chosen surface or canvas. Use spatulas, brushes, or drizzle techniques to achieve your desired art effect. For more complex work (such as layered colours or wave details), pour resin in stages, allowing partial curing for each layer.
Allow the coloured resin to cure undisturbed, following your resin’s recommended cure times and temperature guidelines. Avoid moving or covering your piece until fully set to achieve a flawless finish.

Tips and Common Mistakes When Colouring Epoxy Resin
Always read the instructions for your pigments and resin system, as exceeding the recommended pigment load (usually up to 5%) can prevent proper curing. Mix gently to minimise bubbles. If using multiple pigments, test combinations on a spare piece first to avoid undesired colours or cloudiness. Resist the urge to rush; allowing each step to set properly ensures spectacular, durable results.
Expert Insight: Selecting Pigments for Resin Painting
Choose your pigment type according to your desired effect. Use pastes for deep or opaque colour, transparent dyes for clarity, and curated palettes for themed art such as ocean scenes. Always ensure pigments are resin-compatible to guarantee even dispersion and full curing.
- "Colourfun Set" – Liquid Epoxy Resin Colourant Set for Solid Colour EffectsPrice range: £13.45 through £48.15Colourfun Set offers intense translucent pastes designed for colouring transparent epoxy resin projects within the painting theme.
- "Colourfun" – Liquid Epoxy Resin Colourant 25-100ml – High coveragePrice range: £3.65 through £9.85Liquid epoxy resin colourant designed for vivid, intense pigments and easy blending in resin painting.
 "Magic Crystal" – Transparent Resin Colour 45ml£4.65Transparent resin colour designed for vibrant, glass-like effects and jewel-like resin art.
 "Marine Palette" – Set of Dyes for Ocean Art, Epoxy Resin, and Beach EffectsPrice range: £10.85 through £16.85A set of epoxy-safe marine dyes including 4 or 6 carefully selected shades designed for ocean-inspired resin artworks.
Frequently Asked Questions
Can you recolour cured epoxy resin?
Once epoxy resin is cured, pigment cannot be incorporated. Colouring should be completed before the resin sets.
How much colourant should be added to epoxy resin?
Generally, do not exceed 5% pigment by weight. Excess pigment can lead to improper curing or cloudiness.
Is any paint or dye safe for colouring epoxy resin?
Only use pigments and dyes specifically designed for epoxy resin to ensure bonding, clarity, and curing.
How do you achieve translucent versus opaque effects in resin?
Add less colourant for translucent effects, and use pastes or higher pigment loads for opaque results.
What should I do if my coloured resin remains sticky?
Sticky resin usually results from incorrect ratio or too much pigment. Scrape away and re-coat with fresh resin.
Can you mix different types of pigments in epoxy resin?
Yes, as long as all pigments are epoxy-compatible. Always test small amounts to ensure desired effect and curing.