 Free shipping on orders over £29,85


How to make a flower covered in resin
A practical step-by-step guide to botanical resin art


Preserving the delicate beauty of flowers in resin is a rewarding craft that produces striking jewellery, coasters, and unique home décor. This comprehensive guide will walk you through the process, ensuring your flowers remain vibrant and your resin stays crystal clear, making it ideal for both beginners and experienced resin artists.
What You’ll Need
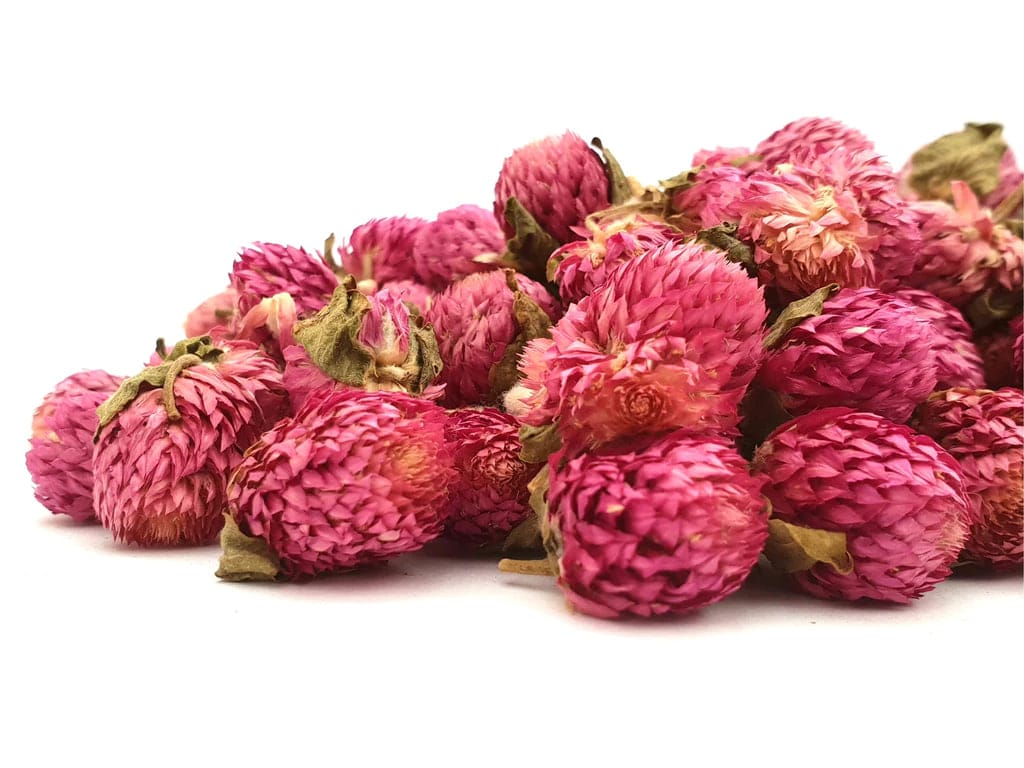
- Natural Dried Flowers for Art Projects and Epoxy Resin Casting – ideal for embedding due to their prepared, moisture-free state.
- “Art Pro Deluxe” – Ultra-High Viscosity Epoxy Resin for Artists – provides the clarity and detail preservation demanded for botanical art.
- “Evershine Collection” – Artisan Jewellery Epoxy Resin Kit with 100+ Accessories – an accessible all-in-one option including tools and detailed instructions.
- “Vase” – Flower Vase Resin Art Kit with Mica Powder and Silicone Mould – best for larger or shaped decorative pieces such as trays or vases.
- Nitrile gloves, mixing cups and stirrers, silicone or plastic moulds, tweezers, and a flat dust-free workspace.

Showcase of Flower Resin Projects
Browse inspirational examples of flowers beautifully embedded in clear resin, providing creative ideas for jewellery, decorative trays, and coasters. Notice how careful preparation and the right materials can make colours and details truly stand out in each piece.

Step 1: Prepare Your Flowers and Workspace
Work in a well-ventilated area on a clean, level surface to avoid airborne dust ruining your resin finish. Select only fully dried, moisture-free flowers, as trapped water can cause clouding or incomplete curing. Use tweezers for delicate handling to prevent bruising and petal loss.
If preparing your own flowers, ensure they are properly pressed or dried beforehand. For convenience and reliability, choosing Natural Dried Flowers for Art Projects and Epoxy Resin Casting provides ready-to-use botanical elements that integrate smoothly into your work.
Step 2: Arrange and Seal the Flowers
Lay out your design in the mould, testing arrangements before applying resin. It’s key to remove moisture from flowers and avoid overcrowding, which can cause uneven coating or visible bubbles.
For extremely delicate or thin blooms, consider a light sealant spray or gently brushing with resin to prevent unwanted air bubbles and transparency loss. Seal delicate blooms if you wish to lock in vivid colours and add extra protection from resin absorption.
Step 3: Mix and Pour Your Resin
Accurately mix your chosen resin, following the manufacturer’s ratio. The “Art Pro Deluxe” – Ultra-High Viscosity Epoxy Resin for Artists is ideal for keeping details crisp and preventing movement during the pour—perfect for intricate arrangements.
Slowly pour a layer into the mould, covering the base. Add your flowers and top up as needed, ensuring a complete coat. Pour the resin slowly in layers for the best clarity and to minimise trapped air.
Step 4: Remove Bubbles and Allow to Cure
Gently pass a heat gun or torch over the surface (following safety guidelines) to eliminate surface bubbles. Avoid over-heating, which could distort the flowers or the resin.
Allow for full curing as per product instructions (typically 24–48 hours depending on resin type). Keep the mould covered and undisturbed to prevent dust and marks.

Step 5: Demould and Finish Your Piece
Once cured, carefully remove from the mould. Address any sharp edges with fine sandpaper. Depending on the project, you may wish to drill for findings or sand for a glass-smooth finish. The “Evershine Collection” – Artisan Jewellery Epoxy Resin Kit with 100+ Accessories is particularly useful for jewellery, offering tools to add clasps and details.
Handle your project only when fully cured to preserve integrity and clarity. Display or wear with pride, enjoying your preserved floral art for years to come.
Tips and Common Mistakes
Give your resin enough time to degas after mixing to reduce bubbles. Always dry flowers thoroughly—even a touch of moisture can make resin turn cloudy. Use only compatible mould types, and do not rush the cure time. For best results, avoid handling or demoulding too early.
Tips from Experienced Resin Artists
Work methodically and always measure your resin accurately to avoid sticky or soft finishes. Consider layering for deeper effects and enhanced protection for delicate petals. Read about ultra-high viscosity resin to keep intricate flower designs sharp with fewer bubbles.

- Natural Dried Flowers for Art Projects and Epoxy Resin CastingPrice range: £5.45 through £7.85Natural dried flowers prepared for immediate use, suitable for resin art and crafts with a natural aesthetic.
- "Art Pro Deluxe" – Ultra-High Viscosity Epoxy Resin for ArtistsPrice range: £33.85 through £287.85Art Pro Deluxe epoxy resin offers ultra-high viscosity for precise control and a clear, self-levelling finish suitable for detailed resin art.
 "Evershine Collection" – Artisan Jewellery Epoxy Resin Kit with 100+ Accessories£20.85"Evershine Collection" features 500g of crystal-clear resin and over 100 accessories, suitable for jewellery making within the theme How to make a…
 "Vase" – Flower Vase Resin Art Kit with Mica Powder and Silicone Mould£39.85Flower Tray Resin Art Kit for making flower-shaped vases with mica powders and silicone mould, suitable for resin art in the stated theme.
Frequently Asked Questions
Can I use fresh flowers in resin art?
No, fresh flowers contain moisture that causes clouding and improper curing. Always use fully dried botanicals for best results.
How do I stop bubbles forming in resin?
Pour the resin slowly, use dried flowers, and gently apply heat to release trapped air before curing.
What epoxy resin works best for preserving flowers?
Ultra-high viscosity or specialised art resins help retain detail and clarity when embedding flowers in resin.
Is sealing flowers necessary before resin?
For most dried flowers, sealing isn’t necessary, but it can help protect highly delicate or coloured blooms from air bubbles.
How long does resin take to cure?
Cure times vary by product but full curing generally takes between 24 and 48 hours for most epoxy systems.
How can I get a clear finish on floral resin art?
Use a high-quality art resin, pour in layers, and cover your work to prevent dust settling during curing.