 Free shipping on orders over £29,85


How to polish DIY resin
Step-by-step guide to obtain a mirror shine on resin


Polishing DIY resin transforms dull or cloudy pieces into eye-catching works of art with a glossy, professional finish. Whether you are crafting jewellery, furniture inlays, or custom décor, understanding proper polishing techniques can elevate the quality and clarity of your results. This guide explains how to achieve seamless shine on your resin work, from surface preparation through to buffing, addressing common pitfalls every crafter faces.
What You’ll Need
- “Ebonite Abralon” – Sanding Pads 360-4000 Grit for Resin and Wood – for progressive sanding
- 1200W Polisher for Sanding and Buffing – Variable Speed, D-Handle (optional for optimal results on larger surfaces)
- “Epoxy Polish” – Epoxy Resin Polishing System – for gloss restoration and scratch removal
- “Carbon Polish” – Polishing System for Dark and Black Surfaces, 250ml (for dark/black resin pieces)
- Clean, lint-free microfibre cloths
- Protective gloves and mask
- Clean water for wet sanding

Key Polishing Tools in Action
See how dedicated sanding pads and polishers transform resin surfaces. Consistent technique and grit progression are vital for flawless results.

Step 1: Prepare and Clean the Resin Surface
Begin by ensuring your resin project is fully cured. Any uncured or tacky surface can worsen during sanding and polishing, leading to permanent marks. Clean the piece with a lint-free cloth and mild soapy water to remove dust and debris. Allow it to dry completely before proceeding to the next stage.
Check for any surface imperfections such as raised edges or bubbles. Minor flaws should be trimmed or sanded off with a fine hand file. Always wear protective gloves and mask to shield your skin and prevent inhalation of resin dust during this preparation stage.
Step 2: Sand the Surface Progressively
Begin sanding with a coarse grit (around 360) to remove visible scratches or imperfections. Work your way through finer grits up to 4000 in gradual steps, always sanding in circular motions and frequently rinsing the surface with clean water. Wet sanding minimises heat and reduces particle build-up, which helps to avoid accidental swirling.
For efficient results on flat or large resin projects, consider using the “Ebonite Abralon” – Sanding Pads 360-4000 Grit for Resin and Wood. Their foam backing ensures even pressure and can be used wet or dry depending on your preferred method. Each stage should remove the scratches left by the previous grit, finishing with a fine grit for a satin-smooth surface ready for polishing.
Step 3: Polish for a Glossy or Mirror Finish
Buffing your sanded resin with a dedicated polishing cream is the secret to a truly glassy result. Apply a small amount of resin polish onto the surface and spread evenly. Use a polishing pad or microfibre cloth, working in slow, overlapping circles with even pressure.
For general projects, a product such as the “Epoxy Polish” – Epoxy Resin Polishing System is specially formulated for rapid scratch removal and to prevent swirl marks. If working with black or very dark resin, switch to the “Carbon Polish” – Polishing System for Dark and Black Surfaces, 250ml for a rich finish without white residue.
Larger areas benefit from machine polishing using variable speed tools like the 1200W Polisher for Sanding and Buffing – Variable Speed, D-Handle. Always keep the polisher moving steadily and avoid staying too long on one spot.

Step 4: Finishing Touches and Surface Protection
Once you are satisfied with the shine, use a fresh microfibre cloth to remove residual polish. Inspect under natural light for any overlooked spots and repeat previous steps if necessary. To prolong the high-gloss effect, handle your piece with care and clean only with mild soap and soft cloths in future.
Store polished resin items away from abrasive contacts and strong solvents, which can cloud or dull the finish over time. Good maintenance preserves your hard work and keeps your resin projects looking their best.

Tips, Common Mistakes, and Troubleshooting
- Polishing resin properly prevents haziness – Ensure all sanding steps are completed before polishing to avoid cloudy results.
- Choose the right sanding pad grit for each stage – Skipping grits leaves visible scratches.
- Resin must be fully cured before polishing – Premature polishing leads to smearing and an uneven finish.
- Avoid over-polishing in one spot – This can cause friction burns or dull patches on the resin.
If you see persistent marks, revert to the previous sanding stage, and repeat. Always clean between steps to remove residue. For dark resin, ensure the specific polish used does not leave a white cast.
Avoiding Swirls and Dullness
Notice the difference between properly finished and rushed surfaces. Attention to the sanding and polishing sequence ensures clarity and preserves your hard work.

- "Epoxy Polish" – Epoxy Resin Polishing SystemPrice range: £17.85 through £44.85An epoxy resin polishing system designed for providing a glossy finish with easy application and multi-surface use.
- "Ebonite Abralon" – Sanding Pads 360-4000 Grit for Resin and Wood£3.95Ebonite Abralon Sanding Pads provide precise sanding grit options and are suitable for polishing resin and wood surfaces in DIY projects.
 1200W Polisher for Sanding and Buffing – Variable Speed, D-Handle£85.95A variable speed polisher designed for sanding and buffing epoxy resin surfaces, suitable for DIY and professional use.
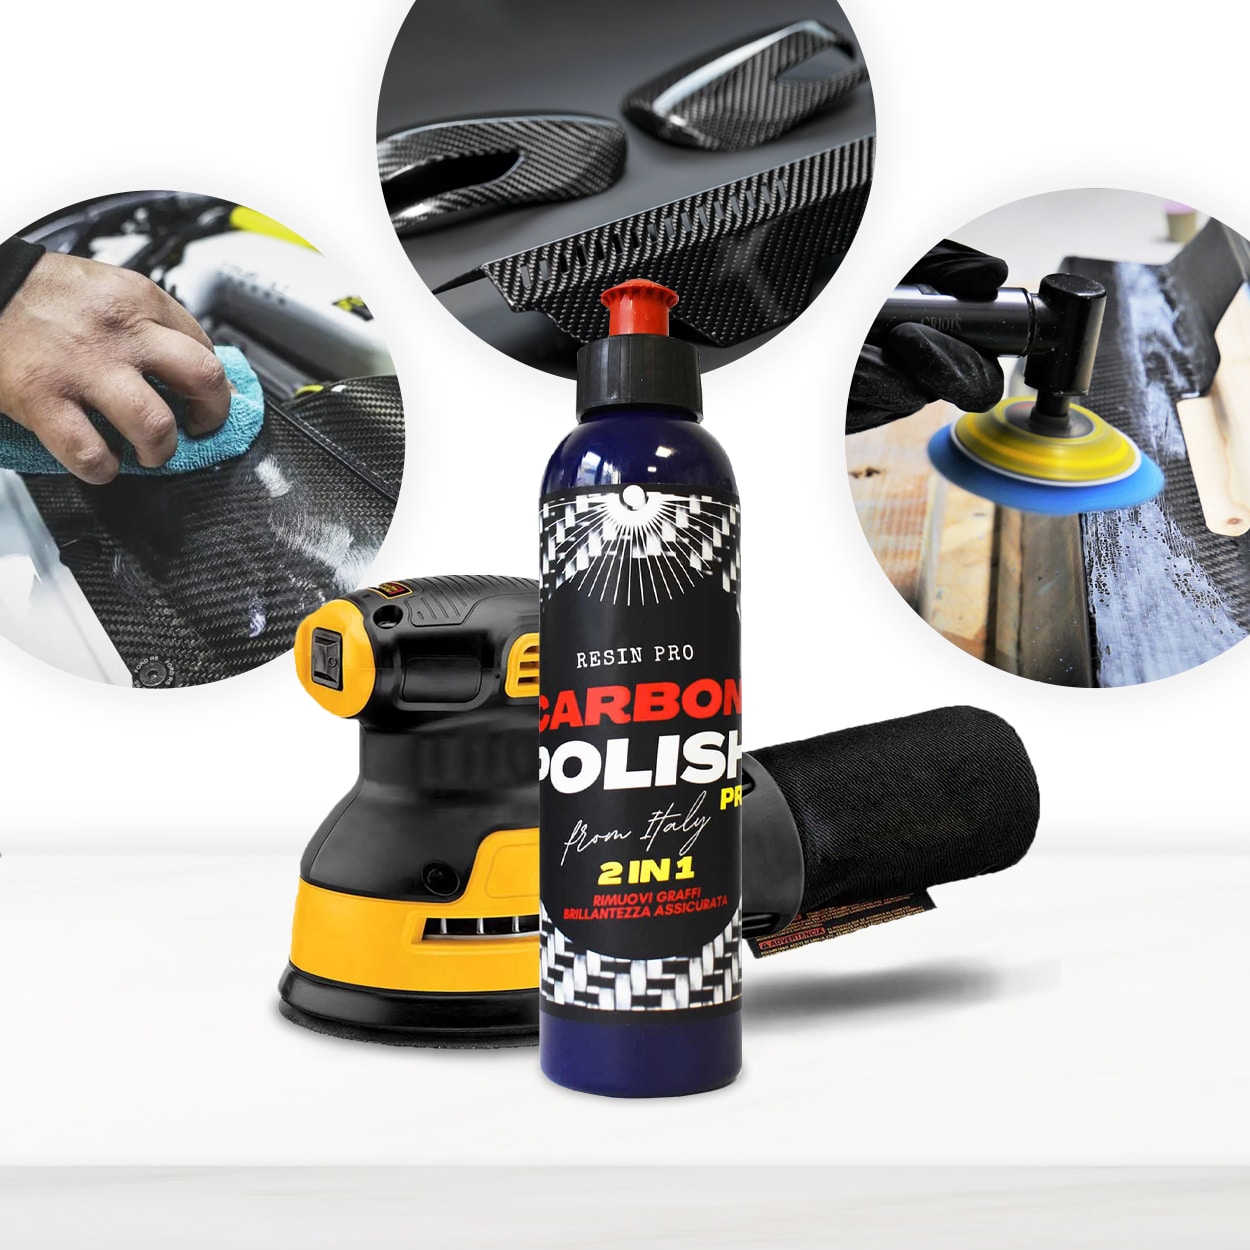 "Carbon Polish" – Polishing System for Dark and Black Surfaces, 250mlPrice range: £17.85 through £44.85Carbon Polish is designed for polishing dark and black epoxy resin surfaces, offering easy application and a finish without white residue.
Frequently Asked Questions
Should I wet or dry sand DIY resin?
Wet sanding is preferred for resin, as it reduces heat and minimises dust, resulting in a smoother, scratch-free finish.
How long after casting can I polish resin?
Wait until the resin is fully cured—usually at least 72 hours—before starting to sand or polish to prevent smearing or surface damage.
What if my polished resin is still cloudy?
Return to a finer sanding grit, ensure each sanding stage is complete, and thoroughly clean between steps before buffing again.
Do I need a machine to polish resin?
A polishing machine is useful for large or flat surfaces but hand-polishing with pads can produce excellent results for smaller projects.
Which polish should I use for dark epoxy resin?
Use a special polish for dark or black resin, such as Carbon Polish, to avoid white residue and achieve a mirror finish.
Can I skip grits when sanding resin?
Skipping grits leaves scratches visible after polishing. Always progress gradually through the recommended sanding sequence.