 Free shipping on orders over £29,85


How do you polish Formlabs resin?
Step-by-step guide to achieving a perfect polish on Formlabs resin


Polishing Formlabs resin brings out its clarity and brilliance, transforming your 3D printed or cast creations into stunning, display-worthy pieces. This guide will walk you through every stage of achieving a glass-smooth finish on Formlabs resin, ensuring your hard work truly shines—whether it’s for prototypes, art, or functional parts.
What You’ll Need
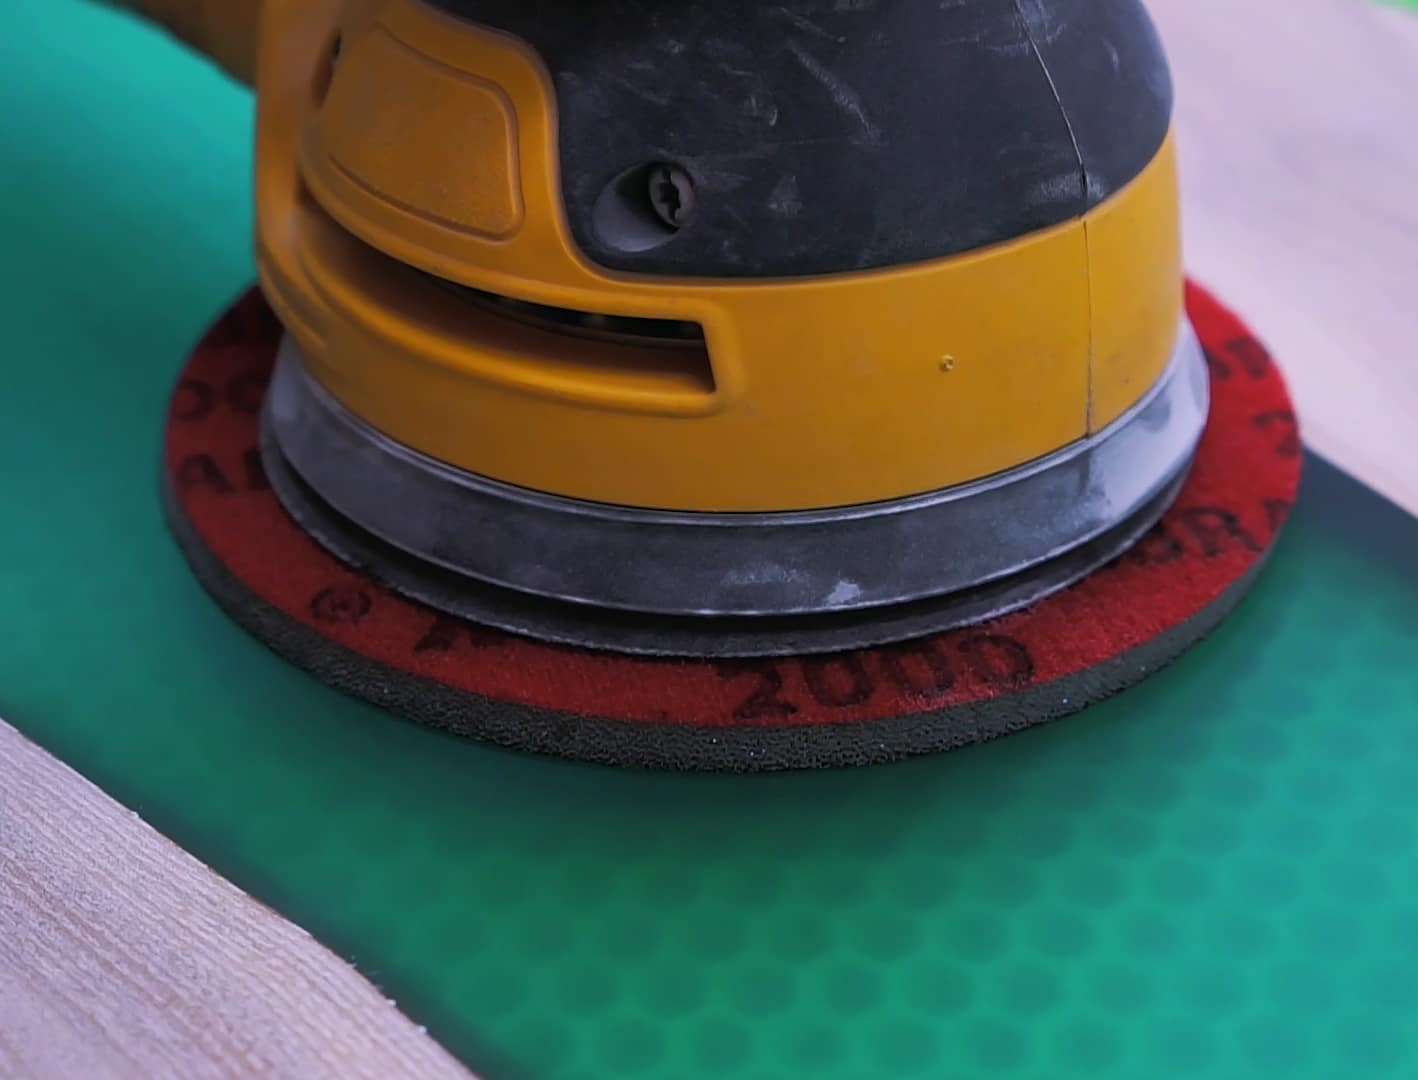
- “Ebonite Abralon” – Sanding Pads 360-4000 Grit for Resin and Wood – for progressive wet or dry sanding of resin surfaces
- “Epoxy Polish” – Epoxy Resin Polishing System – to eliminate micro-scratches and reveal a glossy finish
- Polishing Sponge Discs 150mm – 2 Pack – for final buffing and mirror gloss
- “Carbon Polish” – Polishing System for Dark and Black Surfaces, 250ml – optional, for dark-coloured resin projects
- Microfibre cloths, clean water, mask, gloves, and rotary polisher (recommended)
Essential Tools and Workspace Setup
Set up your workspace in a well-ventilated area, keeping it free of dust and lint to avoid imperfections in your polished surface. Gather all required materials—including cleaning cloths, sanding pads and your preferred polish—before starting to streamline the process. Wearing gloves and a mask is advisable, especially during sanding, to protect yourself from fine particulates and resin dust.
Step 1: Prepare the Resin Surface
Begin by ensuring your Formlabs resin item is fully cured and clean from dust or grease. Wash the piece with mild soap and water, then dry it thoroughly with a soft cloth. Inspect the surface for support marks, uneven cured resin, or imperfections; these should be sanded down before polishing begins. Always start with a clean, cured surface to ensure flawless results later.
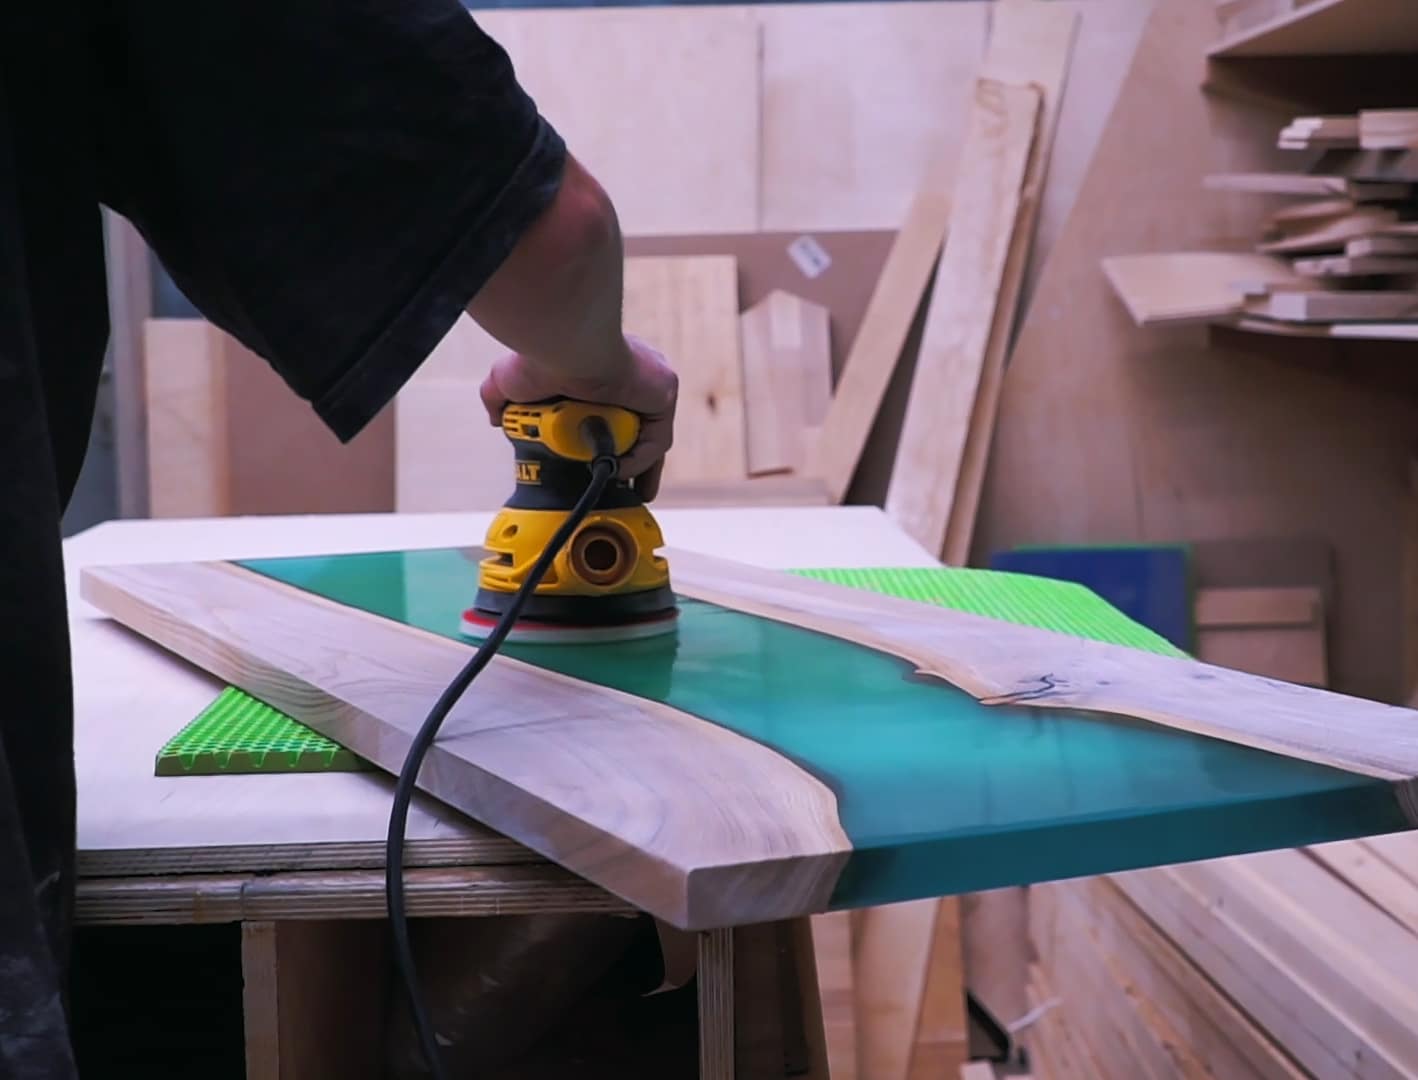
Step 2: Sand the Surface Using Progressive Grits
Effective polishing starts with well-executed sanding. Use Ebonite Abralon Sanding Pads starting with the coarsest grit (such as 360 or 500) to remove blemishes and visible lines. Use the pads wet, keeping the surface lubricated to minimise scratches and dust. Continue sanding with progressively finer grits (up to 4000) for a smooth, even finish. Dry and examine the surface between each grit to monitor progress. Progress gradually through finer grits to prevent haze or deep scratches that can ruin your polish later.
Work in a dust-free, ventilated space and always wear appropriate protection. Do not rush the sanding process—take your time for each grit to ensure all marks from the previous step are removed.
Avoid abrasive pads not meant for resin, as these may damage delicate parts or leave unremovable scratches.
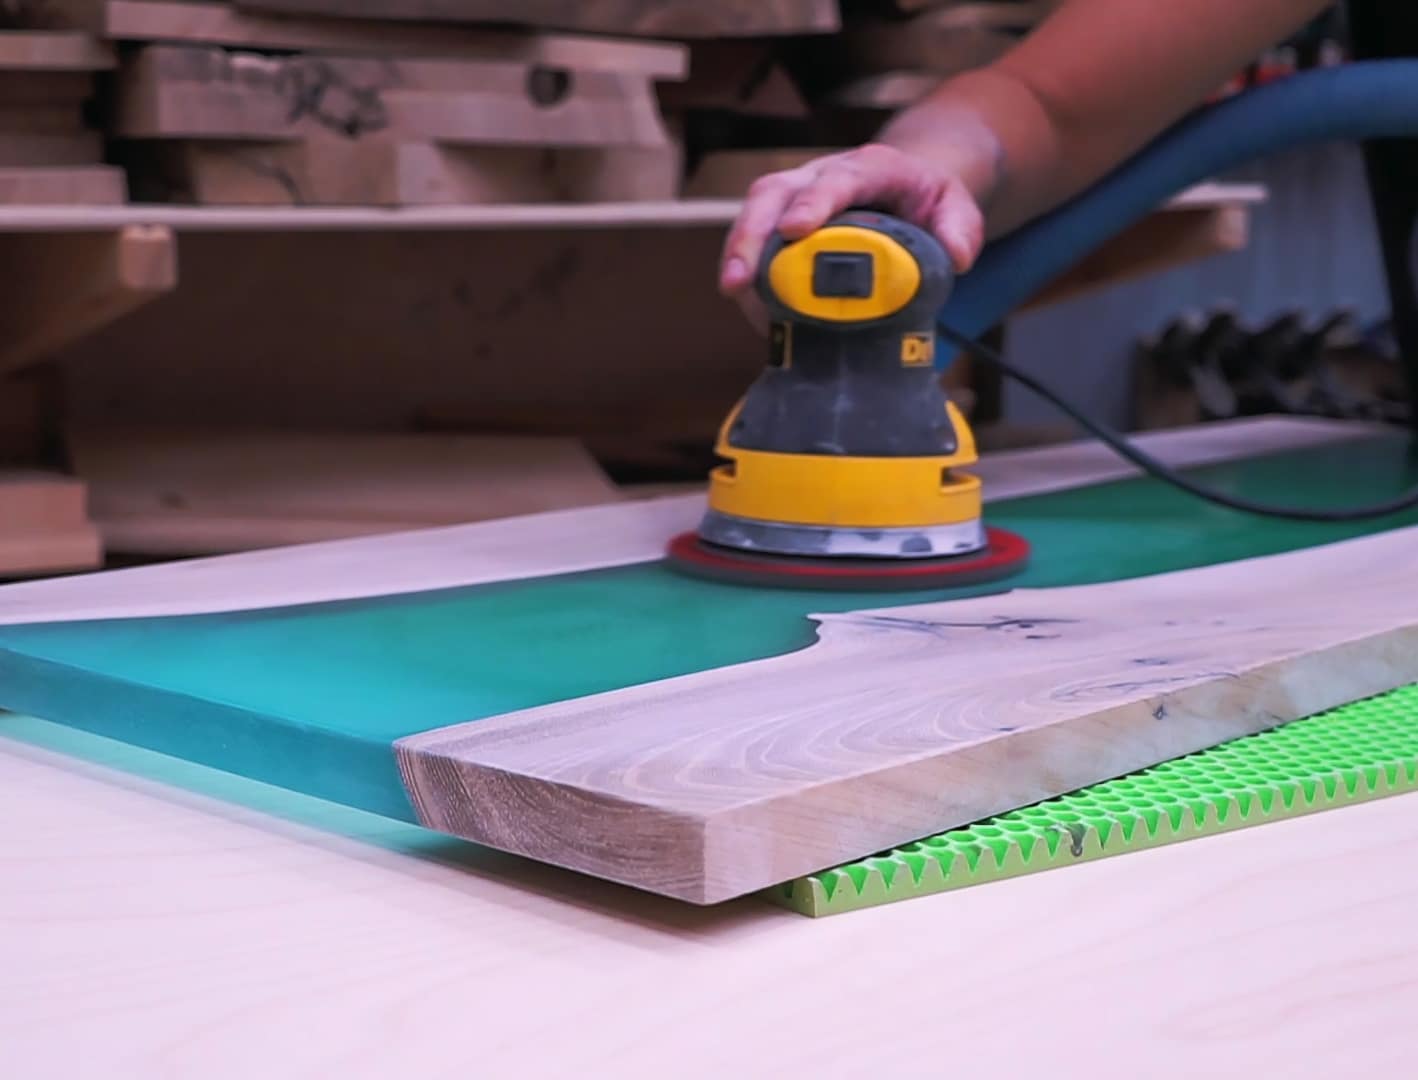
Step 3: Apply Polishing Compound
Once the resin is perfectly smooth to the touch, it’s time to shift from sanding to actual polishing. For most clear or light-coloured Formlabs resin, use Epoxy Polish. Apply a small amount to the surface. Using a polishing sponge disc or microfibre pad, gently work the polish in circular motions—either by hand or attached to a rotary polisher for an even, professional finish. For dark or black resin, reach for Carbon Polish, ensuring you avoid white residue on the glossy surface.
Apply polish with gentle, consistent motion, and do not let the surface overheat. It may take several passes before all micro-scratches are removed and the surface becomes glass-clear.
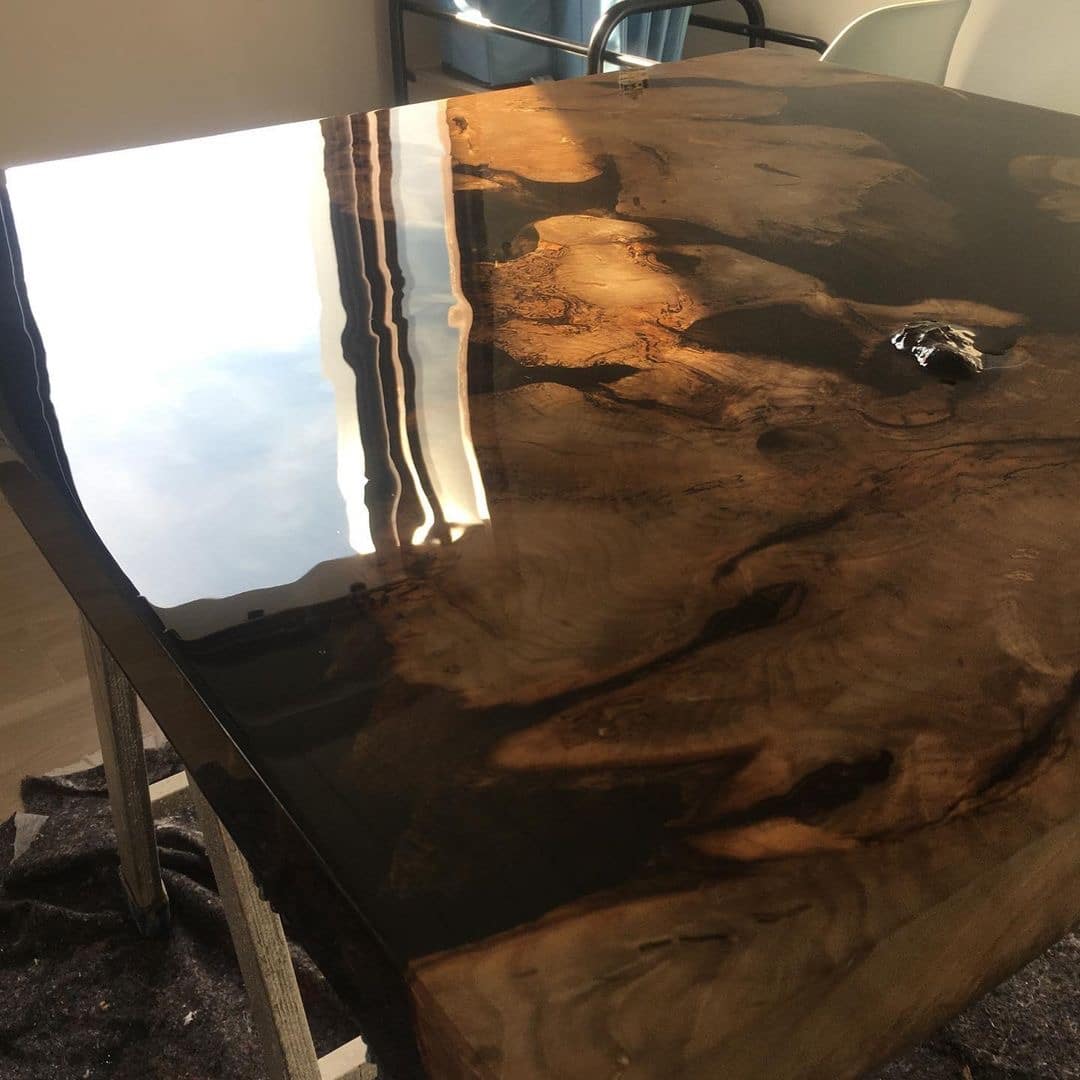
Step 4: Buff and Finish to a High Gloss
For the final step, use clean Polishing Sponge Discs or a new microfibre cloth to buff the resin gently. This enhances clarity and removes any lingering polish. Pay special attention to edges and intricate details. Inspect your piece under proper lighting—repeat steps if any dull patches remain.
Finish with a clean microfibre or sponge disc for optimum brilliance and to prevent swirl marks. If needed, repeat the polishing step on difficult areas for an ultra-high-gloss result.

Tips and Troubleshooting for Polishing Formlabs Resin
Take care not to press too hard during sanding and polishing; let the materials do the work. If you notice persistent scratches, drop back to a slightly coarser grit and progress again. For very dark or black projects, always use a dedicated polish to avoid residual marks. Avoid cross-contamination of sanding grits and keep all materials free of dust or debris between steps.
If the finish looks cloudy, the cause is commonly skipped grits or insufficient time spent at each stage. Take the time to revisit the sanding process if required—patience leads to a lasting, professional finish.
Showcasing Polished Resin Results
Well-polished Formlabs resin exhibits remarkable depth and clarity, with mirror-like reflections and flawless surfaces. Whether for jewellery, art, or engineering prototypes, a thorough polishing process not only enhances aesthetics but also increases durability and resistance to wear. Take pride in the brilliance and transparency you achieve with careful technique and quality materials.
- "Ebonite Abralon" – Sanding Pads 360-4000 Grit for Resin and Wood£3.95Ebonite Abralon Sanding Pads are designed for polishing resin and wood with grits from 360 to 4000, suitable for detailed finishing work.
- "Epoxy Polish" – Epoxy Resin Polishing SystemPrice range: £17.85 through £44.85"Epoxy Polish" offers a straightforward polishing system designed for epoxy resin surfaces to restore a glossy, mirror-like finish.
 Polishing Sponge Discs 150mm – 2 Pack£7.85Polishing Sponge Discs 150mm offer a finishing polish suitable for epoxy resin projects, helping achieve clarity and gloss with a versatile 2 pack.
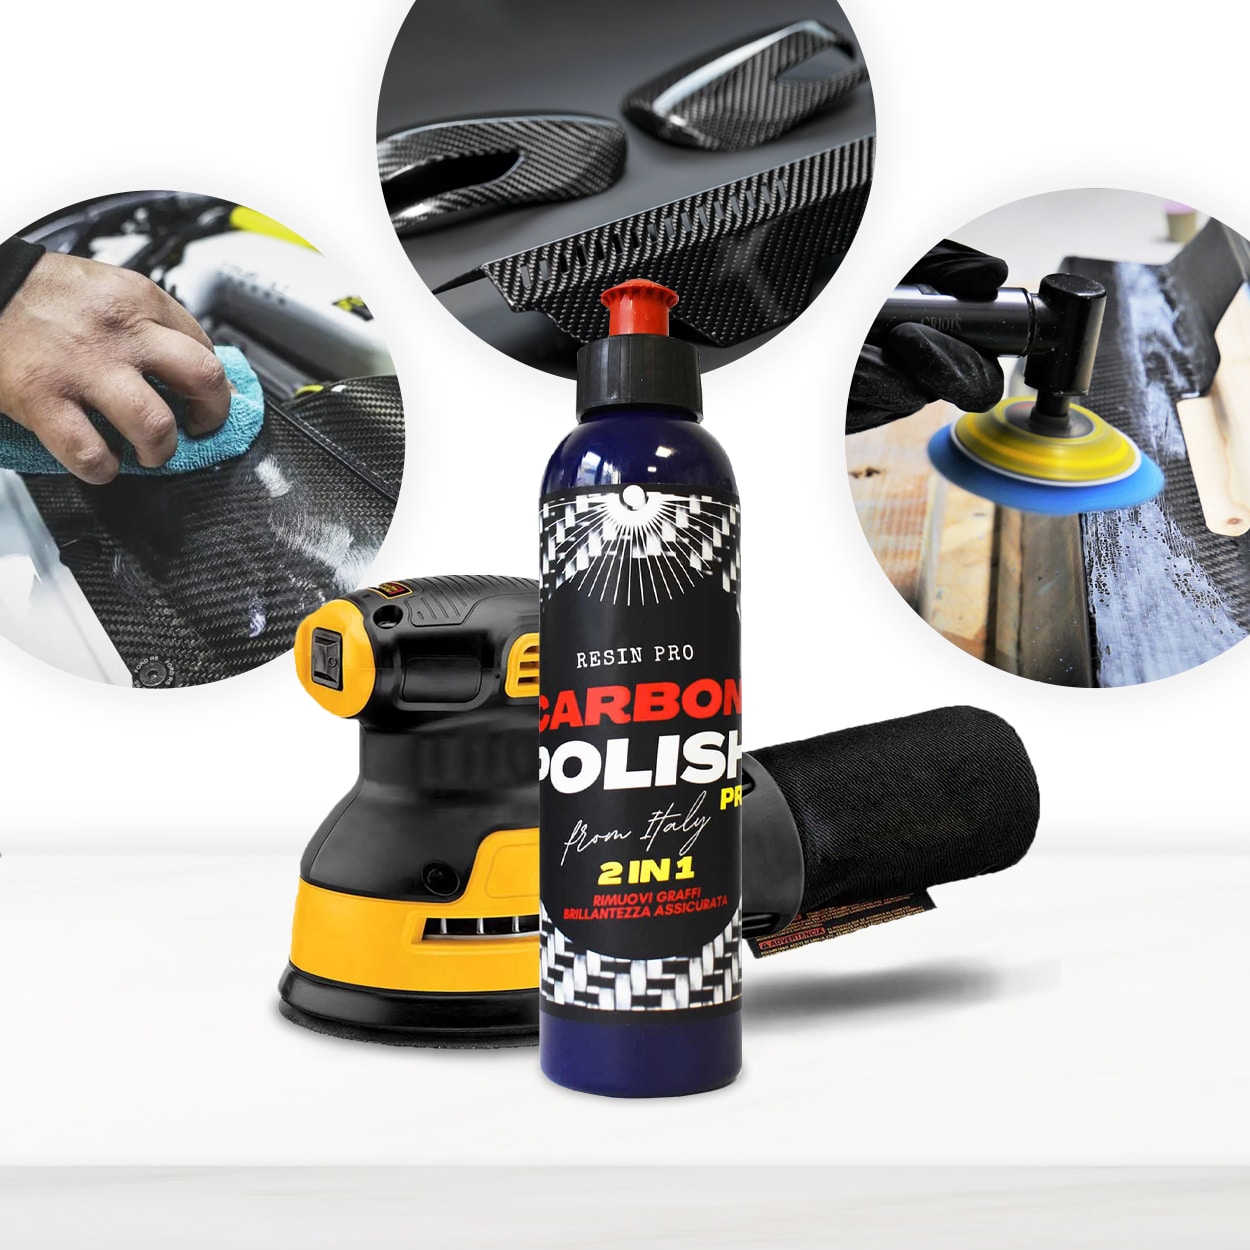 "Carbon Polish" – Polishing System for Dark and Black Surfaces, 250mlPrice range: £17.85 through £44.85Carbon Polish Black is designed for polishing dark or black surfaces, offering a suitable finish for epoxy resin projects within the theme.
Frequently Asked Questions
Do I need a rotary polisher to achieve a glossy finish on Formlabs resin?
While a rotary polisher provides a professional result, careful hand polishing with pads or microfibre cloths can also yield excellent outcomes for small or detailed items.
What is the best polishing system for dark or black Formlabs resin?
For dark or black resin, use Carbon Polish to avoid the white residue sometimes left by standard abrasives.
Why does my Formlabs resin look cloudy even after polishing?
Cloudiness usually results from skipping sanding grits or incomplete sanding. Go back to a finer grit and progress stepwise again.
How do I remove deep scratches or marks from Formlabs resin?
Start sanding with a coarser grit sandpad and gradually move to finer grits, then polish again until scratches disappear.
Is it necessary to use power tools, or can Formlabs resin be polished by hand?
Hand polishing is suitable for smaller pieces. For larger areas or a mirror finish, using pads with a rotary tool provides best results.