 Free shipping on orders over £29,85


How do you shape E-30 resin?
Step-by-step guide to moulding and shaping E-30 resin crafts


Shaping E-30 resin opens up creative possibilities for bespoke coasters, trays, and decorative objects. Whether you’re a beginner or a hobbyist, understanding the correct procedure ensures a professional finish and longer-lasting results for your resin projects.
What You’ll Need
- “Silicone Circle Mould” – For Creating with Epoxy Resin, Ø 20cm
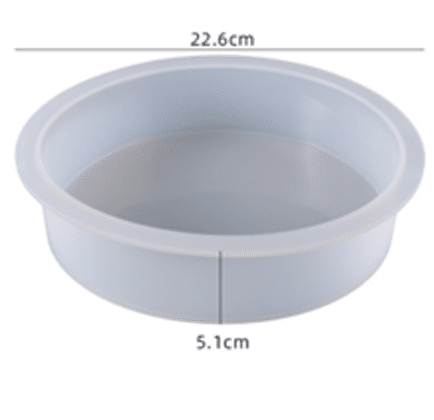
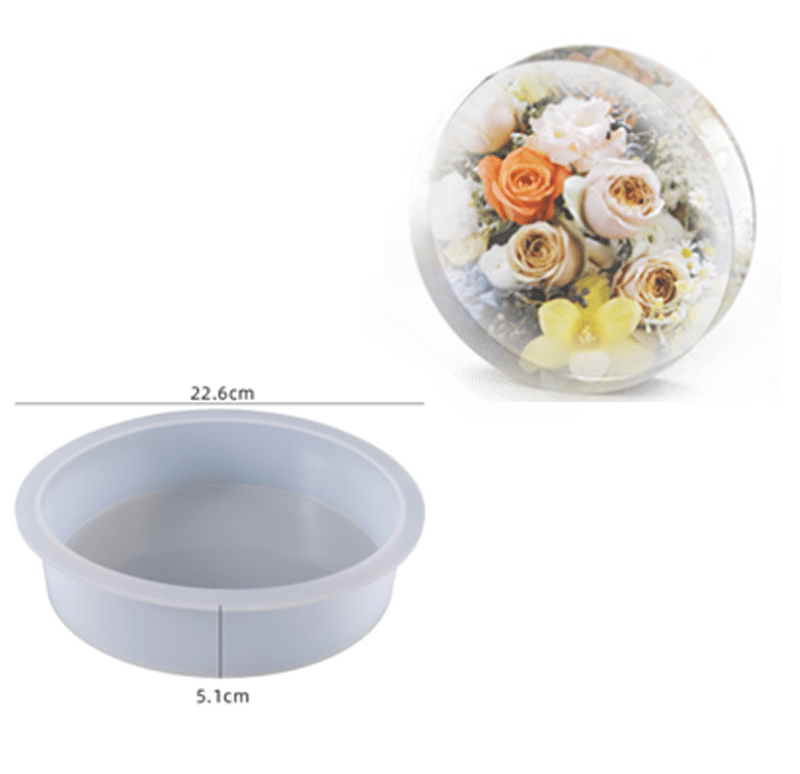
- Round Tray Silicone Mould ⌀26cm for Coasters and Trays
- “Tray” – Silicone Mould for Resin, 30.5x17cm
- “Silicone Heart Mould” – For Creating with Epoxy Resin, 19.5 x 16.5cm
- E-30 resin and appropriate hardener
- Mixing cups, stirring sticks
- Nitrile gloves and a mask
- Protective work surface
Selecting the Right Mould for Your Project
Choosing a suitable silicone mould affects the shape, finish, and ease of demoulding for your E-30 resin creation. Consider the final object you want to make—a circle for coasters, a tray for functional craft, or a decorative heart. Flexibility, size, and durability all influence project outcomes.
Step 1: Prepare Your Workspace and Materials
Begin by protecting your workspace with plastic sheeting or a silicone mat. Always use gloves and a mask when working with resin. Ensure your selected silicone moulds are clean, dry, and free from dust. Inspect the moulds—such as the “Silicone Heart Mould” – For Creating with Epoxy Resin, 19.5 x 16.5cm—for any leftover resin debris from previous projects and remove it for best results.
Organise all your supplies within easy reach. Having everything ready will help you manage time-sensitive resin working periods and avoid accidental mistakes.
Step 2: Mix and Pour the E-30 Resin
Carefully measure the E-30 resin and hardener according to the product instructions. Combine the two components in a clean mixing cup and stir gently for several minutes until the mixture is uniform. Take your time when pouring to avoid air bubbles and uneven fill. This is especially important with detailed silicone moulds, like the Round Tray Silicone Mould ⌀26cm for Coasters and Trays.
Slowly pour the prepared resin into your chosen mould, aiming for a steady, controlled flow. If required, use a wooden stick or spatula to distribute resin and help it fill any corners or intricacies in the mould.
Step 3: Allow Resin to Cure Fully
Once poured, place the filled mould on a level surface away from dust and draughts. Do not attempt to demould before the resin has cured fully. Curing times may vary depending on ambient conditions and thickness, but leaving the resin undisturbed for at least 24–72 hours is a safe guideline for most projects. Avoid moving or bumping the mould to prevent uneven surfaces or trapped bubbles.
If you are making heat-resistant items such as coasters, follow any additional recommendations, such as adding a clear layer for enhanced durability.

Step 4: Demould and Finish Your Resin Piece
After complete curing, gently flex the silicone mould to release the shaped resin piece. Moulds like the “Silicone Circle Mould” – For Creating with Epoxy Resin, Ø 20cm are designed for easy demoulding without deformation. If any rough edges remain, sand them lightly with fine-grit sandpaper for a professional look. Wipe the finished piece with a soft cloth to remove dust or sanding residue.

Tips, Troubleshooting, and Safety Advice
Clean your silicone moulds thoroughly after each use. This preserves their non-stick quality and accuracy. For stubborn resin residue, gently wash with warm soapy water—never abrasive pads or harsh solvents.
Watch for underfilled moulds or overmixing that traps bubbles. If small bubbles appear, pass a heat gun lightly over the resin immediately after pouring to help them rise and pop. Always dispose of resin waste according to local guidelines to protect your environment.
Finishing Touches and Project Inspiration
Add a personal touch to your resin creation by embedding dried flowers, coloured pigments, or metallic flakes before the resin sets. Reviewing sample designs helps spark creativity and refine your own unique projects.

- "Silicone Circle Mould" – For Creating with Epoxy Resin, Ø 20cm£12.85Flexible silicone mould suited for making decorative resin objects such as coasters and artistic creations.
- Round Tray Silicone Mould ⌀26cm for Coasters and Trays£11.85This silicone mould is designed for making coasters and trays with a smooth finish, suitable for heat-resistant resin projects.
- "Tray" – Silicone Mould for Resin, 30.5x17cmPrice range: £11.85 through £12.15"Tray" – Silicone Mould for Resin, 30.5x17cm is a flexible mould suitable for making coasters and decorative resin elements.
 "Silicone Heart Mould" – For Creating with Epoxy Resin, 19.5 x 16.5cm£12.85Flexible silicone heart mould designed for creating decorative objects with epoxy resin.
Frequently Asked Questions
Which moulds are best for shaping E-30 resin?
Flexible silicone moulds are ideal for shaping E-30 resin, offering smooth finishes and easy demoulding.
How long does E-30 resin need to cure in a silicone mould?
E-30 resin typically cures within 24–72 hours, depending on thickness and environmental conditions.
Can I reuse my silicone mould multiple times?
Yes, silicone moulds are reusable if cleaned properly after each use and stored flat to retain their shape.
How do I minimise bubbles when shaping resin?
Mix the resin slowly, pour in a thin stream, and use a heat gun lightly to help bubbles rise and pop.
Can E-30 resin pieces be sanded or polished after demoulding?
Yes, cured E-30 resin can be sanded and polished to achieve a perfectly smooth finish if desired.
Should I use a release agent with silicone moulds and E-30 resin?
A release agent is usually not required for quality silicone moulds, but can be used for intricate or deep designs.