 Free shipping on orders over £29,85


How to finish resin?
Step-by-step guide to achieving a flawless resin finish


Finishing resin is an indispensable step to make your creations stand out, whether you are working on jewellery, artwork, or furniture. Achieving a glossy, scratch-free surface enhances visual appeal and ensures lasting durability. This guide walks you through the correct way to finish resin pieces, from preparation to that final brilliant shine.
What You’ll Need
- “Ebonite Abralon” – Sanding Pads 360-4000 Grit for Resin and Wood – for detailed wet or dry sanding.
- 150mm Sanding Paper Discs – Assorted Grits for Resin & Wood Finishing, 10pcs – for smooth surface preparation.
- Polishing Sponge Discs 150mm – 2 Pack – for that vital final touch and buffing.
- “Epoxy Polish” – Epoxy Resin Polishing System – ideal for achieving a high-gloss, mirror-like finish.
- Clean microfibre cloths and, if needed, a rotary polisher or hand pad holder.
- Protective gloves and safety glasses for dust management.

Essential Surfaces and Examples
The finishing process works on resin jewellery, coasters, tabletops, and art pieces alike. Examples include high-gloss river tables, crystal-clear pendants, and decorative trays. The right tools and preparation help avoid common blemishes and achieve a glass-like, professional appearance on all resin types.

Step 1: Clean the Surface Thoroughly
Clean the surface thoroughly before beginning any finishing work. Remove dust, oils, or excess resin drips with a lint-free cloth and a mild detergent if necessary. Ensuring the piece is clean prevents scratches and embedded debris during sanding or polishing, leading to a much smoother final result.
Step 2: Sand the Resin Smooth
Begin sanding with a medium grit, such as 360 or 400, especially if the cast surface has prominent bumps, ridges, or imperfections. Make gentle, even strokes along the surface, and check regularly for an even matte appearance. For detailed or curved areas, sanding pads offer reliable flexibility and control. Move up through the grits in sequence—for example, 800, 1200, then up to 4000—to gradually refine the surface. Work through sanding grits gradually to avoid leaving scratches that will show through in the final finish.
For larger flat items, a sanding block or mechanical sander provides consistency, but stay lightweight with the pressure to prevent wavy marks. Wet sanding with specialised pads, such as the “Ebonite Abralon” – Sanding Pads 360-4000 Grit for Resin and Wood, can help keep down dust and reduce heat build-up, which is particularly important for epoxy resin surfaces.
Step 3: Polish Only When Resin is Fully Cured
Do not attempt to polish unless the resin is fully cured, as this could cloud or scratch the surface. When ready, apply a professional resin polish—either by hand using a soft pad or, for the best results, using a pad holder or rotary polisher. A quality system like the “Epoxy Polish” – Epoxy Resin Polishing System is designed to remove microscopic scratches left by sanding and restore a dazzling clarity. Use a circular motion, maintaining light, even pressure, and replenish the polish as needed.

Step 4: Buff for a Final Brilliant Shine
After polishing, buff the resin thoroughly with a clean microfibre cloth or a designated sponge disc designed for finishing. Buff for a final brilliant shine across the surface, working in overlapping small circles. The Polishing Sponge Discs 150mm – 2 Pack are ideal for this step, helping you achieve a mirror-smooth finish with little effort. Check under strong light for any dulled or streaky patches and repeat the buffing if needed for a flawless result.

Tips, Troubleshooting and Common Mistakes
Patience and attention to detail are key for beautiful results. Always progress through each sanding grit without skipping steps, as each level removes marks from the previous one. Avoid using too much pressure during polishing or buffing—overheating can haze the finish. If you notice cloudiness, repeat with a finer polishing compound and ensure the resin is dust-free beforehand. Let each step dry completely before moving to the next, and always prioritise safety with dust management and proper personal protective equipment.
Photos: From Matte to Mirror Gloss
Visual progress is the best motivator: show before-and-after photos at each stage, from sanding to high-gloss polishing. Demonstrations of the technique, especially on challenging pieces like curved jewellery or large flat art panels, help highlight the difference a quality finish makes for resin projects.

- "Epoxy Polish" – Epoxy Resin Polishing SystemPrice range: £18.95 through £47.45"Epoxy Polish" offers a professional-grade system to restore a glossy, mirror-like finish to resin and similar surfaces.
- "Ebonite Abralon" – Sanding Pads 360-4000 Grit for Resin and Wood£4.15Ebonite Abralon sanding pads are designed for polishing epoxy resin and wood with versatile wet or dry use.
 Polishing Sponge Discs 150mm – 2 Pack£8.45Polishing Sponge Discs 150mm – 2 Pack are designed to provide an essential finishing touch for epoxy resin projects in the How to finish resin? theme.
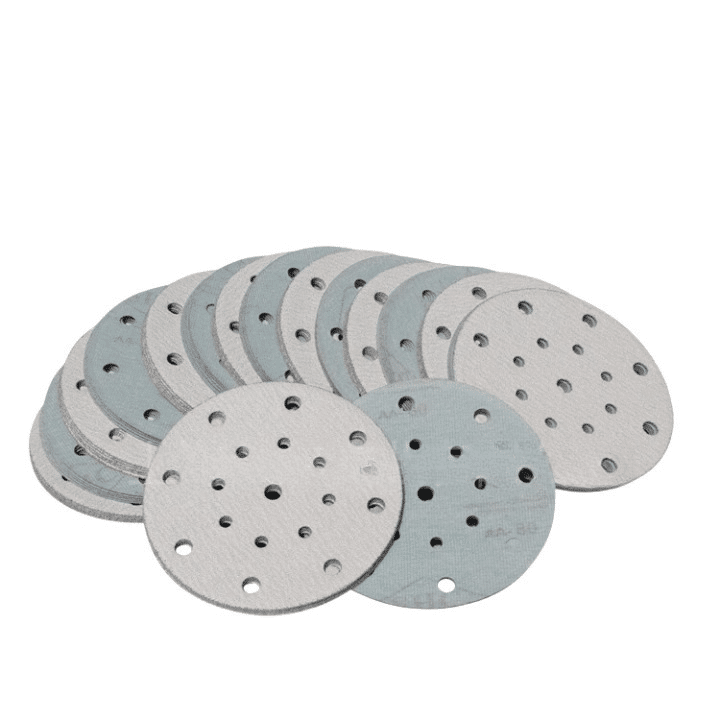 150mm Sanding Paper Discs – Assorted Grits for Resin & Wood Finishing, 10pcs£9.45150mm sanding paper discs designed for finishing resin and wood surfaces, suitable for various crafting stages.
Frequently Asked Questions
Can I finish resin without a specialised polishing system?
You can hand-sand and buff resin for a matte or satin finish. For a mirror shine, use a dedicated resin polish.
Do I need to wait until resin is fully cured to polish?
Yes, always wait for full cure. Polishing uncured resin may cause scratches or cloudiness and an uneven result.
What is the best way to remove scratches from resin?
Progress through finer sanding grits until scratches are gone, then polish and buff for clarity.
How can I achieve a mirror-like finish on resin?
Smooth the surface with sanding up to 4000 grit, then polish and buff with appropriate compounds and sponges.
How do I fix cloudiness or haze after finishing resin?
Try re-sanding with a finer grit and repolishing. Always ensure the surface is clean and free from dust or abrasive residue.
Are polishing sponges necessary for a good finish?
They help achieve a high-gloss finish but are not strictly essential for all projects. For best results on flat or large surfaces, use them.