 Free shipping on orders over £29,85


How to Use Filling Epoxy Resin Tutorial?
Step-by-step guide for a flawless resin pouring process


Creating beautiful resin art, tables or functional objects like coasters is within anyone’s reach with the right approach. This tutorial will guide you through the essential steps for using filling epoxy resin safely and effectively, whether you’re a total beginner or looking to refine your process. We’ll focus on the fundamental actions, safety tips, and common mistakes to help you achieve smooth, bubble-free and durable results.
What You’ll Need
- “River-Table” – Complete Kit for Creating Your First Epoxy Resin Table — ideal for beginners or those making their first resin and wood table, as it supplies resin, hardener, sealant, pigments, and instructions.
- Free Step-by-Step Lesson “Kiwi Coasters” by Natalia Natirum — a practical guide to resin coasters, useful if exploring smaller or artistic projects.
- Resin Class – 3D Effects Coasters Masterclass, 120 Minutes — for learning key techniques before starting a project.
- Free Step-by-Step Resin Ocean Art Lesson by Natalia Natirum — guidance on resin art styles, especially ‘Ocean Art’ effects.

Essential Materials for a Successful Epoxy Pour
Selecting the right materials streamlines your project and boosts confidence. Starter kits, like the “River-Table” – Complete Kit for Creating Your First Epoxy Resin Table, combine resin, hardener, and key accessories to take away the guesswork. For artistic pours or effects, tap into inspiration with free step-by-step guides designed for all skill levels.

Step 1: Prepare Your Workspace and Materials
Start by setting up a clean, dust-free, and level workspace. Work in a well-ventilated area and protect surfaces with plastic sheeting or an old cloth. Gather all your materials, including accurate measuring tools, mixing sticks, and moulds or formwork as needed for your project. If you are new to epoxy work or want everything ready, the “River-Table” – Complete Kit for Creating Your First Epoxy Resin Table is an all-in-one option with clear, step-by-step instructions.
Wear gloves and, if working with larger pours or in less ventilated spaces, a mask for added safety. Ensure your resin and hardener are at room temperature before starting, as this promotes proper mixing and helps reduce bubbles.
Step 2: Measure and Mix Resin Accurately
Always measure resin and hardener precisely according to the ratios specified by your product’s instructions. Too much or too little hardener can prevent proper curing, leaving you with a sticky or brittle finish. Pour both components into a clean mixing cup.
Mix slowly and thoroughly for several minutes, ensuring you scrape the sides and base of the container. Slow mixing minimises air bubbles and produces a homogeneous blend, essential for transparent designs and strong casting. If you are following the Free Step-by-Step Lesson “Kiwi Coasters” by Natalia Natirum, remember that even artistic projects need careful blending for smooth results.
Step 3: Pour and Fill Your Mould or Surface
Pour the mixed resin steadily into your prepared mould or onto your work surface. For river tables and larger items, pour in layers if needed to avoid excessive heat and cracking. Use a spatula or stick to guide resin into corners or around complex shapes. Avoid moisture and dust contamination, as these can cause cloudiness or disrupt curing.
Epoxy resin can be tinted or enhanced using pigments included in specialist kits. If pouring into wooden formwork, proper sealing with silicone or release film, as found in the “River-Table” – Complete Kit for Creating Your First Epoxy Resin Table, can help you cleanly demould the finished item.

Step 4: Cure and Finish Your Resin Project
Let your resin project cure undisturbed and protected from dust. Refer to the recommended curing times stated in your kit or tutorial. Patience is crucial during curing; handle only once it is fully hardened to avoid fingerprints or deformation.
Once fully cured, you can unmould or remove your item from formwork. Some kits, like the one for river tables, include a polishing set for a glossy finish and show you how to work through graduated sanding pads. For art pieces or coasters, follow the instructions in the respective tutorials for a smooth edge and shine.

Tips, Common Mistakes, and Troubleshooting
Resin art and furniture projects come with a learning curve. Track the following to avoid frustration:
- Temperature matters — resin that’s too cold won’t mix or cure well, while high temperatures may create bubbles or rapid curing issues.
- Resist the urge to rush; allow for recommended standing and curing times to prevent sticky or uneven areas.
- If you spot bubbles after pouring, a gentle pass with a heat gun or a quick flame can help, but don’t overdo it to avoid scorching or adding dust.
- Test colours or special effects on a small scale before using them on your main project.
Mastering a Professional Finish
Perfect results depend on patience, clean technique, and careful surface prep. Use a polishing kit, or sanding pads if finishing your table or coaster. Don’t hesitate to revisit lessons like the Free Step-by-Step Resin Ocean Art Lesson by Natalia Natirum for more methods and artistic inspiration as you grow your skills.

- "River-Table" – Complete Kit for Creating Your First Epoxy Resin TablePrice range: £198.45 through £467.45Complete kit including resin, hardener, silicone sealant, polishing kit and pigment for creating resin and wood tables.
- Free Step-by-Step Lesson "Kiwi Coasters" by Natalia NatirumOriginal price was: £99.00.£0.00Current price is: £0.00.Free video tutorial to create resin coasters resembling kiwi, suitable for the theme How to Use Filling Epoxy Resin Tutorial?
 Resin Class – 3D Effects Coasters Masterclass, 120 MinutesThis masterclass provides an introduction to working with resin, focusing on coasters and bowls creation techniques.
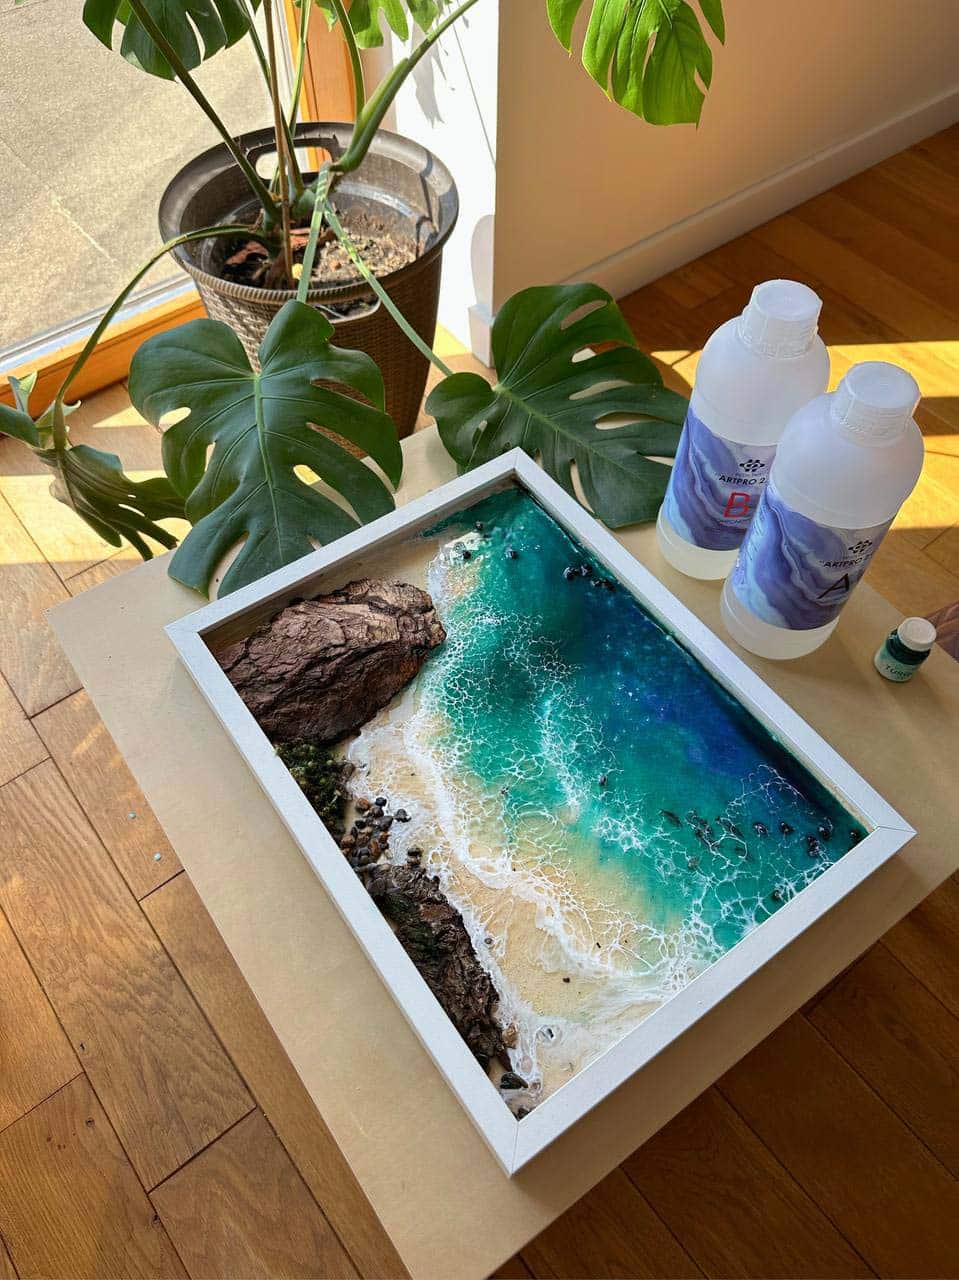 Free Step-by-Step Resin Ocean Art Lesson by Natalia NatirumOriginal price was: £99.00.£0.00Current price is: £0.00.Free video tutorial teaching how to create Resin Ocean Art with guidance from Natalia Natirum, suitable for filling epoxy resin projects.
Frequently Asked Questions
How do I accurately measure and mix filling epoxy resin?
Use clean mixing cups and follow the product's specified resin-to-hardener ratio exactly. Mix thoroughly to ensure a consistent, bubble-free blend.
How can I prevent bubbles when using filling epoxy resin?
Mix slowly and pour in thin layers. Gentle heat (such as a heat gun sweep) can help release trapped air without damaging your piece.
What is the average curing time for a filling epoxy resin project?
Most filling epoxy resins require 24–72 hours to fully cure, but always check your specific kit's instructions for best results.
What are the most common mistakes when using filling epoxy resin?
Mistakes include inaccurate ratios, rushing curing time, and working in dusty or damp environments.
Should I use a kit or follow a masterclass if I'm new to filling epoxy resin?
Beginner kits make the process easier, while masterclasses and free lessons provide useful tips and creative ideas.
What tools are necessary for a basic filling epoxy resin project?
You'll need measuring cups, mixing sticks, gloves, and moulds or prepared formwork as a minimum.