 Free shipping on orders over £29,85


How do you sand resin sheets and paint?
Step-by-step guide to prepping, sanding, and painting resin surfaces
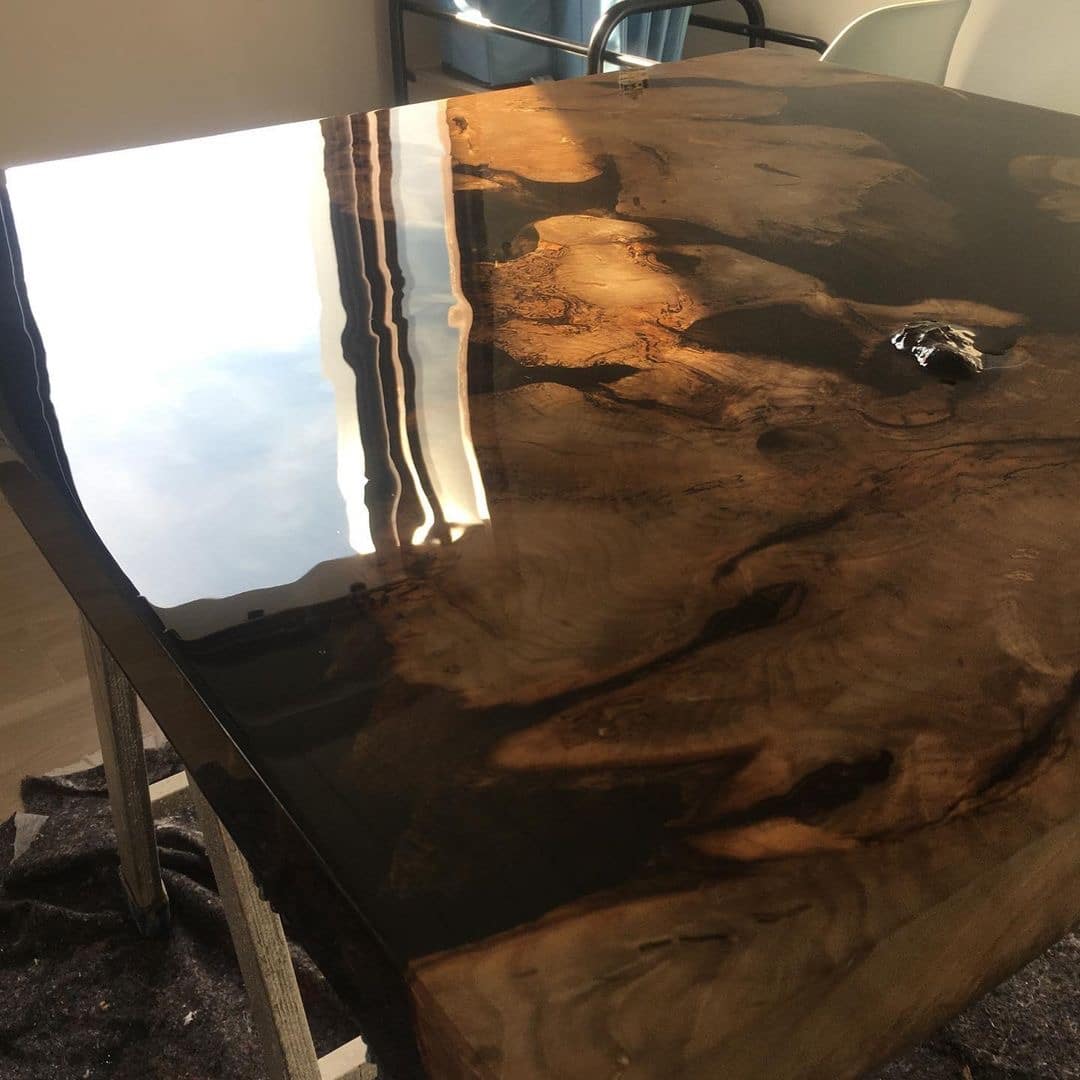
Preparing resin sheets for painting is an essential process for anyone aiming to achieve a smooth, professional finish. This guide walks you through every step, from surface preparation to sanding, cleaning, and painting. Whether you are crafting resin art, DIY décor, or functional panels, mastering these techniques ensures vibrant, long-lasting results.
What You’ll Need
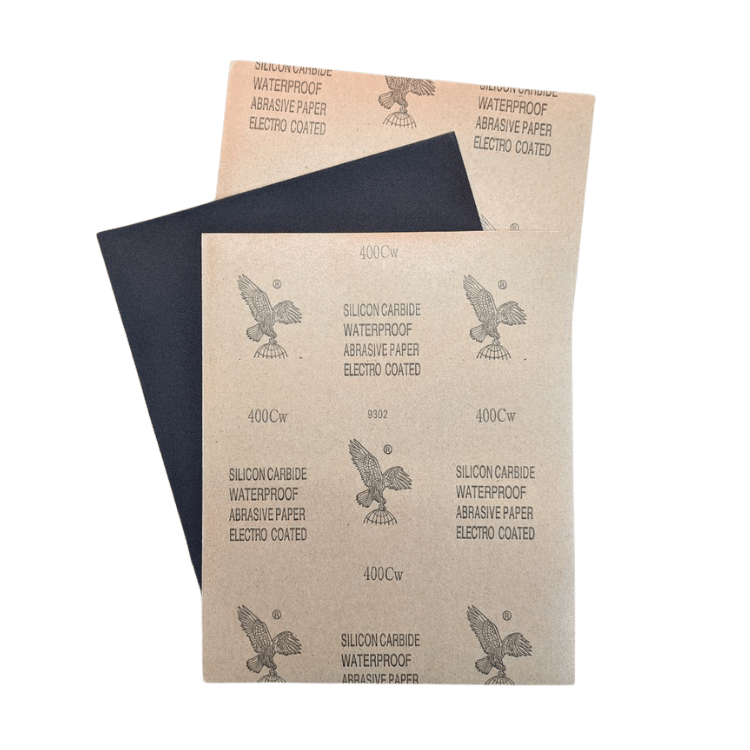
- A4 Waterproof Sanding Paper Assorted Grits Pack of 4 for Crafting and Woodworking – for manual sanding of resin sheets, suitable for both wet and dry use
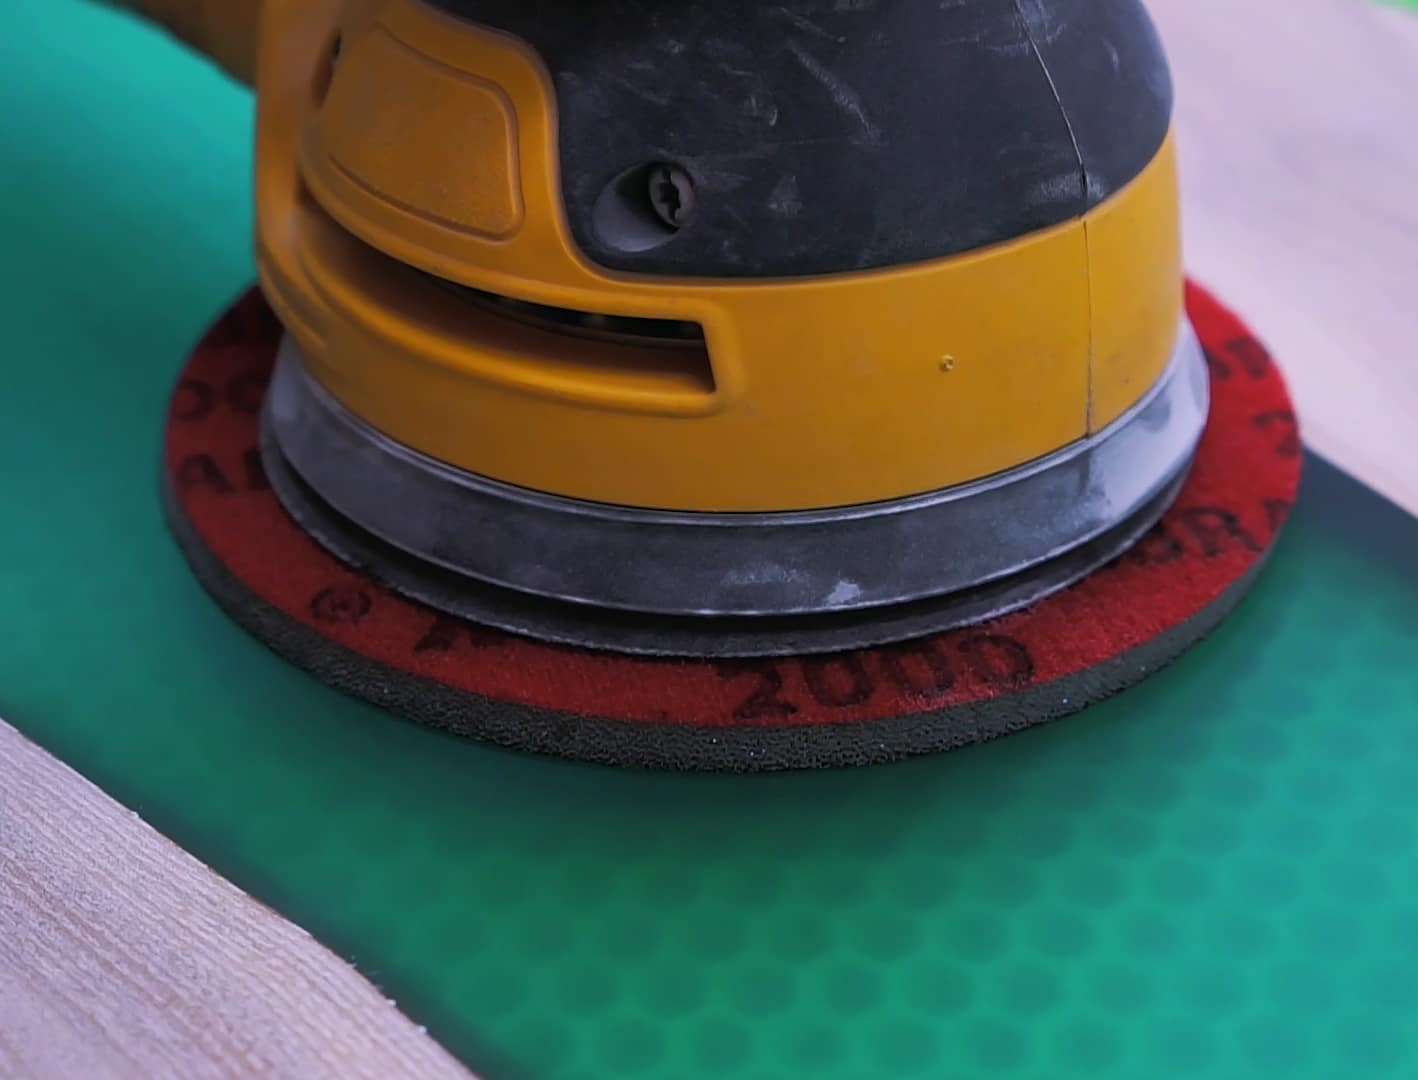
- “Ebonite Abralon” – Sanding Pads 360-4000 Grit for Resin and Wood – ideal for detailed finishing and producing a satin surface ready for painting
- “Epoxy Polish” – Epoxy Resin Polishing System – for polishing the resin sheet if a glossy finish is required before or after painting
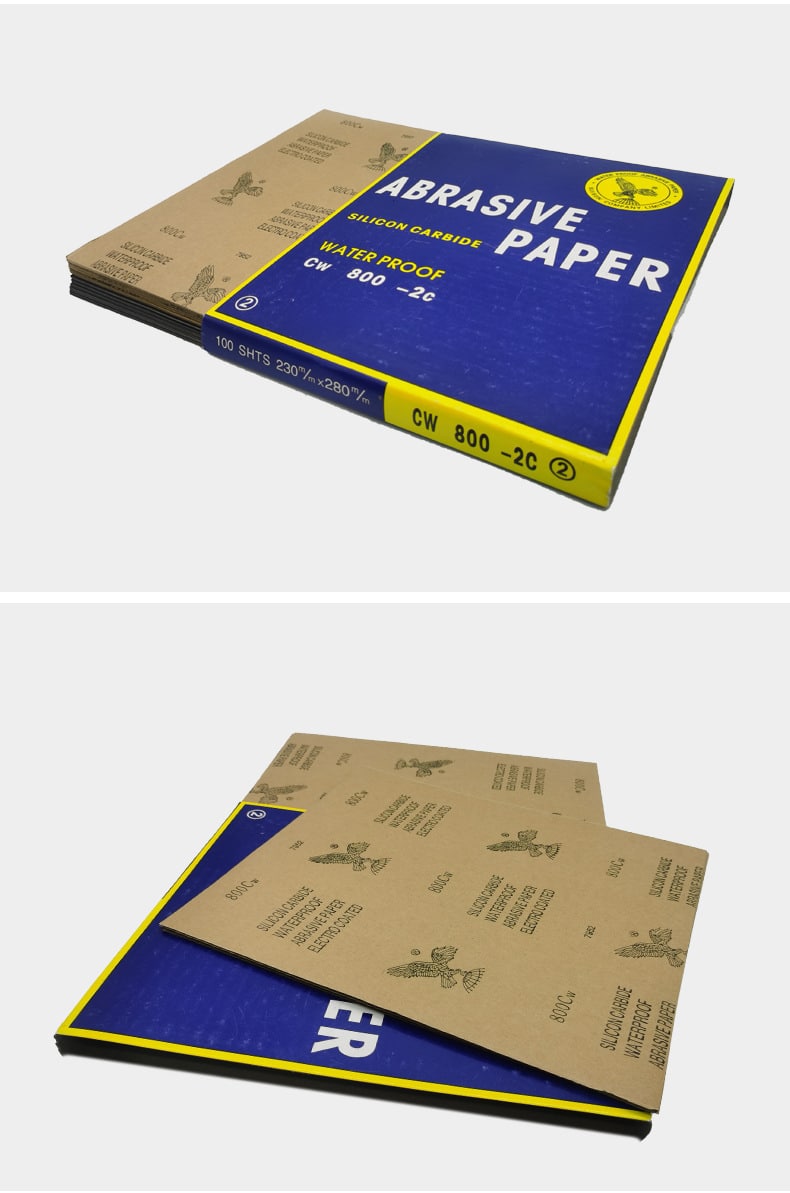
- 150mm Sanding Paper Discs – Assorted Grits for Resin & Wood Finishing, 10pcs – for power sanding larger resin panels
- Clean, lint-free cloths
- Mild detergent solution for cleaning
- Masking tape (for edge protection, if required)
- Protective gloves and dust mask
- Paint suited for resin surfaces (e.g., acrylic or spray paints)
- Primer (if recommended by paint manufacturer)
- Soft brush or paint roller

Essential Tools for Sanding and Painting Resin
Choose your sanding system according to the size and detail of your resin sheet. A4 Waterproof Sanding Paper and Ebonite Abralon Sanding Pads offer versatility for wet or dry sanding, while Sanding Paper Discs are perfect for power tools and large, flat surfaces.
Step 1: Prepare the Surface
Begin by ensuring your resin sheet is fully cured and free from any sticky areas. Remove any debris, dust, or oil by washing the surface with a mild detergent solution. Rinse with clean water and dry thoroughly. If you notice sharp edges or protrusions, carefully trim or sand these down using coarse-grit paper. Wear protective gloves and a dust mask to safeguard yourself from fine particles.
Step 2: Sand the Resin Sheet
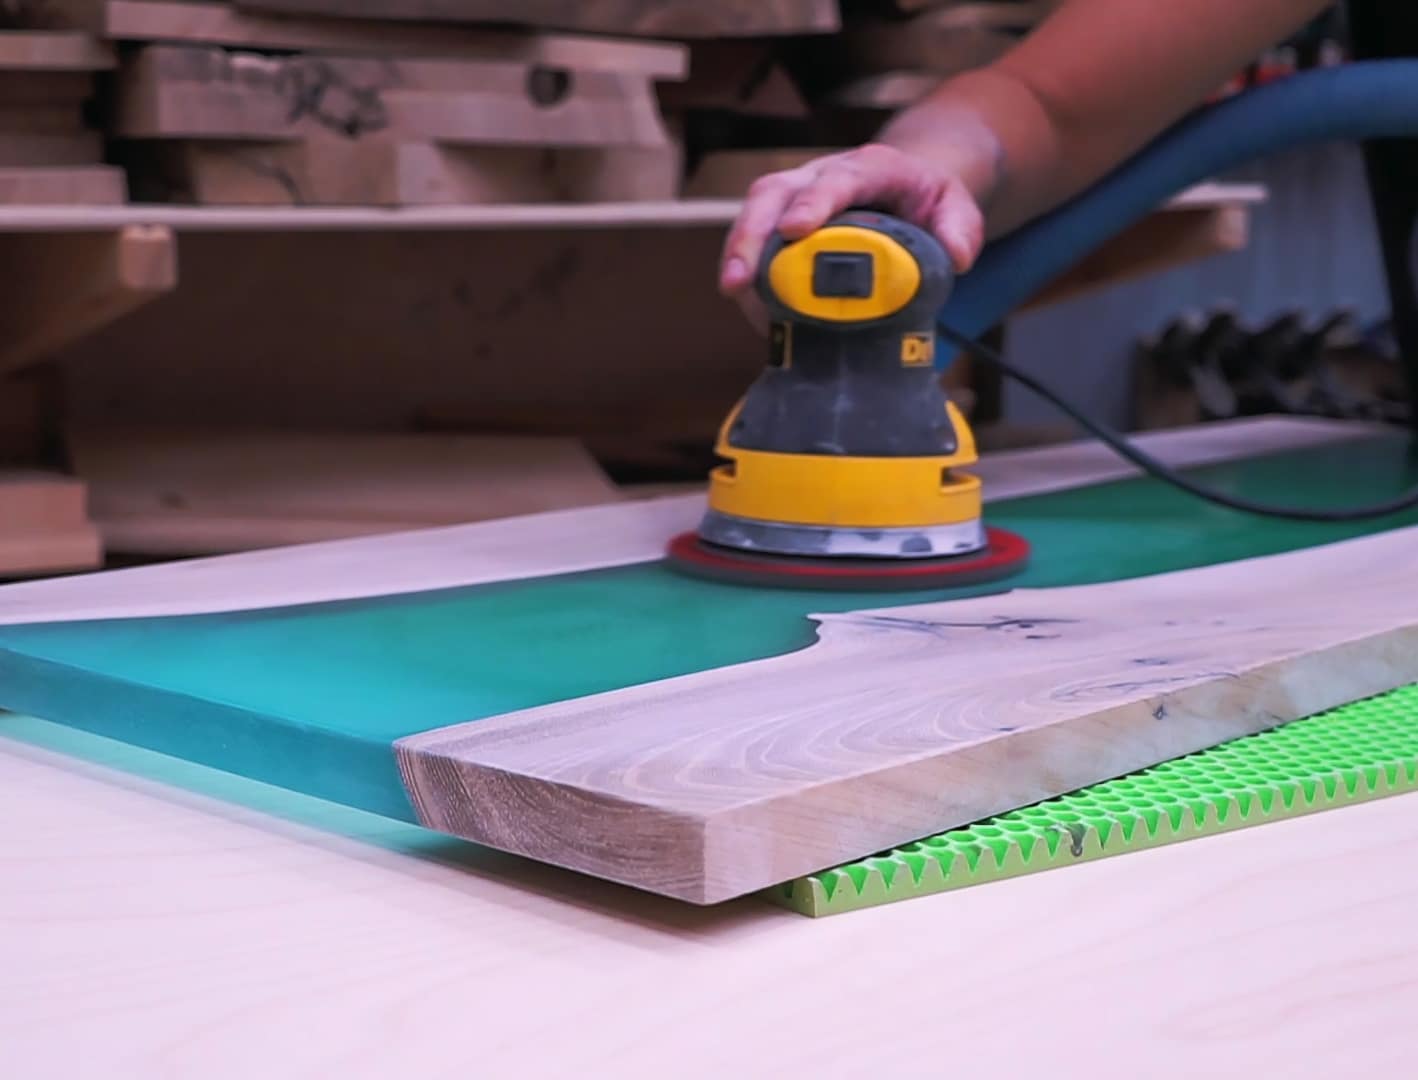
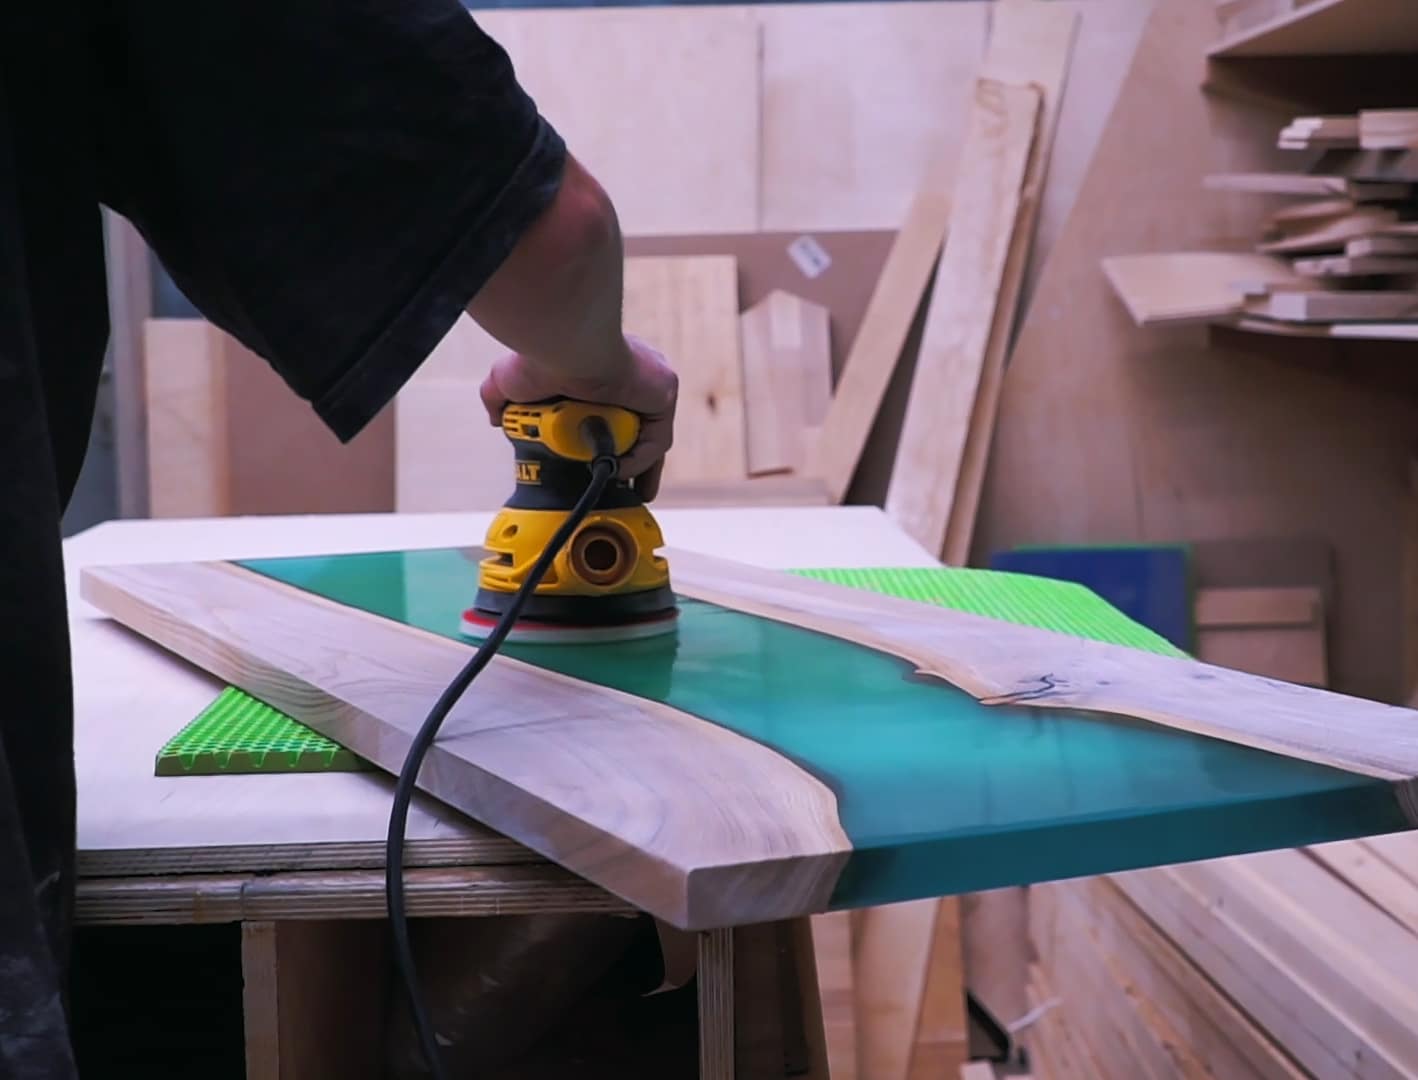
Start sanding using a lower-grit (coarser) abrasive to smooth out imperfections and promote paint adhesion. If hand-sanding smaller pieces, the A4 Waterproof Sanding Paper Assorted Grits Pack of 4 for Crafting and Woodworking is ideal, allowing you to progress from coarse to fine grits as needed. Wet sanding is recommended: dampen the surface and sandpaper to reduce dust and create a finer finish. Use circular, even motions and avoid spending too long in one spot to maintain a level surface.
For larger projects or for a consistent finish, power sanders fitted with 150mm Sanding Paper Discs – Assorted Grits for Resin & Wood Finishing, 10pcs enable quick, even coverage. Always move to finer grits in stages—at least up to 800 or 1200 grit—to eliminate visible scratches.
To achieve a very smooth, satin effect before painting, try “Ebonite Abralon” – Sanding Pads 360-4000 Grit for Resin and Wood. Their foam backing ensures even pressure, helping you get consistent results, especially on curved or detailed surfaces.
Step 3: Clean the Sanded Surface
After sanding, remove all dust and residues for optimal paint adhesion. Wipe down the entire sheet with a damp, lint-free cloth. If using wet sanding, ensure all moisture is dried before proceeding. A tack cloth or compressed air can remove fine particles that settle in tiny scratches or corners. Clean thoroughly after sanding to prevent blemishes in the final paint finish.


Step 4: Prime and Paint Your Resin Sheet
Check if a primer is required for your chosen type of paint—many paints for plastics or resins bond best with a suitable primer. Apply the primer in thin, even layers, letting each coat dry fully. Use masking tape to protect areas you don’t want to paint. Once primed, apply your paint following the manufacturer’s guidelines. Spraying often achieves a smoother finish, but brushing and rolling can work with practice. For bright and even colour, several light coats are preferable to one heavy coat. Let each coat dry fully before re-coating to avoid marks or peeling.
Step 5: Optional Polishing and Finishing
If you desire a glossy finish, polish the painted or unpainted resin with a suitable compound. The “Epoxy Polish” – Epoxy Resin Polishing System helps eliminate fine scratches and brings out a deep, glass-like shine. Use with a rotary polisher or by hand, following the product instructions for best results. Only proceed with polishing when the paint is fully cured (check paint manufacturer’s cure times).


Tips and Troubleshooting
- Choose the right grit for each stage. Starting too fine won’t remove imperfections; finishing too coarse can leave visible marks under paint.
- Wet sanding keeps dust down and leads to a smoother finish on resin, but always ensure the sheet is completely dry before painting.
- Mask edges or areas not to be painted to keep lines clean.
- For the shiniest results, polish only when paint is fully hardened.
- Test your process on a sample before working on your final project, especially with new paint or techniques.
Achieving Best Results on Resin Sheets
Take your time with surface prep and sanding, as these steps determine the smoothness and longevity of your painted finish. Prioritise dust control, allow each layer to dry, and always follow manufacturer guidelines for sanding materials and paint systems.
- A4 Waterproof Sanding Paper Assorted Grits Pack of 4 for Crafting and Woodworking£7.45Sanding paper pack offering various grits and waterproof design, suitable for resin crafts and woodworking projects.
- "Ebonite Abralon" – Sanding Pads 360-4000 Grit for Resin and Wood£4.15"Ebonite Abralon" sanding pads provide precise finishing for epoxy resin sheets and wood, suitable for wet or dry use.
- "Epoxy Polish" – Epoxy Resin Polishing SystemPrice range: £18.95 through £47.45"Epoxy Polish" offers an epoxy resin polishing system delivering a glossy finish. Suitable for resin projects, fitting the theme on sanding and…
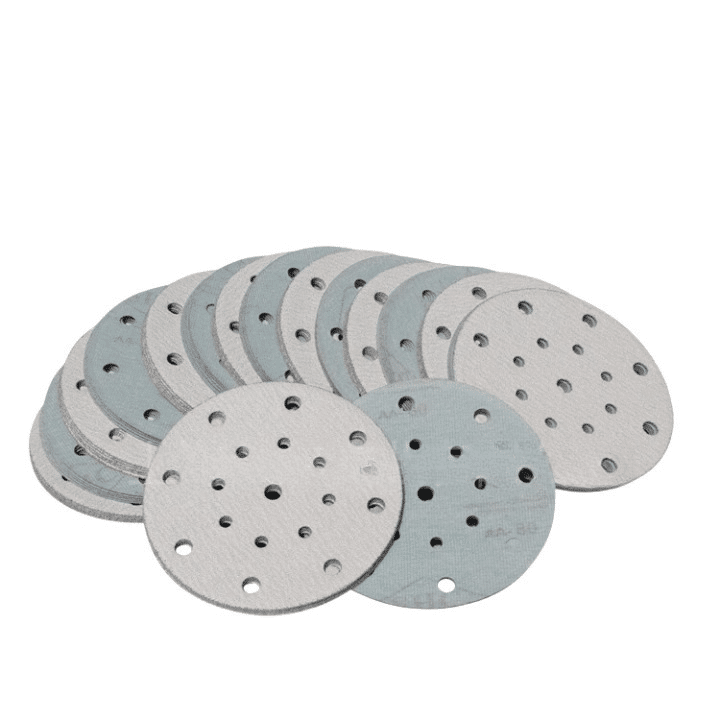 150mm Sanding Paper Discs – Assorted Grits for Resin & Wood Finishing, 10pcs£9.45These 150mm sanding paper discs are designed for finishing resin and wood, suitable across various sanding stages under the theme of sanding resin…
Frequently Asked Questions
Do I need to wet sand resin before painting?
Wet sanding isn't required but is highly recommended for a smoother finish and better paint adhesion on resin sheets.
Which grit is best for sanding resin sheets?
Begin with a lower grit such as 400 or 600 and work your way up to finer grits like 1200 for a smooth, paint-ready surface.
How can I remove scratches before painting resin?
Use progressively finer sanding papers and finish with a detailed sanding pad to eliminate scratches before painting.
Can I use any paint on sanded resin sheets?
Most acrylic and spray paints adhere well, but always check paint compatibility and use a primer if recommended.
When should I polish a resin sheet after painting?
Only polish after the paint has fully cured, typically after several days, to avoid damaging the finish.
What is the best way to clean after sanding resin?
Use a damp, lint-free cloth or tack cloth to remove dust, allowing a clean base for painting.
What are common mistakes with sanding and painting resin?
Rushing surface prep, skipping dust removal, and painting before the sheet is fully dry or cured are the most frequent errors.