 Free shipping on orders over £29,85

← Back to How do you make the petri dish effect on resin?

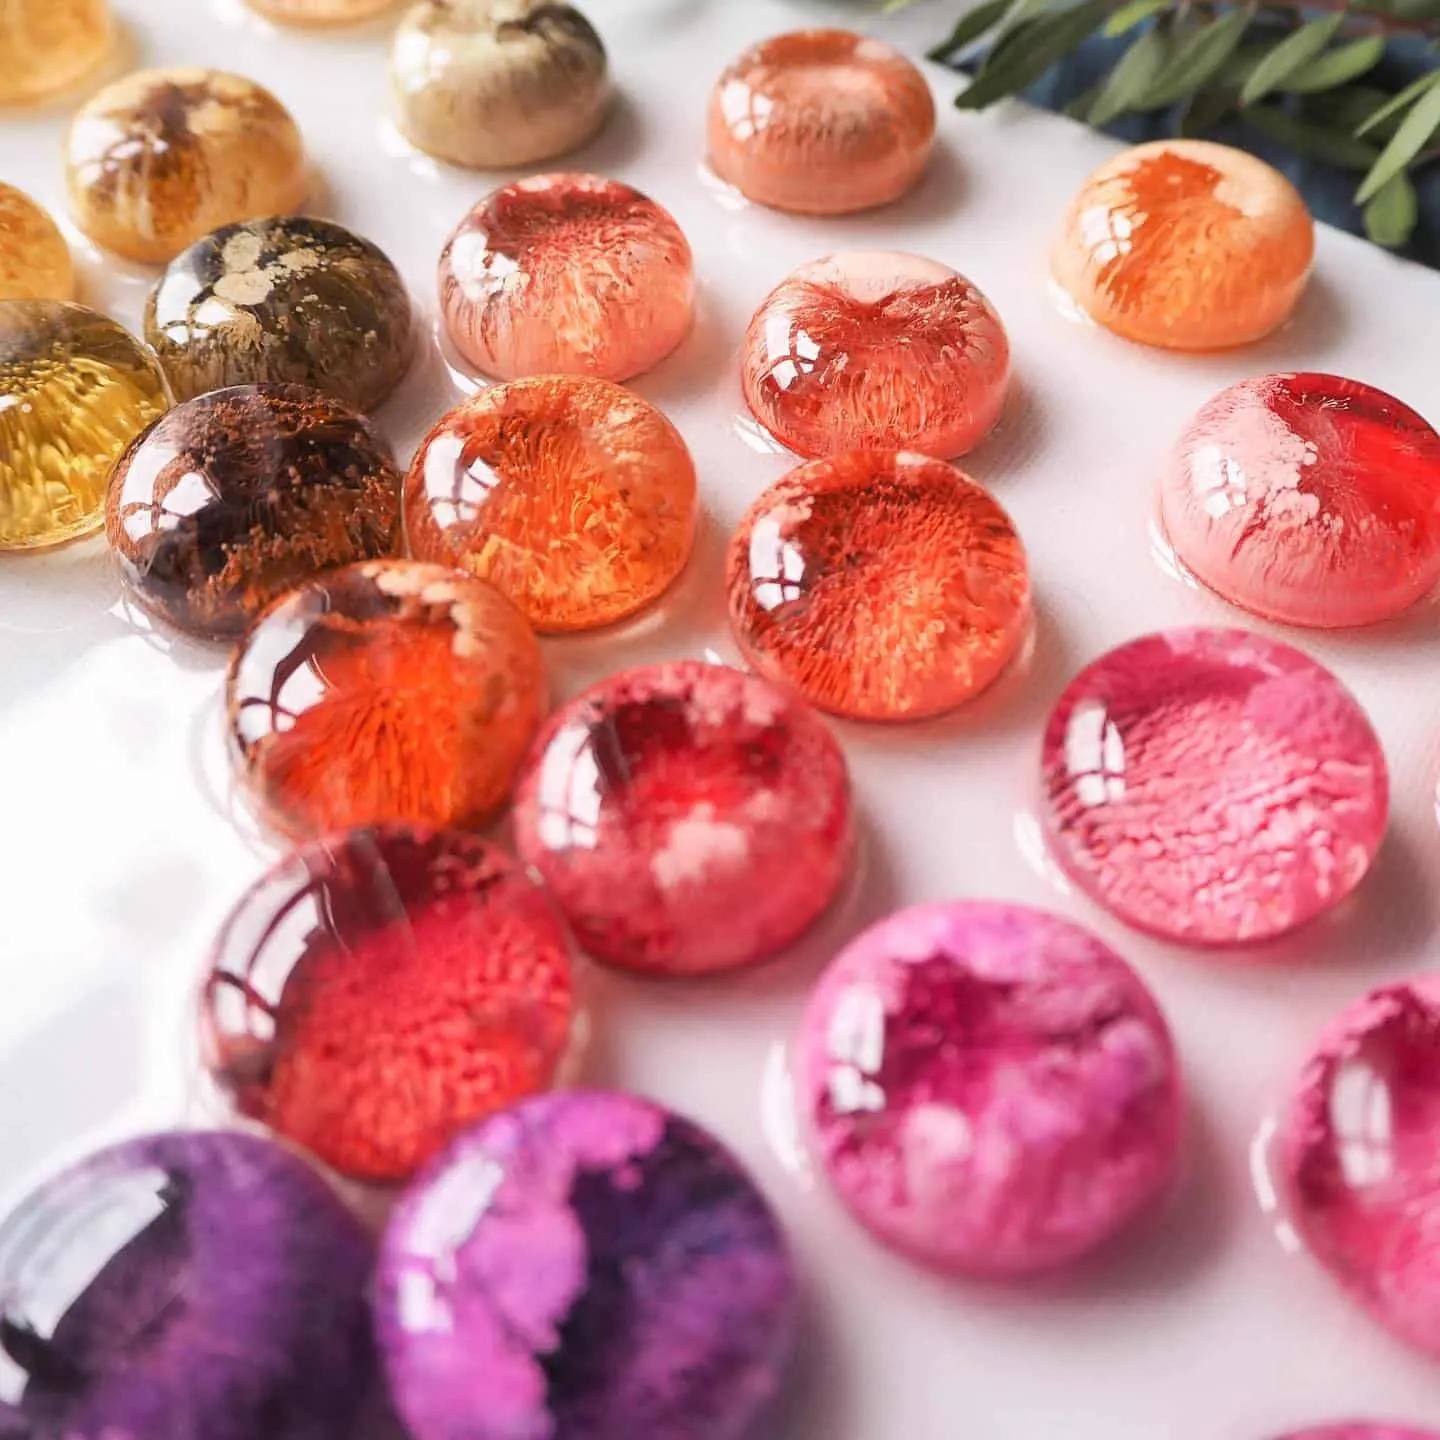
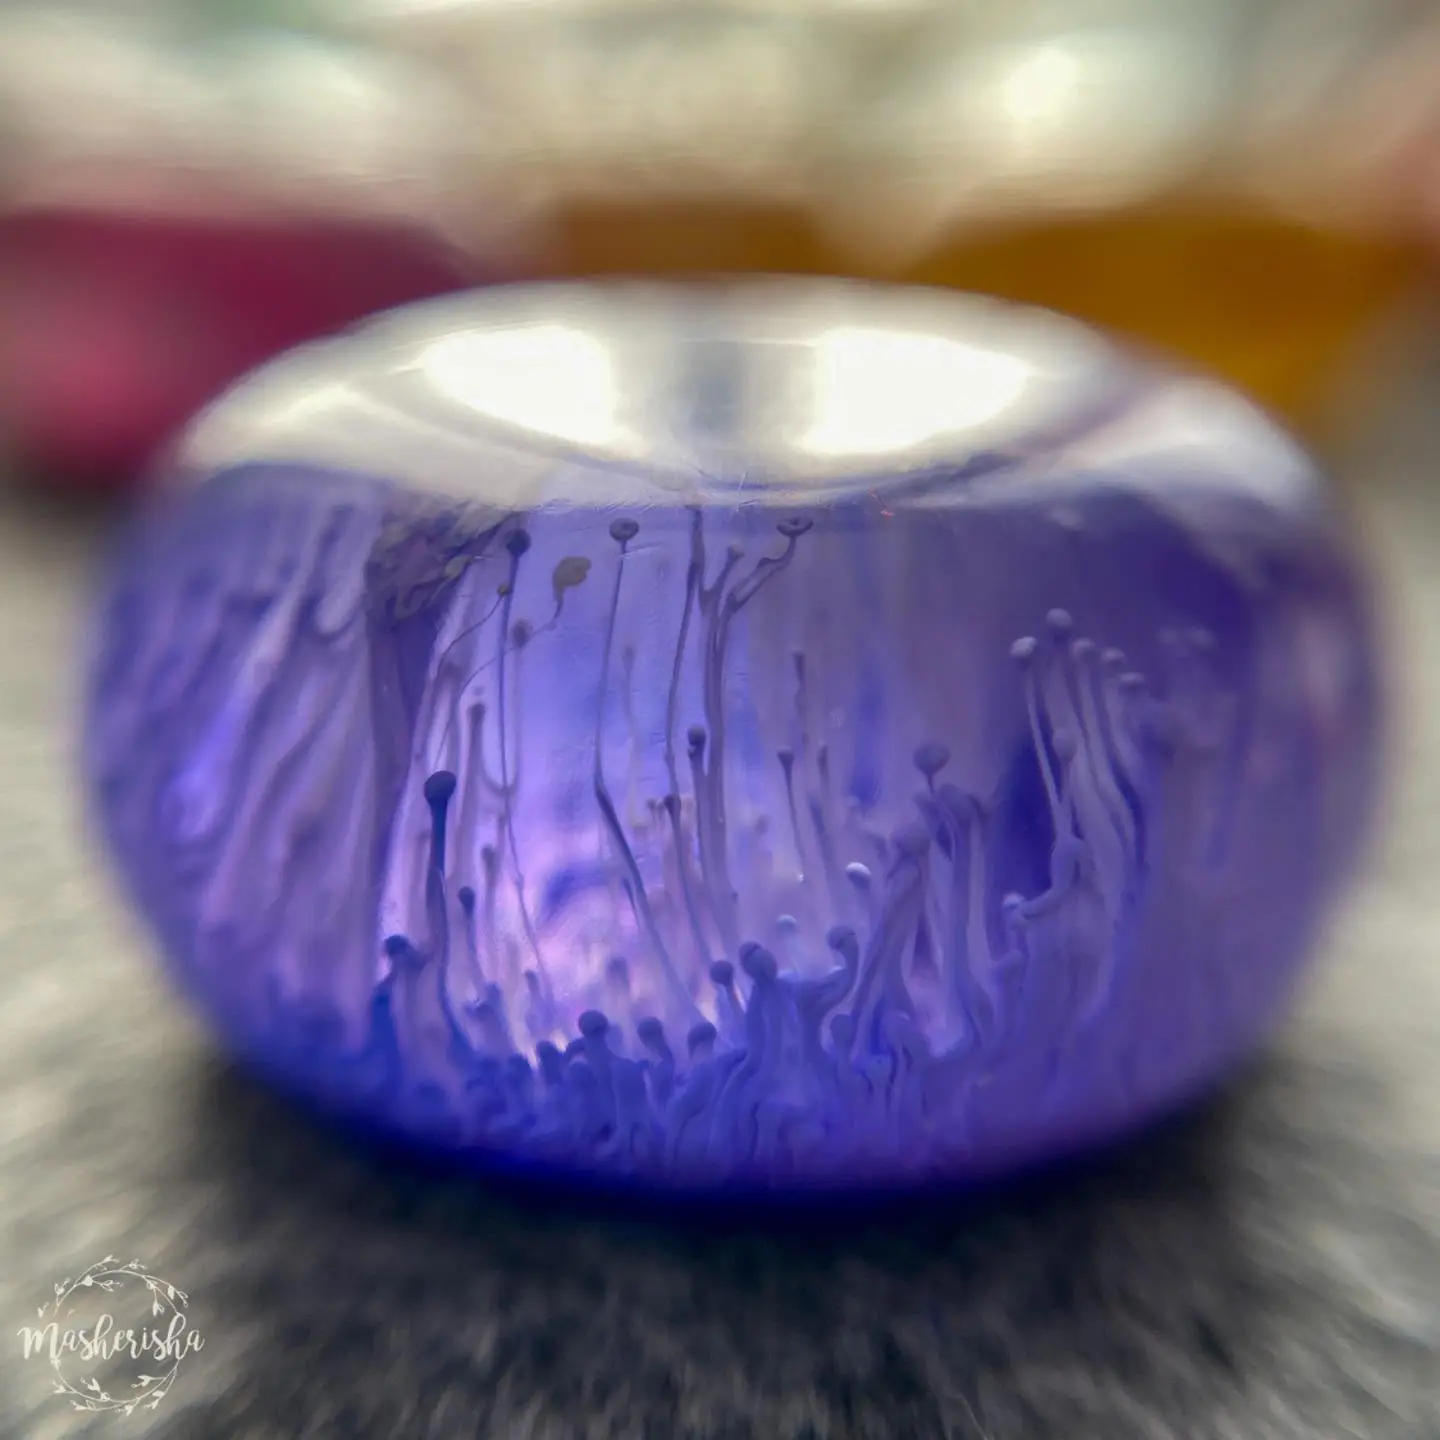
If your Petri resin art is turning out with blurry or overly spread colours, it can distract from the signature crisp, organic patterns that make this style so appealing. Fortunately, with a few adjustments, you can achieve much cleaner effects and sharper details in your Petri creations.
Why Do Colours Blur in Petri Resin Art?
Blurring or excessive spreading usually happens when the resin mixture is too fluid at the time the inks are added, or when ink drops are placed too closely together. The low viscosity allows pigments to travel more freely, merging into one another and losing their distinctness. Overlapping drops can blend before settling, increasing the blur and minimising separation.
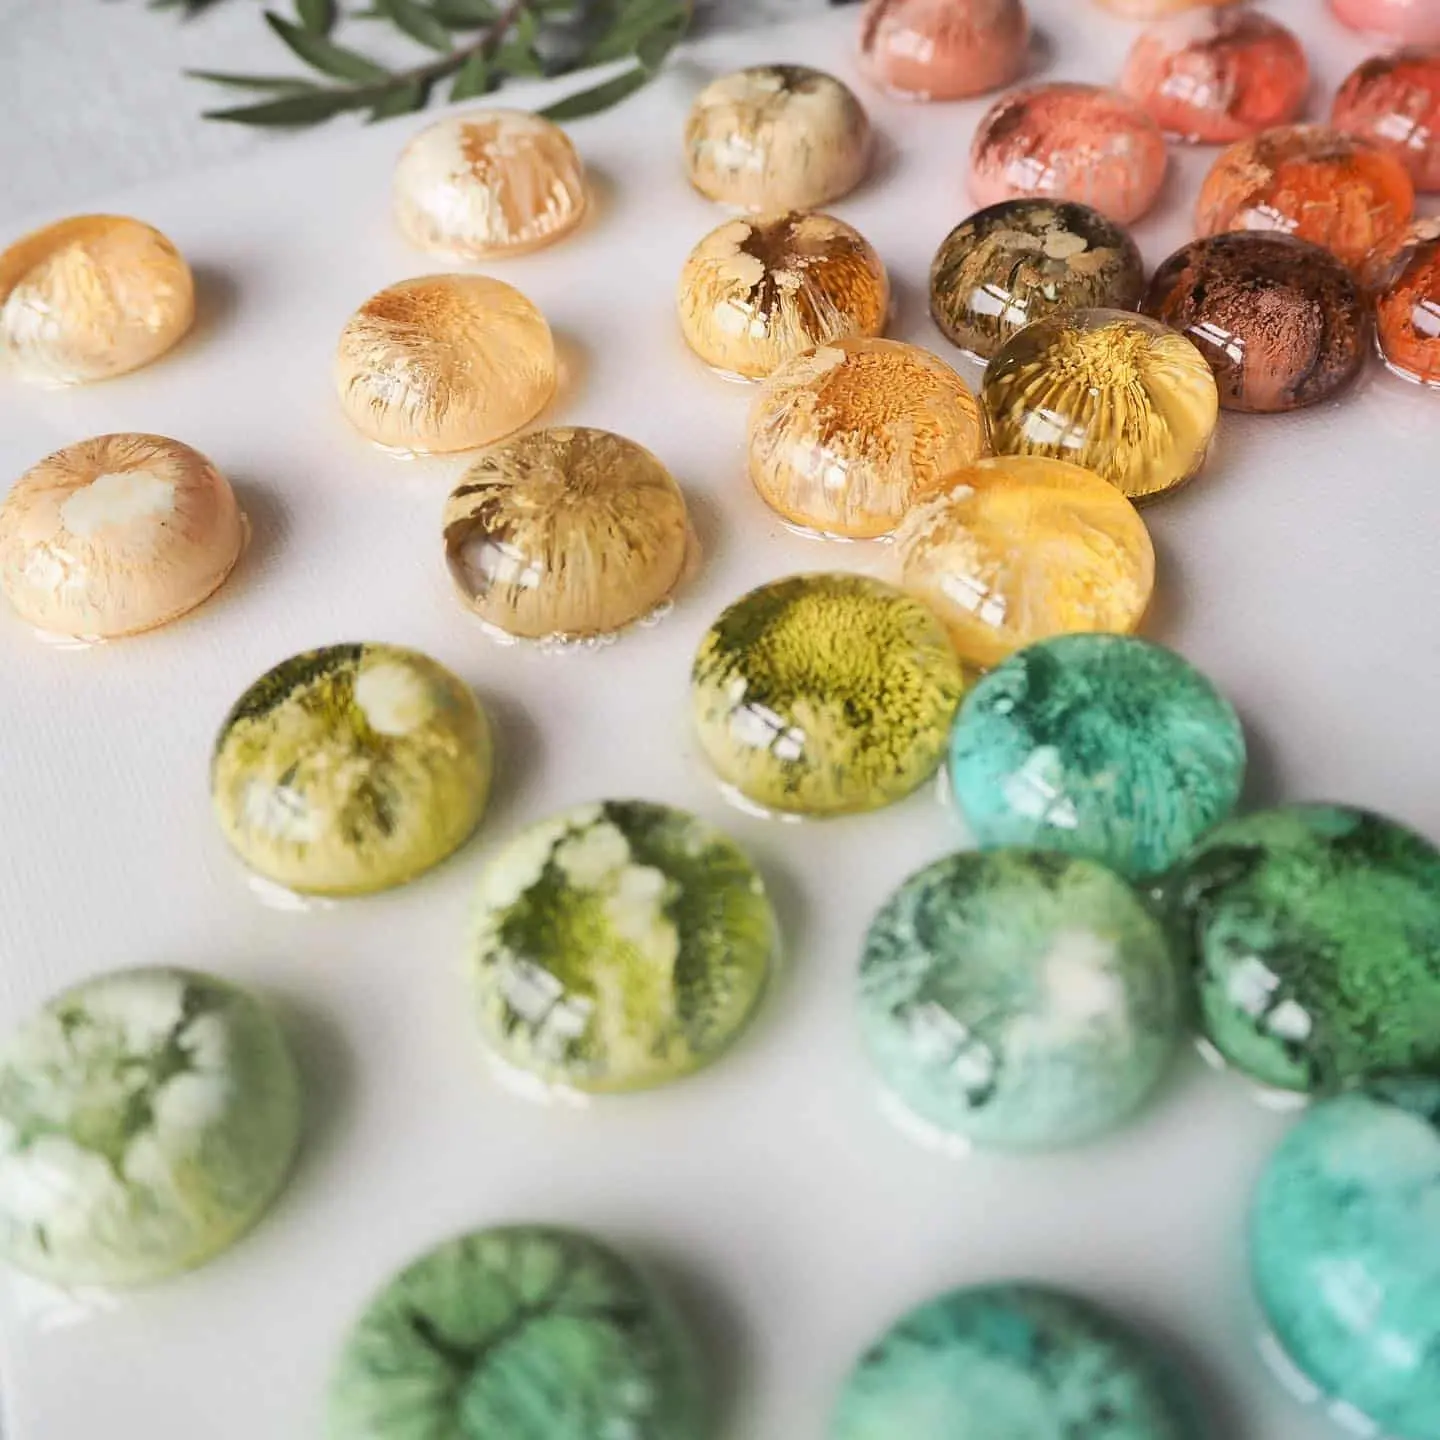
Practical Tips for Sharper Petri Effects
- Timing is key: Allow your resin to become slightly more viscous before dropping ink—typically, waiting 20–30 minutes after mixing (depending on temperature) improves control.
- Mind your drop placement: Space coloured and white ink drops further apart to promote organic movement without merging too soon.
- Choose inks made for Petri art: Dedicated inks, like those in the Petri Art Set, are formulated for this purpose and perform more predictably.
When This Matters Most
These troubleshooting steps are especially important when creating fine details or layered effects in decorative pieces, jewellery, and home décor. Consistent results are easier to achieve with the right approaches and quality materials, such as those found in the Petri Resin Art Starter Kit.

Related products
Related guides
Getting the best Petri dish effects in resin art relies on both timing and technique. By refining your process and using suitable products, you’ll find it easier to achieve the crisp, intriguing patterns this style is known for. For more tips on mastering this technique, return to our main guide on how to make the Petri dish effect on resin.