 Free shipping on orders over £29,85

How to remove scratches from a white resin sink?
Step-by-step guide to restoring shine and removing marks


Unsightly scratches and dull spots can make a white resin sink appear older than it really is. This guide helps you restore your sink’s smooth, shiny surface by safely removing scratches and bringing back its original gloss. Whether your basin has collected fine scuffs over time or a few deeper marks from daily use, you’ll be able to refresh its look using straightforward, achievable methods. No specialist knowledge is required—just patience and the right approach.
What You’ll Need
- “Epoxy Polish” – Epoxy Resin Polishing System – For polishing out fine scratches and restoring gloss.
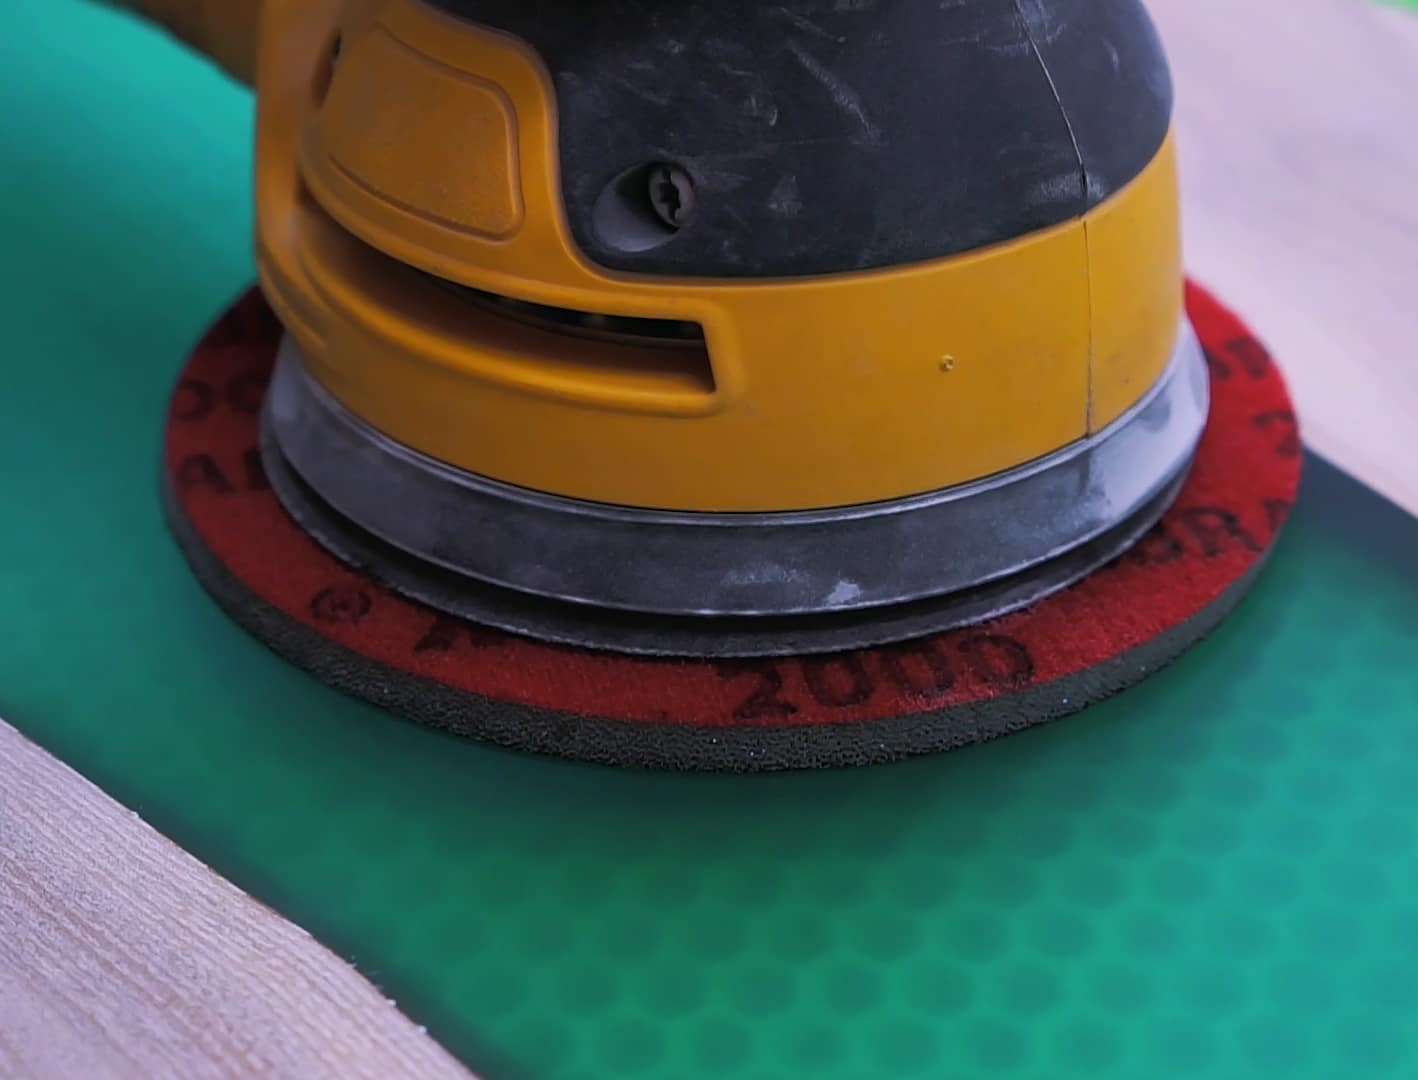
- “Ebonite Abralon” – Sanding Pads 360-4000 Grit for Resin and Wood – To sand away deeper marks and refine the surface.
- Strong Technical Degreaser for Resin Projects – 100% Natural Formula – For cleaning the surface before and after repairs.

Visual Guide: Removing Scratches from Resin Surfaces
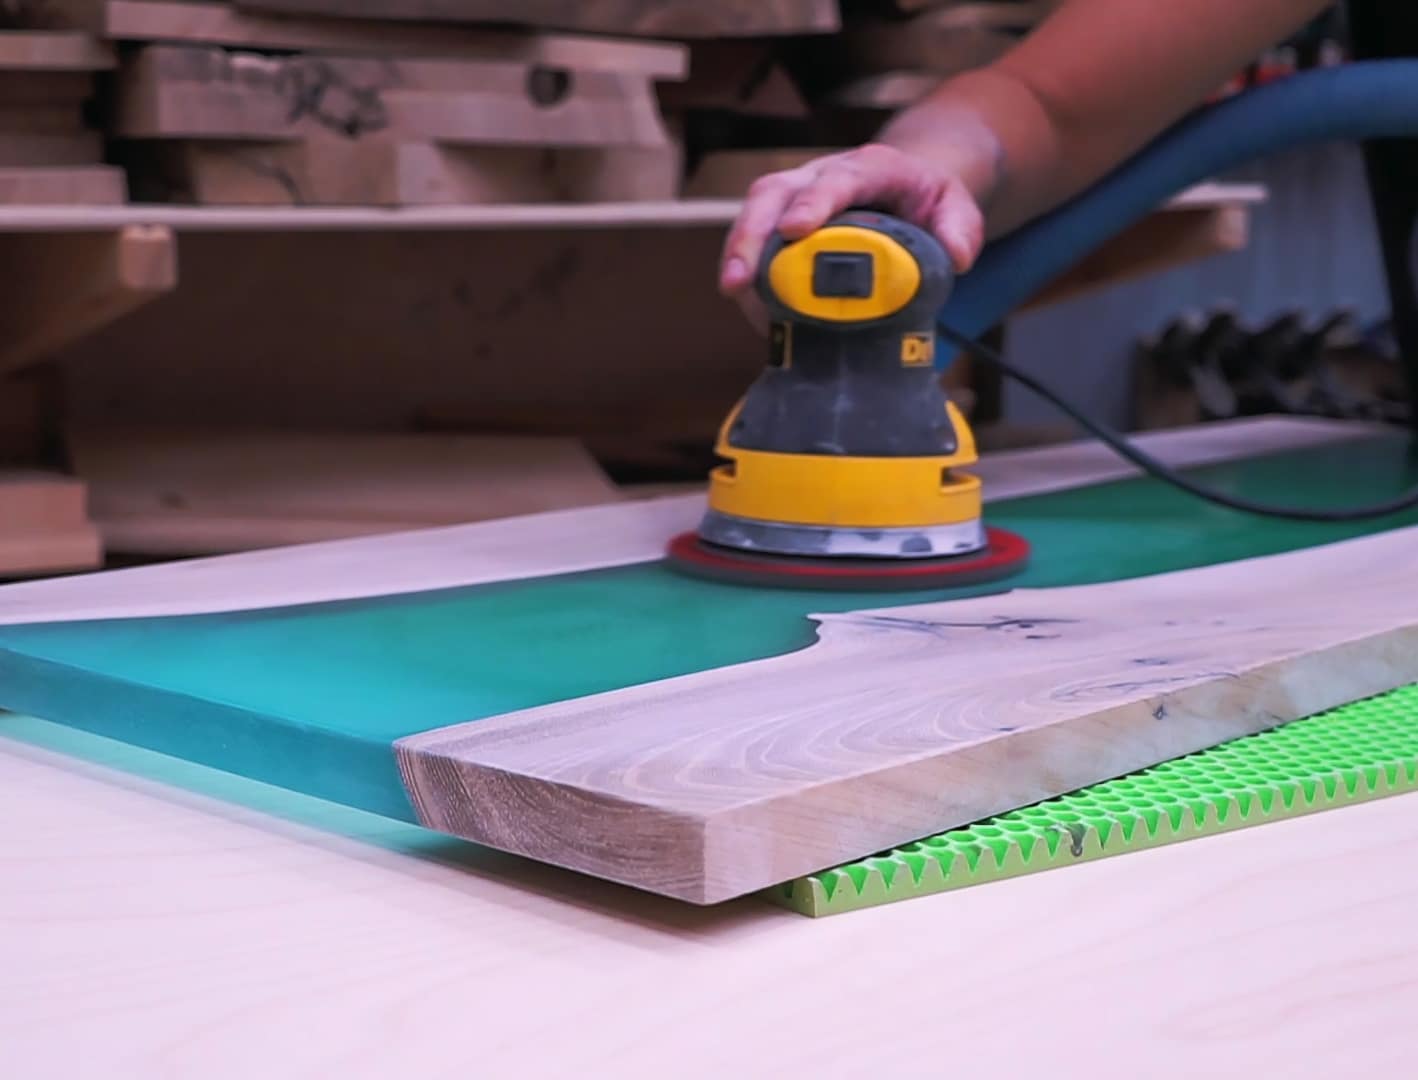
Before and after images can be a great motivator—document each step of your process for comparison. Notice the difference a thorough polish makes on even heavily used white resin sinks.

Step 1: Thoroughly clean the sink
Start by removing all dirt, soap deposits, and residue from the resin sink. Use a soft sponge and a gentle cleaning solution—avoid abrasive scourers, as these can worsen existing marks. Rinse with clean water to remove any cleaner traces. For stubborn grease or adhesive residues, a specialist product like the Strong Technical Degreaser for Resin Projects – 100% Natural Formula helps ensure the sink is fully degreased and ready for sanding or polishing.
Step 2: Use gentle, even strokes to begin sanding
Identify the scratched area and dampen it lightly; wet sanding reduces airborne dust and helps you achieve a smoother result. Select the least abrasive sanding pad that still removes the scratch—typically 1000-2000 grit for fine marks. For deeper imperfections, start with a coarser grit (such as 360 or 500) and progress to finer ones. Sand with easy, circular motions, keeping the pad and surface moist throughout. The “Ebonite Abralon” – Sanding Pads are ideal for this task, offering precise control for resin surfaces.


Step 3: Progress through sanding grits
After the initial sanding, move to a finer pad—gradually increasing up to 4000 grit for a very smooth finish. Each stage should remove only the marks left by the previous grit, so be thorough but avoid over-sanding, which could alter the sink’s shape or finish. Frequently wipe down the area to check your progress and ensure all previous scratch marks are eliminated before moving to the next grit size.
Step 4: Polish for a high-gloss finish
Once the sanding process is complete and the sink feels consistently smooth, it’s time to restore the original shine. Apply an appropriate polishing compound—such as the “Epoxy Polish” – Epoxy Resin Polishing System—using a clean, soft cloth or a dedicated polishing pad. Work in circular motions until the surface looks glossy and even again. If necessary, repeat the polishing step to enhance the lustre of your resin sink.
Step 5: Dry and inspect your results
Rinse away any polish residue and dry the area with a microfibre cloth. Carefully inspect the sink in direct light to check for missed scratches or dull patches. Should you find any remaining blemishes, repeat the final sanding and polishing steps as needed for a consistent, gleaming finish.
Tips, Common Mistakes, and Troubleshooting
Always sand with minimal pressure to avoid adding new scratches. Keep the area damp when sanding, and regularly change pads to prevent grit from accumulating. Test products on a small, inconspicuous area of the sink before treating the main surface, especially if the resin is coloured or unusually sensitive. Avoid household abrasives, which can cause uneven wear. If results are cloudy after polishing, the compound may not have been fully buffed; keep polishing or switch to a finer grit if needed. Consistency and patience are key for a professional-looking outcome.
Tools and Techniques in Action
See close-ups of sanding pads, polish, and degreasers in use on different resin surfaces. Proper technique with the right materials leads to a flawless shine and longer-lasting results.

- "Epoxy Polish" – Epoxy Resin Polishing SystemPrice range: £18.95 through £47.45"Epoxy Polish" is a system designed to restore surfaces to a mirror-like shine, suitable for resin projects in the context of removing scratches.
- "Ebonite Abralon" – Sanding Pads 360-4000 Grit for Resin and Wood£4.15"Ebonite Abralon" sanding pads provide a range of grits for detailed sanding and polishing of resin and wood, suitable for wet or dry use.
 "River-Table" – Complete Kit for Creating Your First Epoxy Resin TablePrice range: £198.45 through £467.45"River-Table" kit includes resin, sealant, pigments and polishing kit with instructions for epoxy projects.
 Strong Technical Degreaser for Resin Projects – 100% Natural FormulaOriginal price was: £10.95.£9.45Current price is: £9.45.Strong Technical Degreaser is designed to clean epoxy resin surfaces gently using a 100% natural formula.
Frequently Asked Questions
Can I use household cleaners on resin sinks?
Mild detergents are safe but harsh abrasives or bleach can damage resin. Use cleaners designed for delicate surfaces when possible.
How do I remove deep gouges in a resin sink?
Extensive damage may require professional repair or filling. For regular scratches, the sanding and polishing process in this guide works well.
How often should I polish my white resin sink?
Polish as needed based on visible wear. Over-polishing is unnecessary and can thin the surface—maintain only when dullness or marks appear.
What if my sink remains cloudy after polishing?
Cloudiness often indicates incomplete polishing or residue left on the surface. Repeat with more buffing or a finer pad as needed.
Should I use a buffer or polish by hand?
Hand polishing is suitable for small repairs. For larger areas or deep scratches, a rotary polishing tool ensures more consistent results.
Can natural degreasers be used on coloured resin sinks?
Yes, natural degreasers are usually safe on coloured and plain resin. Always test on a hidden spot to be sure.