 Free shipping on orders over £29,85


How do you make crafts with resin?
Discover step-by-step methods for stunning resin art projects


Bring your creativity to life by learning the essentials of making crafts with resin. Whether you want to create elegant coasters, stylish jewellery, or unique gifts, mastering the art of resin can add a glossy, professional touch to your handmade projects. This guide will help you understand the process, from workspace setup to finishing techniques, so you can start crafting with confidence and avoid common mistakes.
What You’ll Need
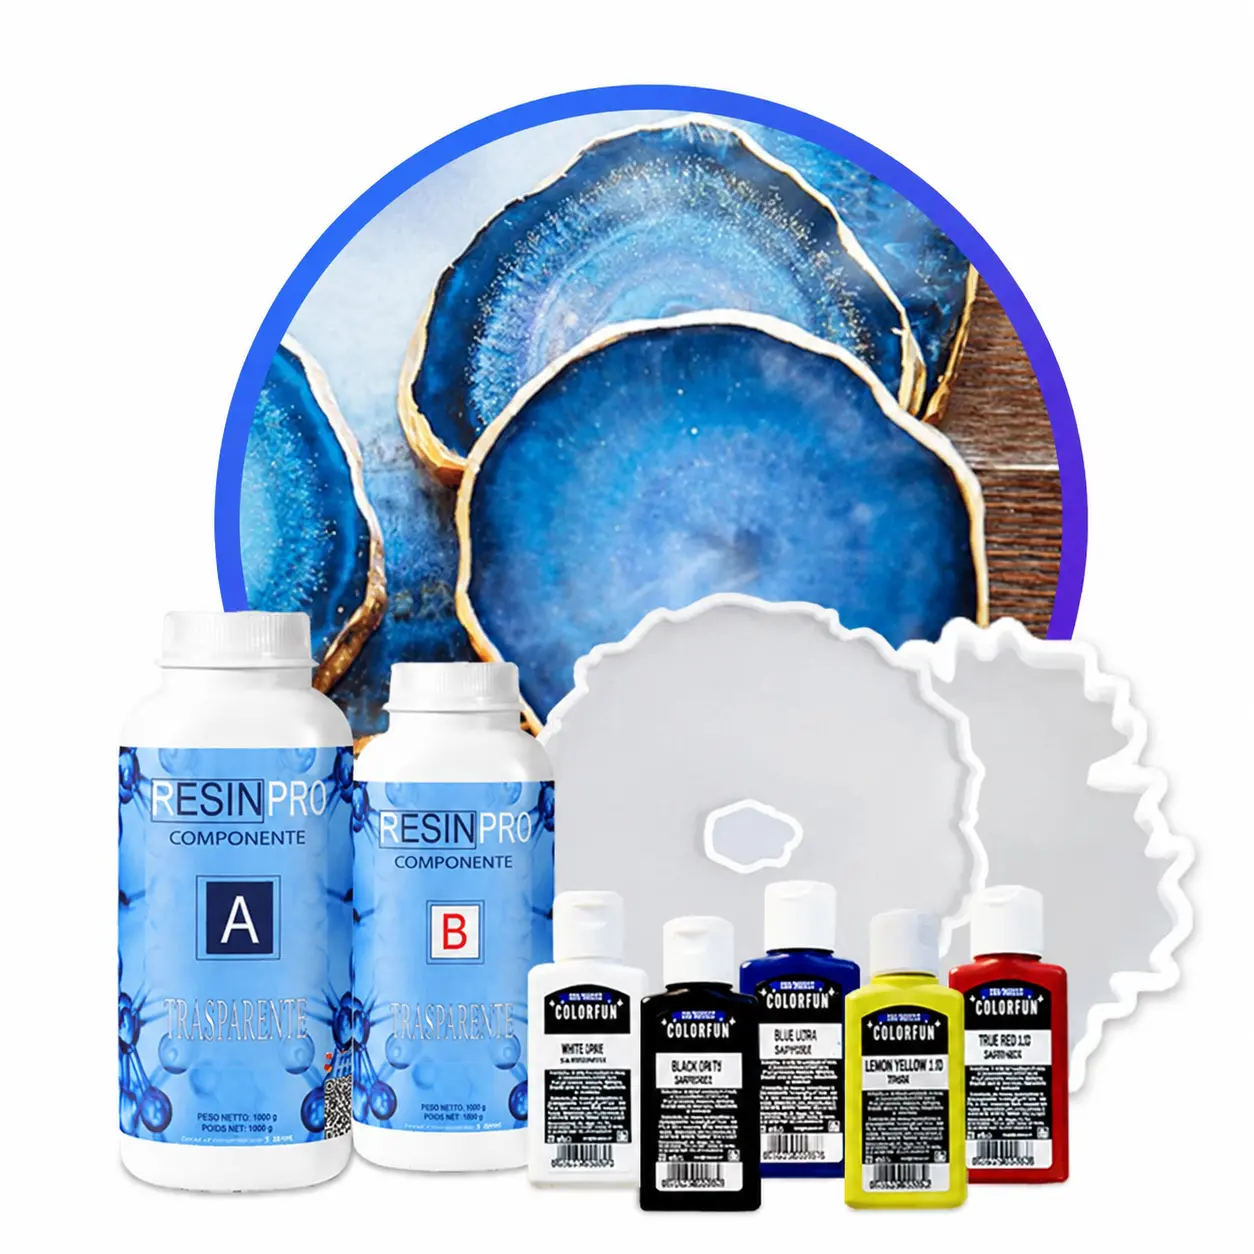
- Resin Geode Coaster Starter Kit – Create Stunning Crystal-Style Coasters at Home: A convenient starting point, complete with resin, colourants, gloves, tools and a silicone mould for coasters.
- “Evershine Collection” – Artisan Jewellery Epoxy Resin Kit with 100+ Accessories: Ideal for crafting custom resin jewellery and incorporating dried flowers or pigments.
- Wooden Resin Coaster Starter Kit – Create Beautiful Handmade Coasters at Home: Designed to help beginners work with real wooden bases and experiment with vibrant colours.
- Essential safety items: Protective gloves, mask, and a well-ventilated workspace.
- Mixing cups, stirring sticks, and household items for preparing your work area.

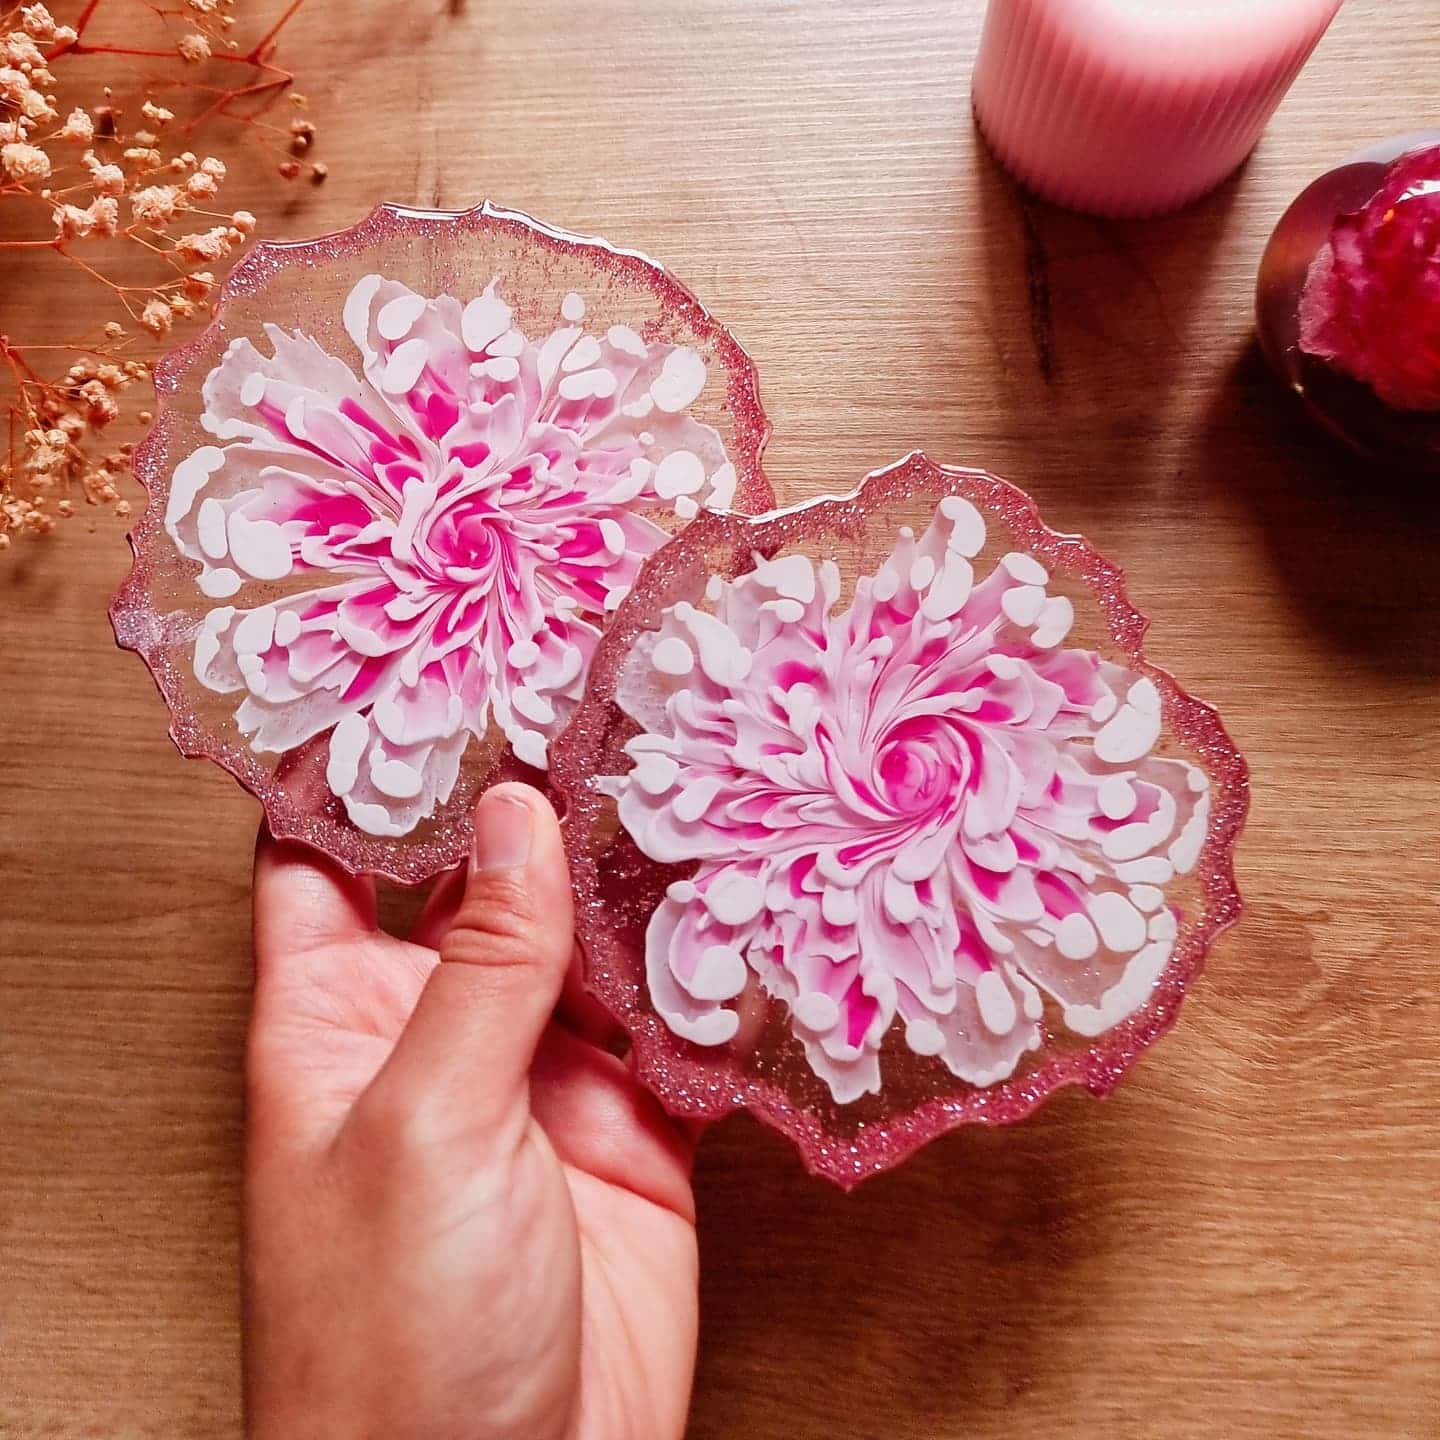
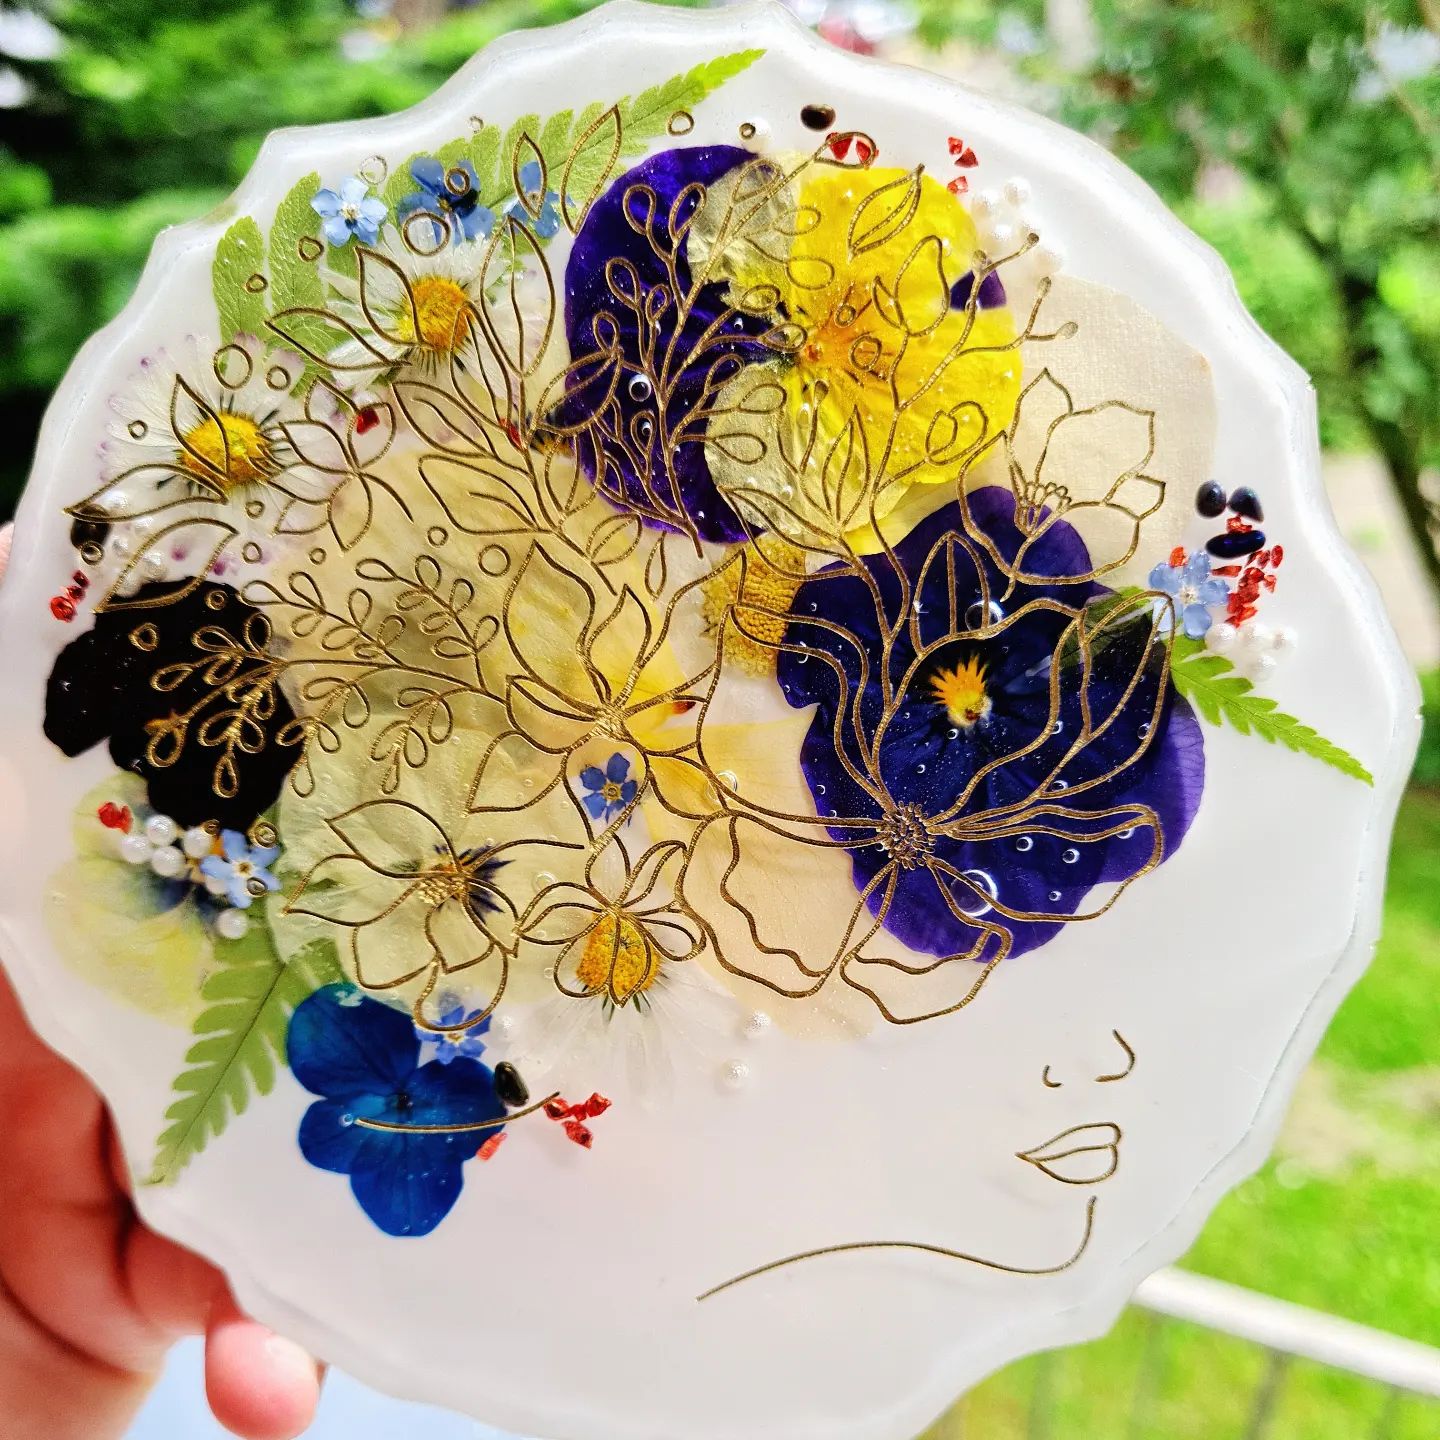
Creative Inspiration for Resin Crafting
See how a range of resin projects come together with vibrant colour blends, metallic finishes and decorative elements. Resin opens possibilities for both practical and artistic crafts, letting you design everything from coasters to jewellery. Explore different styles and effects to personalise every piece.
Step 1: Prepare Your Workspace and Safety Gear
Choose a clean, flat surface and cover it with plastic or disposable paper to protect against spills. Ensuring your area is free from dust and contaminants will help achieve a flawless finish. Always wear gloves and a mask when mixing resin, and make sure there is good ventilation to avoid inhaling any fumes. Keep all mixing tools and containers close at hand to keep your process efficient.
Work in a Well-Ventilated Area to ensure safety, especially during resin mixing and pouring stages. Taking time to arrange all your materials before beginning the project will improve your results and minimise mistakes.
Step 2: Measure and Mix the Resin Accurately
The key to any resin project is accurate measurement and thorough mixing. Most popular craft resins, such as those in the Resin Geode Coaster Starter Kit and “Evershine Collection” Epoxy Resin Kit, require specific ratios (commonly 1:1 by volume for beginners). Pour equal parts resin and hardener into your mixing cup and stir slowly for 2–3 minutes. Make sure you scrape the sides and bottom to blend thoroughly, as improper mixing can cause sticky spots or incomplete curing.
Follow the Mixing Instructions Carefully from your chosen kit. If colouring, add pigment or mica powder after combining resin and hardener, then stir gently to achieve an even colour.
Step 3: Pour and Add Decorative Elements
Once your mixture is ready, pour it gradually into your mould or onto your base. Depending on your project, you might use a silicone mould from the Resin Geode Coaster Starter Kit or wooden bases from the Wooden Resin Coaster Starter Kit. Pour slowly to avoid trapping bubbles.
This is the stage to add creative touches — swirl in additional colours for marbled effects, insert dried flowers, or sprinkle metallic flakes if desired. Gently tap or wiggle the mould to help bubbles escape and settle the resin evenly. For jewellery or small keepsakes, the accessories in the “Evershine Collection” Kit make it simple to personalise designs.
Pour and Add Decorative Elements thoughtfully, keeping in mind the overall aesthetic and depth of your craft.
Step 4: Allow Sufficient Curing Time
After pouring and decorating, cover your items to protect from dust and let them cure as directed by your kit instructions — usually between 24 and 48 hours. Avoid moving or disturbing the pieces during this period to ensure a glass-like finish. If your work needs partial demoulding for shaping, as taught in the Resin Class – 3D Effects Coasters Masterclass, 120 Minutes, check the recommended timings closely.
Allow Sufficient Curing Time for the best durability and clarity in your finished piece.
Tips and Common Mistakes to Avoid
Resin crafting rewards a little patience and attention to detail. Always measure ratios accurately and mix slowly to reduce bubbles. If bubbles do appear, they can often be gently removed with a toothpick or by warm air from a heat gun held at a distance. Avoid pouring in a humid or cold environment as this might affect the curing process. Do not rush the demoulding as premature removal can cause warping or damage.
Embrace Patience and Creativity: Each project is a chance to experiment. Try new colour blends or embedded elements as your confidence grows, and always refer to the step-by-step instructions included with your chosen kit for project-specific tips.
Finishing Touches and Caring for Resin Crafts
Protect your completed projects from scratches and excessive heat for lasting beauty. Clean finished resin items with mild soap and soft cloths, and store out of direct sunlight to maintain colour and clarity.

- Resin Class – 3D Effects Coasters Masterclass, 120 MinutesThis 120-minute masterclass guides you through working with resin to create functional art such as coasters, trays and bowls.
- Resin Geode Coaster Starter Kit – Create Stunning Crystal-Style Coasters at Home£42.85This kit is designed for making geode-style resin coasters, suitable for beginners exploring resin crafts inspired by natural stone patterns.
 "Evershine Collection" – Artisan Jewellery Epoxy Resin Kit with 100+ Accessories£21.95"Evershine Collection" is a jewellery epoxy resin kit with 100+ accessories, designed for craft enthusiasts and beginners.
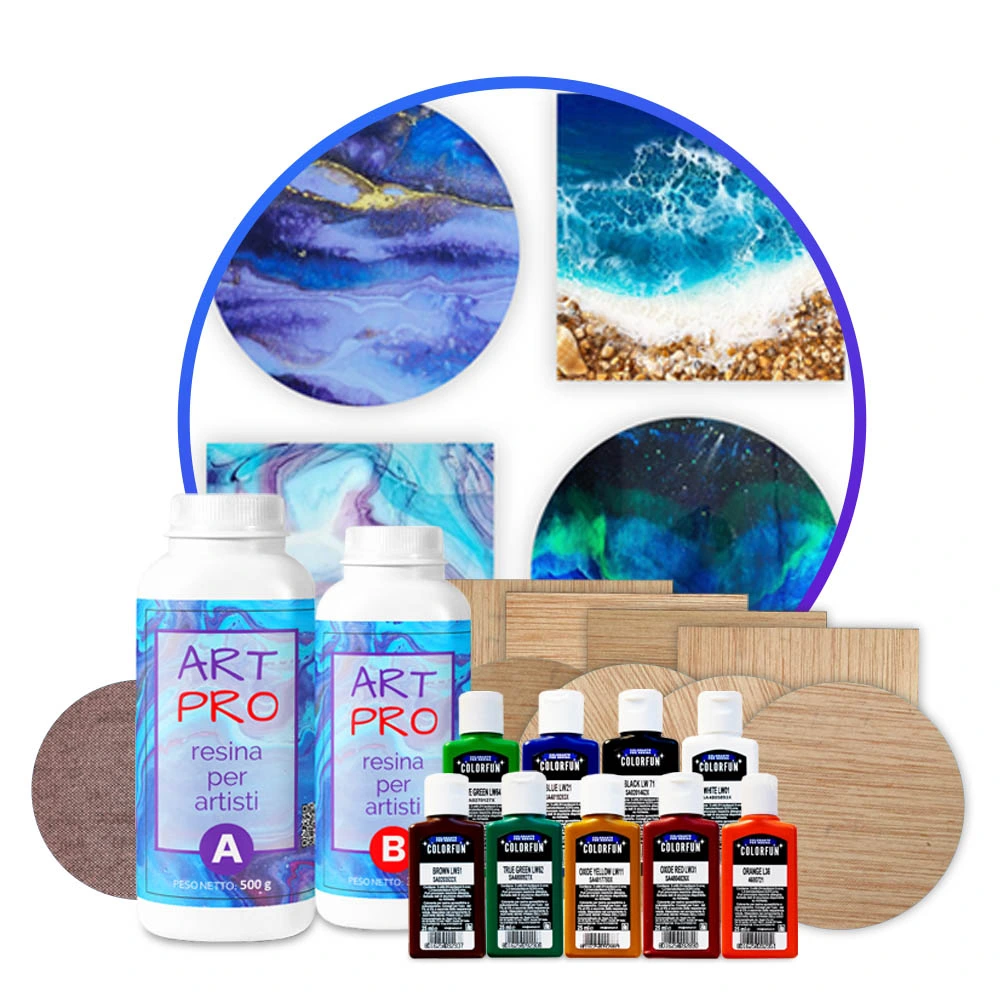 Wooden Resin Coaster Starter Kit – Create Beautiful Handmade Coasters at Home£50.85This kit contains materials to create elegant wooden resin coasters, suitable for beginners exploring resin crafts.
Frequently Asked Questions
How long does resin typically take to fully cure?
Most resin kits require 24–48 hours for a complete cure, but always check your kit instructions for specific timings.
What types of crafts are possible with basic resin kits?
You can create coasters, jewellery, decorative pieces, trays, ornaments, and personalised gifts using beginner-friendly kits.
How should I clean up after doing a resin project?
Wipe tools immediately with paper towels and use acetone for uncured resin. Never pour unused resin down the drain.
Can I add flowers, pigments, or mica to my resin crafts?
Yes, most craft resins accept pigments, powders, glitters, dried flowers, and metallic foils for decorative effects.
What are the main safety precautions when working with resin?
Wear gloves and a mask, work in a ventilated area, and avoid skin or eye contact with liquid resin or hardener.
Why did my resin not cure properly or stay soft?
Common causes are incorrect mixing ratios or under-mixing. Measure carefully and stir thoroughly for best results.