 Free shipping on orders over £29,85


How do you paint a resin statue?
Step-by-step techniques to achieve a flawless painted finish


Painting a resin statue allows you to bring your art, models, or ornaments to life, whether you want a subtle antique effect or an eye-catching, luminous finish. This guide will show you every step involved, from preparation through to final detailing, so your painted resin statue looks professional and lasts for years to come.
What You’ll Need
- 12-Piece Artists Paint Brush Set for Epoxy Resin Art & DIY Projects – for varied strokes and fine detail work
- 5-Piece Disposable Paint Brush Set for Art, Crafting & DIY Projects – ideal for single-use applications or tricky areas
- “Argento/Gold/Rame” – Floating Metallic Pigment – 20ml – for metallic surface effects
- Phosphorescent Pigment – Glow-in-the-Dark Additive for Resin, Paint, and Varnish – for luminous details
- Primer (suitable for resin)
- Acrylic paints or desired paint type
- Fine-grit sandpaper and lint-free cloth
- Protective gloves and mask

Essential painting tools and pigments for every resin surface
Choosing quality brushes and pigments ensures a flawless, vibrant finish on your resin statues. Explore accessories for resin or discover more metallic pigments to customise your project.

Step 1: Prepare the Resin Surface
Begin by inspecting the statue for any imperfections. Use fine-grit sandpaper to smooth out rough edges, mould seams, or surface bumps. Wipe away sanding dust with a lint-free cloth to avoid particles sticking to your paint. Work in a clean, dust-free environment to prevent debris from settling on the wet paint later.
Wear gloves and a mask to protect yourself from dust and airborne particles during sanding. Taking time with this stage ensures the paint adheres well and leaves you with a flawless finish.
Step 2: Prime the Statue
Resin is naturally slick, so applying a quality primer is essential for paint adhesion. Use a primer formulated for plastics or resin and apply a thin, even coat across the entire statue. Allow it to dry completely according to the primer’s instructions.
This step helps your painted colours appear vibrant and prevents flaking or peeling in the future. After the primer dries, gently sand rough spots and remove any lingering dust with a clean cloth.
Step 3: Apply Your Base Coat
Once primed, you can begin painting your chosen colour. Apply paint in thin, even layers, allowing each coat to dry before adding another. This prevents brush marks and ensures a smooth, professional result.
For fine details and smaller sections, select a detail brush from the 12-Piece Artists Paint Brush Set for Epoxy Resin Art & DIY Projects. Disposable brushes are excellent for quick colour changes or covering larger areas conveniently.

Step 4: Add Decorative Touches and Effects
Add depth, metallic highlights, or luminous details to make your resin statue stand out. For metallic finishes, carefully blend in “Argento/Gold/Rame” – Floating Metallic Pigment to give striking, sparkling accents. To create a glow-in-the-dark effect, mix Phosphorescent Pigment – Glow-in-the-Dark Additive for Resin, Paint, and Varnish into your paint for added visibility and visual interest at night.
Work these pigments in gradually. Test pigments on a sample area first to check the effect before committing to the whole statue. This is especially important with floating or glow effects which may appear stronger once dry.

Step 5: Seal and Protect Your Finish
Once fully dry, apply a compatible clear varnish or sealer to protect your artwork. This will help preserve colour vibrancy and shield your statue from dust, moisture, and UV fading. Allow adequate curing time as specified by your sealant before displaying or handling your finished piece.
Now your resin statue is ready to be showcased, indoors or out, with a durable and impressive new look.
Tips and Common Mistakes When Painting Resin Statues
- Allow each layer to dry fully before the next to avoid muddy colours or tacky finishes.
- Choose a well-ventilated area to work and consider using a spray booth for priming.
- Avoid thick coats of paint, which can obscure fine sculpted details.
- If using metallic or glow pigments, mix thoroughly and apply in moderation for best results.
- If you’re new to resin painting, practice techniques on a spare piece first.
Showcase your creativity with unique pigment effects
From metallic streaks to glowing accents, creative pigment choices let your resin statue reflect your personality. Browse the full range of dyes and pigments for your next masterpiece.

- 12-Piece Artists Paint Brush Set for Epoxy Resin Art & DIY Projects£6.95A 12-piece brush set designed for epoxy resin art and DIY projects offering versatile brush shapes and durable synthetic bristles.
- 5-Piece Disposable Paint Brush Set for Art, Crafting & DIY Projects£6.45This set of five disposable brushes is designed for intricate epoxy resin projects and craft applications.
- “Argento/Gold/Rame” – Floating Metallic Pigment – 20mlFloating Metallic Pigment designed to add golden streaks to resin or craft projects within the theme of painting resin statues.
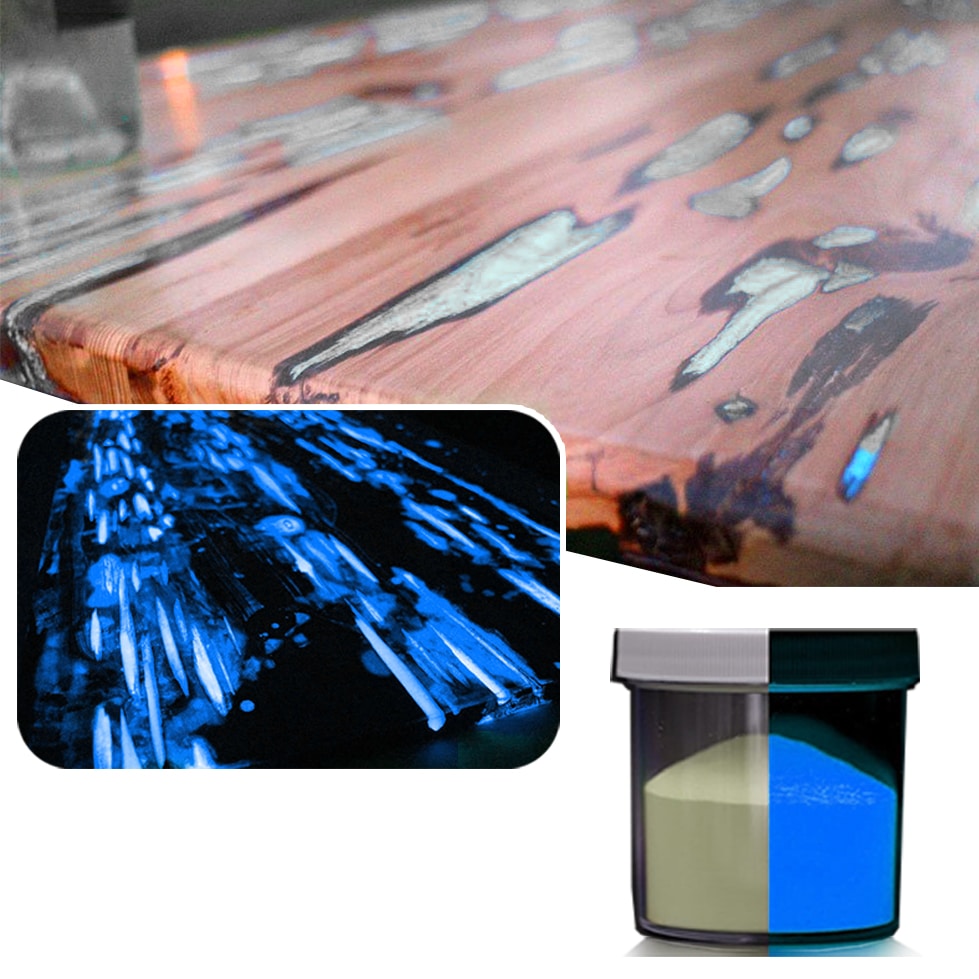 Phosphorescent Pigment – Glow-in-the-Dark Additive for Resin, Paint, and VarnishPrice range: £8.45 through £13.95Phosphorescent Pigment is a photoluminescent additive suitable for resins and paints, designed to enhance details visible in the dark.
Frequently Asked Questions
Can acrylic paint be used on a resin statue?
Yes, acrylic paint is commonly chosen for resin statues, especially when paired with a suitable primer for better adhesion.
How do I make paint stick to a resin statue?
Always sand the surface lightly and apply a primer formulated for resin before painting to ensure long-lasting results.
What type of brush is best for painting detailed areas on resin statues?
A fine tip artist's brush is ideal for small, intricate details, while broader strokes can be handled by larger brushes.
Can you use metallic pigments on resin statues?
Yes, metallic pigments can be mixed into suitable paints or applied as highlights for a dynamic, shimmering finish.
How can I make my resin statue glow in the dark?
Mix a phosphorescent pigment into your paint or sealer to create eye-catching glow-in-the-dark details.
Do I need to seal a painted resin statue?
Sealing is recommended to protect your paintwork from fading and wear, especially for outdoor displays.