 Free shipping on orders over £29,85


How do you polish clear resin?
Step-by-step guide for mirror finishes on resin surfaces


Clear resin can achieve a stunning, glass-like shine—but only if it’s polished correctly. This guide explains how to transform dull, sanded resin creations into beautifully reflective masterpieces. Whether you’re a craftsperson seeking professional polish or a beginner wanting to learn the basics, you’ll find the essential steps, common pitfalls to avoid, and tips for the perfect finish.
What You’ll Need
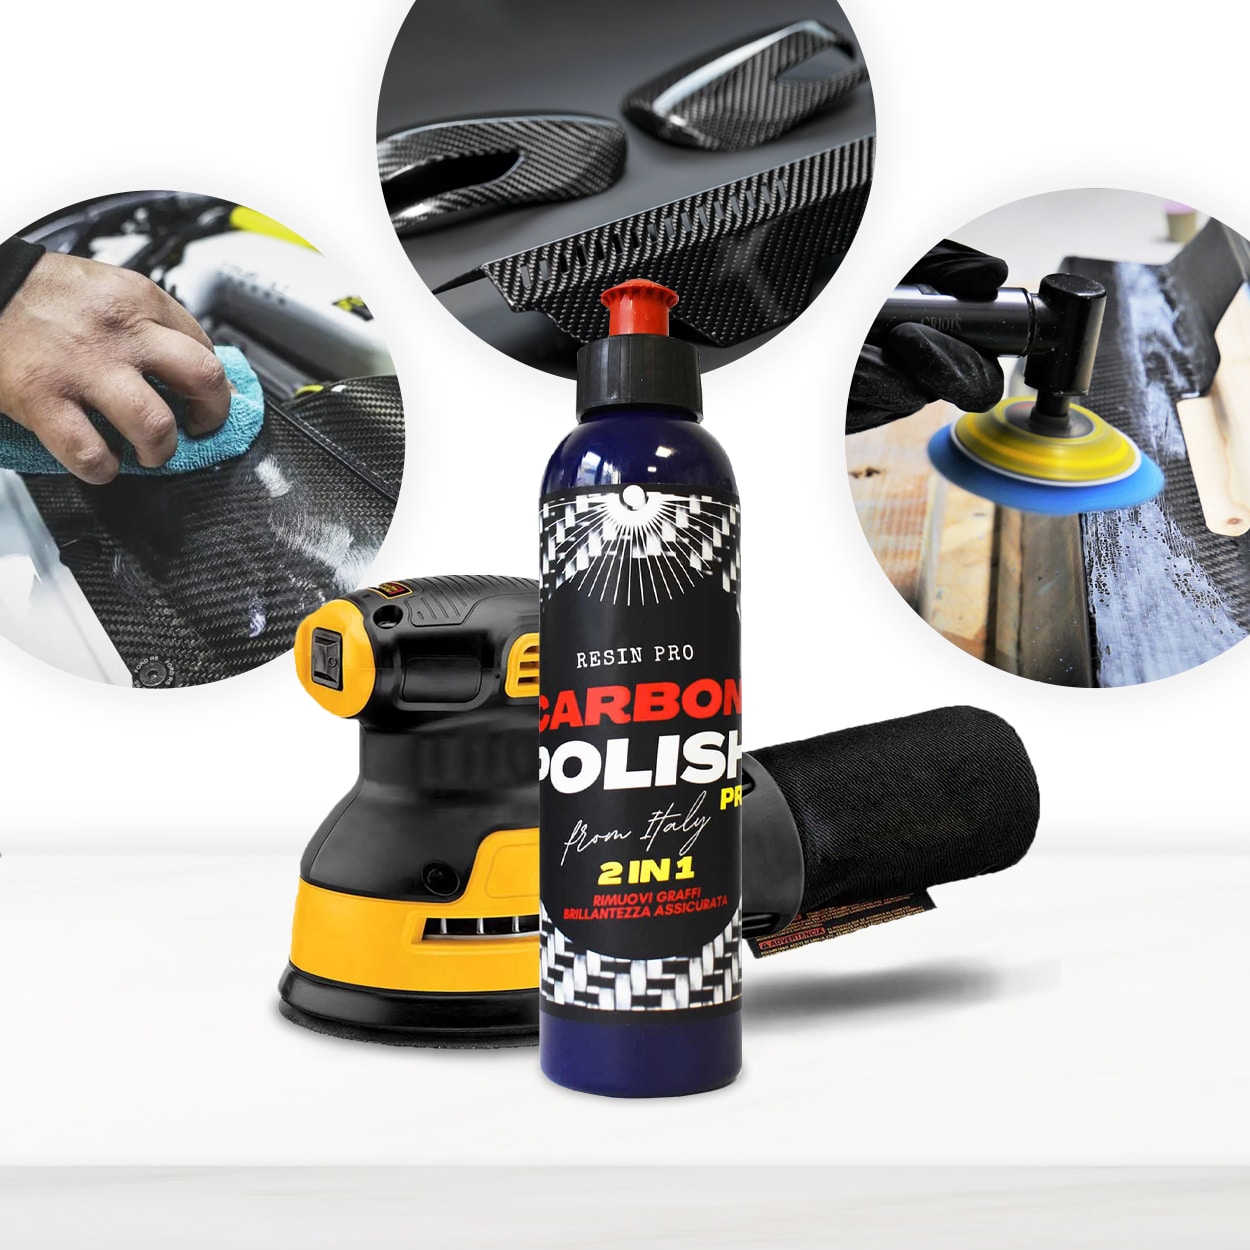
- “Epoxy Polish” – Epoxy Resin Polishing System – Removes fine scratches and provides a high-gloss shine.
- 1200W Polisher for Sanding and Buffing – Variable Speed, D-Handle – For efficient sanding or buffing, especially on larger surfaces.
- Wet and dry sandpaper (various grits, typically from 600 to 3000 grit).
- Microfibre cloths or soft polishing pads.
- Water (for wet sanding).
- Protective gloves and a dust mask.
- Clean workspace with bright lighting.

Key Tools for Effective Resin Polishing
For best results, combine quality wet and dry sandpaper with a resin-specific polishing compound. Powered polishers, such as variable speed units, can save significant time on larger surfaces or intricate pieces.

Step 1: Clean and Inspect the Resin Surface
Begin by ensuring your resin creation is fully cured and free from uncured patches, which can interfere with sanding and polishing. Remove dust, grease, and debris using a damp microfibre cloth. A spotless surface helps prevent scratches during sanding or polishing, and exposes any imperfections you may want to address.
Thorough cleaning sets the stage for a successful polish—resist the temptation to skip this preparation step.
Step 2: Sand Out Imperfections and Scratches
Start sanding with medium-grit (600–800) wet and dry sandpaper to level uneven areas and remove surface scratches. Always keep the surface wet when sanding to minimise dust and reduce heat. Move in circular or back-and-forth motions, checking frequently for consistency. Gradually work through finer grits (1200, 2000, up to 3000) until visible scratches are gone and the resin feels smooth.
Over-sanding or skipping grit stages may leave visible scratches—be methodical and patient for best results.
For larger projects or to save time and effort, use a 1200W Polisher for Sanding and Buffing – Variable Speed, D-Handle with appropriate sanding pads. This is especially useful when levelling big resin tables or art panels.
Step 3: Choose and Apply the Correct Polishing Compound
Select a resin-specific polish designed for your project’s colour and type. For general clear resin, “Epoxy Polish” – Epoxy Resin Polishing System is highly effective at restoring deep clarity and gloss. If your piece has dark hues or carbon inclusions, a specialist polish for dark surfaces can help prevent unwanted white marks or hazing.
Use a clean microfibre cloth or a soft buffing pad to apply the polish. Dab a small amount onto the surface and work in a circular motion, applying gentle pressure. For large or stubbornly dull areas, employ your variable speed polisher at low to medium speed for more consistent results.
Choose the right polish for your resin type and surface colour to avoid cloudiness and swirl marks.

Step 4: Buff to a Mirror Shine
Once the polishing compound has been thoroughly worked in, switch to a clean microfibre cloth or a dedicated polishing sponge. Buff the area in overlapping circles until the polish residue is cleared and a dazzling reflection appears. For complex shapes or fine details, careful hand buffing gives more control.
Buff gently and never rush the polishing process. Take your time to reveal the resin’s natural clarity and depth.

Troubleshooting, Tips, and Common Mistakes
If you notice streaks, haze, or remaining scratches, you may need to revisit sanding with a finer grit before re-polishing. Always keep surfaces wet during sanding and allow each polishing stage to finish before wiping clean. Polishing in a dust-free, well-lit area helps you spot imperfections before they’re permanent.
If the resin looks cloudy after polishing, check if you used the correct polish, or if all scratch marks from previous sanding have been removed. Sometimes, a final polish with a dedicated resin compound is all that’s needed for that perfect glossy result.
Visual Examples of Polished Resin
Perfectly polished resin projects reflect light clearly with minimal swirl marks or haze. Compare surfaces before and after polishing to gauge your progress and adjust your techniques as needed.

- "Epoxy Polish" – Epoxy Resin Polishing SystemPrice range: £17.85 through £44.85"Epoxy Polish" is a resin polishing system designed to restore a glossy finish and remove scratches, suitable for various surfaces.
- 1200W Polisher for Sanding and Buffing – Variable Speed, D-Handle£85.95This 1200W Polisher is suitable for sanding and buffing, offering variable speed and a sturdy handle for control.
 "Carbon Polish" – Polishing System for Dark and Black Surfaces, 250mlPrice range: £17.85 through £44.85Carbon Polish is designed for polishing dark and black surfaces including epoxy resin projects, providing a non-whitening finish suitable for the…
 "Fairy Wings" – UV Resin for Volumetric Reliefs, Dual Colour, 30mlOriginal price was: £15.15.£2.85Current price is: £2.85."Fairy Wings" UV Resin is a ready-to-use acrylic gel suitable for artists creating detailed 3D patterns and embellishments.
Frequently Asked Questions
Do I really need to sand resin before polishing?
Yes, sanding removes imperfections and helps polishing compounds deliver a flawless, high-gloss finish.
How can I remove cloudiness or haze after polishing?
Return to sanding with a finer grit, then reapply polish using the recommended compound for clear resin surfaces.
Which polish should I use for clear epoxy resin?
Use a compound specifically formulated for epoxy resin, such as "Epoxy Polish", to avoid dull or cloudy finishes.
How do I buff resin without swirl marks?
Use a clean microfibre cloth, gentle pressure, and dedicated resin polishing products to prevent swirls.
What tools do I need to polish resin projects at home?
Wet and dry sandpaper, a soft polishing pad or polisher, resin polish, clean cloths, and good lighting are essential.
Can resin be polished by hand, or is a machine required?
Both methods work. Machines speed up large or repetitive projects, but detailed work is possible by hand.