 Free shipping on orders over £29,85


How do you polish resin jewellery?
Step-by-step instructions for a flawless resin jewellery shine


Polishing resin jewellery brings out its brilliance and true depth of colour, transforming your handmade pieces into professional-quality treasures. Whether you’re finishing pendants, rings, or statement earrings, learning how to polish your resin creations properly ensures durability and an eye-catching, flawless finish. This guide will walk you through every essential step for shimmering results.
What You’ll Need
- “Ebonite Abralon” – Sanding Pads 360-4000 Grit for Resin and Wood — for smoothing surfaces and preparing for polish
- Manual Polishing Pad Holder for Sanding & Polishind Pads — to comfortably hold your sanding pads for even, detailed work
- “Epoxy Polish” – Epoxy Resin Polishing System — ideal for restoring gloss and removing micro-scratches on resin
- “Carbon Polish” – Polishing System for Dark and Black Surfaces, 250ml — specialised polish for deep, dark resins and black-tinted pieces
- Clean water for wet-sanding
- Microfibre cloths, lint-free towels, or a soft polishing sponge
- Nitrile gloves and dust mask (optional)

Bringing Out the Beauty of Resin Jewellery
Polished resin pieces capture and reflect light in spectacular ways, making colours more vibrant and details more pronounced. Carefully following a step-by-step approach ensures your jewellery stands out and endures with lasting clarity.
Experiment with different polishing tools and compounds to suit the style and finish you desire for each unique piece.

Step 1: Sand Your Resin Jewellery Smooth
Begin with thoroughly cured resin pieces. Inspect for sharp edges, surface irregularities, or haze. To achieve a glass-like finish, sanding is essential to level the surface before any polish is applied. Start with a low grit (around 360-600) and progress through finer grits up to 4000 as needed. Wet-sanding using clean water reduces heat, minimises dust, and helps achieve a uniform result.
If working on intricate shapes or small crevices, using the Manual Polishing Pad Holder for Sanding & Polishind Pads allows for better control and even pressure on every section. Switch out sanding pads as you progress in grit size to avoid scratches carrying over to the finer stages.
Work through progressive grits for best results. Overlooked scratches at any stage can be very noticeable after polishing, so take time at each level.
Step 2: Prepare for Polishing and Clean Thoroughly
Once finishing with the finest sanding pad, rinse your piece thoroughly in clean water to remove all fine particles and grit residue. Dry using a lint-free towel to avoid introducing fibres back onto the surface. Avoid using household tissues, which may scratch delicate resin after sanding.
Check for any remaining dull spots or fine scratches. Inspecting under strong, indirect light helps you spot issues before moving to the polishing phase. Ensuring a perfectly clean, residue-free surface will allow your polishing products to deliver maximum gloss.
Achieve even pressure to avoid flat spots during all stages of sanding and cleaning.
Step 3: Apply the Polishing Compound
Choose a polishing compound tailored to your cast piece. For most clear or lightly coloured resin jewellery, apply a small amount of “Epoxy Polish” – Epoxy Resin Polishing System onto a clean microfibre cloth or soft sponge. Work over the entire surface using gentle, circular motions, focusing on any previously dull or hazy areas.
If your jewellery features deep, dark, or black-tinted resin, opt for “Carbon Polish” – Polishing System for Dark and Black Surfaces, 250ml. This avoids the white haze some general-purpose compounds may leave on darker pieces and produces a rich, mirror-like shine.
Repeat as needed, using clean sections of your cloth, to buff away any polish residue and reveal the high-gloss finish beneath.
Always sand wet when using fine grit pads to avoid heat damage or streaks during this process.

Step 4: Buff to a Final Brilliant Shine
After polishing, use a fresh microfibre cloth or polishing pad to buff the surface. Apply light, even pressure to bring out maximum shine. Move the jewellery piece in your hand frequently to catch all angles and prevent over-buffing in any spot.
If desired, repeat the final polish and buff for extra clarity and lustre. The key is patience—building up brilliance gradually will deliver a jewellery-grade, luminous finish every time.
Buff gently and watch for over-polishing. Harsh friction can dull the very highest gloss or even cause light scratches: less is more at this stage.

Tips for Achieving the Perfect Finish
- Use a clean workspace, free from contaminants like dust and lint.
- Allow resin pieces to cure fully before sanding or polishing—premature buffing can lead to cloudiness or scratches.
- For rings and complex shapes, polish in stages, moving from flat areas to small details.
- If you encounter swirl marks, revisit a finer grit pad with water before your final polish.
- Avoid using harsh household abrasives not designed for resin, as they may mar the surface permanently.
How Polishing Transforms Your Creations
Polishing elevates even simple resin shapes, enriching colour and depth while removing imperfections from casting and sanding. The right products and patience make the difference between an amateur look and professional, sale-ready jewellery.
For more advanced effects, layer different grits and polish compounds, finishing with a clean, soft cloth for a final mirror shine.

- "Epoxy Polish" – Epoxy Resin Polishing SystemPrice range: £17.85 through £44.85Epoxy Polish offers a straightforward system to restore resin surfaces to a glossy finish reflecting the theme of polishing resin jewellery.
- Manual Polishing Pad Holder for Sanding & Polishind Pads£4.85Manual Polishing Pad Holder designed for manual sanding and polishing with easy access to intricate corners suitable for resin jewellery crafting.
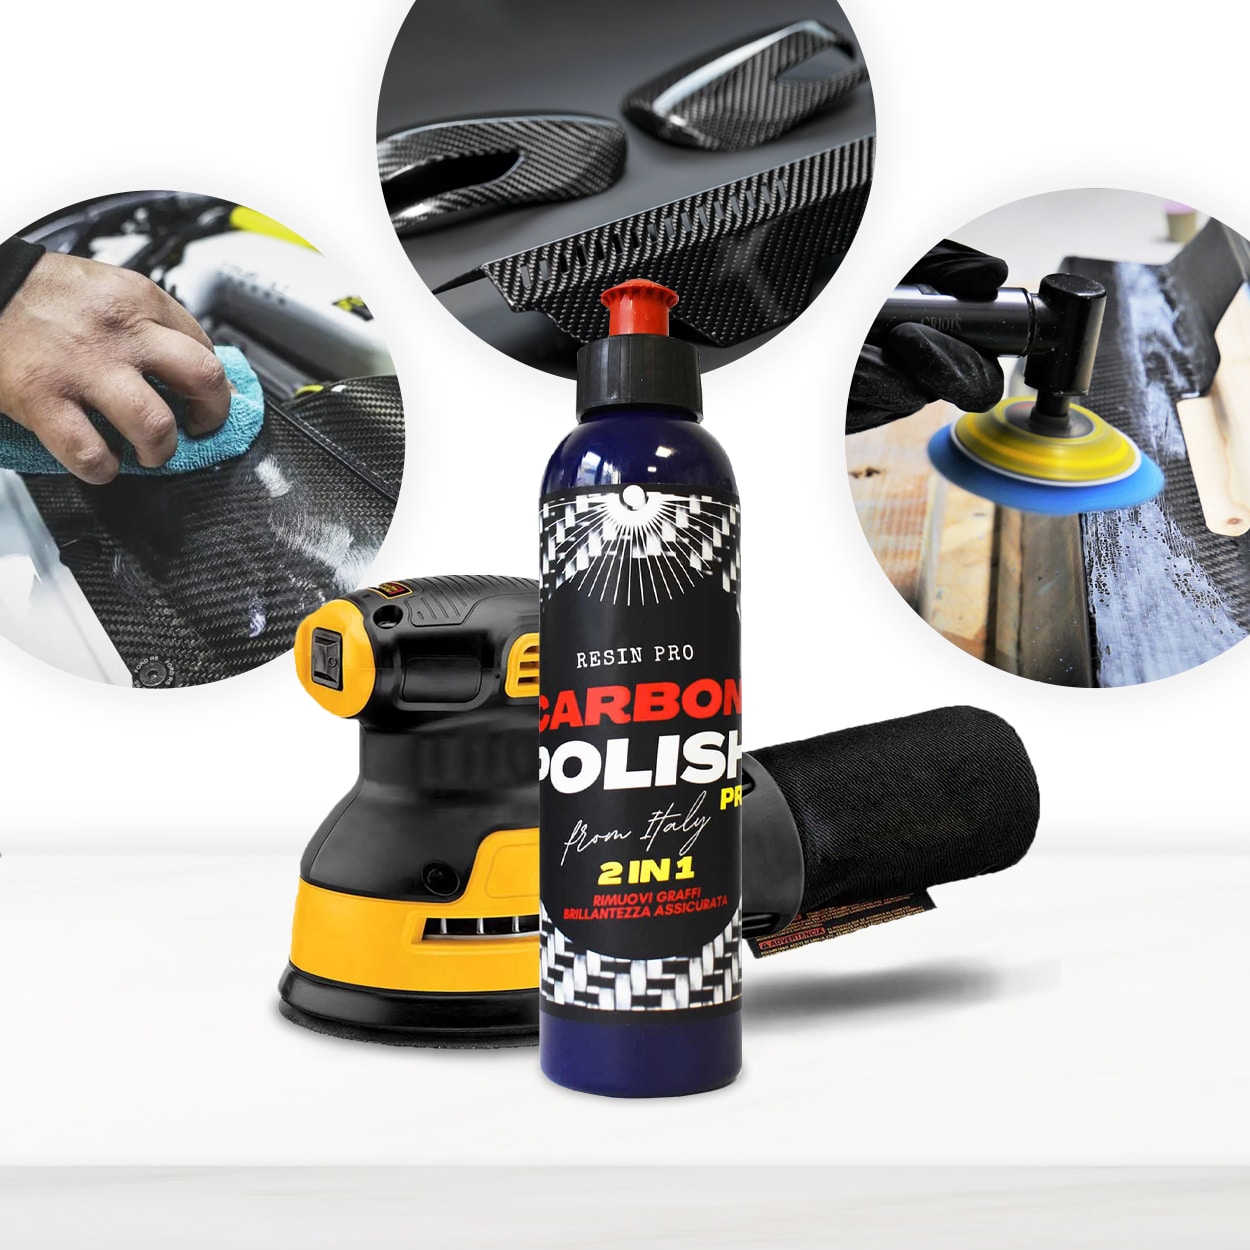 "Carbon Polish" – Polishing System for Dark and Black Surfaces, 250mlPrice range: £17.85 through £44.85Carbon Polish Black is designed for achieving a brilliant finish on dark and black resin surfaces using an easy, eco-friendly application.
 "Ebonite Abralon" – Sanding Pads 360-4000 Grit for Resin and Wood£3.95"Ebonite Abralon" Sanding Pads provide versatile sanding options from 360 to 4000 grit, suitable for resin and wood finishing.
Frequently Asked Questions
Do I need special tools to polish resin jewellery?
While dedicated sanding pads and fine polishing compounds achieve the best finish, careful manual sanding and buffing are possible with microfibre cloths and patience.
Which polish should I use for dark resin jewellery?
A specialist polish like Carbon Polish is recommended to avoid white residue and enhance the shine on deep or black resin pieces.
Why is my polished resin jewellery still cloudy?
Cloudiness can result from incomplete sanding or leftover scratches. Revisit the final grit sanding stage then polish again to reveal maximum clarity.
When can I polish after casting resin jewellery?
Allow resin to cure fully—usually at least 24-48 hours—so it hardens completely before sanding and polishing.
How do I avoid scratching resin jewellery during polishing?
Progress through grits methodically and keep everything clean. Always sand and polish with clean water and fresh, soft cloths or pads.
Can I use household products to polish resin jewellery?
It's best to use products designed for resin. Common household abrasives can dull or scratch the surface irreversibly.