 Free shipping on orders over £29,85

how to make epoxy resin shapes
Step-by-step guide for crafting unique resin objects easily


Crafting your own epoxy resin shapes is a rewarding way to create bespoke decorations, jewellery, and keepsakes. Whether you are a beginner or an experienced crafter, this guide will walk you through each important step, ensuring a smooth creative process and impressive results. Discover how simple it is to transform resin into unique works of art that add personality to your space or make stunning handmade gifts.
What You’ll Need
- “Trasparente” – Multipurpose Clear Epoxy Resin for Casting – Up to 2cm: Multipurpose clear epoxy for detailed casting, providing a glass-like finish up to 2cm thick.
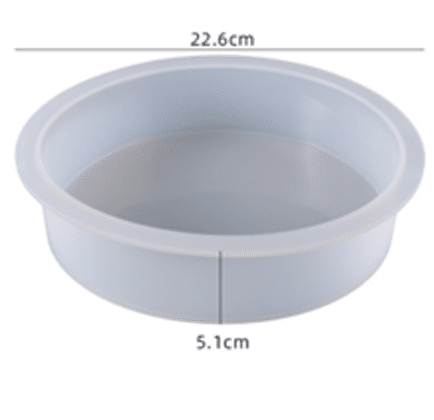
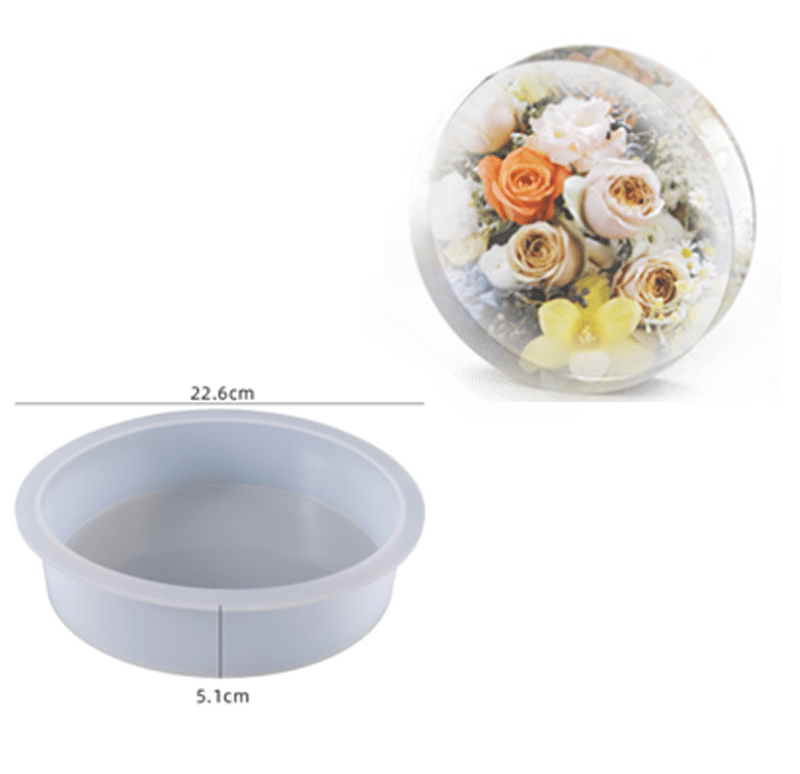
- “Silicone Circle Mould” – For Creating with Epoxy Resin, Ø 20cm: Flexible, reusable silicone mould ideal for making round resin shapes.
- “Silicone Heart Mould” – For Creating with Epoxy Resin, 19.5 x 16.5cm: Perfect for crafting heart-shaped decorations or keepsakes.
- “Evershine Collection” – Artisan Jewellery Epoxy Resin Kit with 100+ Accessories: Complete kit for jewellery making and small resin shapes with included silicone moulds and pigments.
- Mixing cups and sticks
- Protective gloves
- A level working surface
- Masking tape or a protective mat
- Paper towels for spills
Visual Inspiration for Resin Shapes
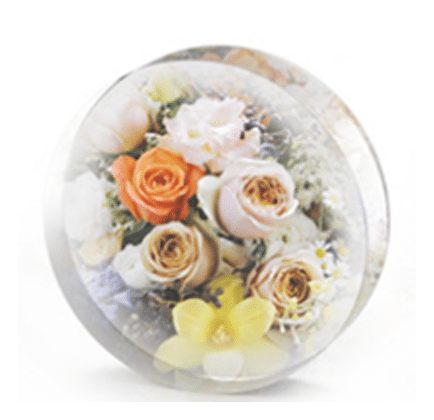
Browse through curated photos of circular and heart-shaped epoxy resin projects. Notice how mould details, translucency, and colour enhancements bring every piece to life. Let these creations spark ideas for your own unique resin shapes!
Step 1: Prepare Your Workspace and Materials
Start by ensuring your work area is clean, organised, and free from dust. Lay down a protective mat or use masking tape to secure paper to your work surface. Work in a well-ventilated area and use gloves to keep your hands protected from resin contact. Gather all required materials, ensuring your chosen silicone moulds are clean and dry before you begin. Preparation helps prevent unwanted debris or marks from affecting your finished shapes.
Step 2: Mix the Epoxy Resin Correctly
Epoxy resin typically comes in two parts: resin and hardener. Carefully follow the mixing instructions provided with your resin, paying attention to the recommended ratios and mixing times. Using a clear, multipurpose product such as the “Trasparente” – Multipurpose Clear Epoxy Resin for Casting – Up to 2cm guarantees a brilliant, see-through result for your shapes. Mix slowly and thoroughly to minimise bubbles; scrape the sides and base of the cup to ensure uniform blending. Incomplete mixing is a common cause of sticky or improperly cured pieces.
Step 3: Pour the Resin into the Moulds
Once your resin is well mixed, gently pour it into your selected silicone moulds. Choose from various shapes such as the “Silicone Circle Mould” – For Creating with Epoxy Resin, Ø 20cm or the “Silicone Heart Mould” – For Creating with Epoxy Resin, 19.5 x 16.5cm to bring your vision to life. Avoid overfilling your moulds; keep the resin below the rim for easy removal and a tidy edge. If you’re experimenting or making jewellery, the “Evershine Collection” – Artisan Jewellery Epoxy Resin Kit with 100+ Accessories provides starter moulds and pigment options to add colour or shimmer. Use a toothpick to pop visible bubbles on the surface for a flawless finish.

Step 4: Cure and Demould Your Shapes
Leave your filled moulds on a flat surface and allow the resin to cure according to the manufacturer’s timing. Let the resin cure undisturbed to avoid dust or accidental marks. Curing times vary, but repositioning or flexing the mould too soon can cause dents or cloudiness. Once fully set and hard, gently flex the silicone mould to release your new resin shape. Semi-transparent and non-stick features of quality moulds make demoulding simple and protect intricate details.

Tips and Common Mistakes
Measure all ingredients precisely and avoid shortcuts. Working in a warm, dry room minimises moisture interference, which can cause cloudiness or weak curing. If you notice bubbles in your casting, try mixing slowly or using a heat gun briefly for surface bubbles. For best mould life, clean only with mild soap and water—harsh solvents can degrade silicone. Experiment with inclusions, colours, and layering for custom effects, but always check compatibility with your chosen resin system.
Finishing Touches for Your Resin Creations
See how polishing, adding findings, or incorporating decorative elements can instantly transform simple resin shapes into professional-quality coasters or personalised gifts. Explore examples from the Evershine Collection to inspire your finishing techniques.
- "Silicone Circle Mould" – For Creating with Epoxy Resin, Ø 20cm£12.85Flexible silicone mould designed for creating epoxy resin decorative objects, notably coasters and artistic pieces.
- "Trasparente" – Multipurpose Clear Epoxy Resin for Casting – Up to 2cmPrice range: £8.45 through £948.85"Trasparente" is an ultra-clear, multipurpose casting epoxy resin for shapes up to 2cm. Suitable for detailed projects and general DIY use.
 "Silicone Heart Mould" – For Creating with Epoxy Resin, 19.5 x 16.5cm£12.85Flexible, reusable silicone mould suitable for creating decorative epoxy resin heart shapes.
 "Evershine Collection" – Artisan Jewellery Epoxy Resin Kit with 100+ Accessories£20.85This kit provides a crystal-clear 1:1 mixed epoxy resin and over 100 accessories suitable for jewellery makers in shaping resin pieces.
Frequently Asked Questions
Can I use different moulds for resin shapes?
Yes, a wide range of silicone moulds are suitable for epoxy resin. Ensure the moulds are clean, dry, and undamaged for best results.
How long does epoxy resin take to cure in shapes?
Most resins require 24–48 hours to cure completely, but always check the instructions for the specific resin you are using.
How can I prevent bubbles in my epoxy resin shapes?
Mix the resin slowly, avoid vigorous stirring, and pop any surface bubbles with a toothpick or heat tool after pouring.
Can I embed decorations or objects into my resin shapes?
Yes, dried flowers, glitter, or small keepsakes can be added. Ensure items are dry and placed securely in the mould before pouring resin.
What should I do if my resin shape is sticky after unmoulding?
A sticky surface typically means improper mixing or incomplete curing. Leave it to cure longer, or mix thoroughly next time.
Is it safe for beginners to use epoxy resin for shapes?
Yes, with proper ventilation and gloves, epoxy resin is accessible for beginners. Always follow safety guidance from the manufacturer.