 Free shipping on orders over £29,85


How to polish objects made of epoxy resin?
Step-by-step technique for a gleaming resin finish


Polishing epoxy resin transforms your finished projects into radiant works of art—eliminating scratches, cloudiness and imperfections. This guide will walk you through the complete process of polishing resin objects for stunning, professional results, whether you are crafting jewellery, coasters, or furniture accents.
What You’ll Need
- “Ebonite Abralon” – Sanding Pads 360-4000 Grit for Resin and Wood — essential for progressive sanding before polishing
- “Epoxy Polish” – Epoxy Resin Polishing System — for a mirror-like final gloss on most clear and coloured resins
- “Carbon Polish” – Polishing System for Dark and Black Surfaces, 250ml — best for black or deep-toned resin projects
- 1200W Polisher for Sanding and Buffing – Variable Speed, D-Handle — for efficient, professional-level buffing (optional for hand polishing)
- Clean microfibre cloths and water spray bottle
- Personal protective equipment (mask, goggles, gloves)

Essential Polishing Tools in Action
Proper preparation and the right tools are key to achieving brilliance. Using compatible sanding pads and the correct resin polishes elevates the final result, making polishing smoother, faster, and more predictable. A sturdy variable-speed polisher can save time on larger pieces, while hand techniques suit smaller, intricate designs. Explore our sanding and polishing range for suitable materials.

Step 1: Prepare Your Workspace and Resin Object
Begin by cleaning your work area and ensuring it is free of dust and debris. Place your epoxy resin object on a stable, protected surface. If needed, secure smaller pieces to prevent movement during sanding or polishing. Always wear suitable personal protection, including a dust mask and eye protection, especially during sanding stages. Protect your workspace before starting to avoid surface damage and ensure safety throughout the process.
Step 2: Sand the Resin Object in Stages
Sanding is crucial for removing surface imperfections, drips, or sharp edges. Start with a coarser abrasive (such as 360–800 grit) and progressively move to finer grits, finishing with 2000–4000 grit for a smooth base. Wet sanding is recommended—use a water spray to reduce heat and prevent resin dust. Do not rush through grit stages; spend a few minutes with each grade for an even surface without deep scratches. The “Ebonite Abralon” – Sanding Pads 360-4000 Grit for Resin and Wood are ideal, offering consistent pressure across the surface for both wet and dry sanding.
After each grit, wipe the resin clean with a damp cloth to check progress. Ensure all sanding marks from the previous grit are erased before progressing to the next finer one.
Step 3: Polish to a High Gloss Finish
Once the surface is fully sanded and dry, apply a small amount of specialist polish suitable for epoxy resin to a clean microfibre cloth or a polishing pad. For typical resin projects, use “Epoxy Polish” – Epoxy Resin Polishing System. For dark-coloured or black resin, opt for “Carbon Polish” – Polishing System for Dark and Black Surfaces, 250ml which prevents white residue on deep tones.
Polishing can be done manually or with a variable-speed polisher. The 1200W Polisher for Sanding and Buffing – Variable Speed, D-Handle allows larger or professional projects to be finished quickly and consistently. Apply gentle, even pressure when polishing; avoid excessive speed or force, which can cause swirls or overheat the surface. Work in circular motions, overlapping each pass.

Step 4: Clean and Inspect the Final Surface
After polishing, wipe away any residue with a clean, dry microfibre cloth. Inspect the resin object under good lighting to spot any areas that might need a repeat of the final polishing step. If dullness, streaks, or marks remain, a second gentle polish usually brings up the desired gloss. Allow your object to sit for a short while before handling so it reaches its optimal clarity and shine.

Tips and Common Mistakes When Polishing Epoxy Resin
Choose specific polish for resin and surface colour—generic or abrasive pastes may leave film or micro-scratches. Never skip grit levels in sanding; it can result in visible scratches that polishing cannot fix. Always clean between stages to avoid contaminants or debris causing new marks.
If unsure, test your process on a small area first. Make sure surfaces are completely cured before finishing. With care and patience, achieving a crystal-clear finish is straightforward and hugely rewarding.
Mastering the Perfect Resin Finish
Patience during each sanding and polishing step is rewarded with flawless shine. Always use products designed for resin and take time to inspect your progress in good light. Consistency beats speed for achieving glossy, glass-like resin surfaces.

- "Epoxy Polish" – Epoxy Resin Polishing SystemPrice range: £17.85 through £44.85"Epoxy Polish" offers a professional system for polishing epoxy resin projects to a glossy finish suitable for crafts and restoration.
- "Ebonite Abralon" – Sanding Pads 360-4000 Grit for Resin and Wood£3.95Ebonite Abralon Sanding Pads provide a consistent finish for epoxy resin and wood surfaces, suitable for detailed polishing tasks.
 1200W Polisher for Sanding and Buffing – Variable Speed, D-Handle£85.95A versatile polisher with variable speed and sturdy handle, designed for sanding and buffing epoxy resin surfaces.
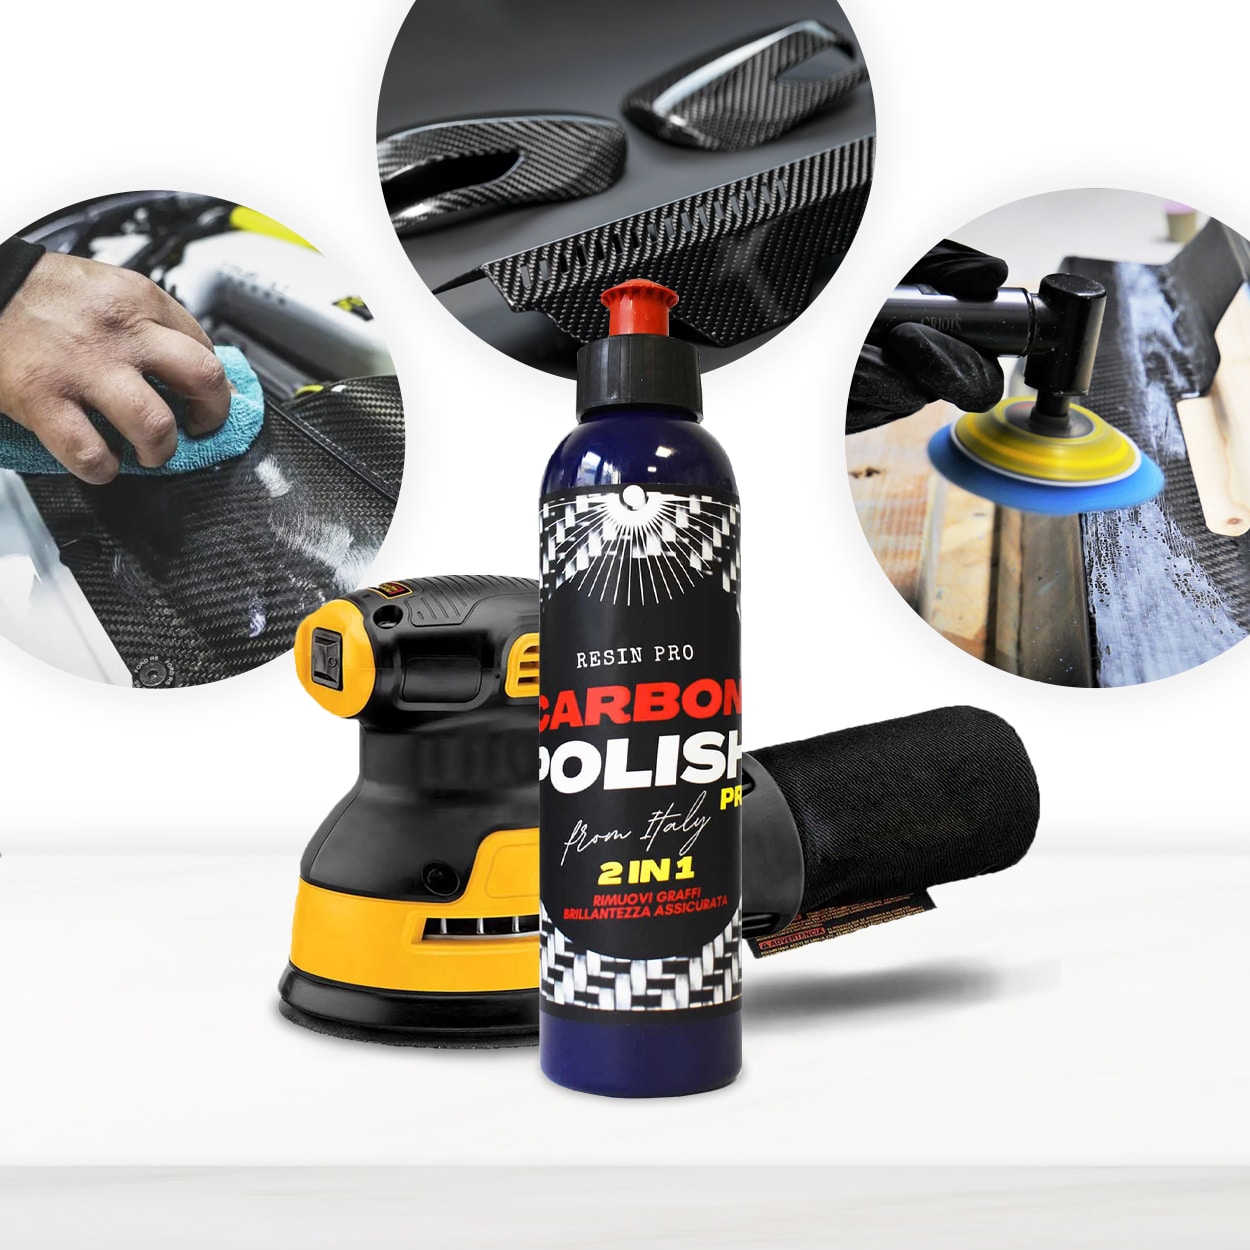 "Carbon Polish" – Polishing System for Dark and Black Surfaces, 250mlPrice range: £17.85 through £44.85"Carbon Polish" is designed for polishing dark and black surfaces including epoxy resin objects, providing a finish without white residue.
Frequently Asked Questions
Do I need a special polish for epoxy resin?
Yes, use a polish formulated specifically for resin to avoid residue, streaks, or reduced shine. Resin polishes provide a superior, clear finish.
Can I polish resin by hand?
Yes, hand polishing is possible for smaller projects using microfibre cloths and dedicated polish, but machines achieve faster, often shinier results.
Why are there scratches after polishing?
Scratches may remain if sanding stages were rushed or grit sizes skipped. Progress carefully through all sanding steps for best clarity.
Can generic car polishes be used on resin?
Generic polishes often leave residue or lack effectiveness on resin. It is best to use specialist resin products for optimal finish and clarity.
Do I always need an electric polisher?
No, an electric polisher is recommended for large surfaces. For small items, hand polishing is sufficient with the right materials.
What if resin looks cloudy after polishing?
Cloudiness can result from insufficient sanding or lack of proper polish. Re-sand with finer grit and use a high-quality resin polish to restore clarity.