 Free shipping on orders over £29,85

How to prepare resin?
Step-by-step guide for mixing, colouring, and pouring resin safely


Preparing resin correctly is the foundation for projects ranging from stunning coasters to large resin tables or contemporary home décor. This guide will take you through each essential step, ensuring your results are crystal clear, strong, and professional—regardless of experience level. Whether you are an absolute beginner or want to refine your technique, you will learn about workspace setup, accurate measurements, mixing, and avoiding common pitfalls for flawless results every time.
What You’ll Need
- “River-Table” – Complete Kit for Creating Your First Epoxy Resin Table – All-in-one for table projects and large pours.
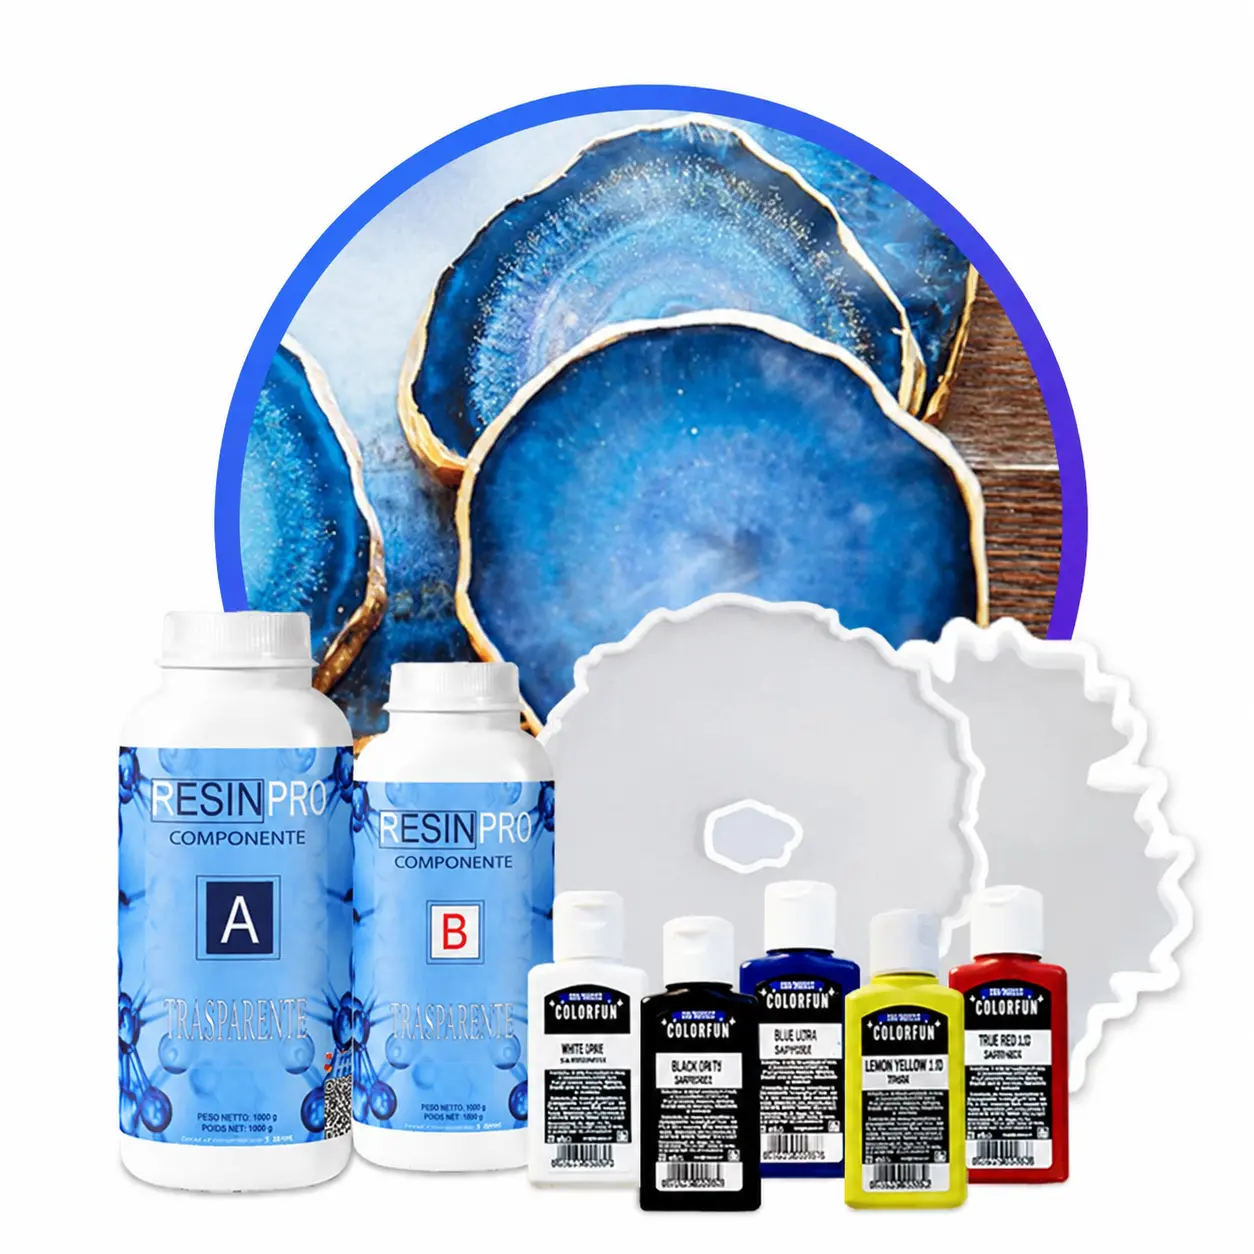
- Resin Geode Coaster Starter Kit – Create Stunning Crystal-Style Coasters at Home – Ideal for coaster and beginner resin art.
- Petri Resin Art Starter Kit – Create Stunning Petri Effect Art at Home – For colourful, artistic effects in decorative pieces.
- Digital scales for weighing resin and hardener
- Mixing cups and stirrers
- Surgical gloves and a protective mask
- Covers for worksurfaces (silicone mats, baking paper or plastic sheeting)
- Optional: Colourants or alcohol inks depending on your design

Perfect Resin Preparation in Practice
Mix exact ratios as specified for the resin type. Even tiny deviations can impact clarity and hardness. Set up all tools and kits before starting to maintain focus and a tidy process. Beginner kits with pre-portioned supplies help simplify early projects and reduce the risk of mistakes.

Step 1: Prepare Your Workspace
Before you even open your resin bottles, set up a workspace that is dry, dust-free, and well-ventilated. Cover all surfaces with protective sheeting to guard against spills or drips. Organise your materials within easy reach and check that your workspace’s temperature is between 18–25 °C, as this is ideal for most epoxy resins. Proper setup minimises the risk of dust and debris contaminating your workpiece.
Wear gloves, eye protection, and a mask for safety. Epoxy ingredients can irritate the skin or eyes, so keep personal protection on at all times for a safer, more comfortable experience.
Step 2: Measure Resin and Hardener Precisely
Accurate mixing is critical for successful resin curing. Read your kit or product’s instructions carefully for the specified mixing ratio—most beginner kits work by weight, such as 100 parts resin to 60 parts hardener. Use a digital scale for precision. Add the resin first, then the hardener, into a clean mixing cup.
Always measure resin and hardener using a digital scale for accuracy. Even small mistakes in proportion can leave your resin sticky or brittle.


Step 3: Mix Slowly and Thoroughly
Using a stirrer, blend the resin and hardener together, scraping both the sides and bottom of the container throughout. Mix at a steady, moderate speed to avoid introducing excess air, which can cause bubbles. Continue mixing for at least three minutes, or as long as the instructions specify.
Mix slowly and thoroughly for at least three minutes. Incomplete mixing can result in a cloudy or partially cured pour.
Step 4: Add Colourants or Inclusions if Needed
If your project involves vibrant designs, now is the moment to stir in pigments or alcohol inks. Kits such as the Resin Geode Coaster Starter Kit – Create Stunning Crystal-Style Coasters at Home provide a range of colourants specifically formulated for resin. Add colours gradually, mixing thoroughly to ensure even dispersion.
For special effects like Petri patterns, follow instructions from the Petri Resin Art Starter Kit – Create Stunning Petri Effect Art at Home, which uses both coloured and white inks layered in resin for striking visuals. Don’t add too much pigment; overloading can impact curing.


Step 5: Pour the Resin Carefully
Once your resin is mixed and coloured, pour it gently into your prepared mould, formwork, or directly onto a project piece. Kits like the “River-Table” – Complete Kit for Creating Your First Epoxy Resin Table include both moulding aids and release films to help you achieve a smooth finish and easy demoulding. Avoid pouring from a height to reduce air bubbles, and use a torch or heat gun if needed to pop any bubbles that appear on the surface.
Pour resin gently to reduce bubbles. Allow the piece to cure undisturbed according to your kit’s specified timing for best results.
Tips and Common Mistakes
Always take your time with measuring and mixing—rushed preparation is the leading cause of sticky or uncured projects. Double-check ratios each time, especially when switching between different kits or products. If you’re using a masterclass or kit for the first time, read all included instructions and allow ample curing time before handling the finished piece. Avoid working in too hot or cold conditions, as both extremes affect curing quality. Finally, store leftover resin sealed and out of direct sunlight to prevent yellowing or degradation.
Common Errors and Finishing Advice
Keep your workspace dust-free through the entire curing process. If you notice imperfections, sanding and polishing kits included in some products can restore clarity and shine. Practise on small projects first to build confidence.

- "River-Table" – Complete Kit for Creating Your First Epoxy Resin TablePrice range: £198.45 through £467.45"River-Table" kit includes essential materials and instructions to prepare a resin table as part of 'How to prepare resin?'
- Resin Class – 3D Effects Coasters Masterclass, 120 MinutesThis masterclass shows how to prepare and work with resin for creating functional art such as coasters and bowls.
 Resin Geode Coaster Starter Kit – Create Stunning Crystal-Style Coasters at Home£42.85A starter kit designed to prepare resin and create geode-inspired coasters with included moulds, colourants, gloves, and instructions.
 Petri Resin Art Starter Kit – Create Stunning Petri Effect Art at Home£55.85This kit includes all essentials to create decorative resin pieces with Petri effects, supporting creative resin preparation.
Frequently Asked Questions
How do I measure and mix resin properly?
Always use a digital scale, following the kit’s exact ratio, and mix both for at least three minutes until completely combined.
Why is my resin sticky or not curing?
Sticky resin is usually due to incorrect ratio or incomplete mixing. Double check each step and mix very thoroughly.
What colours or inks are safe for resin?
Use only colourants formulated for epoxy resin or those provided in resin kits to avoid curing issues or colour separation.
How can I prevent bubbles in my resin?
Mix gently to avoid introducing air and use a torch or heat gun after pouring to release surface bubbles.
What is the ideal temperature for working with resin?
Epoxy resin works best between 18–25 °C in low humidity, so always check your workspace conditions first.
Is it easier to start with a resin kit?
Starter kits offer all components with instructions, making it much simpler and safer for beginners to achieve good results.