 Free shipping on orders over £29,85


How to sand epoxy resin?
Sanding epoxy resin is a crucial step to transform a cloudy or uneven surface into a flawless, glass-like finish. Whether you are working on river tables, coasters, or jewellery, mastering the sanding process helps elevate your results from amateur to professional. This guide will walk you through each stage of sanding epoxy resin, highlight important safety considerations, and explain how to achieve a perfect, scratch-free surface.
Step-by-step guide to flawless, scratch-free epoxy resin results


What You’ll Need
- “Ebonite Abralon” – Sanding Pads 360-4000 Grit for Resin and Wood – for precise, controlled sanding (wet or dry use)
- Foam Sanding Block 70x100mm for Resin and Wood Surface Smoothing – ideal for contoured pieces and final finishing
- 1200W Polisher for Sanding and Buffing – Variable Speed, D-Handle (optional) – for large, flat surfaces or polishing stages
- Clean water (for wet sanding)
- Soft lint-free cloths
- Protective gloves and mask
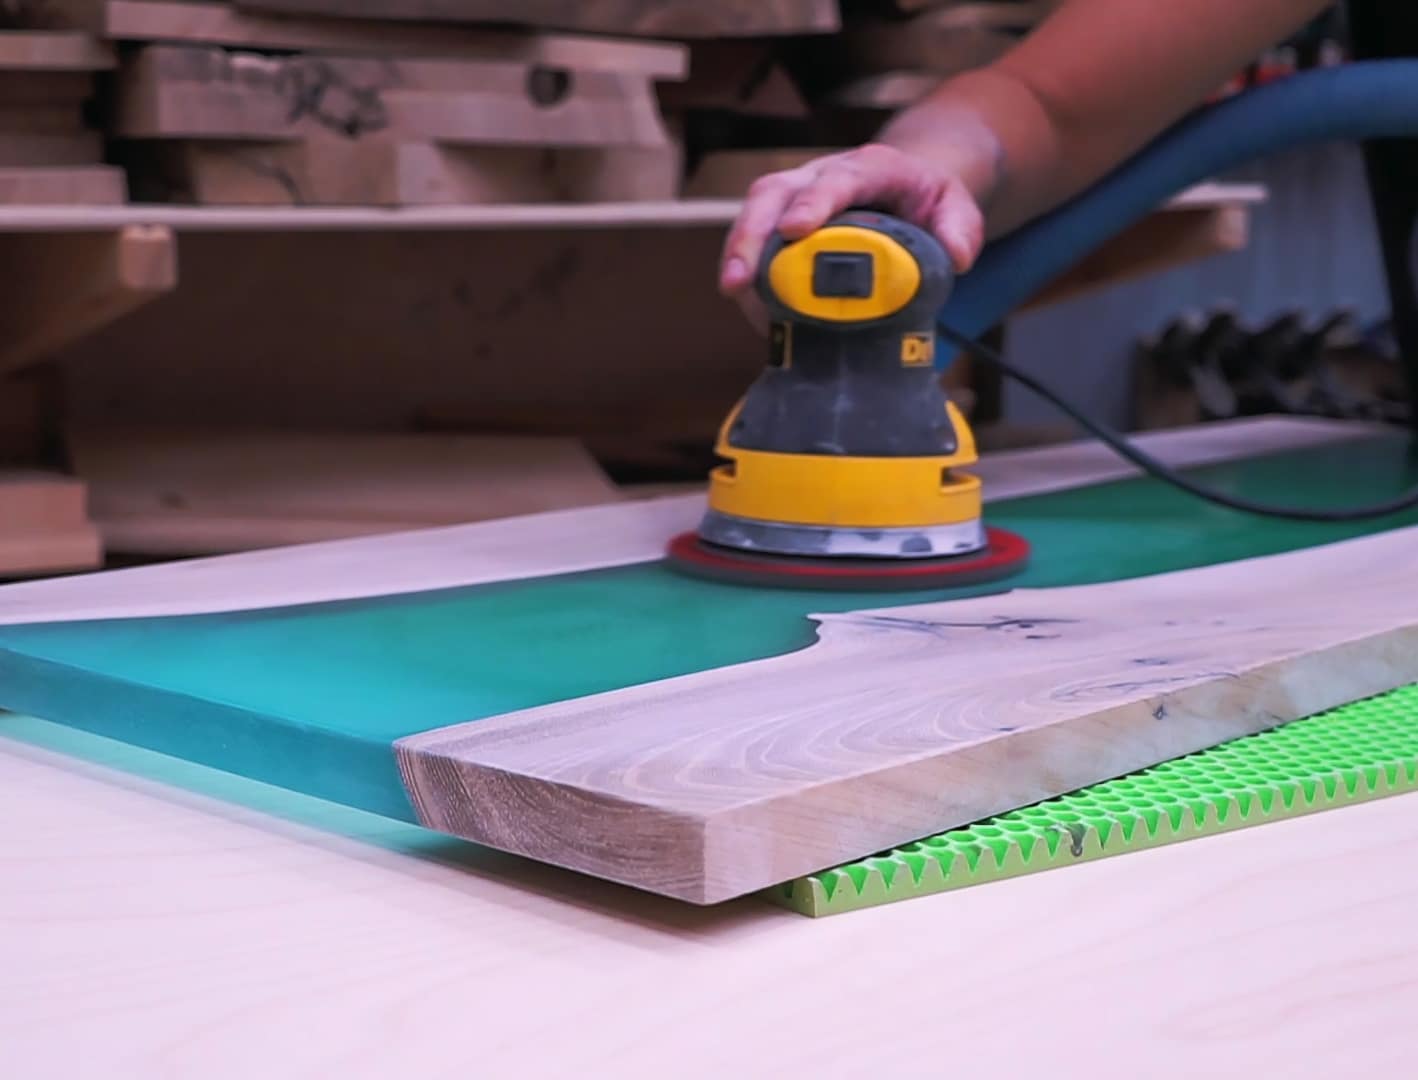
Visual Guide to Sanding Epoxy Surfaces
See how sanding transforms epoxy resin from a dull, rough state to a glossy, professional-grade finish. Step-by-step photos demonstrate the impact of each grit, showing why patience and proper technique make a visible difference in your results.
Step 1: Assess and Prepare the Epoxy Surface
Begin by thoroughly inspecting your cured epoxy resin surface. Check for dust nibs, bubbles, or uneven patches. Make sure the resin has fully cured, as premature sanding can lead to gummy build-up or surface damage. Clear away any surface dust or debris with a soft cloth. For intricate or contoured pieces, a Foam Sanding Block 70x100mm for Resin and Wood Surface Smoothing is excellent as it adapts to curves and edges, making preparation easy on both flat and shaped surfaces.
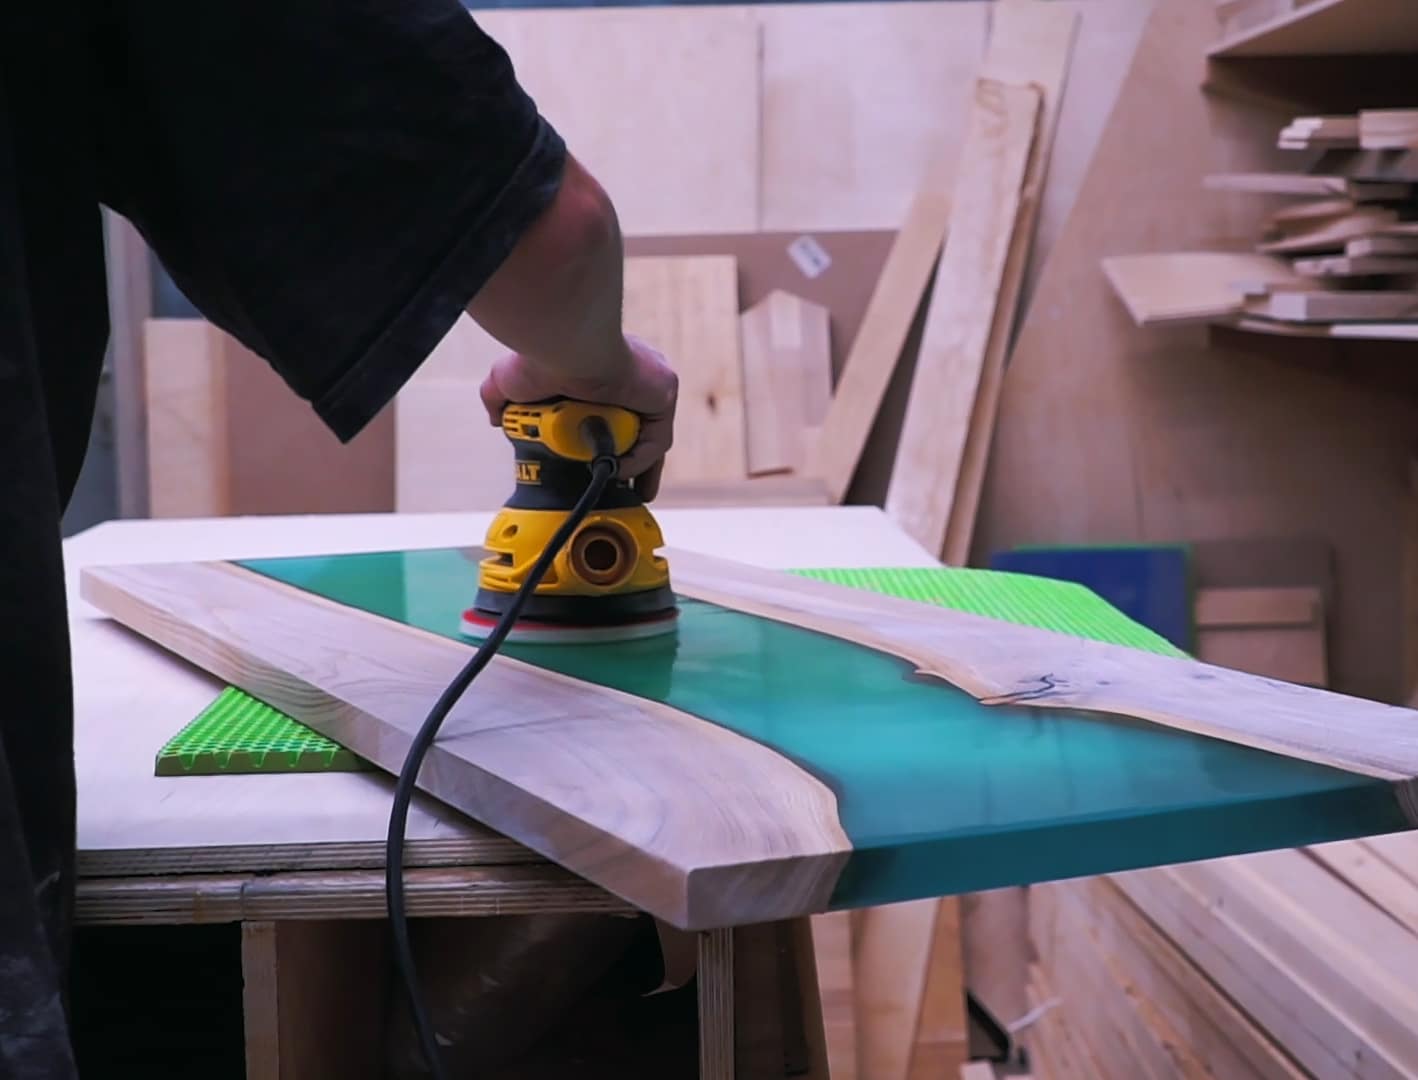
Step 2: Begin with Coarse Grit and Wet Sanding
Choose the right grit progression for your project: most epoxy jobs begin with 360 or 400 grit, depending on the severity of surface defects. Soak your sanding pad or block in clean water if wet sanding (strongly recommended for resin). Wet sanding minimises heat, prevents clogging, and ensures a finer finish without gouging the epoxy. Work with gentle circular motions, applying light, even pressure. For large or flat surfaces, consider using the 1200W Polisher for Sanding and Buffing with suitable pads for a more uniform result.
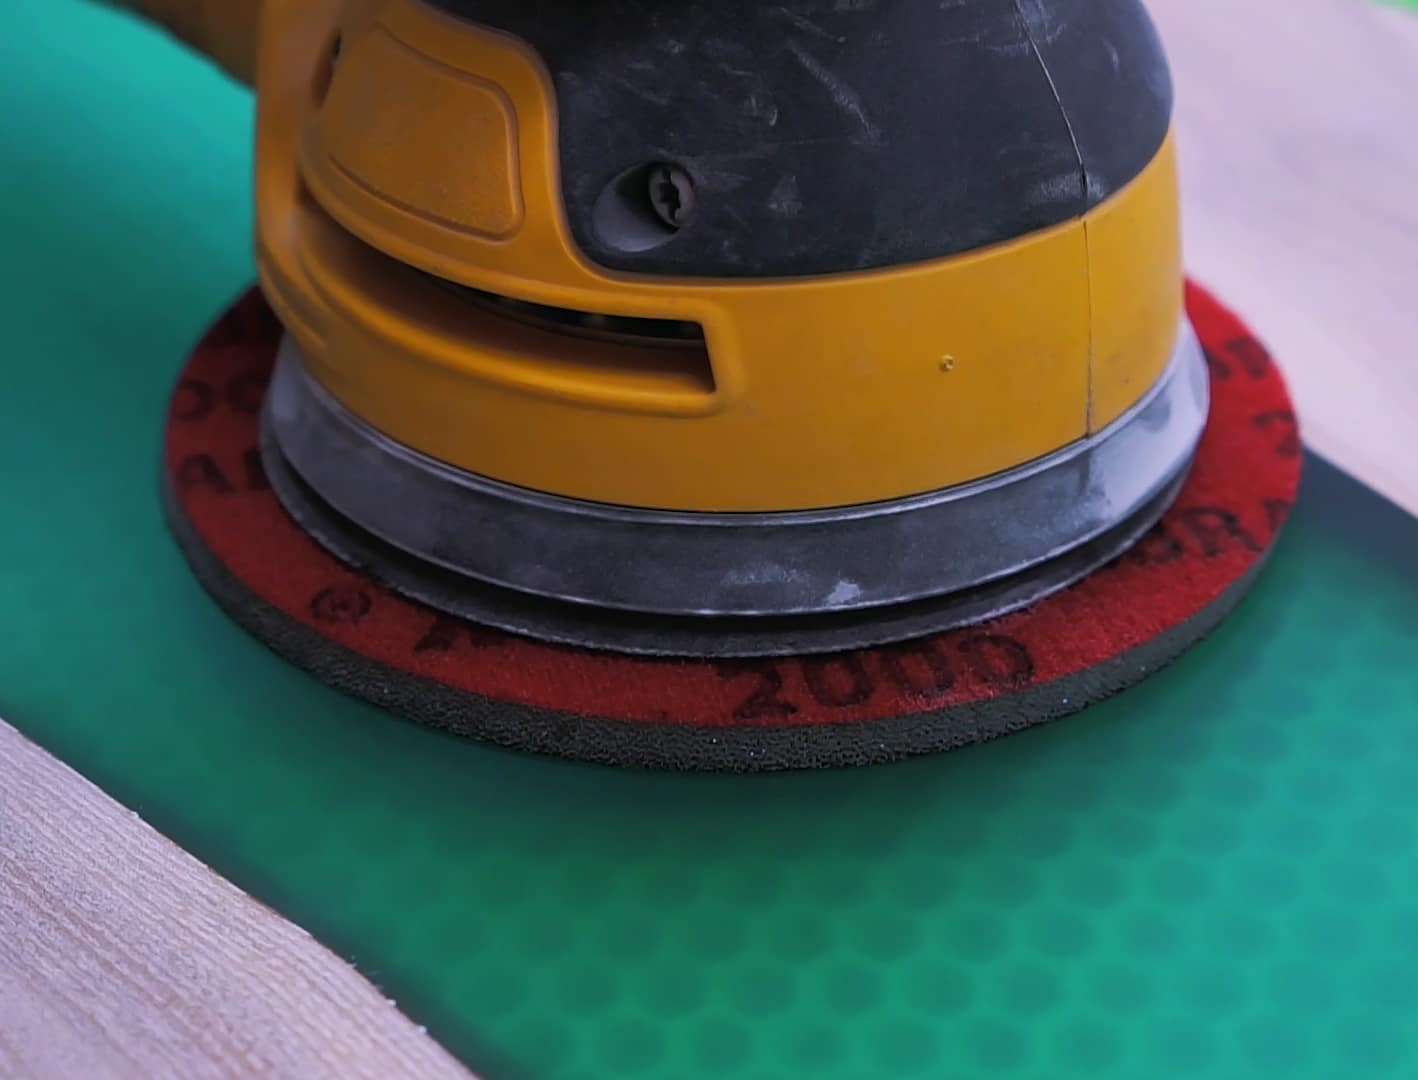
Step 3: Work Gradually Through Finer Grits
Sanding is most effective and delivers the clearest finish when you do not rush between grits. After each stage (e.g., 360, 600, 1000, 2000, and up to 4000 grit), rinse the surface and check for visible scratches from the previous grit. Each new sanding pass should remove the marks of the previous coarser grit. Keep the surface wet and clean your sanding pads regularly to avoid introducing scratches back into the finish. The “Ebonite Abralon” – Sanding Pads 360-4000 Grit for Resin and Wood are ideal for progressing smoothly between each stage while maintaining consistent pressure and minimal clogging.
Step 4: Clean and Inspect Between Each Stage
After each sanding grit, clean thoroughly between sanding stages using clean water and a lint-free cloth. This step prevents old grit or residue from causing scratches during finer sanding. Careful inspection under good lighting reveals any remaining marks. If you spot persistent scratches, repeat the previous sanding grit before moving ahead. Attention to cleanliness results in a uniform, polished appearance and prepares the surface for further finishing or polishing as desired.

Tips and Common Mistakes When Sanding Epoxy Resin
Always sand wet for epoxy – dry sanding creates heat, which may soften or damage the resin. Use gentle, even pressure and avoid aggressive force. Overlooking cleaning between grit changes often causes stubborn scratches. Do not skip grits or sanding stages, as each successive grit is necessary for a scratch-free final result. For complex shapes or corners, use flexible sanding blocks such as the Foam Sanding Block for better control and surface adaptation.
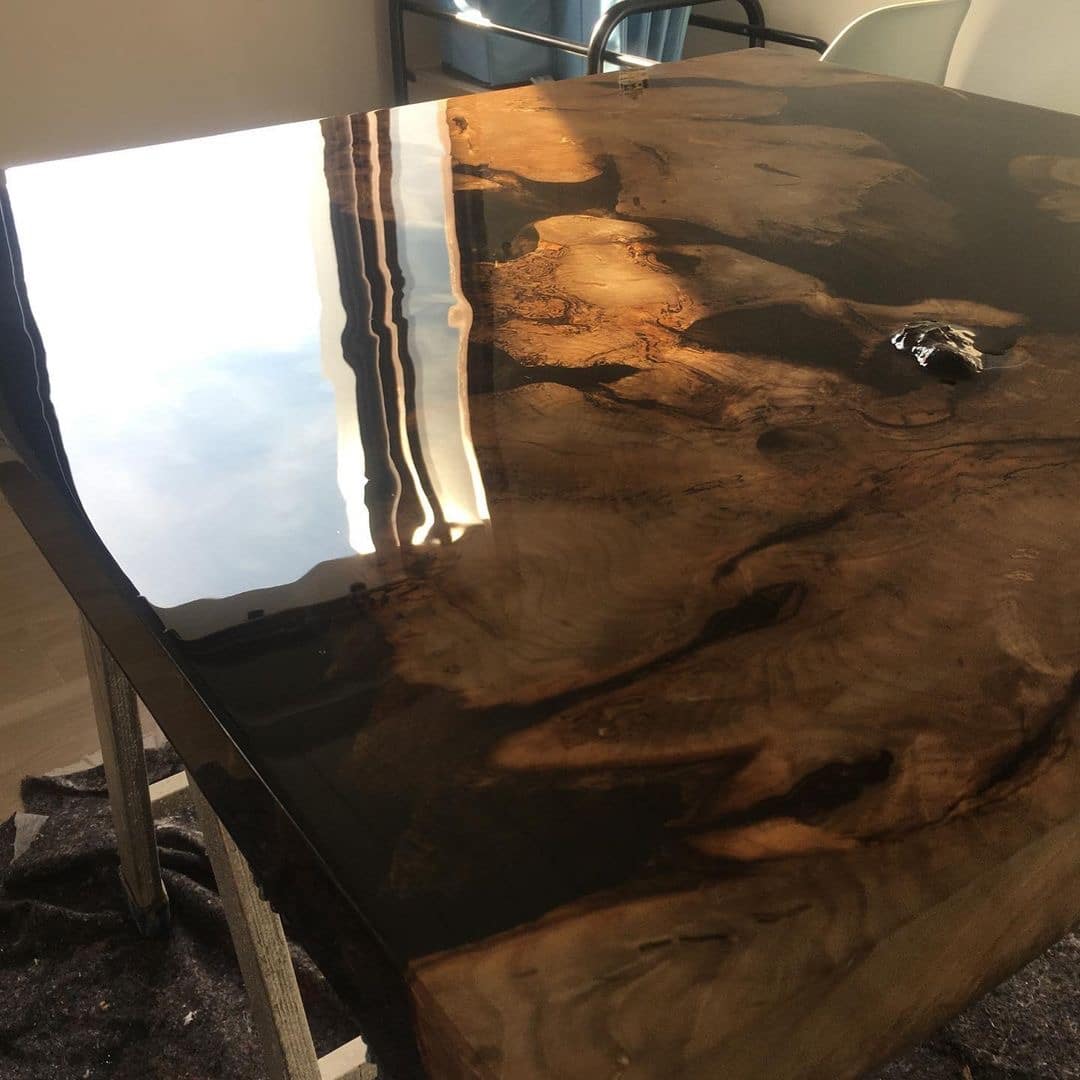
Close-Ups of Sanded and Polished Resin
Examine up-close examples displaying the effects of proper sanding and polishing. From initial surface preparation to final clarity, these images highlight the importance of each sanding phase and the beauty of a meticulously finished piece.
- "Ebonite Abralon" – Sanding Pads 360-4000 Grit for Resin and Wood£3.95"Ebonite Abralon" Sanding Pads suit detailed finishing on epoxy resin and wood with various grit options from 360 to 4000.
- 1200W Polisher for Sanding and Buffing – Variable Speed, D-Handle£85.95The 1200W Polisher is suitable for sanding and polishing epoxy resin with variable speed control and sturdy grip.
 Foam Sanding Block 70x100mm for Resin and Wood Surface Smoothing£1.85The Foam Sanding Block suits smoothing epoxy resin and wood surfaces, adapting to contours for a polished finish.
Frequently Asked Questions
What is the best grit to start sanding epoxy resin?
Start with 360 or 400 grit for most resin surfaces, adjusting lower if there are major defects. Progress to higher grits for a smooth finish.
Can you dry sand epoxy resin surfaces?
Wet sanding is advised for epoxy resin because it reduces heat and prevents clogging. Dry sanding increases risk of scratches or heat damage.
How can I prevent scratches when sanding epoxy?
Work through each grit stage methodically, wet sand, clean between grits, and avoid skipping any step to prevent unwanted scratches.
Is polishing necessary after sanding resin?
Polishing is optional but highly recommended for a crystal-clear, glossy surface after you have finished sanding with the finest grit.
Do I need special tools to sand epoxy resin?
You can sand by hand using suitable pads or blocks, or use an electric polisher for large surfaces. Select tools based on your project's size and shape.
How long should I wait before sanding cured epoxy?
Wait until the resin is fully cured, typically at least 48-72 hours, or longer as indicated by your specific product instructions.