 Free shipping on orders over £29,85

What are the steps to create a 3D effect with epoxy resin?
Step-by-step guide for striking 3D depth in resin art projects


Creating a captivating 3D effect with epoxy resin opens the door to imaginative and visually striking resin art. Whether you are crafting unique coasters or aiming for gallery-worthy depth in wall decor, learning the right layering and colouring techniques can transform your work from flat to fantastic. This guide will walk you through the essential steps to successfully achieve a three-dimensional look in your epoxy resin projects.
What You’ll Need
- “Art Pro Deluxe” – Ultra-High Viscosity Epoxy Resin for Artists – for sharp, defined layers and exceptional clarity
- Petri Resin Art Starter Kit – Create Stunning Petri Effect Art at Home – ideal for organic pattern effects and flowing colours
- Resin Geode Coaster Starter Kit – Create Stunning Crystal-Style Coasters at Home – great for crystal-style layered coasters
- Silicone moulds or casting surfaces
- Resin colourants, alcohol inks or pigment powders
- Mixing cups and stirring sticks
- Protective gloves and apron
- Dust-free workspace

Visual Inspiration for 3D Resin Art
See a gallery of dimensional effects and colourful details possible with high-clarity epoxy resin. Whether you prefer geometric bands, ocean motifs, or the intricate petri style, these techniques all start with deliberate layering and quality materials. Let these images spark ideas for your next 3D project.

Step 1: Prepare Your Materials and Workspace
Begin by organising all your tools and ensuring your workspace is completely dust-free, well-ventilated, and protected from accidental spills. Epoxy resin is sensitive to airborne dust and moisture, which can compromise clarity and curing. Use gloves, apron and protective mask to prevent skin contact and inhalation of fumes. Set out your mixing tools, moulds, and colourants within easy reach; having everything ready will help you work efficiently once the resin is mixed.
Step 2: Mix and Pour the First Resin Layer
Carefully measure and mix your chosen epoxy resin according to the product instructions, ensuring a thorough blend to avoid improper curing. Pour a thin, even base layer into your mould. This initial layer acts as the optical foundation for your 3D effect, so focus on an even, bubble-free surface. To elevate line definition and clarity, consider using “Art Pro Deluxe” – Ultra-High Viscosity Epoxy Resin for Artists for the base, as its clarity and self-levelling properties result in a superb finish.


Step 3: Build Up Depth with Colour and Layering
Once the first layer has started to cure (but is still slightly tacky), begin adding elements that create a sense of depth—such as pigments, glitters, or decorative inclusions—before pouring subsequent resin layers. In the case of Petri or geode effects, alternate between clear, coloured and white resin or drip alcohol inks for fascinating interactions and patterns. Allow each layer to partially cure before pouring the next; this prevents colours from blending unintentionally and maintains the separation that produces a true 3D effect. If you’re aiming for crystal-style coasters, the Resin Geode Coaster Starter Kit – Create Stunning Crystal-Style Coasters at Home provides both colourants and a clear resin base specifically for this purpose.
Step 4: Add Final Effects and Allow to Cure
With all layers poured, finish your piece by using a heat gun or torch to gently remove surface bubbles without disturbing the layering. Add any final effects, such as a shimmering top coat or metallic edge, to intensify the three-dimensional appearance. Ensure the entire piece cures in a dust-free environment for the recommended time—often between 24 to 48 hours depending on the project. Avoid over-mixing colours in this final stage for crisp, defined patterns.


Step 5: Demould and Finish Your 3D Resin Artwork
Once fully cured, demould carefully to prevent damage or surface blemishes. Sand edges if necessary and clean the finished piece with a soft, lint-free cloth. If a high-gloss finish is desired, a final clear resin coat can be added and left to cure. At this stage, your artwork should reveal intricate, layered patterns with visual depth—a hallmark of 3D resin art. Should you wish to expand your skills, structured learning such as the Resin Class – 3D Effects Coasters Masterclass, 120 Minutes could provide creative insight and guided technique development.
Tips and Troubleshooting for 3D Resin Effects
Work in thin layers for maximum control. Use opaque whites or lighter shades to create highlights and enhance visual depth between transparent or coloured layers. Do not rush curing stages—premature pouring can cause bubbling or loss of pattern definition. Take time to experiment with small test pours to discover how your chosen pigments and inks interact with the resin medium. If you encounter issues with unmixed resin or tacky surfaces, ensure future measurements are accurate and mixing is thorough but gentle. Patience and a dust-free space are among the key factors for success in 3D epoxy resin art.

Close-up Details of 3D Effects
Observe the striking differences created by layering and selective colour placement. From transparent depths to metallic shines and organic movement in the resin, mastering each step ensures a professional finish—whether you’re working with coasters, artwork, or sculptural forms.

- "Art Pro Deluxe" – Ultra-High Viscosity Epoxy Resin for ArtistsPrice range: £35.95 through £302.45Art Pro Deluxe provides precise control and a crystal-clear, glossy finish suited for resin art and layered effects.
- Resin Class – 3D Effects Coasters Masterclass, 120 MinutesThis course teaches how to create functional resin art pieces like coasters and bowls, suitable for those exploring 3D resin effects.
 Petri Resin Art Starter Kit – Create Stunning Petri Effect Art at Home£55.85This starter kit provides materials and guidance for making decorative resin art with flowing colours and unique Petri effects.
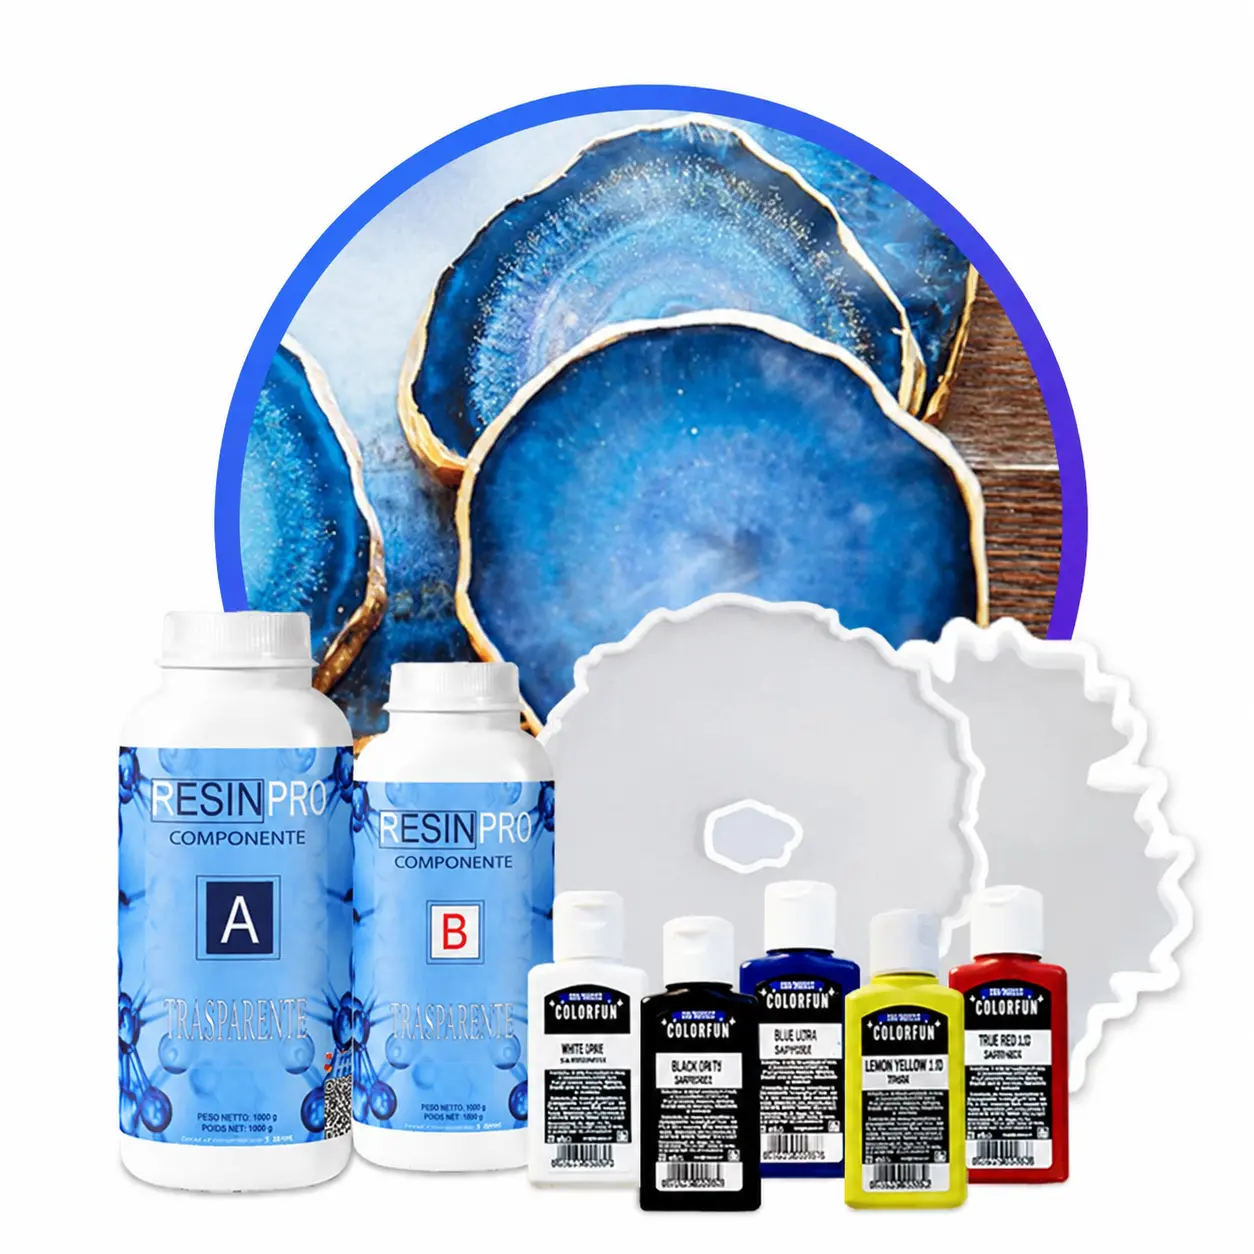 Resin Geode Coaster Starter Kit – Create Stunning Crystal-Style Coasters at Home£42.85Create handmade resin coasters inspired by geodes with this starter kit including resin, moulds, colourants and instructions.
Frequently Asked Questions
What is the best resin to use for 3D art layering effects?
Ultra-high viscosity epoxy resins help achieve crisp lines and separated layers, ideal for creating a 3D look.
How do I prevent colours from blending together in resin pours?
Allow each resin layer to partially cure before adding the next, so colours remain distinct and do not bleed.
How long should I let my 3D resin artwork cure?
Most pieces need 24 to 48 hours in a dust-free environment for a thorough, bubble-free cure.
What are common mistakes when creating 3D effects with resin?
Rushing layers, not mixing thoroughly, or failing to use protective gear can cause flaws in the finished piece.
Can I use alcohol inks for creating the Petri effect?
Yes, alcohol inks create organic, colourful reactions in resin, especially when layered with white ink.
What is the safest way to handle epoxy resin at home?
Always use gloves, a protective mask, and work in a ventilated area to avoid skin contact and fumes.