 Free shipping on orders over £29,85

What to do to paint a resin RV roof that is crumbling?
Step-by-step guide to repairing and repainting damaged resin rooftops


Dealing with a crumbling resin RV roof can be daunting, but the right approach will restore both protection and appearance. This comprehensive guide walks you through cleaning, repair, smoothing, and painting, ensuring a durable, weather-resistant finish that stands up to the elements. Whether you’re a seasoned DIY enthusiast or tackling this challenge for the first time, follow these proven steps for reliable, lasting results.

What You’ll Need
- Strong Technical Degreaser for Resin Projects – 100% Natural Formula: A gentle cleaner suitable for removing grease, silicone, and contaminants from delicate resin surfaces.
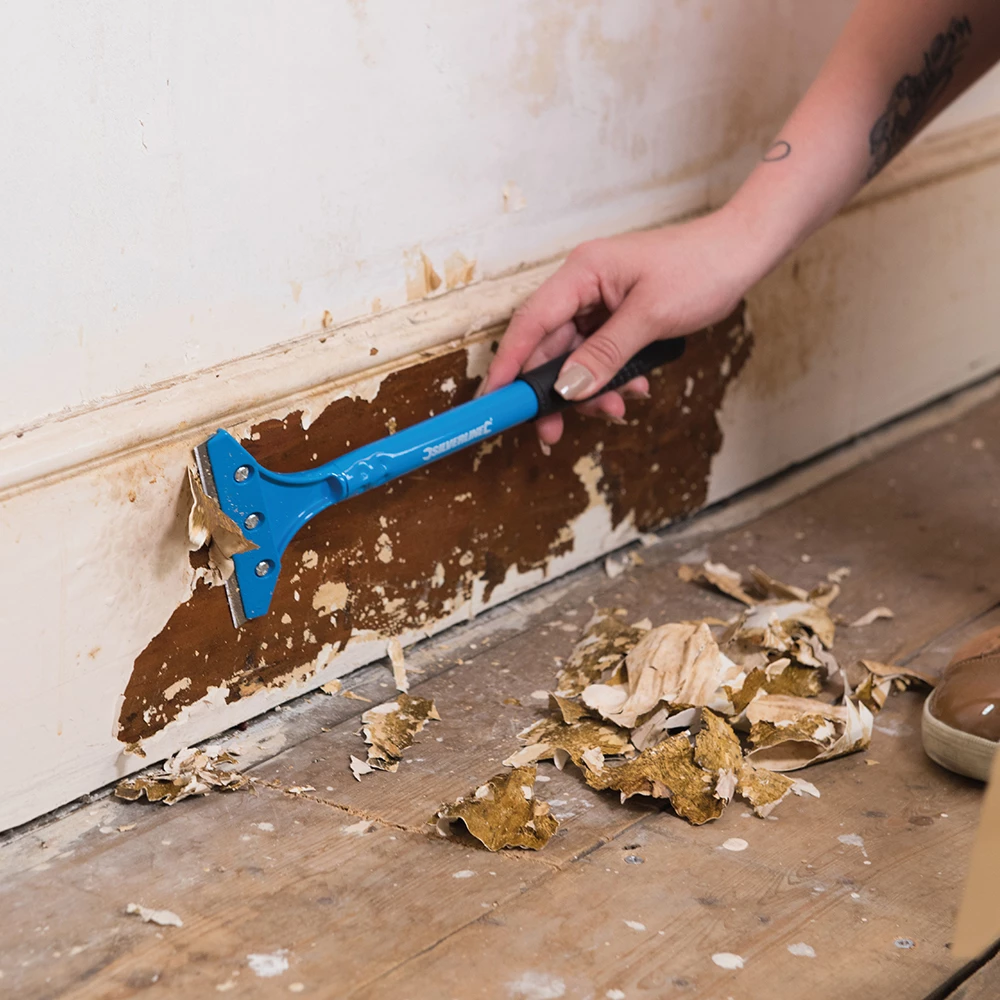
- Heavy Duty Scraper for Paint and Epoxy Resin Removal: For safely lifting loose, flaking resin and paint prior to repairs.
- Resin Fibreglass Repair Kit – Complete Polyester Resin and Hardener Set: Used to repair and reinforce damaged or missing roof sections.
- CROP 2K Fiberglass Putty – 750 ml + Hardener: Ideal for filling cracks, dents, and providing a smooth base for priming and painting.
- A suitable primer and UV-resistant roof paint for exterior resin surfaces.
- Protective gloves, mixing tools, brushes, masking tape, and sanding paper (various grits).

Preparing Damaged Resin Roofs for Repair
Preparation is the key to effective restoration. Before you begin repairs or painting, methodically remove all loose resin and previous paint using the right tools. Remember, patience in this early stage prevents future issues with adhesion or leaks. Clean with a natural degreaser to create the ideal base for your repairs and finish.
Step 1: Remove Loose and Crumbling Resin
The first priority is to prepare your RV roof by eliminating all compromised areas. Using a Heavy Duty Scraper for Paint and Epoxy Resin Removal, gently scrape away flaking resin and paint, working carefully to avoid gouging the intact substrate. Ensure you also clear any loose debris around seams, edges, or fixtures for a clean working area.
Once the visibly loose material is removed, gently sand edges of exposed patches to feather them into the surrounding surface. Completely remove loose material to avoid repair failures later on.


Step 2: Clean and Degrease the Roof Surface
Even if the surface looks clean, hidden oils or contaminants can prevent new repairs from bonding. Apply your Strong Technical Degreaser for Resin Projects – 100% Natural Formula with a clean cloth, making sure to treat all areas including seams and corners.
Allow time for the degreased surface to dry fully before proceeding. Silicone or oil residues can prevent adhesion, so cleaning is critical before moving on to any repairs.
Step 3: Patch and Reinforce Damaged Areas
For sections where the resin has crumbled or holes have appeared, use the Resin Fibreglass Repair Kit – Complete Polyester Resin and Hardener Set. Follow the kit’s instructions to mix and apply the polyester resin and fibreglass matting, firmly reinforcing weak spots or gaps. Position the fibreglass to slightly overlap the damaged area, ensuring full coverage and waterproof sealing.
Allow each repair stage to cure thoroughly as per the manufacturer’s guidelines before handling or introducing further layers.


Step 4: Fill and Smooth the Surface
After structural repairs have set, smaller cracks, shallow dents, or surface irregularities can be addressed using CROP 2K Fiberglass Putty – 750 ml + Hardener. Carefully spread the putty, pressing it into voids and feathering the edges for a seamless blend. Once cured, sand down the area to produce a flush, even finish that’s ready for priming.
Aim for a uniform, smooth surface. Heavy sanding may cause more damage to fragile areas, so use light pressure and fine-grit paper near repairs.
Step 5: Prime and Paint for Long-Lasting Protection
Once all repairs are fully cured and sanded, apply a primer designed for resin or composite surfaces. Priming ensures proper adhesion and longer paint life. When the primer is dry, finish with a high-quality, UV-resistant paint suitable for exterior resin roofing.
Follow manufacturer drying times and application instructions for each product. Ensure the roof is fully dry before painting to avoid bubbling or peeling paint.
Use suitable primer and paint—this is crucial for weather resistance and long-term durability.

Tips and Common Mistakes to Avoid
- Work on a dry, mild day to avoid moisture or humidity impacting repairs and paint cure times.
- Always use protective gloves and masks where necessary.
- Don’t rush through drying and curing phases—patience yields the best results.
- When in doubt, consult the product instructions or seek expert advice for specialist requirements.
Troubleshooting: If repairs don’t bond or paint peels, check for inadequate surface prep or trapped moisture. Re-clean and repeat the affected step as needed.
Achieving Smooth, Lasting Results
Investing time in proper repair and finishing ensures years of weather protection. Each repair—whether patching holes or applying putty—should be allowed to cure fully before the next step. Use compatible materials for filling and painting, and always work in good weather conditions for the best outcome.

- Resin Fibreglass Repair Kit – Complete Polyester Resin and Hardener SetResin Fibreglass Repair Kit offers strong structural reinforcement with clear instructions, suitable for various repair needs.
- CROP 2K Fiberglass Putty – 750 ml + Hardener£15.85CROP 2K Fiberglass Putty is a polyester putty designed for repairs and creating a smooth surface before priming and painting.
- Heavy Duty Scraper for Paint and Epoxy Resin Removal£8.95Heavy Duty Scraper offers a lightweight design with a razor-sharp blade suitable for paint removal tasks under the specified theme.
 Strong Technical Degreaser for Resin Projects – 100% Natural FormulaOriginal price was: £10.95.£9.45Current price is: £9.45.The Strong Technical Degreaser is designed for cleaning resin projects and various surfaces with a 100% natural formula suitable for this theme.
Frequently Asked Questions
Can you repair a crumbling resin RV roof?
Yes, crumbling resin RV roofs can be repaired by removing loose material and using specialist repair kits to restore integrity before repainting.
What should you use to clean a resin RV roof before repairs?
Use a dedicated technical degreaser designed for resin projects to remove grease, silicone, or other residues without damaging the surface.
What is the best way to fill cracks in an RV roof?
Use a polyester fibreglass repair kit for large or structural cracks, and a fibreglass-reinforced putty for smaller holes and smoothing.
Can you use any paint on resin RV roofs?
No, always choose a primer and UV-resistant exterior paint formulated for resin or composite surfaces to ensure lasting results.
Why do repairs fail on resin RV roofs?
Most failures happen due to poor surface preparation, trapped moisture, or using the wrong materials. Follow each step closely for success.
How long should you let the roof cure before repainting?
Curing time depends on the materials used. Refer to the kit or putty instructions and allow extra time in cool or humid conditions.
Is it safe to DIY repair a resin RV roof?
With the right tools, materials, and safety precautions, most repairs and repainting can be done DIY. When in doubt, consult a specialist.