 Free shipping on orders over £29,85
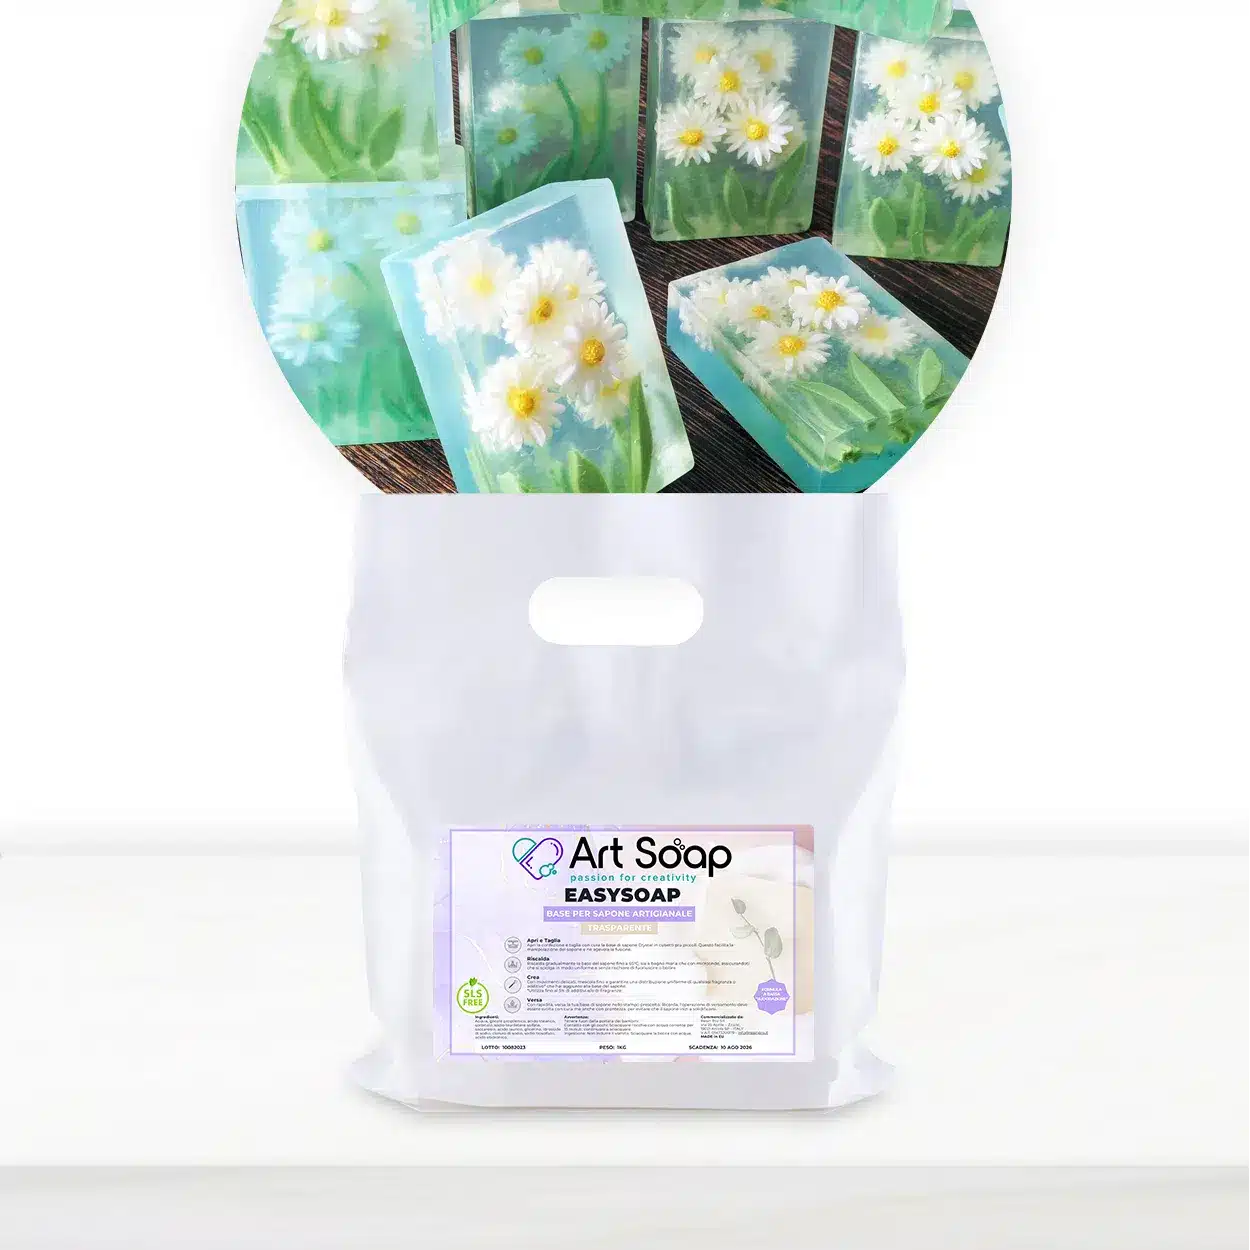
“Art Soap” – Handmade Soap Base 1kg
 Available, ready for shipping
 Order now to receive your product between Wednesday 24 June and Thursday 25 June.
 Shipping from £1.97 - Free for orders over £29.85
£12.45
Tue, 23. Jun
Ordered
Tue, 23. Jun - Wed, 24. Jun
Order Shipped
Wed, 24. Jun - Thu, 25. Jun
Estimated delivery
Discover the Art Soap Base, perfect for creating handmade soaps for your DIY projects. This versatile soap base is suitable for both beginners and experienced crafters.
- 🌱 Safe Ingredients: Dermatologically tested for gentle skin care.
- 🔥 Heat Resistant: Formulated to withstand humid conditions.
- 🎨 Easy to Use: Just heat, colour, scent, and mould!
Description
Description
💥 About
The Art Soap Base is a versatile and safe soap base tailored for creating stunning handmade soaps. Whether you’re a beginner or a seasoned crafter, this product enables you to unleash your creativity in unique DIY soap creations.
💡 Key Benefits
- 🌿 Natural Ingredients: Made with dermatologically tested components, ensuring a gentle touch on the skin and free from harmful substances.
- 🔥 Heat and Moisture Resistant: Formulated to withstand humid and hot climates, making it ideal for crafting long-lasting decorative soaps.
- 🎨 Customisable: Effortlessly colour and scent your soap base to match your style.
- 🧼 Easy to Use: Simply melt in a water bath or microwave and pour into your chosen mould!
☝🏽 Useful Information
- Product Weight: 1kg of soap base for multiple crafting projects.
- Versatile Uses: Perfect for making decorative soaps and various cosmetic projects.
🎯 Who It’s For
- – DIY soap makers
- – Craft enthusiasts
Get creative with the Art Soap Base and explore the endless possibilities for your soap crafting projects! 💖
Instruction
Instruction
Crafting Your Own Handmade Soap: A Creative and Fragrant Journey
Making hand-made soap is not only a practical skill but also an enjoyable and artistic endeavor. With a few simple steps and a dash of creativity, you can produce beautiful and personalized soap bars. In this guide, we’ll walk you through the basic soap-making process and provide some creative ideas to elevate your soap-making game.
Materials
Before you embark on your soap-making adventure, gather the necessary products to ensure a smooth and enjoyable process. Here’s a comprehensive list of the items you’ll need:
1. Soap base
Choose between a white or translucent soap base depending on your desired soap colour and transparency. The soap base serves as the foundation for your creation, so select a high-quality option for the best results.
2. Soap colourants and fragrances
3. Soap moulds
4. Double Boiler (for better results)
5. Thermometer (for checking soap temperature)
6. Additives (for example, herbs flowers, clays, oatmeal etc)
Step-by-step guide
Before you dive into the world of soap crafting, set up a dedicated workspace. Lay down a plastic drop cloth or old newspapers to protect your work surface. Ensure that your silicone mould is clean, and all materials are within easy reach. This preparation will make the process smoother and more enjoyable.
1. Prepare the Soap Base: Cut the soap base into small, uniform chunks to facilitate even melting. Place the chunks in a microwave-safe container or use a double boiler for melting. Gradually heat the soap base in short intervals, stirring between each one. Aim for a temperature of around 50°C to prevent overheating and air bubble formation.
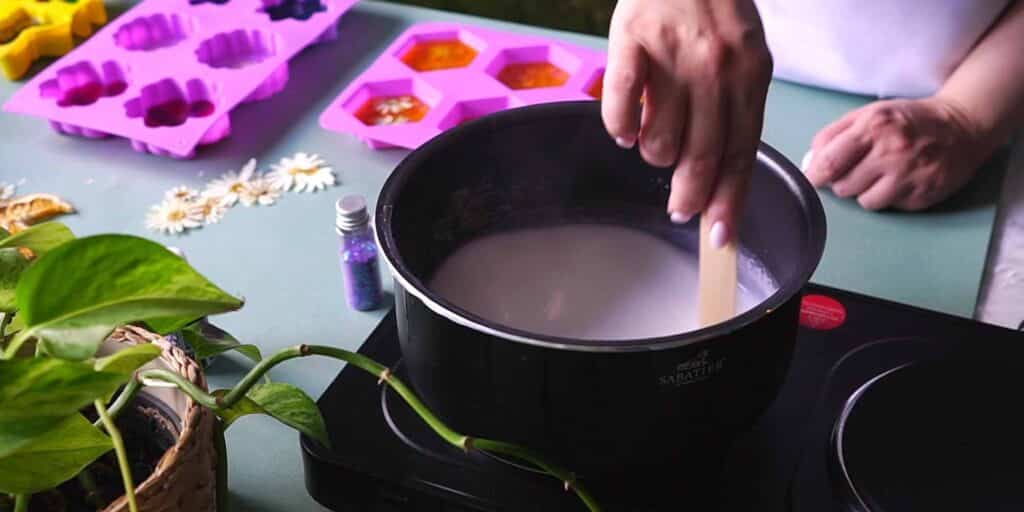
2. Enhance with Fragrance and play with Colours: Once the soap base is fully melted, it’s time to add fragrance. Add approximately 0.5-1.5% of the total soap base weight in fragrance oil. This step not only provides a pleasant aroma but also adds a personal touch to your soap. Divide the melted soap base into separate containers for each colour you want to use. Add soap colourants to achieve your desired hues. Stir well to evenly distribute the colour throughout the soap base.
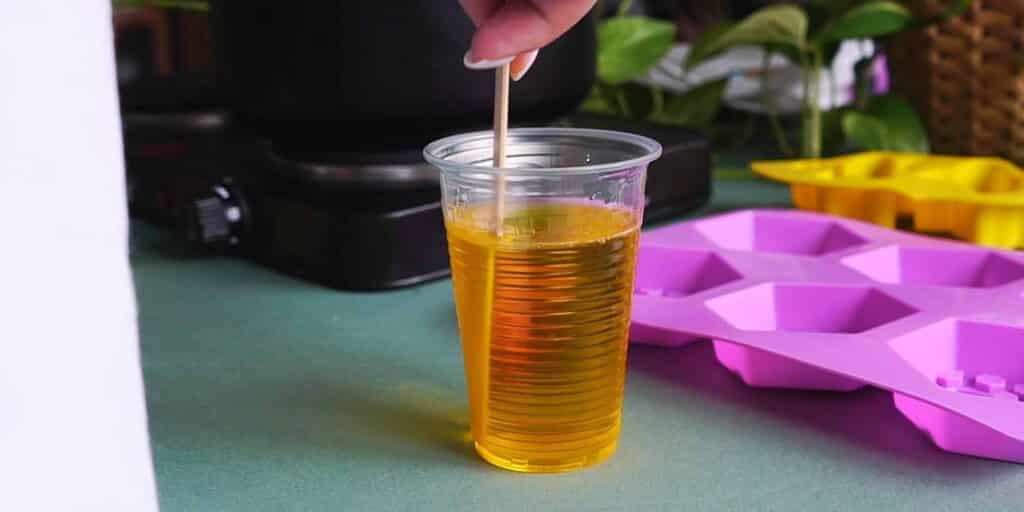
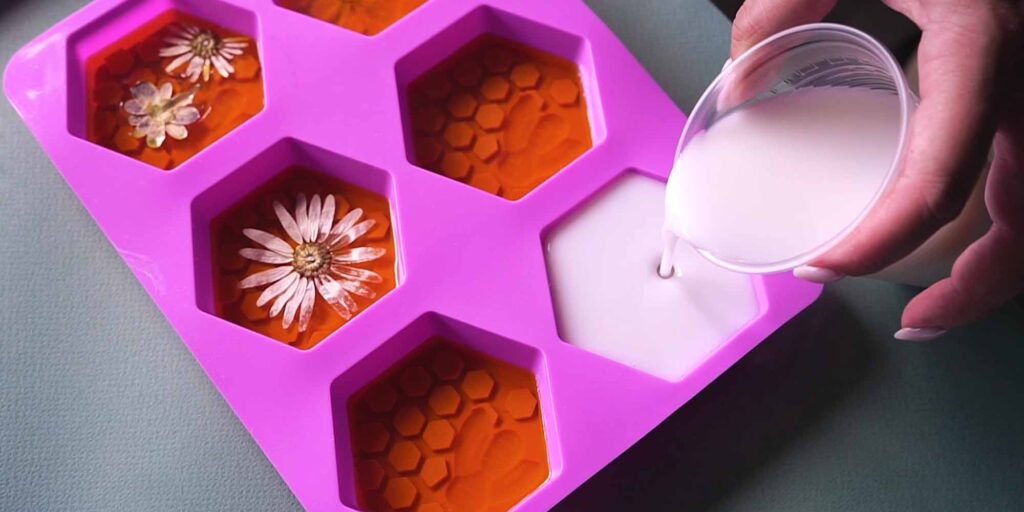
3. Create Beautiful Designs: Pour the coloured soap into the silicone mould. Whether you opt for multi-coloured layers, solid colours, or a combination, this is where your creativity shines. Experiment with different pouring techniques to achieve unique patterns. Lightly tap the mould on your work surface to release any trapped air bubbles. For a smooth finish, spray rubbing alcohol on the soap’s surface. You can also add any decorative objects you want. For example, dried flowers, herbs, glitter etc.
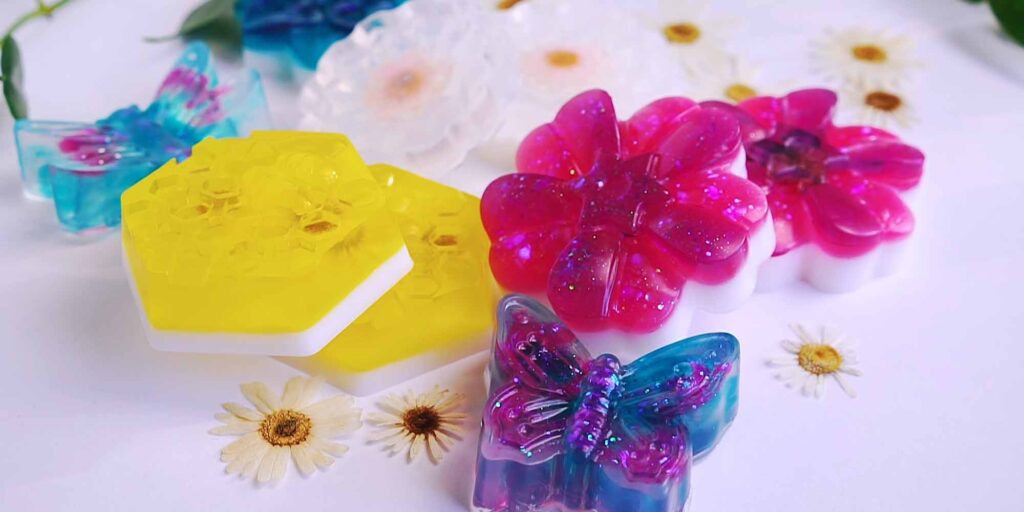
4. Patience is a Virtue: Allow the soap to cool and harden. This process may take a few hours, so resist the temptation to check on it too soon. Leave it undisturbed until it’s completely solid. Once the soap has fully hardened, carefully pop it out of the silicone mould. Use a knife to trim any rough edges or excess soap.
Creative Ideas to Elevate Your Soap-Making
Now that you’ve mastered the basics, here are some creative ideas to take your handmade soap to the next level:
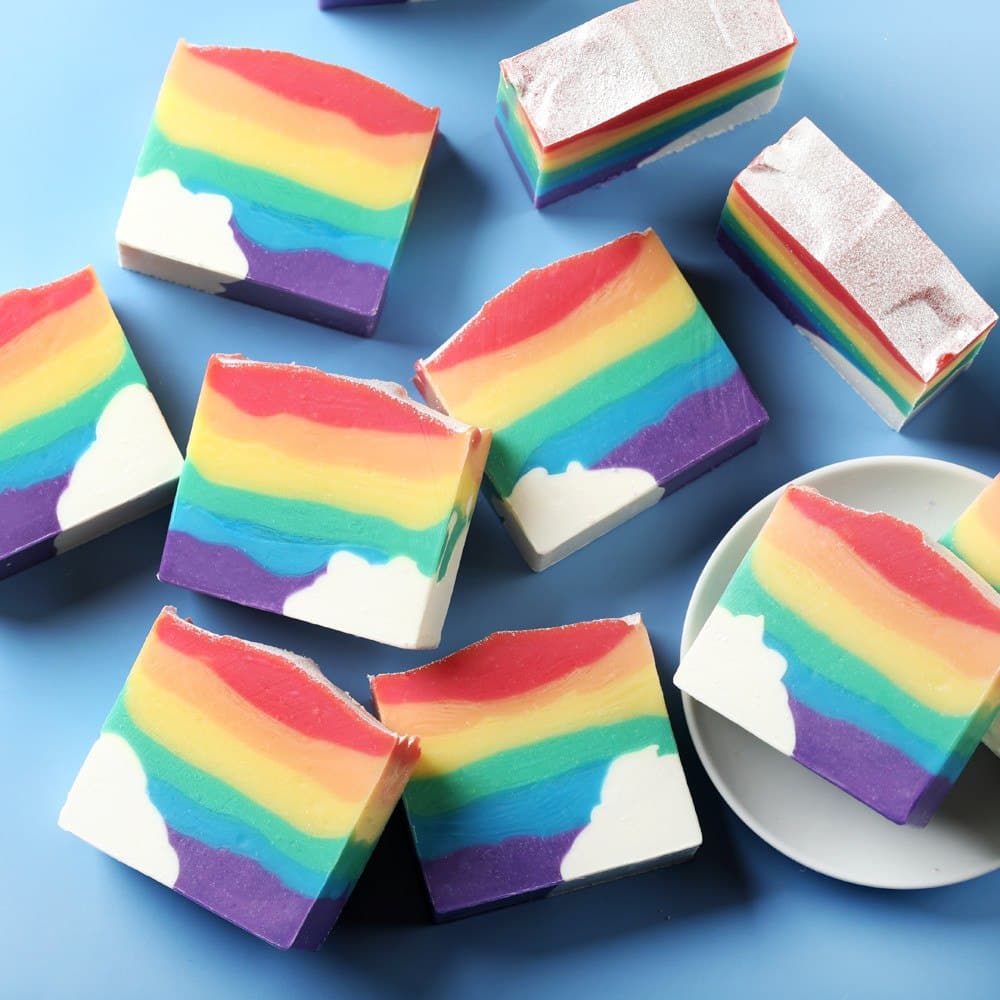
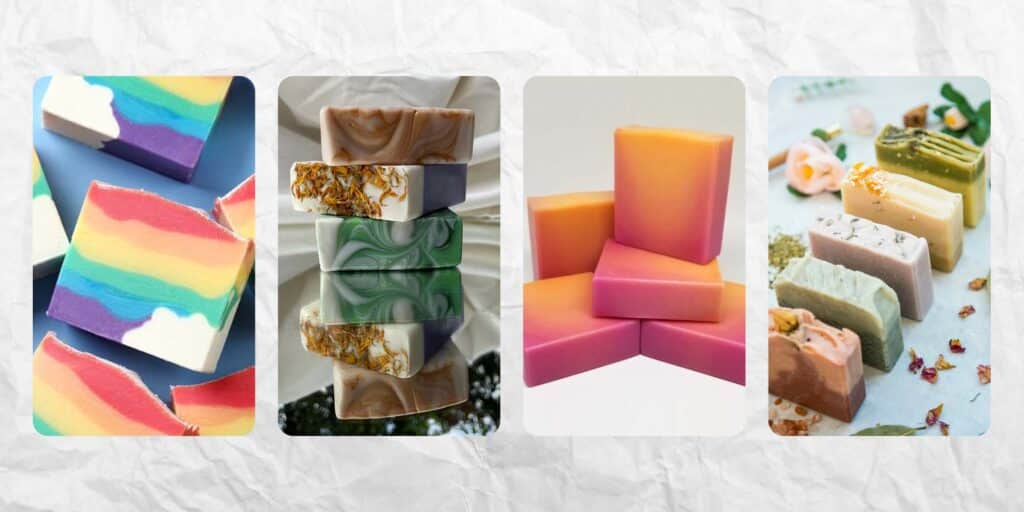
1.Layered Rainbow Soap: Create a soap bar with colourful layers, resembling a vibrant rainbow. Pour each layer separately, allowing them to cool and harden before adding the next.
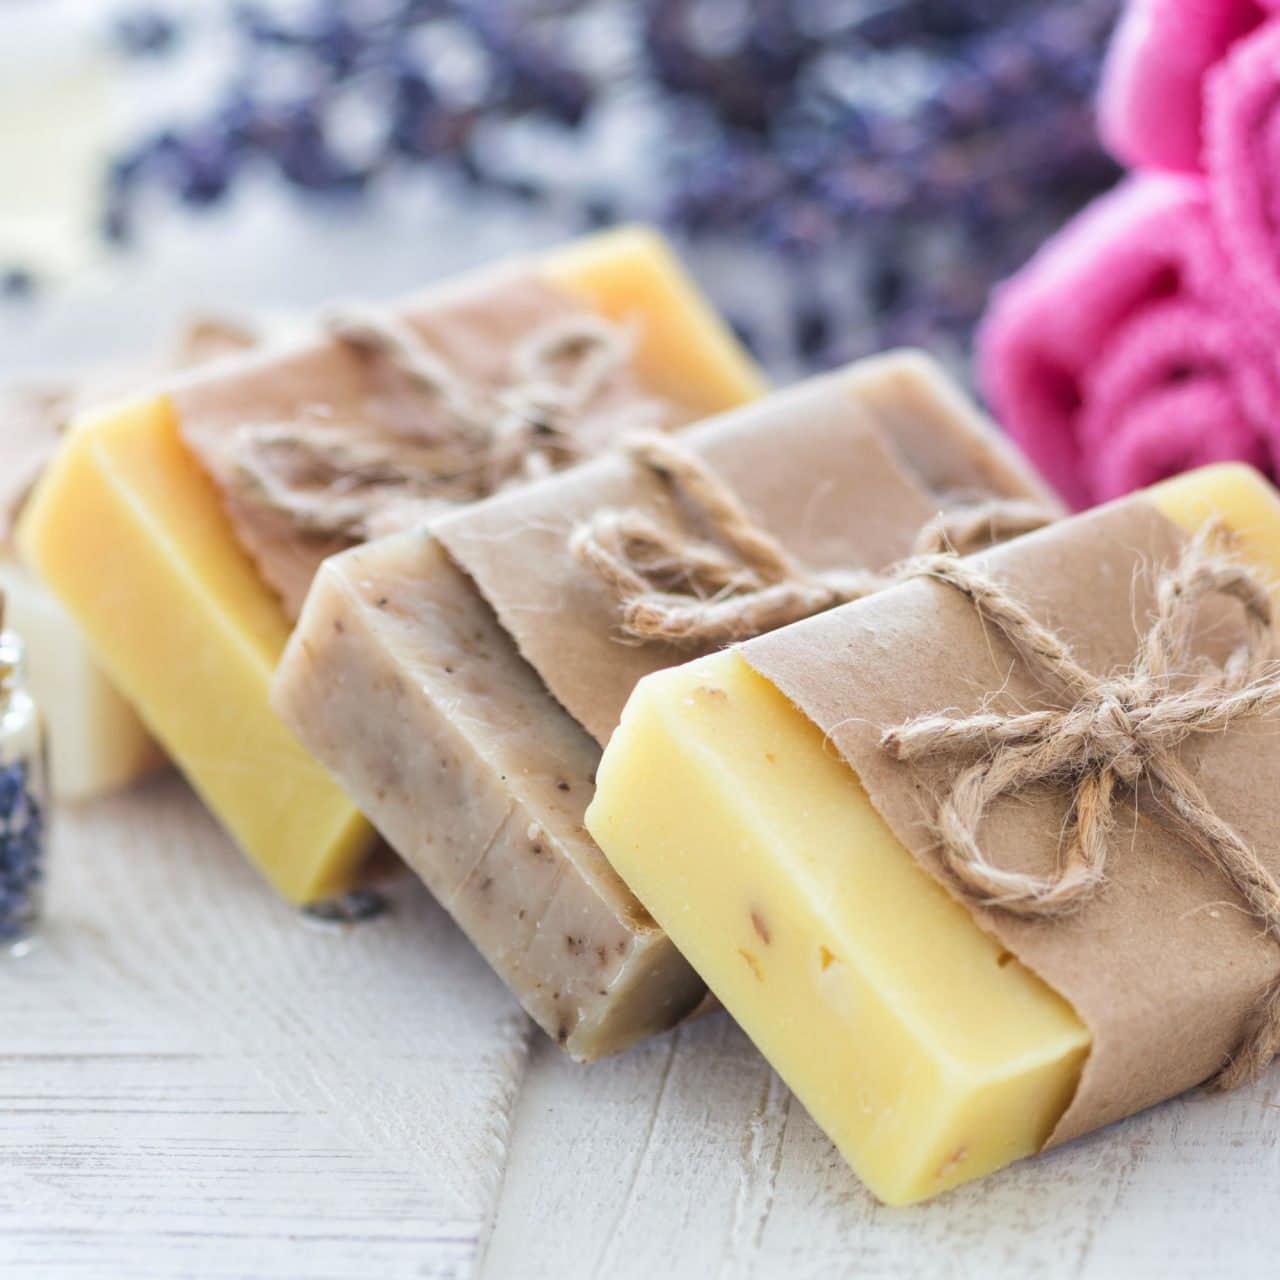
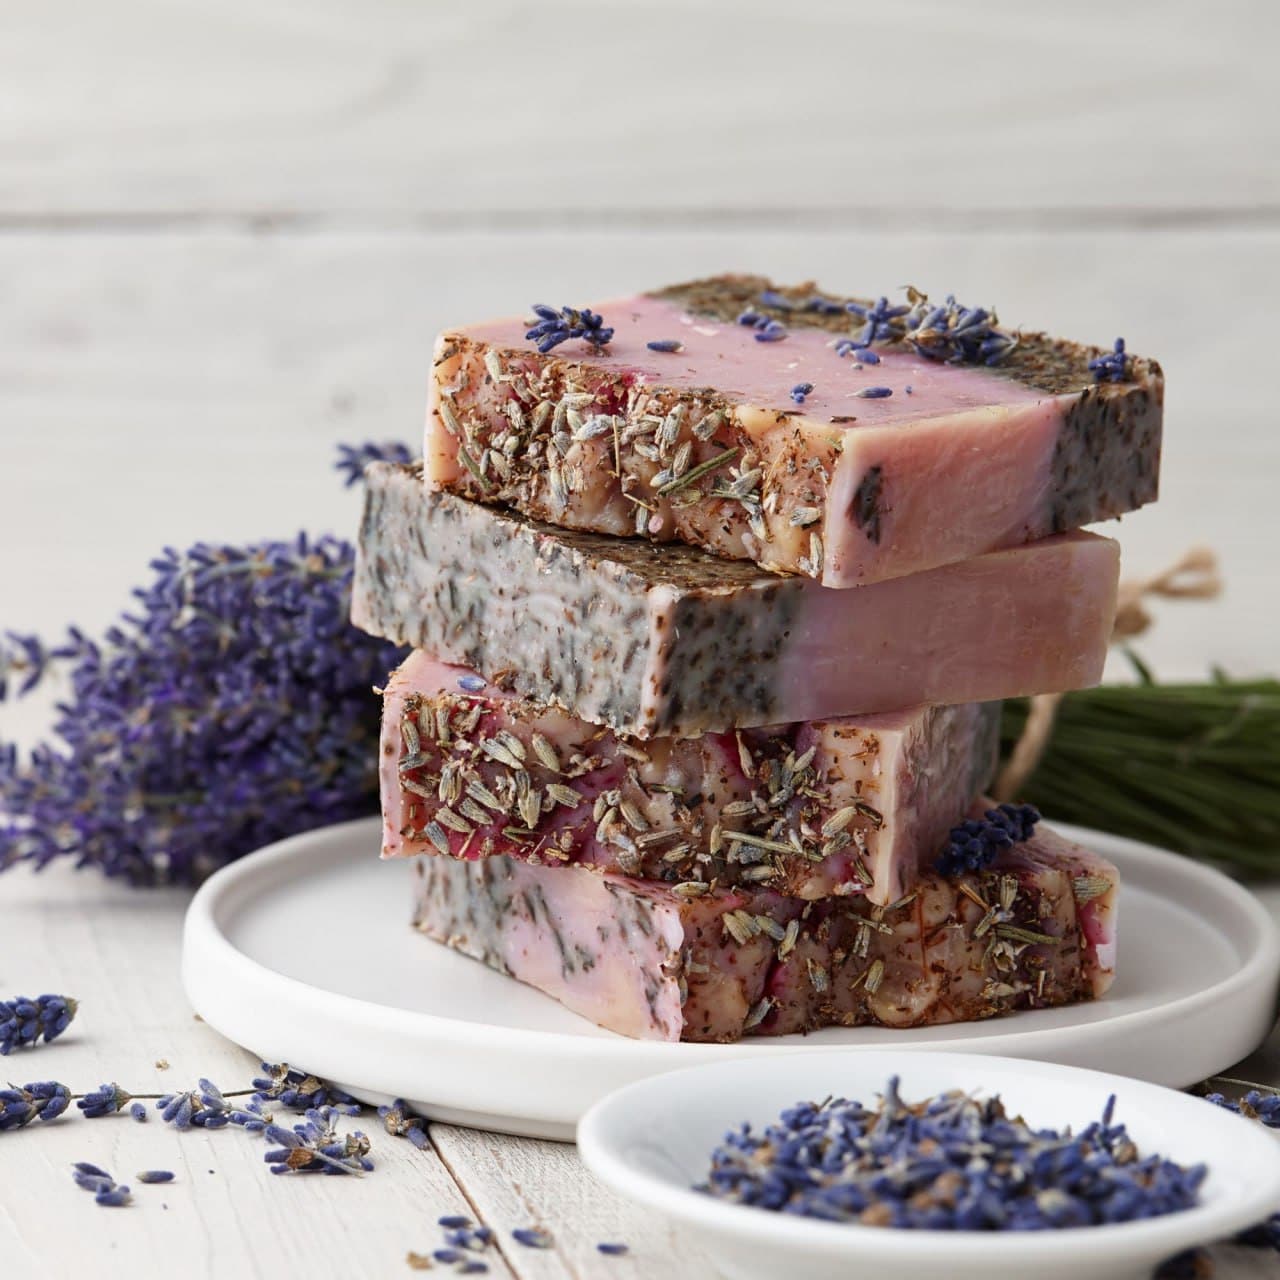
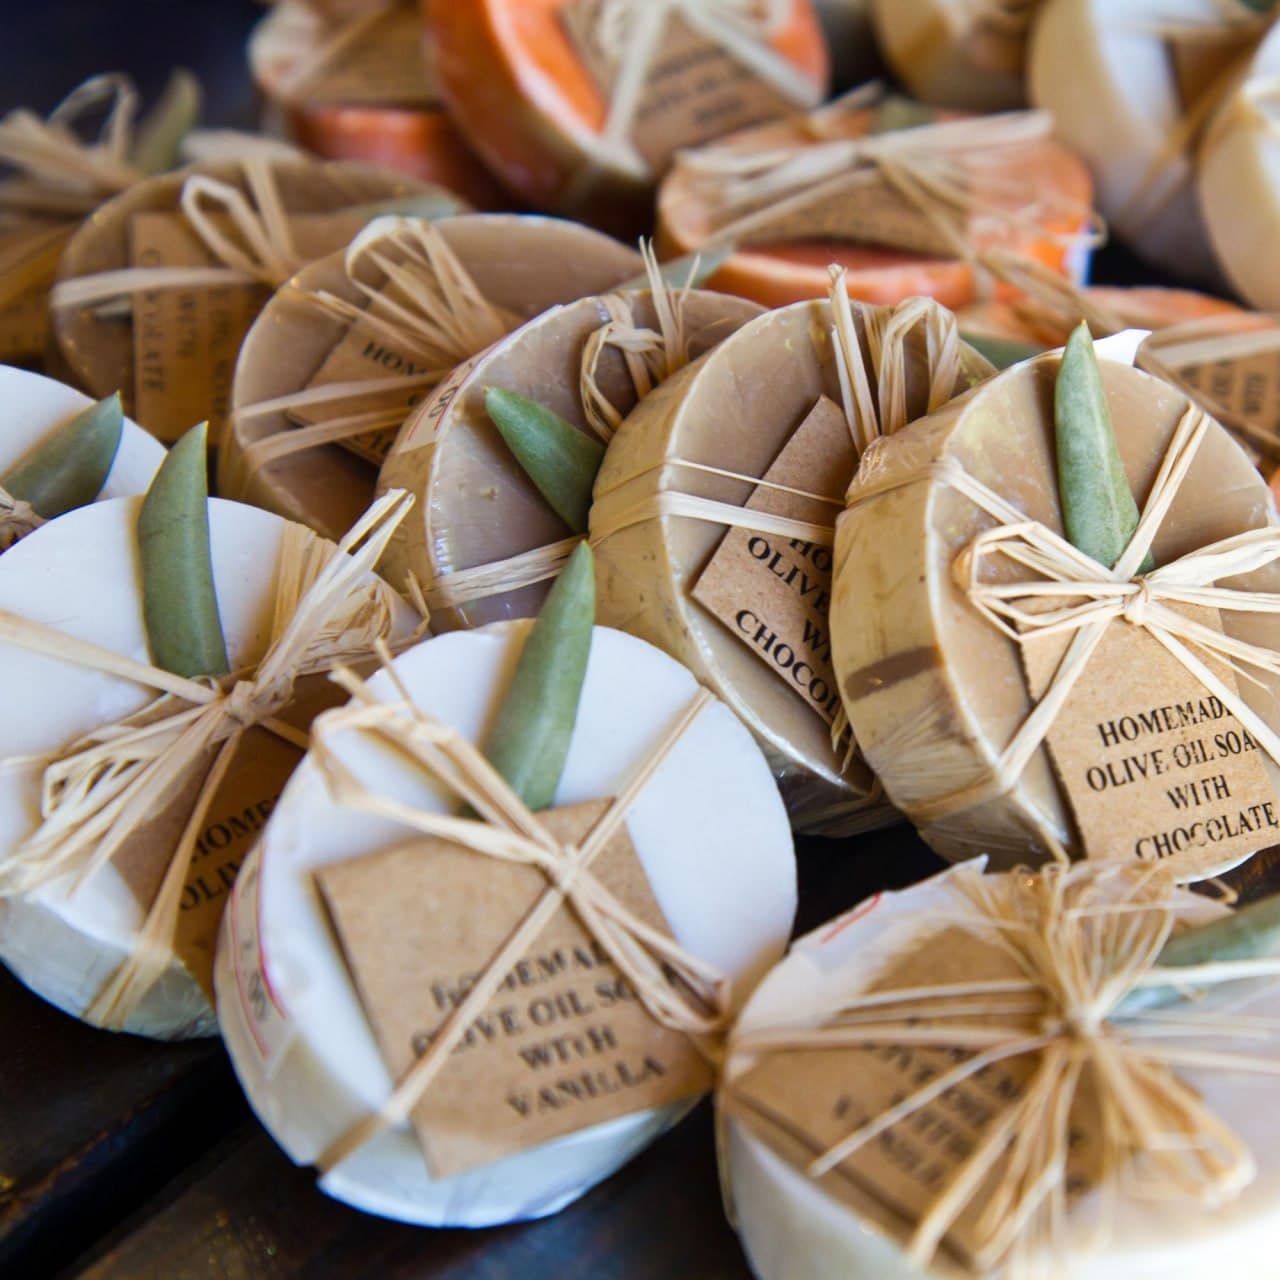
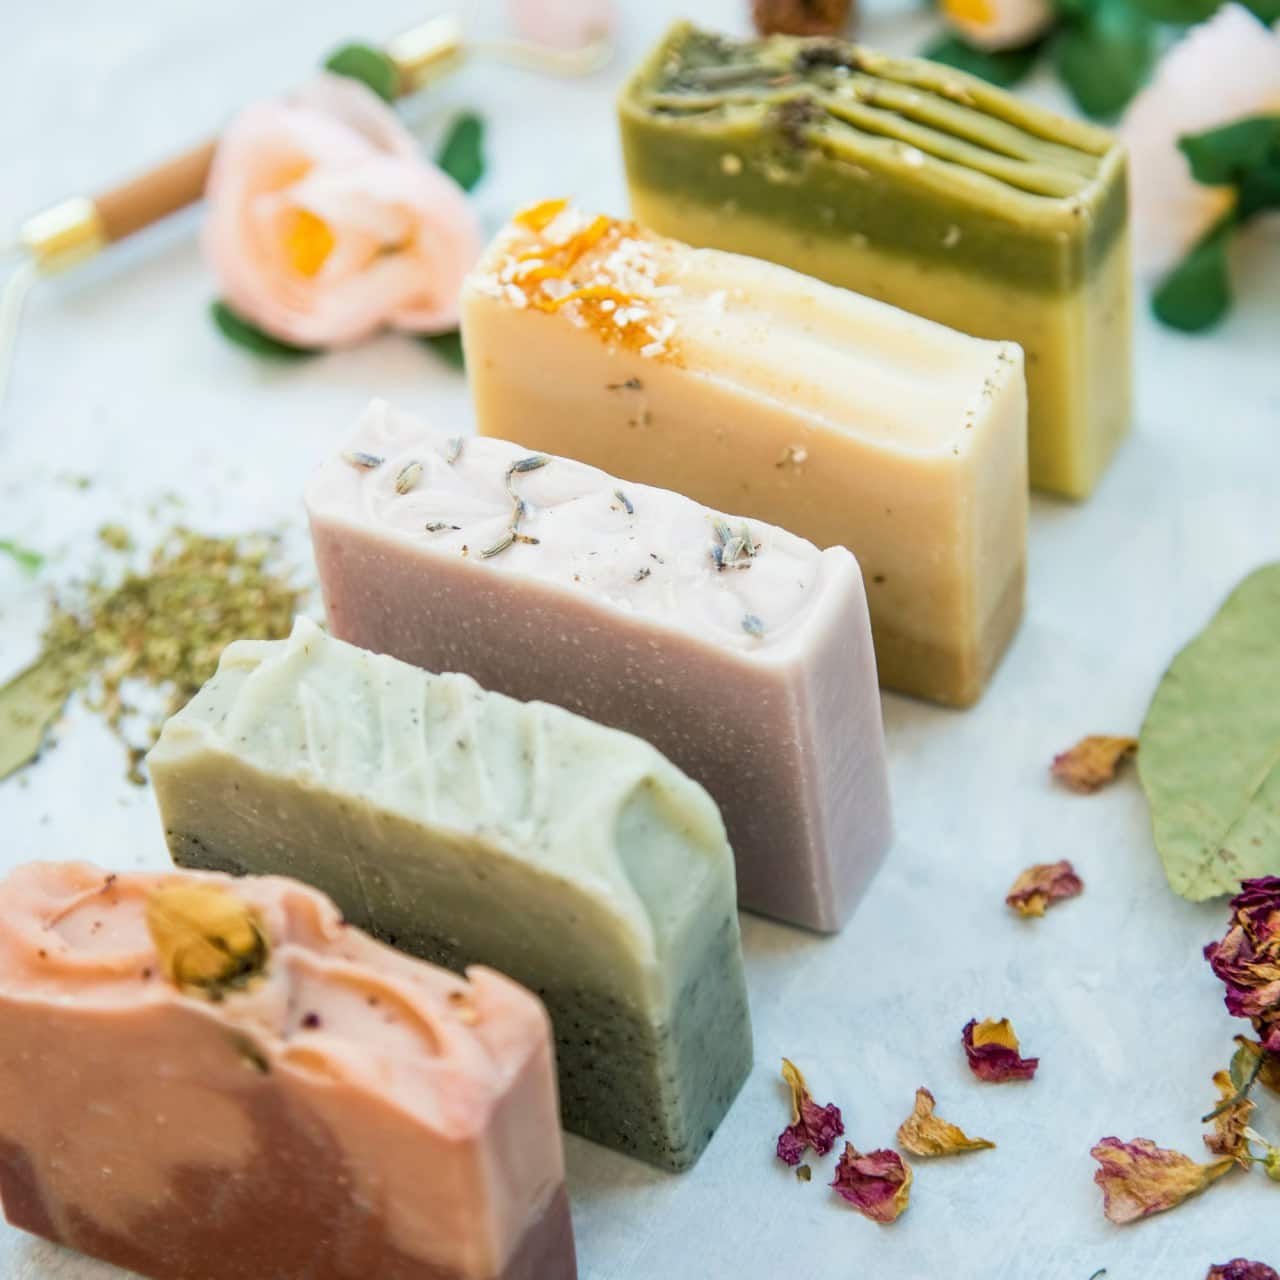
2.Botanical Embeds: Embed dried flowers, herbs, or petals into your soap for a natural and organic appearance. Lavender, rose petals, or calendula can add a touch of beauty to your creation.
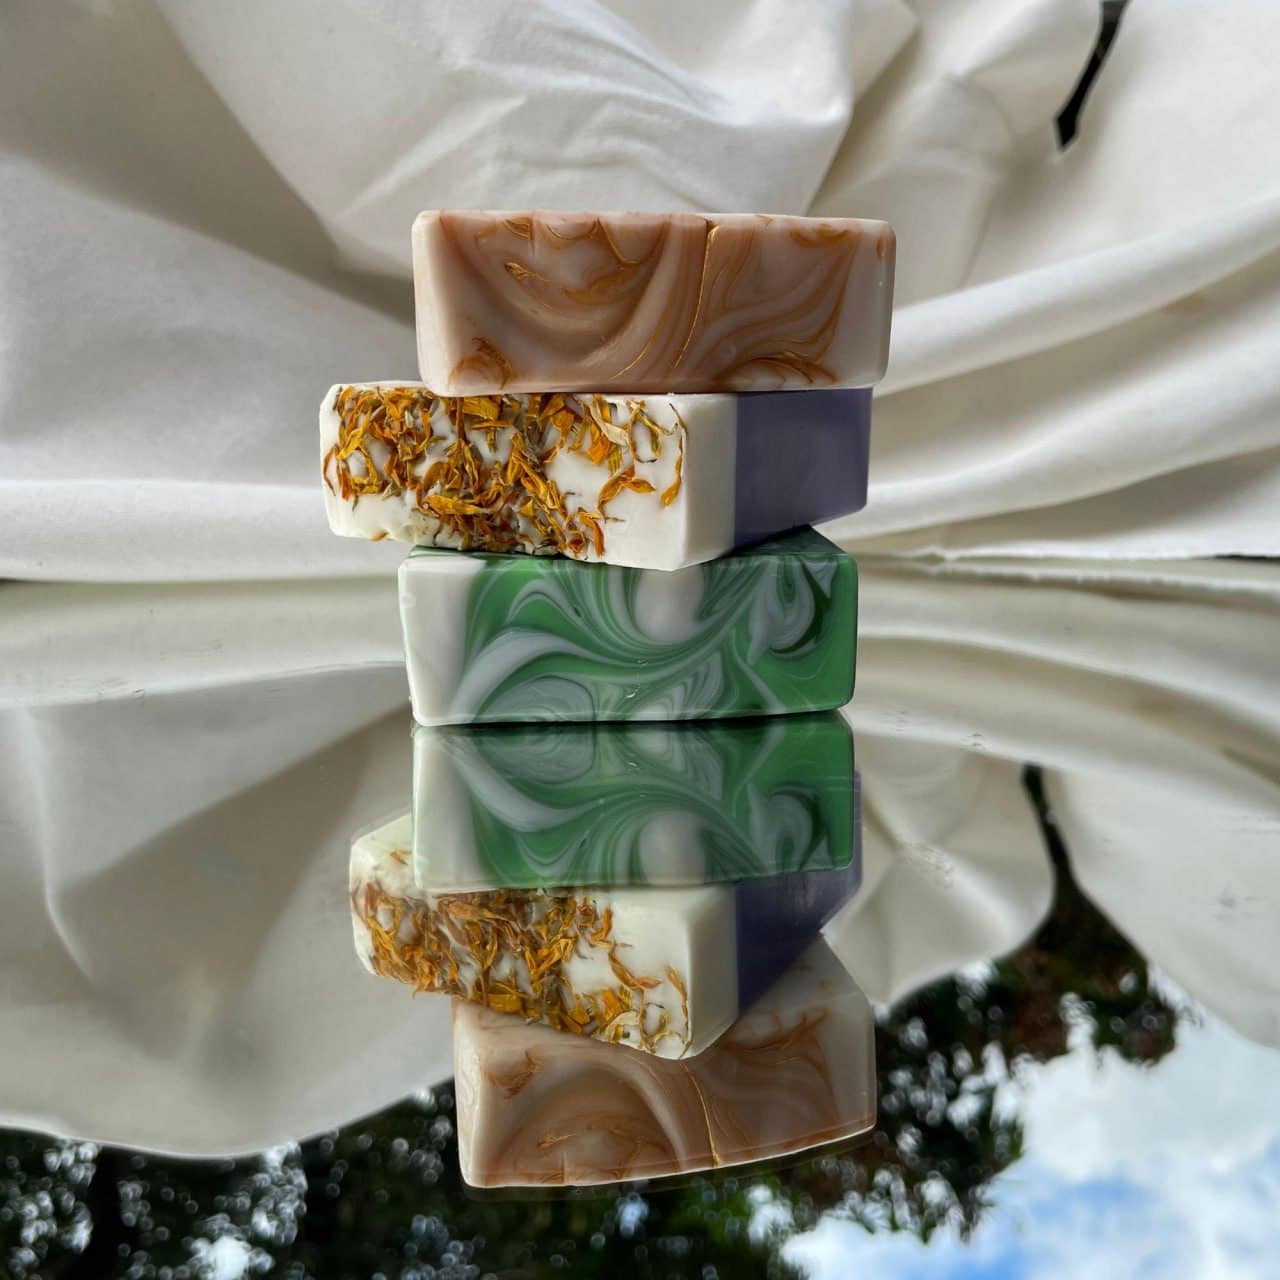
3.Marbleized Swirls: Achieve a marbled look by pouring different coloured soap into the mould and using a skewer to swirl the colours together before they fully harden.
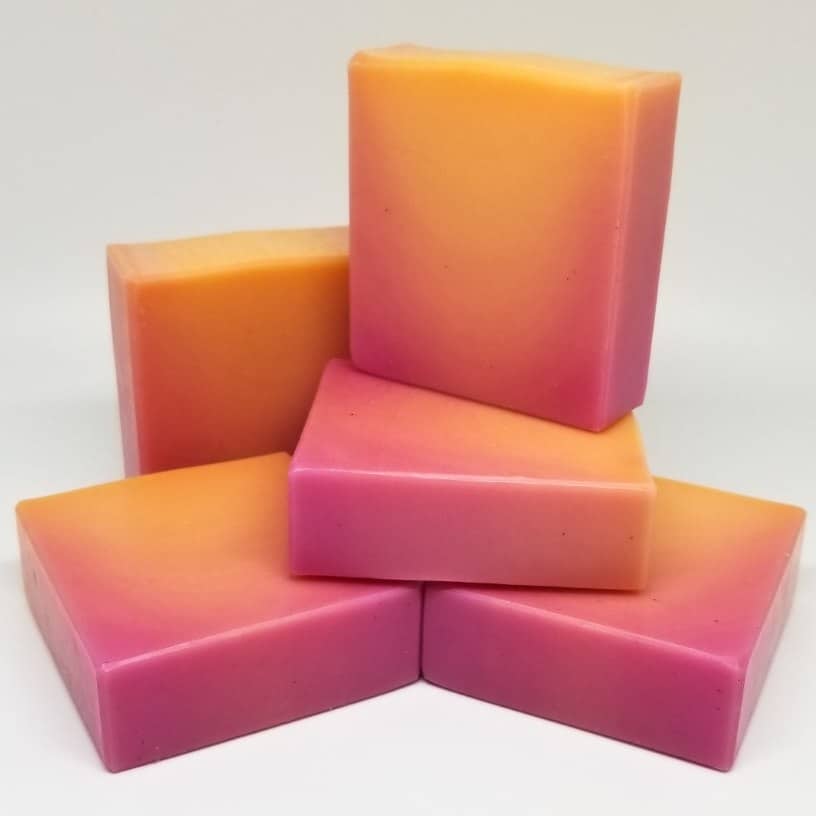
4.Ombre Effect: Create a soap bar with a gradual colour shift, like an ombre. Start with a light colour at the top and transition to a deeper shade at the bottom for a visually stunning effect.
5.Exfoliating Scrubs: Add natural exfoliants like coffee grounds, oatmeal, or poppy seeds to your soap for a gentle scrubbing effect that also adds texture and an extra layer of luxury.
With these creative ideas and a bit of experimentation, you can turn your soap-making hobby into an art form. Enjoy the process, and don’t be afraid to let your imagination run wild as you craft personalized, fragrant, and visually appealing soap bars.
Reviews
Reviews
COD:
SOAP-TRA