 Free shipping on orders over £29,85


How to make objects with transparent resin?
Creating objects with transparent resin opens up endless creative possibilities for functional art, jewellery, and decorative pieces. This comprehensive guide covers every stage of the process, helping beginners and advanced makers alike achieve crystal-clear results while avoiding common pitfalls.
Clear step-by-step guide to casting professional transparent resin objects

What You’ll Need
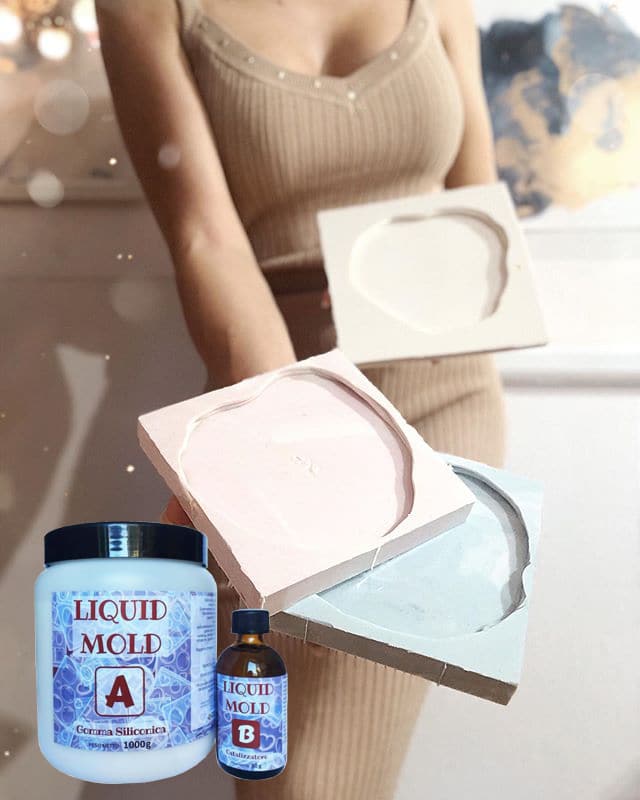
- “Liquid Mould” – Casting Liquid Silicone Rubber, 5-40 Shores, Bi-Component A+B – for mould making if you want custom shapes
- “Trasparente” – Multipurpose Clear Epoxy Resin for Casting – Up to 2cm – ideal for clear castings up to 2cm thick
- “EpoxyTable 5-Five” – Deep Pour Epoxy Resin for Tables and Large Projects – Up to 5cm – for deeper cast transparent objects
- “Epoxytable 10-Ten” – Deep Pour Epoxy Resin for Tables, Up to 10cm Casting – for very thick or large projects
- Mixing containers, stirring sticks, gloves, eye protection
- Release spray (for pre-made moulds, optional)
- Level working surface
See Transparent Resin Creations In Action
Watch clear resin objects being cast and revealed in step-by-step project images. These visuals can help you understand each stage, from mould setup to final polish, ensuring your results are as stunning as your inspiration.

Step 1: Prepare Your Mould
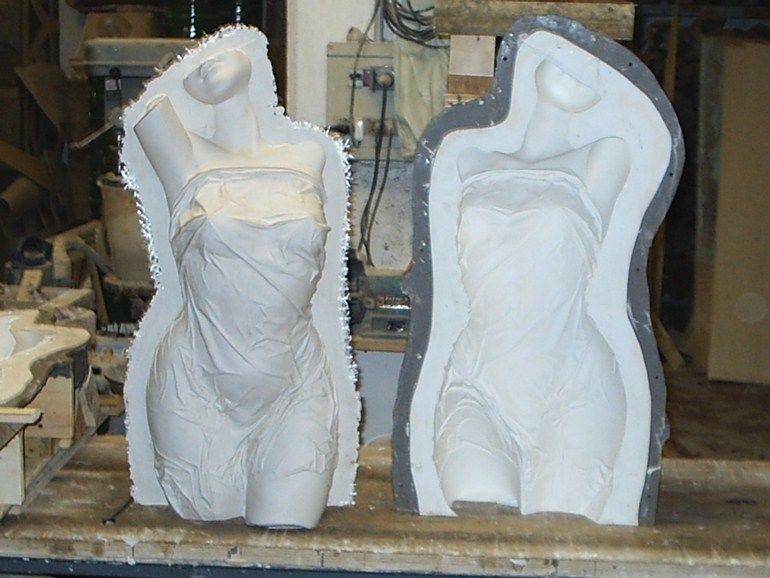
The first step in creating clear resin objects is selecting or making the right mould. Silicone moulds are preferred for their flexibility and detail. If you want a custom shape, consider creating your own using “Liquid Mould” – Casting Liquid Silicone Rubber, 5-40 Shores, Bi-Component A+B. Ensure the mould is thoroughly clean and dry before use; any dust or moisture can impact the final clarity of your piece. For complex or delicate shapes, a high-quality silicone mould will help achieve crisp details and easy demoulding.
Step 2: Mix the Resin Carefully
Refer to your chosen resin’s instructions for exact mixing ratios. Accurate weighing and combining Part A and Part B is critical. Mixing too quickly can introduce bubbles, so stir carefully and scrape the sides and bottom of your mixing vessel. Accurate measurements and thorough mixing prevent curing failures. If you’re working with layers thicker than 2cm, select a product such as “EpoxyTable 5-Five” – Deep Pour Epoxy Resin for Tables and Large Projects – Up to 5cm or “Epoxytable 10-Ten” – Deep Pour Epoxy Resin for Tables, Up to 10cm Casting, following their specific deep-pour recommendations.
Let mixed resin rest a few minutes to allow trapped air to escape before pouring. If you see surface bubbles, a quick pass with a heat gun or hairdryer (on low) can help eliminate them. Do not overheat, as this can cause yellowing or create uneven cures.
Step 3: Pour and Cast the Resin
Slowly pour the mixed resin into your mould, starting at one corner and allowing it to flow naturally to reduce the risk of air pockets. For projects requiring maximum clarity, pour in a thin, continual stream and avoid unnecessary agitation. Avoid pouring layers too thick for your chosen resin: for example, “Trasparente” – Multipurpose Clear Epoxy Resin for Casting – Up to 2cm should not exceed 2cm per layer, while specialised deep-pour epoxies can go thicker as directed.
Ensure your workspace is level to keep the resin surface even. Once poured, cover your piece with a clean box or dome to prevent dust from settling while curing.

Step 4: Cure and Demould Your Object
Allow the resin to cure undisturbed for the full recommended time—often 24–72 hours depending on product and thickness. Curing at temperatures between 20–25°C is ideal. Patience here delivers the best, clearest results. Once fully set, gently remove your object; silicone moulds simplify this step. Let your resin cure fully before demoulding to avoid fingerprints, cloudy finishes, or warping.
After demoulding, edges can be sanded or polished as needed for a professional finish.

Tips, Troubleshooting, and Common Mistakes
Maintain a dust-free working environment and avoid high humidity, which can cause surface blemishes. Pour within the suggested thickness range for your resin, as excessive thickness may cause overheating or incomplete cures. Always measure accurately and mix thoroughly. If bubbles persist, a light heat application usually helps, but overuse can damage clarity. For the best shine, allow each layer to set before adding more, and wait for the resin to fully harden before sanding or polishing.
Project Finish Inspiration
Completed transparent resin objects showcase the versatility of these techniques, from jewellery to home decor. Study cured surfaces, edge finishing, and presentation ideas to elevate your own transparent resin creations.
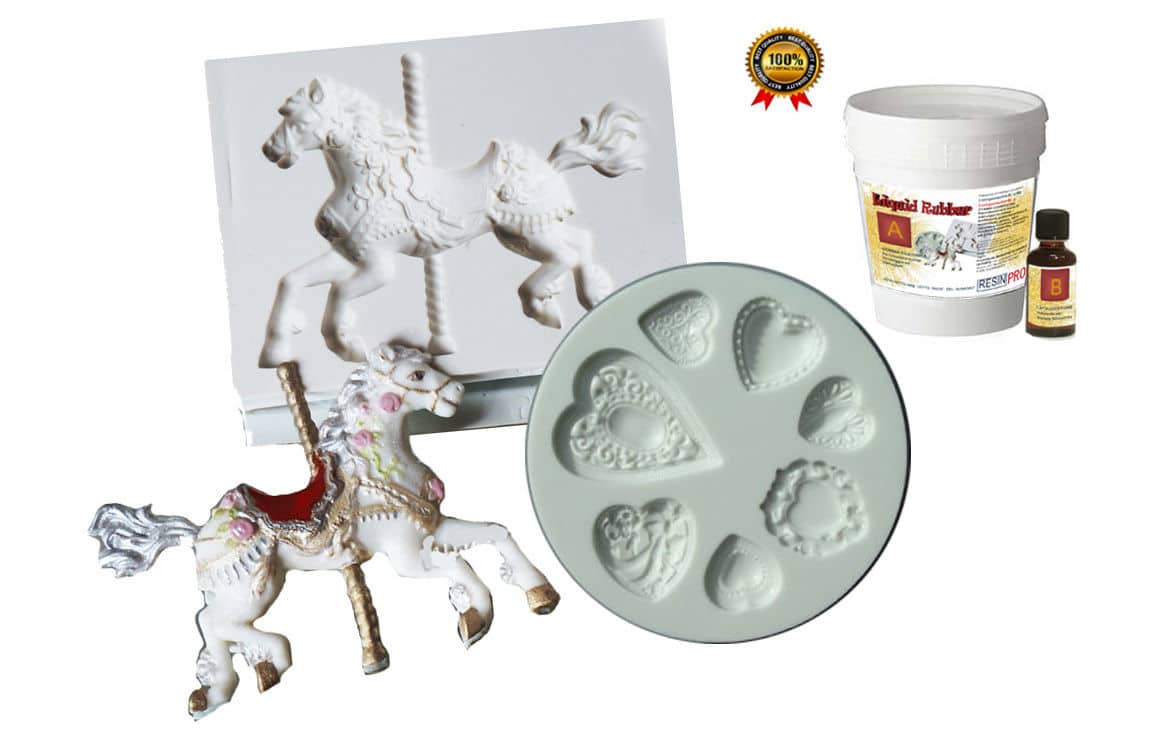
- "Liquid Mould" – Casting Liquid Silicone Rubber, 5-40 Shores, Bi-Component A+BPrice range: £13.45 through £368.85"Liquid Mould" is a casting liquid silicone rubber designed for making moulds with fine detail and undercuts.
- “Epoxytable 10-Ten” – Deep Pour Epoxy Resin for Tables, Up to 10cm CastingPrice range: £33.85 through £334.85“Epoxytable 10-Ten” is designed for creating tables and other projects requiring deep pouring of up to 10cm with non-yellowing clarity.
 "Trasparente" – Multipurpose Clear Epoxy Resin for Casting – Up to 2cmPrice range: £8.45 through £948.85The "Trasparente" resin offers a clear, glossy, self-levelling finish suitable for detailed casting projects up to 2cm thickness.
 "EpoxyTable 5-Five" – Deep Pour Epoxy Resin for Tables and Large Projects – Up to 5cmPrice range: £16.85 through £1,099.85"EpoxyTable 5-Five" is suitable for deep pour projects such as tables, offering transparency and resistance in line with the theme.
Frequently Asked Questions
Can you cast thick clear resin objects?
Yes, provided the correct deep pour resin is used and thickness limits per product are followed for safe curing and clarity.
How do you avoid bubbles in transparent resin?
Mix gently, pour slowly, and use a heat gun or torch briefly to burst surface bubbles after pouring.
What moulds are best for transparent resin?
Flexible silicone moulds work best for clear resin casting, making demoulding easy and reducing damage risk.
Why is my cast resin cloudy?
Cloudiness can result from incomplete mixing, moisture, or dust contamination. Careful preparation and accurate mixing help ensure clarity.
How long does transparent resin take to cure?
Cure times vary by product and thickness, but most transparent resins require at least 24–72 hours for best results.
What is the best depth per layer for clear resin?
Follow the specific resin's guidelines—many recommend up to 2cm per layer, but deep pour resins support thicker pours up to 10cm.