 Free shipping on orders over £29,85


How to Make Epoxy Resin Moulds at Home
Step-by-step guide for creative and reliable DIY resin mould making


Unlock the potential of your resin projects by learning how to make custom epoxy resin moulds at home. Whether you want to shape coasters, frame sentimental keepsakes, or bring unique artistic ideas to life, mastering homemade moulds opens up endless creative opportunities. This in-depth guide covers the essentials of design, materials, and best practices for producing high-quality, reusable moulds—perfect for both complete beginners and advanced crafters seeking professional results right from their home workspace.
What You’ll Need
- “Pure Mould” – Translucent Liquid Silicone Rubber for Mould Making: Translucent platinum based liquid silicone rubber suitable for mould making with compatibility for various casting materials.
- “Silicone Circle Mould” – For Creating with Epoxy Resin, Ø 20cm: A reusable, heat-resistant silicone mould designed for shaping decorative epoxy resin pieces.
- “Silicone Hexagons Mould” – For Creating with Epoxy Resin – 24x21cm: Flexible, reusable silicone mould designed for creating decorative epoxy resin pieces and coasters.
- Mixing container and stirring stick
- Modelling clay or shape template (for DIY moulds)
- Gloves and workspace protection (disposable or reusable)
- Resin and chosen inclusions (flowers, photos, etc.)

Inspiration for Mould Making
Take cues from nature or interior trends—geometric patterns, botanicals, or minimal round shapes can make your resin projects feel professionally designed. Personalise decorative pieces by embedding flowers, photos, or meaningful trinkets into your resin moulds for unique results.

Step 1: Design and Prepare Your Mould Shape
Begin by deciding what you want your final resin object to look like—coaster, trinket tray, jewellery shape, or an ornamental piece. If you’re making a custom mould, sculpt your shape from non-porous modelling clay or use an existing template. Work in a clean, dust-free area as any imperfections will be reproduced in the finished cast. Ensure that the original shape or template is free of moisture and well supported on its base to prevent silicone leakage during pouring.
For ready-to-use options, consider pre-made silicone moulds or hexagonal moulds for standard shapes and reliable performance.
Step 2: Mix and Pour Your Silicone Rubber
If you are making a custom mould, select a platinum-based silicone rubber designed for casting, such as the “Pure Mould” – Translucent Liquid Silicone Rubber for Mould Making. Prepare your silicone by measuring equal parts of the base and the catalyst as per the Follow precise mixing ratios instructions—usually 1:1 by weight or volume. Stir slowly but thoroughly to minimise air bubbles and achieve a uniform colour.
Slowly pour the silicone mixture over your prepared shape, starting from one corner and allowing it to flow naturally. This method helps avoid air entrapment around details. Tap the mould gently or use a vibrating surface to release any trapped bubbles before the silicone cures.
Step 3: Allow to Cure and Remove the Mould
Once poured, cover your setup and leave the silicone undisturbed. Typical curing times range from 3 to 8 hours for fast-setting products, but always refer to the product’s specific guidelines. Ambient temperature can affect curing speed—warmer temperatures generally accelerate the process.
After curing, gently flex the silicone away from the prototype or template. Plan demoulding with care to avoid tearing, especially around fine details. Inspect for success—your new mould should be flexible, tear-resistant, and finely detailed for future resin casting projects.

Step 4: Clean, Store, and Use Your Mould
Before using your new mould with resin, wash it lightly with soapy water to remove any residue, and leave it to dry completely. Silicone moulds are highly reusable if properly maintained. Store in a flat, cool spot away from sunlight, ensuring no heavy items press on the shape to prevent distortion.
When ready, pour your prepared epoxy resin and includes (such as dried flowers or keepsakes) directly into the mould. Follow your resin product’s recommended work time and demoulding period. Clean moulds after each use without harsh solvents to maintain their non-stick surface and flexibility.

Tips and Common Mistakes When Making Resin Moulds at Home
Choose high-quality silicone rubber formulated for resin casting to guarantee smooth demoulding and detail reproduction. Avoid using acidic release agents or rough handling during unmoulding, as this may tear the silicone. Premade silicone moulds take the guesswork out of resin casting if you want quick and consistent results.
Keep your workspace organised and start with small batches to avoid wasting material while you build confidence. If you notice persistent bubble issues, stir more gently or consider additional degassing steps. Always check curing temperatures and times based on your silicone to prevent incomplete setting and flexible failures.
Showcase: Finished Resin Mould Projects
From colourful coasters to sentimental display items, finished epoxy resin pieces made from homemade and ready-moulds can enhance any home or office. Show off your creations by gifting or decorating your space.

- "Pure Mould" – Translucent Liquid Silicone Rubber for Mould MakingPrice range: £22.85 through £158.85"Pure Mould" is a translucent liquid silicone rubber designed for mould making compatible with various materials including epoxy resins.
- "Silicone Circle Mould" – For Creating with Epoxy Resin, Ø 20cm£12.85Flexible silicone mould suitable for creating coasters and decorative resin objects at home or in a professional setting.
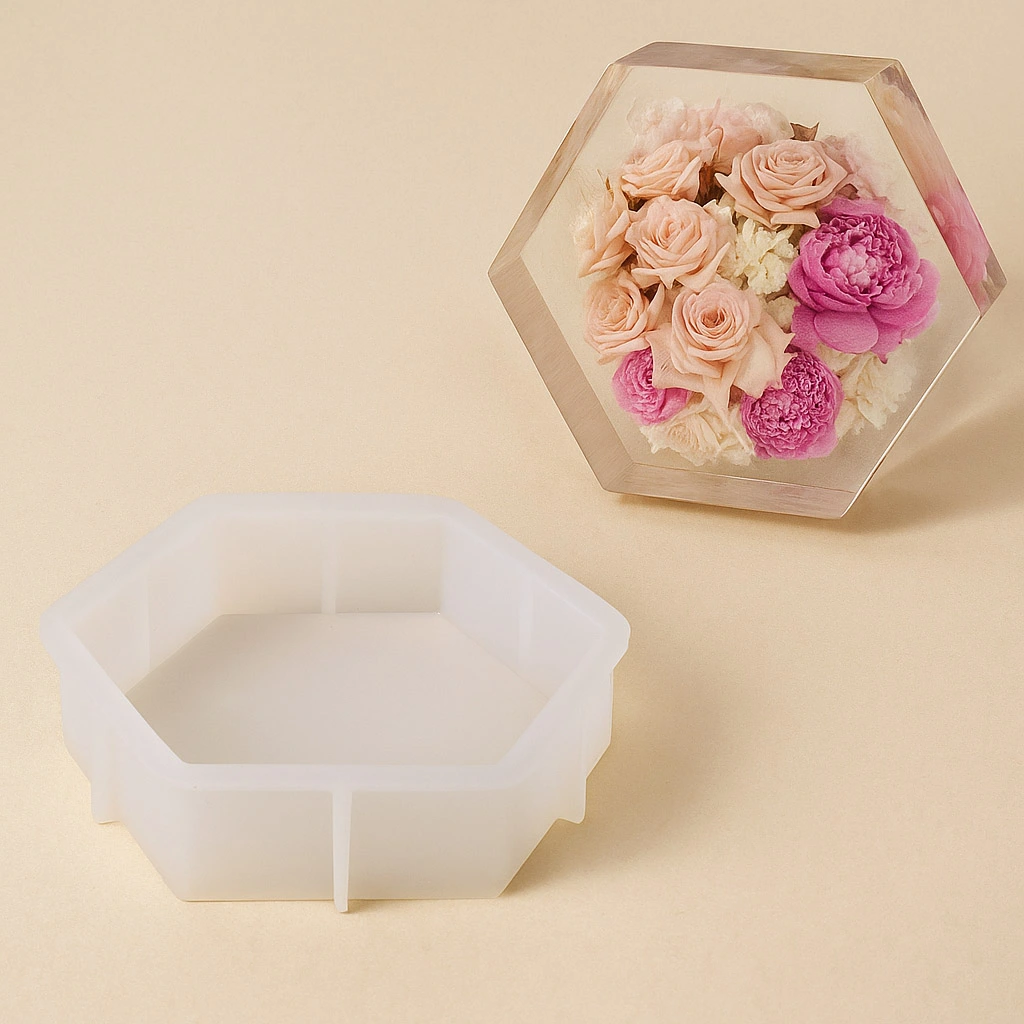 "Silicone Hexagons Mould" – For Creating with Epoxy Resin – 24x21cm£12.85Silicone Hexagons Mould is suitable for making decorative resin objects and coasters with personal keepsakes.
Frequently Asked Questions
What type of silicone is best for making epoxy resin moulds at home?
A platinum based, translucent silicone rubber is ideal as it allows you to observe detail and ensures flexible, reusable moulds.
How can I remove my resin cast from the mould without damaging it?
Flex the silicone gently and plan demoulding carefully, especially around intricate areas, to avoid tears and preserve fine details.
How can I avoid bubbles in my resin or silicone moulds?
Stir your mixture slowly to limit air introduction and pour from one spot to allow the material to flow naturally.
Can I reuse my silicone mould for multiple resin projects?
Yes, with proper cleaning and storage, silicone moulds are highly reusable and can provide many casts without deformation.
How long should I let the silicone cure before using for resin casting?
Refer to your silicone's instructions but generally allow 3–8 hours for full curing before demoulding and using.