 Free shipping on orders over £29,85


How to embed a flower in a resin cube
Preserve natural beauty inside clear, elegant resin keepsakes.

Preserving a delicate flower inside a clear resin cube is a wonderful way to capture a moment from nature, create one-of-a-kind art, or craft unique gifts and décor. This guide will take you through every step of the process, helping you achieve consistently impressive and long-lasting results.
What You’ll Need
- Natural Dried Flowers for Art Projects and Epoxy Resin Casting – fully prepared for resin embedding
- “Cube Mould” – Square Silicone Mould for Resin, 8.5×8.5cm
- “EpoxyTable 5-Five” – Deep Pour Epoxy Resin for Tables and Large Projects – Up to 5cm or “Trasparente” – Multipurpose Clear Epoxy Resin for Casting – Up to 2cm, depending on your cube size
- Mixing cups and sticks
- Nitrile gloves
- Protective work area covering
- Toothpick or craft stick (for air bubbles)
- Optional: Tweezers for delicate positioning

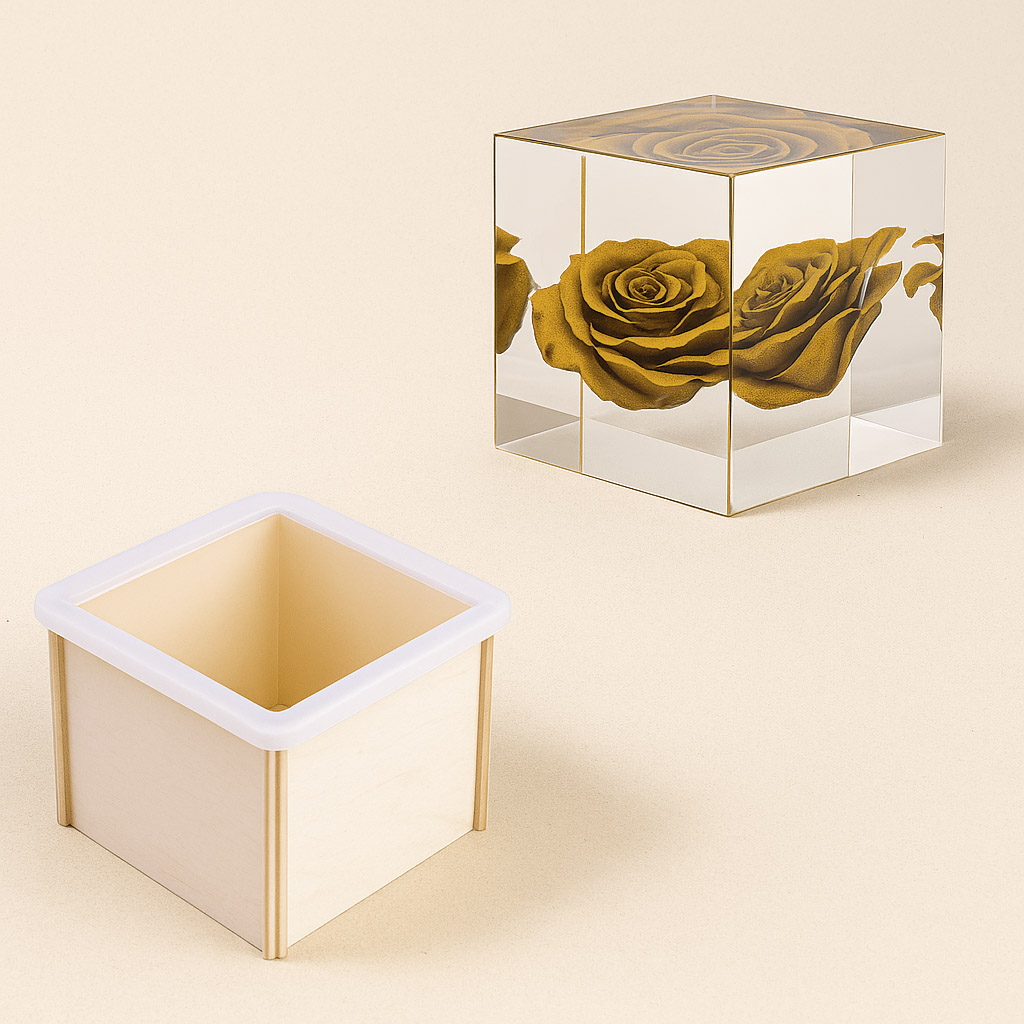
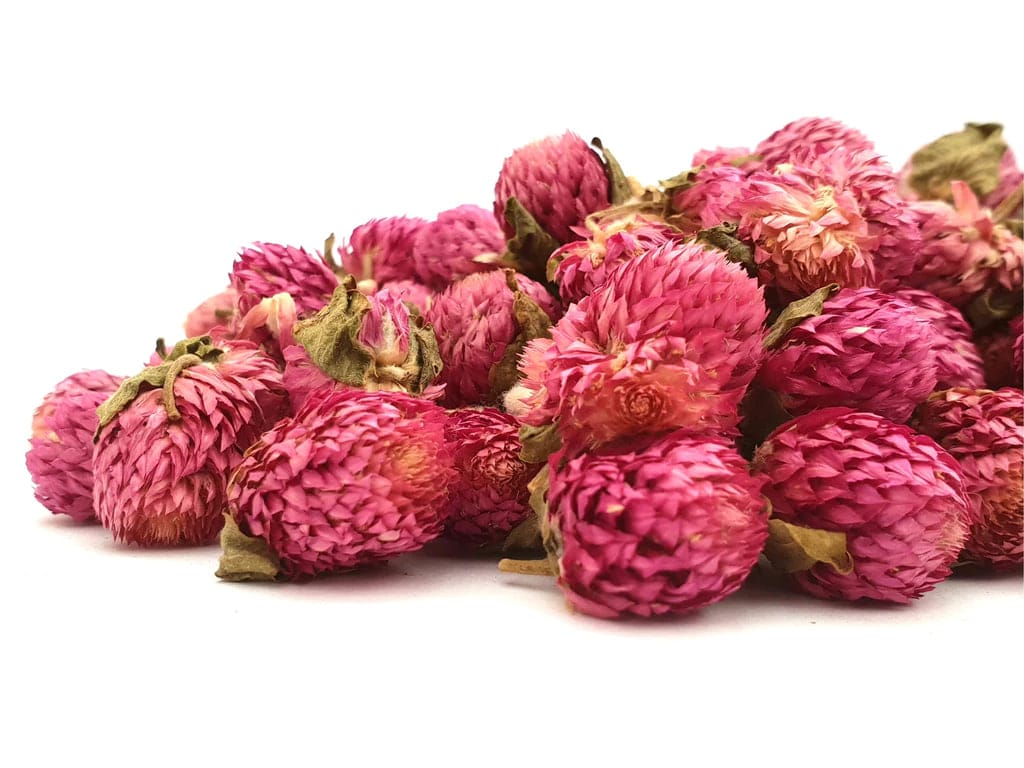
Essential Materials in Action
See close-ups of natural dried flowers and a silicone cube mould ready for casting. Each element plays an important role in achieving a flawless resin creation, with the clear resin showcasing the preserved bloom in all its beauty.

Step 1: Prepare Your Workspace and Materials
Set up your project on a level, dust-free surface covered with protective sheeting. Ensure good ventilation, and wear protective gloves at all times. Unpack all tools and familiarise yourself with the process before you begin, as resin has a finite working window once mixed.
Choose fully dried flowers to avoid trapped moisture.
Moisture from live or inadequately dried blooms can cause cloudiness or even mould inside the finished resin cube, so source professionally dried flowers for best results.
Step 2: Mix and Pour the First Layer of Resin
Mix your resin and hardener as per the product instructions, stirring slowly to minimise bubbles. For cubes thicker than 2 cm, go for “EpoxyTable 5-Five”; for thinner projects, “Trasparente” is ideal. Pour a shallow base layer (about a quarter of the mould depth) and allow it to partially cure to a gel state — this supports your flower during placement.
Avoid pouring thick layers all at once to prevent bubbles.
Pouring in stages helps to trap fewer bubbles and maintain maximum clarity.
Step 3: Position and Embed the Flower
Arrange your chosen dried flower gently onto the partially cured base. Use tweezers if required for careful positioning. Press the flower lightly so it does not float when covered by subsequent resin layers.
Use a reusable silicone cube mould for best results.
Silicone cube moulds like the “Cube Mould” – Square Silicone Mould for Resin make demoulding effortless and ensure crisp, clear cube edges.
Step 4: Pour Remaining Resin in Layers
Mix a fresh batch of resin as instructed, then pour gently over the flower in stages, waiting for each layer to set or become tacky before adding the next. This prevents your flower from shifting and minimises the risk of bubble formation.
Clear resin should be poured in layers for maximum clarity.
Pause briefly after each pour to let bubbles rise, then gently pop them using a toothpick or by exhaling softly over the surface to avoid heat damage.

Step 5: Cure and Unmould Your Resin Cube
Allow the cube to cure fully in accordance with your chosen resin’s product instructions. Don’t rush this stage; curing solidifies clarity and hardness, ensuring longevity and a perfect finish.
Remove bubbles carefully after each pour.
After curing, carefully flex the silicone mould to release the cube. Polish with a soft cloth if needed.
Leave the resin to cure fully before unmoulding.
Tips, Common Mistakes, and Troubleshooting
- If you see persistent bubbles, mix resin more slowly or at a slightly warmer temperature (but don’t overheat).
- Pouring too thick can cause overheating or incomplete curing; always check the maximum recommended thickness for your resin.
- Use only fully dried flowers, as live or damp material can ruin clarity or introduce mould.
- Avoid moving the mould during curing to ensure the flower stays centred and the surfaces remain perfectly level.
Detailed Views and Troubleshooting
Explore side-by-side comparisons of successful flower casts and common pitfalls such as bubbles or cloudy cubes. Spotting these differences early helps refine your technique and prevents disappointment in your finished piece.

- Natural Dried Flowers for Art Projects and Epoxy Resin CastingPrice range: £5.45 through £7.85Natural dried flowers prepared for use in resin projects offering natural aesthetic, suitable for art within this theme.
- "Cube Mould" – Square Silicone Mould for Resin, 8.5×8.5cm£8.45"Cube Mould" offers a square resin form made from professional silicone suitable for creating embedded items within an 8.5×8.5cm finished piece.
- "EpoxyTable 5-Five" – Deep Pour Epoxy Resin for Tables and Large Projects – Up to 5cmPrice range: £16.85 through £1,099.85"EpoxyTable 5-Five" is designed for deep pour projects up to 5cm with a clear, bubble-free finish. Suitable for embedding flowers in resin cubes.
 "Trasparente" – Multipurpose Clear Epoxy Resin for Casting – Up to 2cmPrice range: £8.45 through £948.85"Trasparente" is a clear epoxy resin suited for crafting detailed castings and tables, delivering a glossy finish for projects up to 2cm thick.
Frequently Asked Questions
What is the best resin for embedding flowers in cubes?
Use a clear, deep pour resin such as EpoxyTable 5-Five for cubes over 2cm. For thinner projects, Trasparente resin works well.
How should I prepare flowers before casting?
Ensure the flowers are thoroughly dried to prevent cloudiness or decay. Moisture inside the resin may cause mould.
How can I prevent bubbles when embedding flowers?
Mix resin slowly, pour in thin layers, and remove bubbles using a toothpick or by exhaling gently over the resin.
When can I unmould my cured resin cube safely?
Wait for the resin to cure fully as per the manufacturer’s guidance. Unmoulding too soon may damage the finish.
What type of mould should I use for flower resin cubes?
A silicone cube mould is best for this purpose as it is non-stick, reusable, and provides crisp, clear results.
Why should I pour resin in layers?
Layering helps avoid bubbles, ensures even distribution, and stabilises flowers within the resin for the best clarity.