 Free shipping on orders over £29,85


How to paint polyurethane resin?
Step-by-step tips for a smooth, long-lasting painted finish


Painting polyurethane resin allows you to transform castings, models, and projects with vivid colour and professional finish while maintaining surface detail and durability. Whether you’re working on small figures, prototypes, or decorative objects, this guide takes you through each step for a flawless and long-lasting result.
What You’ll Need
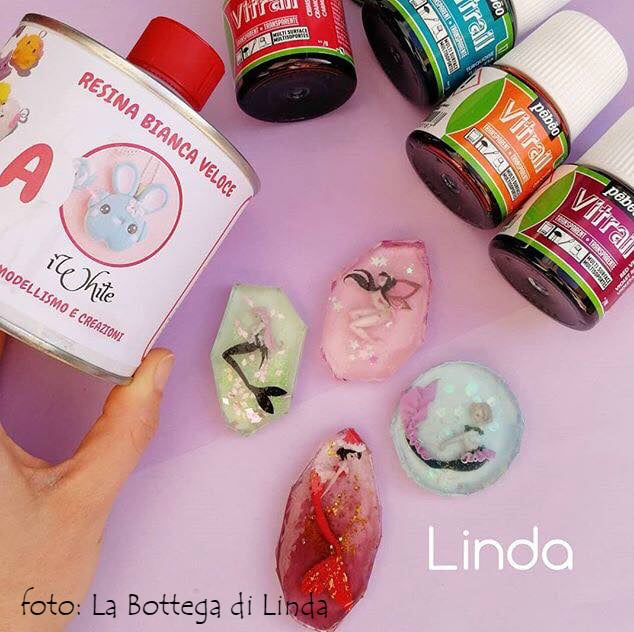
- “IWhite” – Polyurethane Casting Resin – White, Fast-Curing Two-Part System (if casting new pieces)
- Primer suited for plastics and polyurethane
- Acrylic or polyurethane-compatible paint
- 12-Piece Artists Paint Brush Set for Epoxy Resin Art & DIY Projects
- Soft abrasive pads or fine sandpaper (800–1200 grit)
- Lint-free cloth or paper towels
- Protective gloves and mask (if sanding or spraying)
- Optional: “Heat Pro” – Flexible Heat-Resistant Glossy Coating or “Prolux” – PU coating for tiles, concrete, plastic and metal – suitable for driveable surfaces for sealing and protection

Essential Tools for a Flawless Finish
Choosing the right brushes and coatings can drastically improve your painting results. Use high-quality synthetic brushes for smooth application and consider a durable polyurethane top coat for added resilience and gloss.

Step 1: Prepare and Clean the Resin Surface
Cleanliness is critical for painting any polyurethane resin object. Begin by removing dust, mould-release agents, and surface residue. Wash the item with warm water and a gentle detergent, then rinse and allow to dry thoroughly. Handling with gloves prevents oils from your hands affecting paint adhesion.
If the surface feels glossy or slick, gently rub with fine sandpaper (800–1200 grit) or a soft abrasive pad. This creates microscopic roughness so paint and primer adhere securely. Avoid heavy sanding that could obscure small details, especially on cast models.
Wipe away sanding dust with a lint-free cloth. The goal is a dry, slightly matt surface free of contaminants or fingerprints.
Step 2: Apply a Suitable Primer
Priming is essential for excellent paint adhesion on polyurethane resin. Use a primer formulated for plastics or polyurethane; these products bond to tricky surfaces and help reveal subtle flaws that may need touch-up before painting. Spray-on primers provide an even base, but brush-on options work for smaller items or detail corrections.
Allow the primer to dry according to manufacturer instructions—usually 15 to 60 minutes. Lightly sand any imperfections with fine abrasive, then remove dust before continuing. For best results, do not skip or rush the priming step.
Step 3: Paint Your Polyurethane Resin
Once primed, you’re ready for colour. Acrylic paints are popular for detailed objects and models due to their rapid drying, rich pigment, and flexibility. For functional or outdoor items, choose paints labelled compatible with polyurethane or plastic.
Using a dedicated set such as the 12-Piece Artists Paint Brush Set for Epoxy Resin Art & DIY Projects helps you achieve clean brushwork for both broad surfaces and tiny details. Soft synthetic bristles ensure smooth, shed-free results.
Apply paint in multiple thin layers, letting each coat dry thoroughly before the next. This avoids drips, brush marks, and poor bonding. Mask off areas if you wish to keep parts unpainted or to create crisp lines for decoration or functional details.
Step 4: Protect and Seal the Painted Finish
For lasting protection and durability—especially on items exposed to handling, heat, or the elements—apply a dedicated clear sealant or specialist polyurethane coating as the final layer. Choose a clear gloss or satin finish that enhances your project without yellowing or clouding the colours beneath.
If you need extra heat or abrasion resistance, small decorative items can benefit from “Heat Pro” – Flexible Heat-Resistant Glossy Coating, while larger or driveable surfaces may be better served by “Prolux” – PU coating for tiles, concrete, plastic and metal – suitable for driveable surfaces. Allow sealants to cure completely before using or displaying your piece.
Tips for Success and Common Mistakes
- Always allow the polyurethane resin to fully cure before painting. Premature painting may cause poor adhesion or tacky finishes.
- Check paint and coating compatibility with your resin and primer—mismatched products may peel or react unpredictably.
- If spraying paint or primer, ventilate your workspace and wear an appropriate mask.
- Thin, even layers yield the best durability—heavy coats increase the risk of runs and extend drying times.
- Select brushes appropriate for your paint type to avoid marks or bristle loss. Wash brushes promptly to keep them in prime condition.
Surface Detail and Coating Durability
Detailed resin castings often require gentle handling during preparation to preserve ornamentation. Heat-resistant and UV-protective coatings can prolong the appearance and life of your finished piece, especially for practical items.

- “IWhite” – Polyurethane Casting Resin – White, Fast-Curing Two-Part SystemPrice range: £24.00 through £36.95IWHITE is a fast-curing polyurethane resin suitable for detailed casting and can be coloured or painted as part of the How to paint polyurethane…
- 12-Piece Artists Paint Brush Set for Epoxy Resin Art & DIY Projects£6.95This 12-piece brush set offers versatile shapes and durable synthetic bristles designed for various epoxy resin art and DIY tasks.
 "Prolux" – PU coating for tiles, concrete, plastic and metal – suitable for driveable surfacesPrice range: £44.85 through £494.85"Prolux" is a polyurethane coating designed for durable finishes on multiple surfaces including tiles and concrete.
 "Heat Pro" – Flexible Heat-Resistant Glossy CoatingPrice range: £26.45 through £185.45"Heat Pro" is an elastic polyurethane resin designed for epoxy projects, providing heat and scratch resistance with a glossy finish.
Frequently Asked Questions
Can I use acrylic paint on cured polyurethane resin?
Yes, once the surface is properly cleaned and primed, acrylic paints are suitable for painting cured polyurethane resin objects.
Is primer necessary before painting polyurethane resin?
A primer formulated for plastics or polyurethane ensures optimal paint adhesion and a uniform, durable finish.
What is the best method for sealing painted polyurethane resin?
A clear polyurethane or specialist resin top coat provides long-lasting protection and preserves the vibrancy of the painted surface.
What should I avoid when painting polyurethane resin?
Do not paint before full curing, use incompatible paints, or apply thick coats, as these can lead to poor results.
Should polyurethane resin be sanded prior to painting?
Light sanding improves paint and primer adhesion, but take care to preserve detail on precision castings.
Which type of brush gives the best results on polyurethane resin?
Soft synthetic brushes provide smooth application and reduce brush marks or loss of bristles during painting.