 Free shipping on orders over £29,85

How is a resin sculpture replica made?
A complete guide from mould to casting for artists and makers

Sculpture replication using resin allows for the preservation or duplication of artworks, models, or cherished objects with remarkable detail and durability. Whether you are an artist, model maker, or hobbyist, mastering this process opens up creative possibilities for both restoration and innovation. This guide will walk you step by step through making a resin sculpture replica, focusing on accuracy, finish, and safety throughout the process.
What You’ll Need
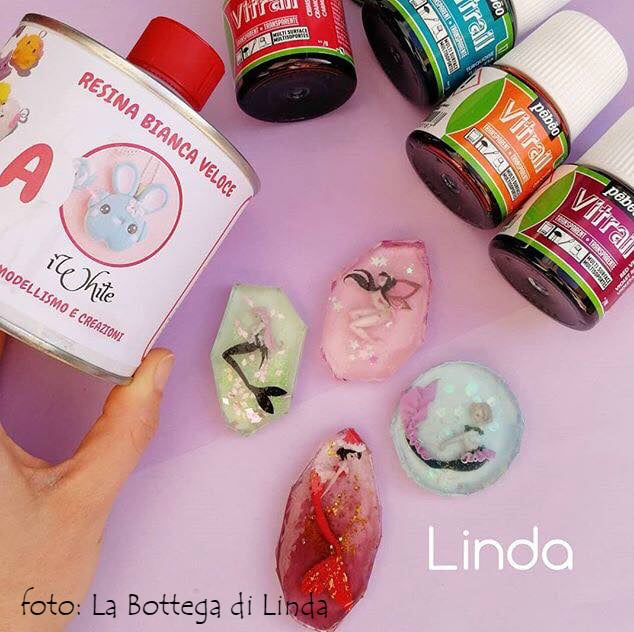
- “IWhite” – Polyurethane Casting Resin – White, Fast-Curing Two-Part System: Ideal for rapid, detailed casting where a white finish or colouration is desired.
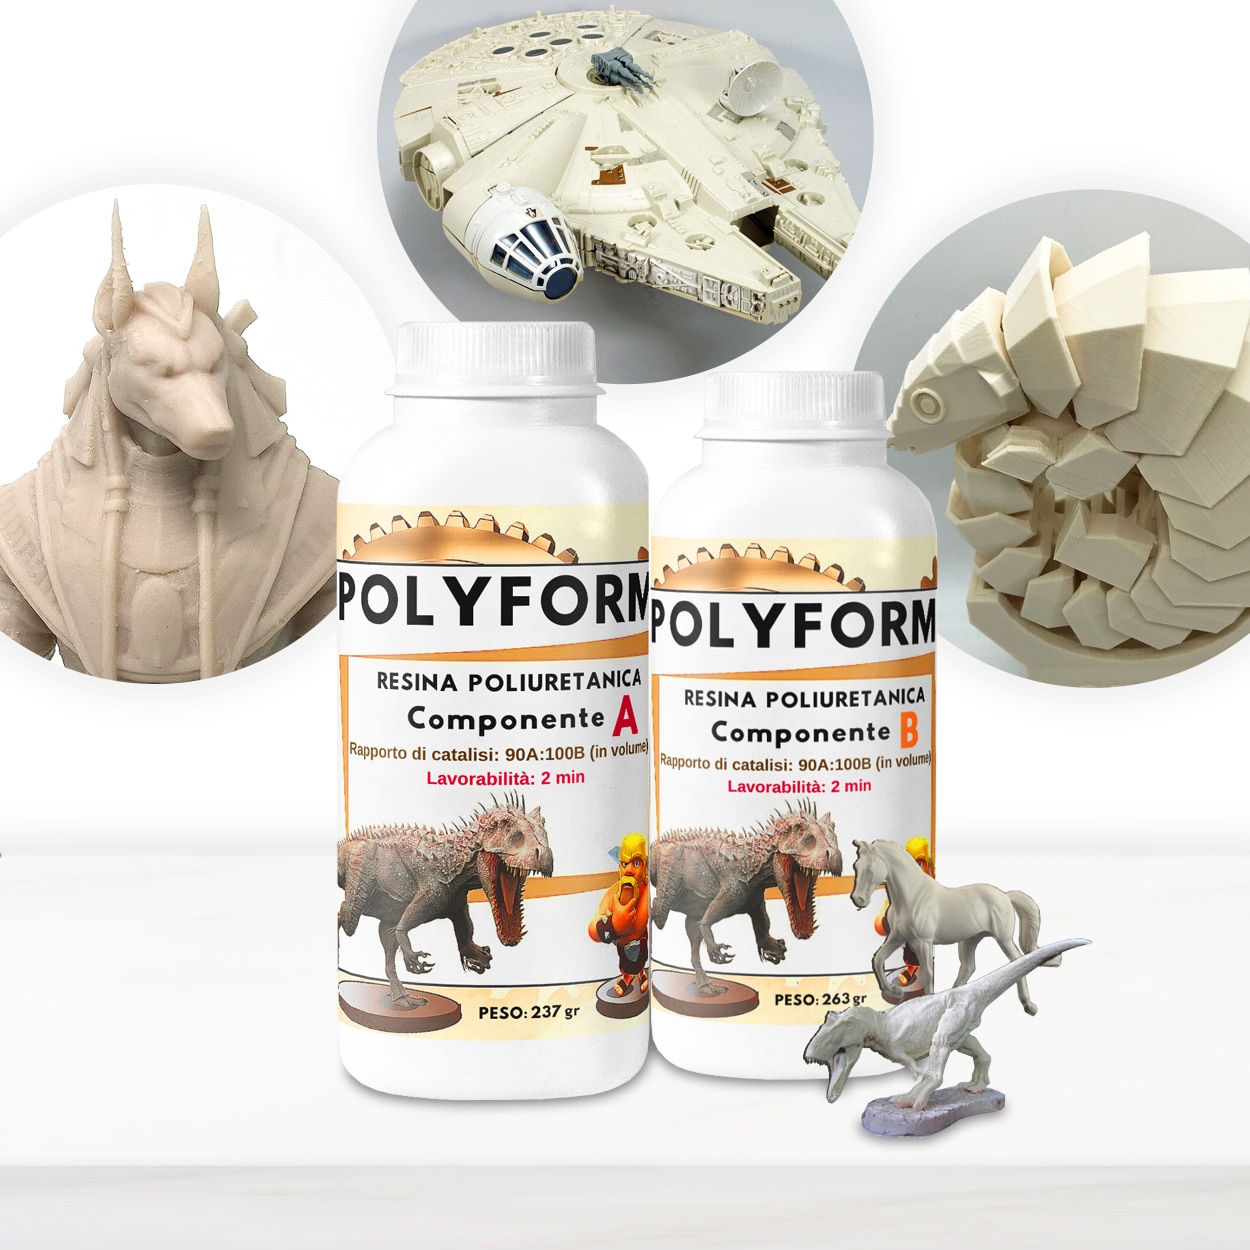
- “Polyform” – Polyurethane Casting Resin, Beige, Fast-Setting for Prototyping: Suitable for quick-setting, robust replicas and small batch production.
- “EpoxyTable 5-Five” – Deep Pour Epoxy Resin for Tables and Large Projects – Up to 5cm: For casting larger or thicker sculptures up to 5cm deep.
- “Epoxytable 10-Ten” – Deep Pour Epoxy Resin for Tables, Up to 10cm Casting: For super-deep sculpture castings and large artistic projects up to 10cm.
- Silicone mould (custom made or purchased for your original piece)
- Mixing cups and stirring sticks
- Protective gloves, apron and safety glasses
- Release agent (optional, for complex moulds)
- Sculpting or cleaning tools for finishing

Essentials for Successful Resin Sculpture Replication
Begin each project by assembling all materials—including resin, moulds, and safety gear—so you can focus fully on technique. Careful planning ensures a smooth workflow from preparation through to casting and finishing.

Step 1: Prepare Your Workspace and Mould
Begin by selecting a well-ventilated, dust-free area for your casting project. Place down a protective cover to safeguard your surfaces from accidental spills. Gather all required tools and ensure your silicone mould is clean and fully dry—any moisture can negatively affect the resin curing process. If your mould is highly detailed or has undercuts, consider applying a suitable release agent to make demoulding easier and to preserve fine details.
Always work in a well-ventilated environment and never skip personal protective equipment to prevent allergic reactions or irritation.
Step 2: Mix the Resin Accurately
Accurately measuring and mixing your resin is crucial for a successful casting. Refer to the specific instructions provided with your chosen resin. For example, when using “IWhite” – Polyurethane Casting Resin – White, Fast-Curing Two-Part System, weigh parts A and B in the recommended ratio (usually equal or as per product guidance) and combine them in a clean mixing cup. Stir vigorously but gently, scraping the sides and bottom to ensure a homogenous blend while minimising bubble formation.
Carefully mix the resin according to manufacturer instructions to ensure proper cure and avoid soft spots or stickiness in your replica.
Step 3: Pour and Fill the Mould
Slowly pour the mixed resin into the prepared mould, starting at the lowest point and allowing it to flow naturally into detailed areas. For very intricate sculptures or deep pours (such as with “EpoxyTable 5-Five” – Deep Pour Epoxy Resin), pour in steady, thin layers to prevent overheating and unwanted air entrapment. Slightly tapping or vibrating the mould after pouring helps dislodge trapped air bubbles.
Avoid trapping air bubbles by pouring steadily, and be mindful of resin working times—some products like “Polyform” set quite quickly, so work efficiently.
Step 4: Curing and Demoulding
Allow the filled mould to cure undisturbed and at the recommended temperature for your chosen resin type. Most polyurethane resins set within 30 minutes and are ready to demould, while deep pour epoxy resins may require much longer—sometimes several hours to days for thick pieces. Avoid removing the sculpture too soon, as premature demoulding can cause distortion or surface imperfections.
Allow the casting to fully cure before handling. Plan your demoulding timing based on the resin you use to achieve a crisp, undamaged replica with strong mechanical properties.
Step 5: Finishing Touches and Detailing
Once the replica is released from the mould, inspect it for seams, flash, or slight flaws. Use fine files, sandpaper, or carving tools to refine the shape and remove any imperfections. Polyurethane resins such as Polyform and “IWhite” are paintable after curing, allowing you to further customise your piece. Clean up gently to prevent damaging crisp moulded details.
Tips, Common Mistakes, and Troubleshooting
Measure and mix resins precisely for consistent results. Work at recommended temperatures to ensure complete curing—avoid damp, cold, or humid environments as these can slow down the process or affect the surface finish. For particularly deep or large castings, pour in staged layers rather than a single batch to prevent heat build-up. Remove bubbles as soon as they appear on the surface and take your time cleaning finished pieces for the best visual outcome.
Clean tools promptly after use to prevent hardened residue. Test small batches if you are new to a resin or working with unfamiliar moulds, and always read product guidelines thoroughly.
Achieving Detail and Durability in Your Replicas
Select a resin that matches your detail requirements, curing timeframe, and project scale. Polyurethane resins excel for speed and fine features, while deep pour epoxies are the choice for larger, thicker pieces with crystal-clear finishes.

- “IWhite” – Polyurethane Casting Resin – White, Fast-Curing Two-Part SystemPrice range: £24.00 through £36.95IWHITE White Polyurethane Casting Resin is a fast-curing two-part system designed for detailed moulding and rapid prototyping within the theme of…
- “Polyform” – Polyurethane Casting Resin, Beige, Fast-Setting for PrototypingPrice range: £15.95 through £141.95Polyform resin is suitable for rapid prototyping and model making with fast setting and detailed castings.
 "EpoxyTable 5-Five" – Deep Pour Epoxy Resin for Tables and Large Projects – Up to 5cmPrice range: £17.95 through £1,154.95"EpoxyTable 5-Five" offers low viscosity and non-yellowing epoxy, designed for deep pours up to 5cm including tables and large projects.
 “Epoxytable 10-Ten” – Deep Pour Epoxy Resin for Tables, Up to 10cm CastingPrice range: £35.95 through £351.95“Epoxytable 10-Ten” is designed for deep pour applications including tables and large artistic projects up to 10cm thickness.
Frequently Asked Questions
What kind of resin should I use for high-detail casting projects?
A polyurethane casting resin such as IWhite is ideal for rapid, precise detail replication in sculpture projects.
How do I avoid bubbles in resin castings?
Pour slowly, tap the mould gently, and ensure your resin is well-mixed to release trapped air and reduce bubbles.
How long should I leave resin in the mould?
The curing time depends on the resin; most polyurethane resins need about 30 minutes, while deep pour epoxies may require several hours.
Do I need a mould release agent when making resin sculpture replicas?
A release agent can prevent difficult demoulding and help preserve fine details, especially in intricate or deep moulds.
Can polyurethane resin be coloured or painted after casting?
Yes, once fully cured, polyurethane resins can be painted or coloured to match your design.
What are the main health and safety tips for resin casting?
Wear gloves and eye protection, work with good ventilation, and follow manufacturer safety guidance for handling resins.