 Free shipping on orders over £29,85


How do you use transparent resin?
Step-by-step guide for casting, coating, and resin artwork.

Transparent resin offers creative possibilities for artists, DIY enthusiasts, and makers wanting to create striking clear castings, beautiful coatings, or layered resin artwork. This guide walks you through the complete process so you can achieve brilliant results, whether crafting jewellery, making decorative trays, or exploring new artistic techniques.
What You’ll Need
- “Trasparente” – Multipurpose Clear Epoxy Resin for Casting – Up to 2cm: A certified, non-toxic clear epoxy resin suitable for artistic, woodworking and restoration projects with layers up to 2cm.
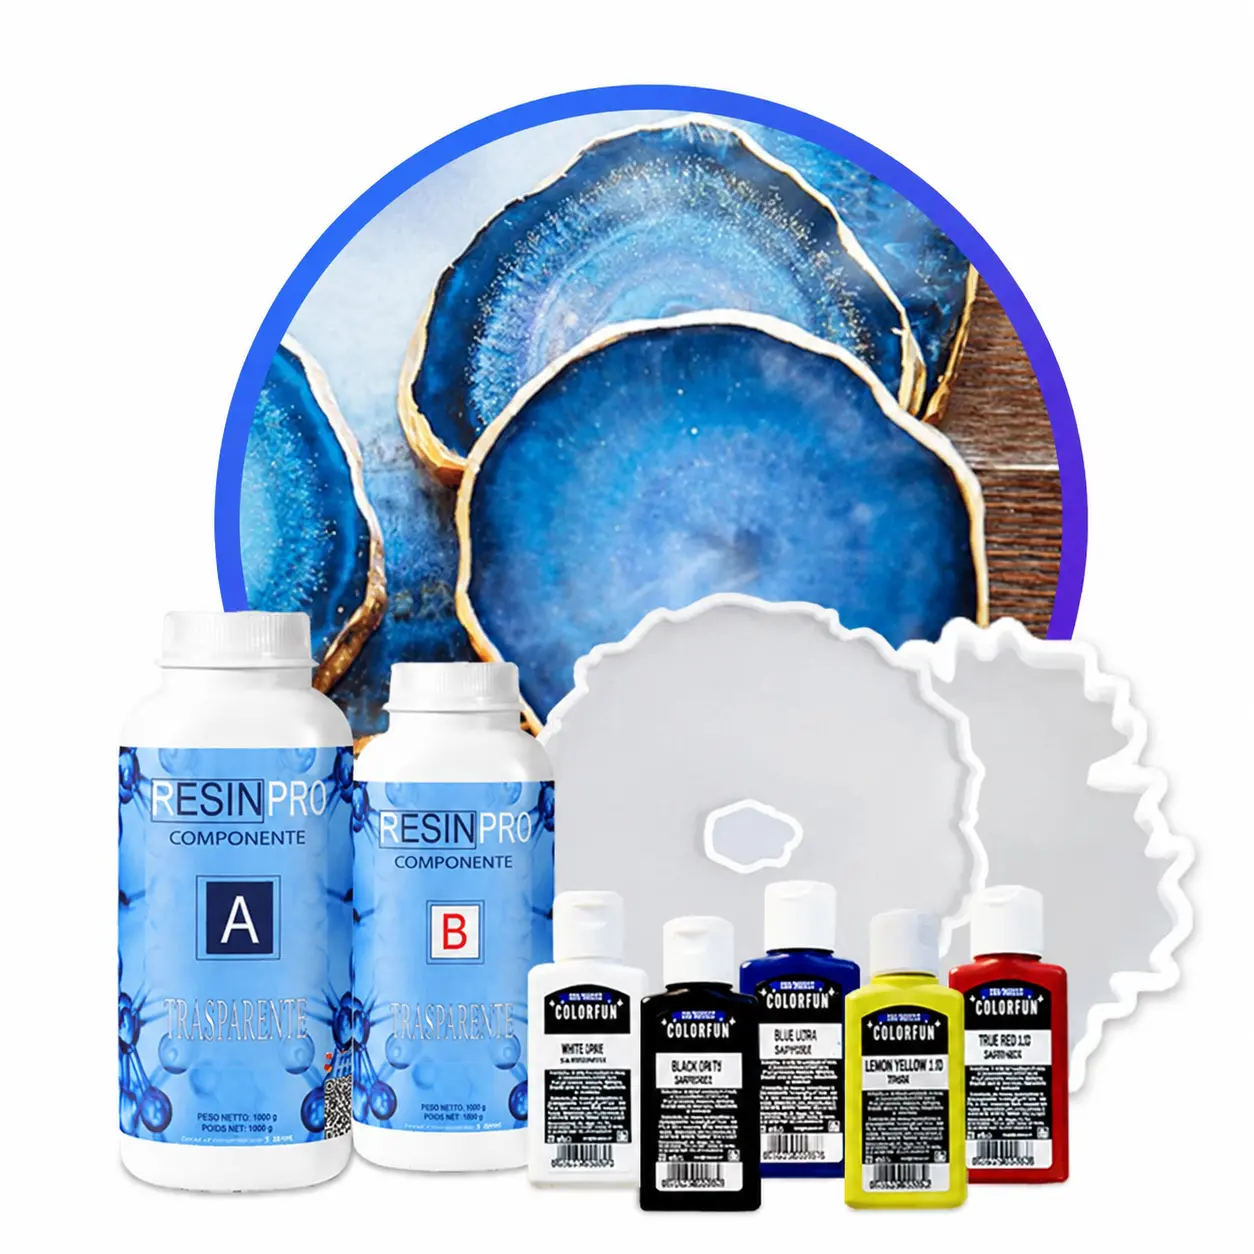
- Resin Geode Coaster Starter Kit – Create Stunning Crystal-Style Coasters at Home: A complete resin kit for crafting crystal-style geode coasters at home.
- “Icrystal” – Clear Epoxy Resin – Odourless Formula – Up to 1.5cm: A transparent, odourless epoxy resin designed for crafts, tables, and surface coatings up to 1.5cm layers.
- “One-2-One” – Epoxy Resin for Handcraft, 1:1 Mixing Ratio: A medium viscosity epoxy resin mixed 1:1 by volume, designed for transparent handcraft and decorative uses.
- Protective gloves and eye protection
- Mixing cups and stirrers
- Suitable moulds or substrates
- Silicone mat or plastic sheet for surface protection

See the Process in Action
View examples of resin mixing, pouring, and art projects created with transparent epoxy resins. Notice the clarity and depth achieved by following precise steps and using high-quality materials. Visual walkthroughs can inspire your own creative approach and highlight the importance of careful preparation.

Step 1: Prepare Your Workspace and Materials
Work in a well-ventilated area and cover your workspace with a protective sheet to guard against spills. Have all materials prepared before you start, including gloves and measuring tools. Place your mould or item to be coated on a silicone mat or protected surface.
Make sure the substrate or mould is clean, dry, and free from dust, as any debris may show in the final clear finish. If creating geode-style coasters, organise your colourants and arrange any decorative elements in advance.
Step 2: Measure and Mix the Resin
Read the instructions for the transparent resin you are using to determine the correct mixing ratio. For example, “One-2-One” – Epoxy Resin for Handcraft, 1:1 Mixing Ratio is designed for easy 1:1 mixing by volume. Using a digital scale or marked mixing cups, measure resin and hardener accurately for the quantities you need.
Combine the resin and hardener in a clean cup and mix thoroughly while avoiding bubbles. Stir slowly for 2–3 minutes, scraping the sides and bottom, until the mixture is clear and uniform. Some resins, such as “Icrystal” – Clear Epoxy Resin, are formulated to be odourless, making them comfortable for indoor use.
Step 3: Pour and Create Your Project
Use a clean, dust-free environment for this step to maintain clarity. When pouring, do so slowly into the centre of your mould or onto your workpiece. For deep castings, “Trasparente” – Multipurpose Clear Epoxy Resin for Casting – Up to 2cm allows for pours up to 2cm per layer. For coasters and shallow pours, the Resin Geode Coaster Starter Kit contains everything you need to achieve layered artistic effects.
Gently tap or vibrate the mould to help release any air bubbles. If necessary, use a low-heat gun or small torch in quick passes to pop surface bubbles, but be careful not to overheat or scorch the resin.

Step 4: Curing and Finishing Touches
Allow your project to cure in a dust-free, stable environment. Protect against dust during curing by loosely covering it with a box or container. Most projects will reach initial cure in 24–48 hours, depending on the resin formula and room temperature.
Once cured, remove from the mould or substrate. For flat surfaces, you may opt to sand any sharp edges gently. If layering, allow full curing before handling or adding subsequent pours to maintain optimal clarity and adhesion.

Tips and Common Mistakes to Avoid
Pour in thin layers for best clarity. Exceeding the recommended layer thickness can cause overheating, distortion, or unwanted bubbles. Always adhere to the layer guidelines for your chosen product.
Be patient and do not rush layering. Each layer should fully cure before applying another for the clearest, most durable result. Avoid introducing moisture or contaminants mid-process.
Remember to follow safety protocols, and dispose of any mixed resin responsibly after completion.
Gallery: Transparent Resin Finished Projects
Explore stunning final results made with transparent resins: from crystal-clear coasters to elegant castings and intricate surface coatings. Observe the brilliance and visual depth possible with the right resin and careful technique.

- "Trasparente" – Multipurpose Clear Epoxy Resin for Casting – Up to 2cmPrice range: £8.95 through £397.95"Trasparente" is a clear epoxy resin designed for multipurpose casting projects up to 2cm thick with an ultra-clear, glossy finish.
- Resin Geode Coaster Starter Kit – Create Stunning Crystal-Style Coasters at Home£42.85A starter kit designed for creating handmade resin coasters with natural geode-inspired patterns, suitable for beginners exploring resin art.
 "Icrystal" – Clear Epoxy Resin – Odourless Formula – Up to 1.5cmPrice range: £12.45 through £341.45"Icrystal" Clear Epoxy Resin offers good clarity and ease of use suitable for various creative and craft projects.
 "One-2-One" – Epoxy Resin for Handcraft, 1:1 Mixing RatioPrice range: £15.95 through £59.95"One-2-One" epoxy resin offers a medium viscosity and easy 1:1 mixing ratio, suitable for transparent decorative and jewellery projects.
Frequently Asked Questions
How thick can you pour transparent resin?
Most transparent epoxy resins are suitable for pours from 1cm to 2cm per layer. Check your resin’s specifications before pouring.
How can I avoid bubbles in transparent resin?
Mix slowly and let the resin rest before pouring. Use a heat gun to help release surface bubbles while taking care not to overheat.
Can transparent resin be used indoors?
Odourless formulas like 'Icrystal' are suitable for indoor use. Always ventilate your workspace and follow recommended safety measures.
What can you make with transparent resin?
Clear resin is used for jewellery, decorative trays, coasters, casting projects, and protective coatings on wood or art pieces.
Why did my resin turn yellow?
Exposure to UV light over time can cause yellowing. Choose resins with integrated UV filters for better long-term clarity.
Which resin is best for clear coasters?
Epoxy resins formulated for clarity and scratch resistance, such as 'Trasparente', are recommended for making coasters.