 Free shipping on orders over £29,85


How do you resin a flower?
Preserve natural beauty in resin with expert embedding tips


Resining a flower lets you capture and preserve blossoms in a crystal-clear finish for art, jewellery, and home décor. This guide covers the essential steps to successfully embed flowers in resin—keeping their colour and delicate detail locked in for years to come. Whether you’re a crafty beginner or an experienced resin artist, these techniques help you achieve professional, lasting results.
What You’ll Need
- “Evershine Collection” – Artisan Jewellery Epoxy Resin Kit with 100+ Accessories (for resin, moulds, accessories)
- “Liquidissima” – Epoxy Resin For Creations & Jewellery (for maximum clarity)
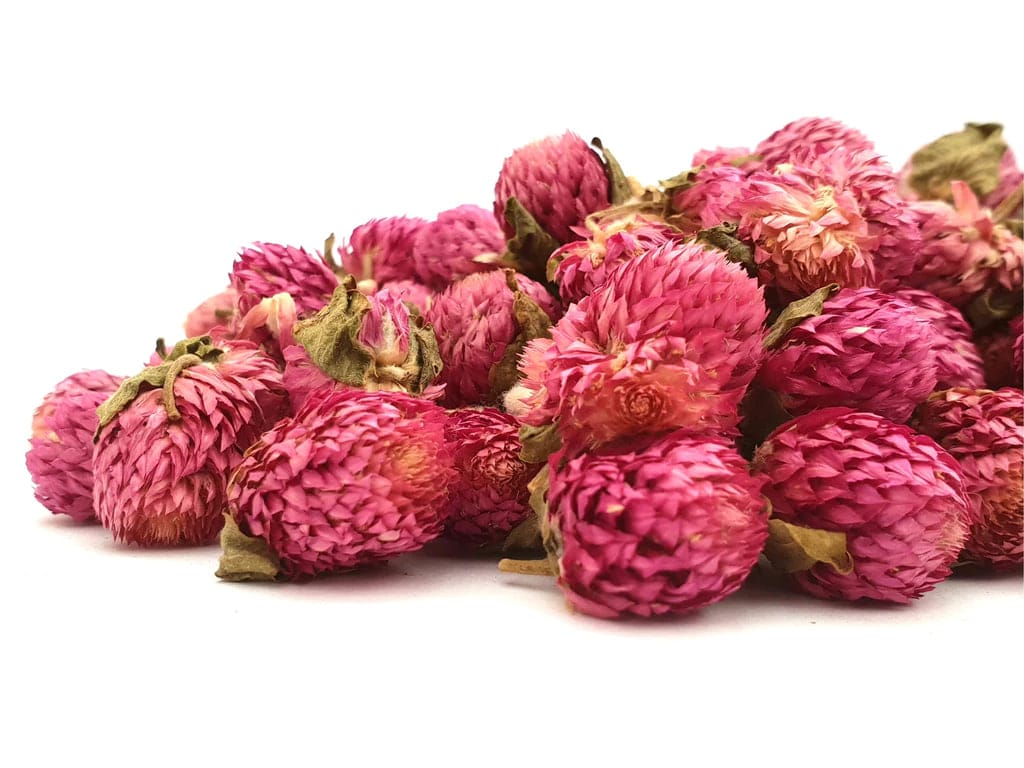
- Natural Dried Flowers for Art Projects and Epoxy Resin Casting or Natural Dried Flower Kit for Epoxy Resin Art and Décor Crafts
- Moulds suitable for your project (e.g. pendant, tray, bookmark)
- Mixing cups and stir sticks
- Nitrile gloves and protective apron
- Plastic sheet or mat to protect your work surface

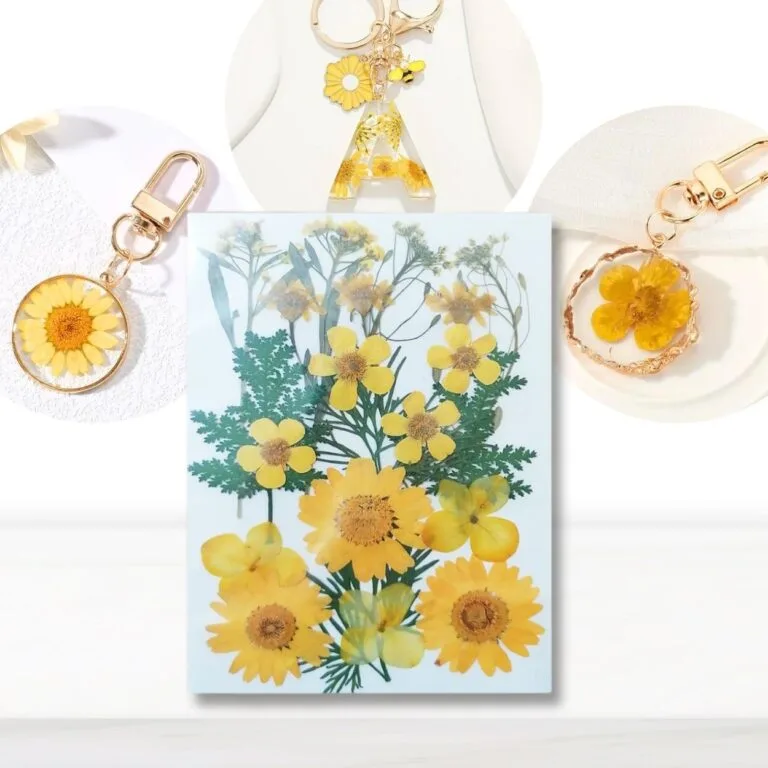
Visual Inspiration: Embedded Flower Resin Projects
See finished resin art pieces featuring beautifully preserved flowers. Discover arrangements, colour palettes, and creative jewellery ideas made possible by embedding dried flowers in clear epoxy. For further inspiration, explore Natural Dried Flowers for Art Projects and Epoxy Resin Casting in our shop.

Step 1: Prepare the Flowers
Start by selecting completely dried flowers. It’s vital to avoid any moisture, as trapped water leads to cloudiness or mould. If you’re using pre-prepared options like Natural Dried Flowers for Art Projects and Epoxy Resin Casting, you can proceed straight to arranging. For self-dried blooms, press or dry them thoroughly between absorbent sheets before use. Handle delicate petals gently to avoid bruising or breaking.
Arrange your flowers on a non-stick surface to plan your design before placing them in the mould. Remove any loose debris or excess stems for a neater final piece.
Step 2: Mix the Resin
Choose a high-clarity casting resin for the best results. Kits such as the “Evershine Collection” – Artisan Jewellery Epoxy Resin Kit with 100+ Accessories or the “Liquidissima” – Epoxy Resin For Creations & Jewellery are formulated for low bubbles and a glass-like finish. Always follow your resin’s instructions for the correct mix ratio and blending method. Mix resin slowly and carefully to minimise trapped air bubbles—scrape the sides and base of your mixing cup, ensuring a thorough, even blend.
Let the mixture rest a few minutes after stirring to allow bubbles to rise to the surface and pop before pouring.
Step 3: Pour and Embed the Flowers
Pour a thin layer of resin into your mould as a base. Gently place the prepared flower onto this uncured resin, arranging it with tweezers for accuracy. Carefully pour more resin in stages, fully covering the flower while preventing bubbles by pouring in layers. Resin with low viscosity—like Liquidissima—flows easily into intricate spaces, enveloping petals and stems with clarity.
If bubbles appear around the flower, manoeuvre them out gently with a toothpick. Avoid overfilling the mould. Allow each layer to set just enough to support the next, reducing movement of delicate elements.
Step 4: Cure and Finish Your Resin Flower Piece
Protect your poured piece from dust and leave it undisturbed for the full curing time recommended by your resin. Most high-clarity resins require at least 24 hours. After curing, demould the item and inspect the edges. Lightly sand any sharp or uneven areas for a professional look, and buff with a soft cloth for maximum shine.
Jewellery projects may need attachment of findings or jump rings, which are often included in beginner-friendly kits such as the Evershine Collection.

Tips and Common Mistakes When Resining Flowers
Work in a well-ventilated area and always wear gloves to protect yourself from resin contact. Thoroughly dry your flowers before use—any residual moisture leads to cloudiness or poor curing. Seal flowers for best clarity if you notice they absorb resin too quickly, which helps prevent colour loss. Avoid using fresh, undried flowers, as this is the most common reason for failed projects.
Pierce visible bubbles gently with a pin or use a heat gun (set on low) wafted briefly over the resin—being mindful not to overheat, which can warp the resin or flowers.
Gallery: Resin Jewellery and Craft Embeds
Browse close-ups of resin jewellery and decorative objects where dried flowers have been seamlessly encapsulated. Capture ideas for your next pendant, coaster, or keepsake using the Natural Dried Flower Kit for Epoxy Resin Art and Décor Crafts and find out how layering and clarity add dimension to your work.

- Natural Dried Flowers for Art Projects and Epoxy Resin CastingPrice range: £5.95 through £8.45Natural dried flowers prepared for use in resin projects, suitable for embedding in jewellery and decor within a craft theme.
 Natural Dried Flower Kit for Epoxy Resin Art and Décor Crafts£8.95Natural dried flowers designed for use in epoxy resin art and décor crafts to add a natural aesthetic to your projects.
- "Evershine Collection" – Artisan Jewellery Epoxy Resin Kit with 100+ Accessories£21.95The Evershine Collection kit provides 500g of clear 1:1 epoxy resin with 100+ accessories, suited for jewellery makers and craft projects.
 "Liquidissima" – Epoxy Resin For Creations & JewelleryPrice range: £12.85 through £31.85Suitable for artists and creators, this resin offers high transparency and longer working time for intricate jewellery moulds.
Frequently Asked Questions
Can you use fresh flowers in resin?
No, fresh flowers must be thoroughly dried before being embedded in resin to prevent mould and discolouration.
How do you prevent bubbles when resining flowers?
Mix slowly, pour in thin layers, and use a low-viscosity resin. Use a toothpick or heat gun to gently remove trapped bubbles.
Should you seal flowers before embedding in resin?
Sealing is optional but helps preserve colour and clarity, especially for delicate or porous flowers. Use a clear-drying sealer.
What mould shapes work best for flowers in resin?
Flat or domed moulds like pendants, coasters, or bookmarks showcase flowers attractively and provide good support during curing.
How long does resin take to cure with flowers?
Most resin projects with flowers cure within 24–48 hours. Room temperature and resin brand affect the total curing time.
Does flower colour remain vibrant in resin?
Dried flowers generally retain their colour in resin, though some fading may occur. Sealing can help maintain brightness.