 Free shipping on orders over £29,85


How are resin magnets made?
Create eye-catching personalised magnets with resin easily at home


Creating your own resin magnets is a rewarding craft project that lets you express your creativity and produce beautiful, practical items for gifts or personal use. Whether you’re looking to preserve tiny treasures, design custom fridge magnets, or create keepsakes, this guide will take you through each step, highlighting essential tips for reliable results every time.

What You’ll Need
- UV Resin Kit with 5 Christmas Silicone Moulds for Festive Crafting – perfect for fast and easy festive designs
- “Liquidissima” – Epoxy Resin For Creations & Jewellery – ideal for detailed and intricate shapes
- “Trasparente” – Multipurpose Clear Epoxy Resin for Casting – Up to 2cm – suitable for larger or thicker magnets
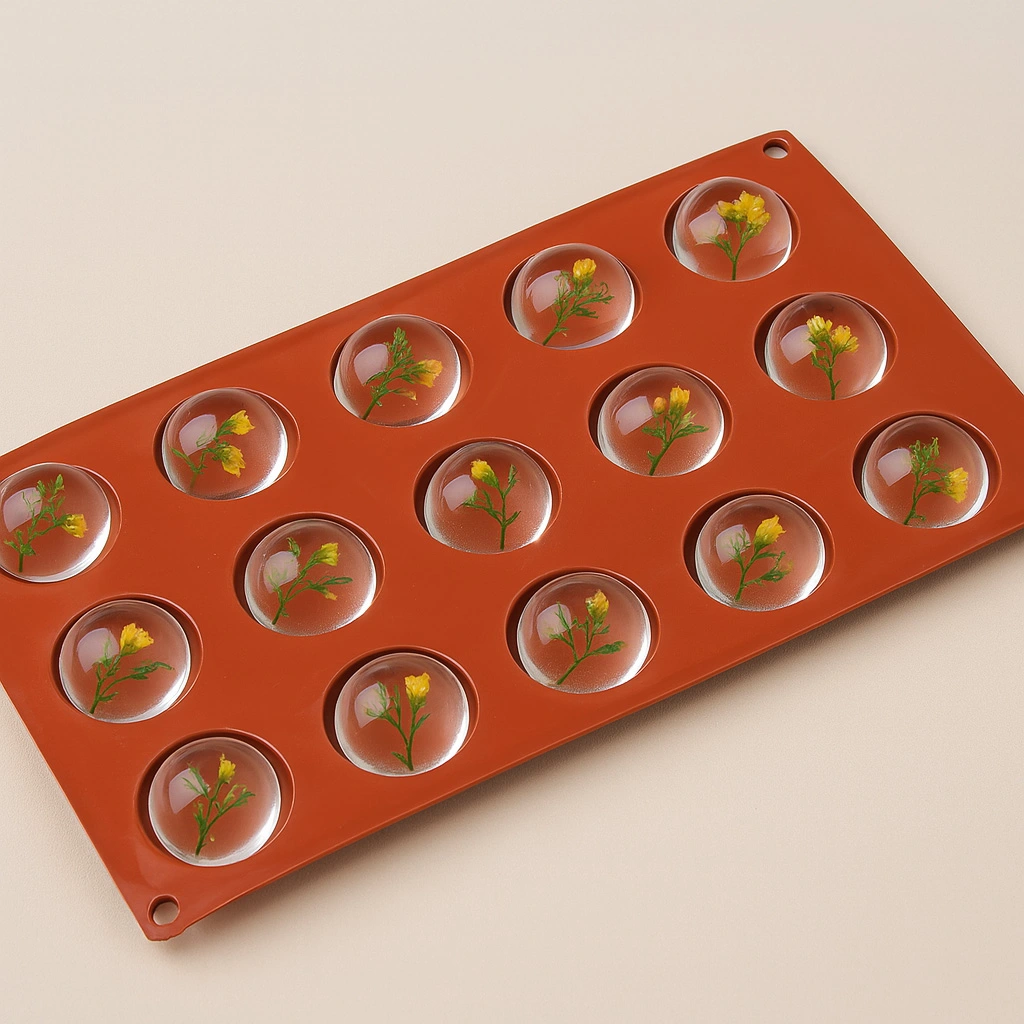
- “Cabochon-15” – Silicone Mould for Resin, Chocolate, Soap, Plaster – Ø40mm – recommended for making uniform magnet shapes
- Small neodymium or craft magnets
- Mixing cups, stir sticks, gloves, and a protective surface
- UV lamp if using UV-cure resin

Inspiration for Resin Magnet Designs
Get creative with inclusions such as glitter, dried flowers, or small photos to make truly personalised magnets. Experiment with layering different resin pigments to achieve vibrant or translucent effects. Festive moulds, geometric shapes, and nature-inspired designs are always popular choices for custom magnets.
Step 1: Choose a suitable silicone mould
The shape and size of your mould will determine the style and practicality of your finished magnets. Select a mould with smooth, clean edges and the right depth for embedding magnets – domed or flat-backed shapes both work well. The “Cabochon-15” – Silicone Mould for Resin, Chocolate, Soap, Plaster – Ø40mm is particularly useful for uniform, cabochon-style magnets, making removal easy and giving a glossy finish.
Avoid moulds with sharp corners that can trap bubbles or make demoulding difficult. Ensure your mould is clean and dry before starting.


Step 2: Mix and pour the resin
Prepare your chosen resin according to the manufacturer’s instructions, mixing carefully to minimise air bubbles. For detailed or intricate designs, “Liquidissima” – Epoxy Resin For Creations & Jewellery is an excellent choice thanks to its low viscosity and long working time. For quick festive magnets, opt for the UV Resin Kit with 5 Christmas Silicone Moulds for Festive Crafting and cure each piece under a UV lamp to set the shape in minutes.
Pour the mixed resin slowly into the mould, filling each cavity about halfway to two-thirds. Tap the mould gently on your work surface to help bubbles rise and escape. Add inclusions or pigment at this stage if you wish.
Step 3: Insert and secure the magnet
Once your resin is partially set (still tacky but firm enough to hold shape), gently press a clean, dry magnet into the back, ensuring it is level and fully embedded but not touching the bottom of the mould. If using thicker pours or larger pieces, the “Trasparente” – Multipurpose Clear Epoxy Resin for Casting – Up to 2cm provides robust clarity and ample depth for larger magnets.
If the magnet tries to float, you can weight it down gently or wait for the resin to become even more viscous before insertion. Let the resin fully cure with the magnet inside.


Step 4: Demould and finish your magnet
Once curing is complete, gently flex the silicone mould to release your new magnet. Remove any sharp edges with fine sandpaper, and check that the magnet is secure. If you wish, polish the surface with a soft cloth to enhance clarity and shine.
If you used a two-step pour for designs or layering, ensure that all surfaces are fully cured before handling or gifting your magnets. Attach to any magnetic surface and enjoy your handiwork!
Tips and Common Mistakes to Avoid
- Avoid overfilling the mould as resin may spill when the magnet is inserted or cause uneven surfaces.
- Clean up drips immediately before they harden, as cured resin can be difficult to remove from surfaces or mould edges.
- Remove your magnets from the mould as soon as they are fully cured to avoid adhesion and preserve the silicone mould’s lifespan.
- If working with children or beginners, supervise closely and always use gloves and protective coverings to ensure safety and cleanliness.
- Work in a dust-free, level area to achieve a crystal-clear, professional finish every time.

Showcase Your Custom Resin Magnets
Present your new magnets as thoughtful gifts for family and friends, or use them to brighten up your own fridge or workspace. You can even display a range of your creations at local craft fairs or online shops—every magnet is unique and hand-crafted! Browse the UV Resin Kit with 5 Christmas Silicone Moulds to start making themed sets for any season.

- UV Resin Kit with 5 Christmas Silicone Moulds for Festive CraftingPrice range: £15.95 through £27.45This UV Resin Kit includes clear fast-curing resin and five Christmas moulds, suitable for crafting festive magnets and jewellery.
- "Liquidissima" – Epoxy Resin For Creations & JewelleryPrice range: £12.85 through £31.85Liquidissima is an epoxy resin designed for clear, intricate jewellery casting with long working time and a self-levelling finish.
- "Trasparente" – Multipurpose Clear Epoxy Resin for Casting – Up to 2cmPrice range: £8.95 through £397.95"Trasparente" is a clear epoxy resin for up to 2cm layers, suitable for detailed casting and DIY projects with a self-levelling, glossy finish.
 "Cabochon-15" – Silicone Mould for Resin, Chocolate, Soap, Plaster – ø40mmOriginal price was: £14.95.£11.85Current price is: £11.85.This silicone mould is designed for crafting with resin, chocolate, plaster and soap, suitable for jewellery making and decorative cabochons.
Frequently Asked Questions
Can any magnet be used in resin crafts?
Small, strong magnets such as neodymium work best. Avoid magnets with coatings that may react with resin or corrode over time.
How long does resin take to cure for magnets?
Cure times vary: UV resin sets in minutes under a lamp, while epoxy resins can take 12–48 hours to fully harden, depending on thickness and temperature.
How do I avoid bubbles forming in my resin magnets?
Mix slowly to reduce air entrapment and tap or lightly torch the mould surface to release bubbles before curing.
Can resin magnets be used outdoors?
Resin magnets can be used outdoors, but choose a UV-resistant resin and avoid prolonged direct sunlight to prevent yellowing and degradation.
Is special glue needed for embedding magnets into resin pieces?
No extra glue is required—embedding magnets during the curing process ensures a secure hold within the resin.
How can I personalise my resin magnets?
Add decorative items or pigment to the resin before pouring, or layer in small prints, glitter or pressed flowers for a unique design.