💥No. 1 Value Epoxy Resin in the UK💥
Free shipping on orders over £29.85

WITH EPOXYFOOD, WE SERVE YOU CREATIVITY FOR FOOD CONTACT ON “A SILVER PLATE”. ACTUALLY, ON A RESIN PLATE!

How many times you wanted to express your creativity and imagination on surfaces and countertops usually in contact with food.
Now you can let go of this frustration thanks to a Food Safe and non-toxic product, created by ResinPro with the specific purpose of coating plates, glassware and cutting boards in daily contact with food and liquids.

A real revolution for who loves to use resin for passion or work, but also a valid encouragement for those who would like to approach this world and test their manual skills on small and handy objects.
The non-toxicity of EpoxyFood is determined by the two-component, high-modulus, unfilled, medium-fluidized EpoxyFood system, which uses only raw materials included in the positive list of substances allowed for food contact (EU Regulation No. 10/2011 January 14, 2011).

Therefore, modelling features a new transparent resin with which you can cover surfaces such as platters, cutting boards, plates, glassware, cutlery, knives and table tops, but not only that!
As usual, with resin creativity has no limits, and it is possible to use EpoxyFood to create a protective layer on printed images, such as photographs, canvases and paintings, or to build furniture and decorative design elements through mounting techniques.

What makes this product suitable for these situations?

  • The ability to achieve an accurate surface finish;
  • Good resistance to yellowing;
  • Good outdoor stability;
  • Excellent mechanical resistance and resistance to basic and acid chemical substances.

The method of application of EpoxyFood is by casting, due to its medium-high viscosity which allows to work on non-toxic thick surfaces.
Charged with mineral aggregates of appropriate grain size, it is also used to create self-levelling epoxy and screed surfaces suitable for contact with food.


The high transparency of this resin will allow you to create, for example, a beautiful platter with fabric embedded:

  • To cut the fabric precisely, we suggest to create a paper cutout of the platter surface and then attach it with needles directly on the cloth;
  • After drawing the outline with a chalk, cut and verify that the dimensions match the platter;
  • Apply the transparent adhesive only on a few areas of the fabric, glue it on the bottom and let it dry;
  • Cast the EpoxyFood resin and move the platter to distribute it equally on the surface, including the edges. Let it dry.

“EPOXYFOOD” – Food Contact Transparent Resin For Coating

The bewilderment is guaranteed!

EPOXY RESIN: PROBLEMS AND SOLUTIONS – THE 12 MOST COMMON PROBLEMS

1. RESIN HAS NOT HARDENED AFTER THE INDICATED TIME

If resin has not hardened after the indicated time has elapsed, there may be several causes. Here are
the most common ones:

  • Double-check the usage ratio indicated in the instructions. An incorrect or approximate combination may affect the catalysation of the product. It is very important that you never add a greater amount of hardener than the specified one.
  • Never cast the second layer without ascertaining first that the previous one has completely hardened. Pouring another layer over a surface that has not catalysed may cause overheating and compromise your work.
  • If you work in an environment where the temperature is relatively low, the curing time of the resin will increase significantly. For example, if you go from 25° [77 F] to 15° [59 F], the curing time will double. Use an external heat source (stove, radiator, etc.) to increase the ambient temperature or apply a hardener suitable for working at low temperatures.
  • Most of the problems concerning the failure to harden of the resins can be traced back to
    incorrect mixing. Make sure to carefully mix your product for at least two minutes,
    meticulously scraping the bottom and the walls of the container used. Never be inattentive in this very important stage.
  • Add the additives (pigments, dyes, etc.) only after mixing resin and catalyst.
  • Use the catalyst you find packed together with the resin you are going to work with. The use of “unrelated” catalysts may vary the final result.


2. RESIN DOES NOT STICK WELL

  • If you want to use resin as a bonding agent or to create River Tables, you may run into some problems related to the stickiness of the product.
  • If you are working on a very porous surface, this will absorb the product very easily, making a second layer of resin necessary particularly on the edges of the material you are going to glue.
  • If you work on wood, make sure to clean and smooth the surface. A rough cleaning may nullify the adherence of the resin.
  • Another problem might relate to the width of your worktop. A large surface of resin alone
    may in fact not guarantee a perfect seal. To deal with this problem, all you need to do is add material to reduce the workload of the resin.
  • Make sure that the resin is evenly distributed over the entire surface.


3. RESIN LOST ITS SHINE

If your resin has taken on an opaque and unpolished colour, the causes are most likely due to climatic conditions of your working environment.
Many times the opacification may be caused even just by a normal change of season.
Use an external heat source to remove moisture and to foster polymerization.


EPOXY RESIN: PROBLEMS AND SOLUTIONS. THE 12 MOST COMMON PROBLEMS.


4. A STICKY FILM HAS FORMED ON THE SURFACE

Once the resin has hardened, a sticky film may form on the surface. This problem can be easily reduced by wiping a sponge soaked in hot water on your surface.
However, if you want to avoid film formation, employ the following precautions:

  • Always try to work in an indoor environment, preventing sudden changes in the room temperature.
  • Avoid working with too small quantities, since the smaller the mix dosages, the more you risk to enhance the formation of impurities in the compound.
  • Remember that film formation does not depend only on moisture but also on the
    presence of CO2, thus limit the use of thermal guns during the catalysis process.
  • Remember that using a container limits the interaction of the resin with the air molecules.
    Try to keep your product as isolated as possible.

EPOXY RESIN: PROBLEMS AND SOLUTIONS. THE 12 MOST COMMON PROBLEMS.


5. AFTER YEARS OF STORAGE, THE HARDENER HAS TAKEN ON A REDDISH COLOR

It is quite normal that, after a few years, the hardener takes on a reddish colour and loses its transparency.
This colour variation does not in any way affect the quality of the resin, which can still be safely used unless a completely colourless product is required.


6. THE RESIN SURFACE HAS AN “ORANGE PEEL” EFFECT

If the resin surface features bulges or an “orange peel” effect after hardening, this is probably due to the temperature of your working environment as well.
There are a few solutions that you can try to reduce this problem:

EPOXY RESIN: PROBLEMS AND SOLUTIONS. THE 12 MOST COMMON PROBLEMS.

  • If the product has not yet completely hardened, use a roller to “smooth” the surface, this procedure will remove the several bulges on the resin surface.
  • If the resin has not yet completely catalysed, you can try a repair casting of maximum 2 mm [0,07”].

EPOXY RESIN: PROBLEMS AND SOLUTIONS. THE 12 MOST COMMON PROBLEMS.

  • If the resin has completely catalysed, sand it with a sheet of 100 grit abrasive paper and finish it with a layer of glossy polyurethane spray paint.


7. THE APPLIED VARNISH DOES NOT STICK TO THE RESIN

If the varnish you have chosen to finish the resin does not stick well to the product, you may have made some mistakes in the preparatory stage:

  • The resin may not yet be fully cured. Let the product dry for another 24 hours before applying the varnish
  • Make sure that the varnish you are using is compatible with the resin. Do not use varnishes that are not compatible with your products.
  • Verify that no sticky film has formed on your resin surface. If so, remove it as described in step 4.

EPOXY RESIN: PROBLEMS AND SOLUTIONS. THE 12 MOST COMMON PROBLEMS.


8. RESIN CURES TOO QUICKLY

Besides the hardening problems, you may also experience issues related to a too fast polymerization of your product.
Again, the reasons are linked to the temperature of your working environment: if it is too high, the product may catalyse too quickly and compromise your work.
It is therefore advisable to keep the temperature at around 20°-25° [68-77 F] and not to mix excessive doses of product.


9. AIR BUBBLES HAVE APPEARED ON THE SURFACE OF THE RESIN

The appearance of air bubbles is one of the most common problems when working with resin.
To avoid this process, make sure to mix the product carefully and slowly, in order to prevent air admission into the compound.
If, during the curing process, the resin features small bubbles on the surface, these can be easily removed with the use of a heat gun that you will have to move quickly over the surface at 10-minute intervals.
Remember that once the product has hardened, bubbles can no longer be removed unless you decide to make a further casting by using colouring agents.


10. RESIN, COMBINED WITH FIBREGLASS, FEATURES MICRO-HOLES

It may happen that, by using resin and fibreglass, some micro-holes can appear. In this case, the solution is very simple: fill these holes with resin using a spatula, let it dry and put down a second coat of resin.


11. RESIN IS NOT COMPLETELY CLEAN

If resin is not completely clean, the reasons may be certainly related to the cleanliness of the environment.
You must be very careful when cleaning the work tools, the container you are going to use (remove any oil or grease from the inside of the wall) and the room you are going to work in.
An extreme cleaning will minimize the risk of contamination of the resin by external agents.


12. WHAT IS AN EPOXY RESIN?

An epoxy resin is a particular type of resin that catalyses thanks to a specific hardener and without requiring any particular climatic condition.
This kind of product has excellent adhesive and mechanical properties, it is completely non-toxic and it can be used to create a wide range of artifacts.

Copyright © Resin Pro Srl.

DIY Pine Cone And Resin Scale / Blank

HOW TO USE EPOXY RESIN: TRICKS AND GENERAL GUIDE

HOW TO USE EPOXY RESIN: TRICKS AND GENERAL
GUIDE.


Definition: Epoxy resin is a two-component thermo-hardening liquid polymer.

Apart from the “technical” definitions, epoxy resin is a liquid product which, if exposed to a minimum temperature of 10-15°C [50-59 F], begins to catalyse and then solidifies.

Here are some “fundamental” points for who approaches this product for the first time.

How do you dose resin?

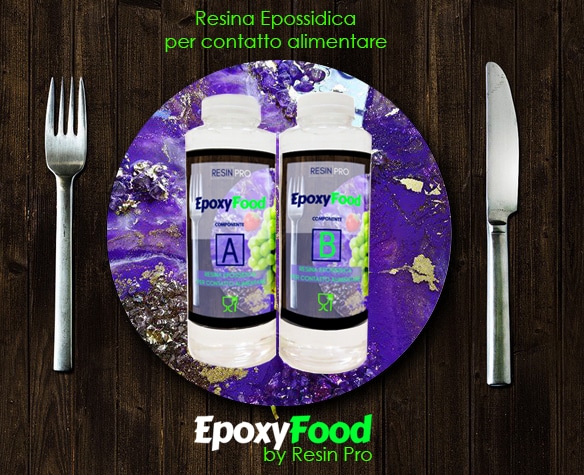
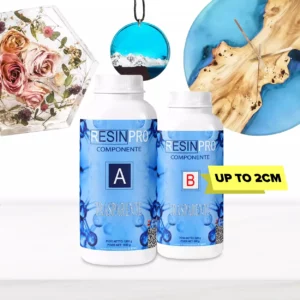
Since it is a two-component product, the package features 2 containers, one with resin “A” and the other with hardener “B”.


Equip yourself with an electronic scale to weigh the grams and with a container to mix the liquids

  • Put the amount of A you think you need in the container, trying to get a round number in grams (e.g. 200 gr [0,44 lb]), this will make it easier to count how much hardener to add;
  • Each product features on the container of B (or even on both) the usage ratio;
  • Let’s make an example with 100A: 60B. Multiply the grams of A previously weighed (200g [0,44 lb]) by 60 and then divide by 100, the result will indicate the grams of B to be added.

Practical example (ratio 100: 60)

40 gr [0,08 lb] component A. how much component B should I add?

Solution A 40/100 = 0.40 A   0.40×60 = 24. This means 24 gr [0,05 lb] of B.

This formula can be used for any usage ratio, 100:50, 100:30, etc.


How to prepare the resin?

After having been accurately measured, the resin must be mixed in an irregular way (so, not always in the same direction) for at least 2-3 minutes. This passage is fundamental, since if you mix it only for a few seconds, the resin won’t be well homogeneous at the molecular level, and therefore it will remain soft/opaque in some parts

How much does the resin harden?

Hardness depends on the formulation, the resting time and the catalysis temperature.

Furthermore, the mechanical resistance of the resin continues to increase up to 4-5 days after application.

So, after 24 hours it may still seem soft, but in the following days it will continue to harden until it becomes like “hard” plastic (let’s say “plexiglass-like”)

How long does it take for epoxy resin to solidify? Is it possible to accelerate hardening?

Also in this case, it depends on the formulation and on the temperature.

However, since it is a “THERMO-HARDENING” polymer, the more it is exposed to heat, the faster catalysis is.


As a general rule, every 10°C [50 F] more, the catalysis time is reduced by half.

Example

20°C [68 F] = 3h00’

30° C [86 F] = 1h30’

40°C [104 F] = 0h45’


To accelerate the catalysis, it is therefore sufficient to keep the casting close to a heat source (even a simple radiator). Be careful, however, not to heat up castings over 1 cm [0,39”] thickness. Resin may in fact heat up too much due to the mass effect (which is explained in the guide)
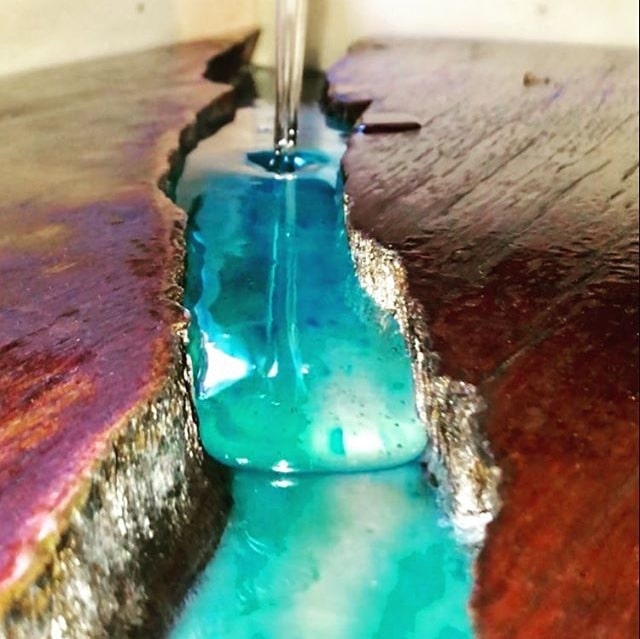
“Mass” effect.

This term is used to describe the exothermic phenomenon (i.e. heat release) that occurs when the resin is poured in high thicknesses (greater than 1 cm [0,39”]). The A molecules, indeed, release heat when they bind with the B molecules, and it is immediately which is immediately dispersed in minimum thicknesses. When the casting thickness is instead higher than 1 cm [0,39”], the heat is dissipated more slowly, so the casting starts to heat up.

This heating further accelerates the reaction, which causes the temperature to rise even more. For this reason, it is necessary to avoid pouring too much resin all at once, in order to prevent it from “cooking” (creating cracks, bubbles and darkening).

Does the resin yellow?

Any resin (even with “advertised” UV filters) sooner or later, if exposed to sunlight, will tend to change colour, turning towards an amber shade. It may take a few weeks or many years depending on exposure to sunlight (outdoor it will yellow sooner), on the thickness of the resin (the thicker it is, the more it will be visible) and the type of colouring. For example, if the resin is coloured in a “strong” tone such as red or black, the yellowing won’t be visible… while if it is white or pink, you will detect it sooner.

Resins usually feature reduced-yellowing characteristics and can therefore be used for manufactured products that should not change colour for several years (if stored indoor), such as paintings, tables or jewellery.


How to remove surface opacity or small ripples that appeared right after solidification?

These surface opacities (especially in the cold season) are the result of the effect of ambient humidity, which creates a patina on the surface of the casting. At first you won’t notice it, but as soon as it solidifies, you will see matt auras and even a crinkled film, in some points.

To avoid this, there are several strategies:

  1. Working in a low humidity (dehumidified) or warm environment;
  2. Heat up the 2 components before pouring them (for example by holding them over a radiator);
  3. Mix the resin with the hardener and apply it only when it starts to heat up (so that the reaction starts when it is still in the container). This operation is essential, but requires a little care.
    Resin (according to the quantity you have prepared, because of the “mass” effect) may in fact need a few dozen minutes before heating up. It should be checked every 5 minutes and as soon as it reaches 40°C [104 F] (that is when it is warmer than our hand), it can be applied. In this way, a part of the molecules has already reacted and it is therefore less vulnerable to ambient humidity. But be careful not to wait too long before pouring, otherwise it may solidify in the container!
  4. It would be a good rule not to apply it in the evening or when it rains (as the ambient humidity increases);
  5. Do not apply on surfaces that still retain moisture such as, for example, wet concrete or undried wood.

Continue reading “HOW TO USE EPOXY RESIN: TRICKS AND GENERAL GUIDE”

An old wooden trunk comes back to life thanks to resin and fluorescent pigment

An old wooden trunk comes back to life thanks to resin and fluorescent pigment

There is a great passion for wooden and resin items of furniture

For the beginners or those who have never used resin and fluorescent pigment before, we have created a brief guide that we hope will give you some useful advice.

We already know that resin gives a “wet” and polished effect. By using in addition the fluorescent pigment, we will enhance wood imperfections, turning the wooden trunk into a modern and unique item.


Resin preparation: we recommend to prepare 200-250 gr [0,44-0,55 lb] of resin for each sqm of the table surface; mix it carefully, following all the instructions included in the package. Once the resin is thoroughly mixed, leave it to rest (5 min) so that the air bubbles that appeared during the mixing procedure can rise.


Where to start?

The first step is to seal the surface of the wood, by applying the resin with a brush. In this way, all the holes (or defects) will be closed and when you will cast the resin it won’t leak out of the unsealed holes (if there are large cracks or openings, seal them with paper tape first). Wait around half a day for the resin to solidify and then get ready for the second step.

How to apply the resin on the trunk?

Start pouring the resin (using a plastic pot with spout) from the centre of the trunk. Since the edges of the trunk are usually irregular, pour it slowly and evenly over the surface. In this way it will be easier to achieve the so-called “mirror effect”.


The edges are the hardest parts. Put a piece of cardboard or a nylon sheet (both is better) on the floor, then carefully pour the resin right on the corner of the edge, and keep pouring along the entire perimeter. After that, quickly spread the “streams” of resin on the sides of the table with a brush, so that it evenly soaks all the wood fibre. After this operation, check the surface to find imperfections (air bubbles).

We recommend to use a hair dryer (or rather a blow dryer) and direct it over the bubbles on the surface to make them burst. If the resin “sneaks” into any surface defects, apply an additional quantity over the defect. Repeat the operation, if necessary. After 24 hours, the table is ready, and you can assemble the legs.

How much resin do you need?

Let’s choose the amount of resin and the amount of fluorescent powder pigment you need!
In order to have a thickness of at least 1,5 mm [0,05”] and therefore achieve the self-levelling (mirror) effect, about 2 kg [4,40 lb] of resin/sqm are required (also according to the size of the holes to filled).

For example:

If you use a section of a circular trunk 60×60 cm [23,62”x23,62”], you will have an area of ​​about 0.3 sqm (0.3×0.3×3.14). Then 2 kg [4,40 lb] X 0.3 sqm = about 700 gr [1,54 lb] of compound A + B (we suggest to use our “multipurpose” resin).


It is advisable to always take a few extra pounds of resin, rather than finding out afterwards that you need 100 gr [0,22 lb] more and that therefore the surface will not self-level. Consider it an investment, since you’ll be able to perform 2-3 extra tests to find the fluorescent pigment concentration you like. This leads to the second question:


How much fluorescent or phosphorescent powder should you buy?

It obviously depends on the size of the holes to be filled. The fluorescent pigment is very effective, therefore it requires a quantity of about 20%. So, if you have 1 kg [2,20 lb] of resin, you need 200 gr [0,44 lb] of pigment.

A trick to save pigment is to fill the larger holes with transparent resin first and then fill only the last few inches with the resin mixed with the pigment.


Before starting, we recommend to perform a little test in a plastic cup, until you achieve the desired fluorescent effect.

For example: 15 gr [0,03 lb] of epoxy component + 3 gr [0,006 lb] of fluorescent pigment powder. Once hardened and exposed to the sun, you can understand how to create this product. If you are not satisfied, try again with 15 gr [0,03 lb] of resin + 5 gr [0,011 lb] of pigment powder, until you achieve the desired fluorescence!

Golden Rule: if you don’t have that much experience with epoxy, perform a test on a small wooden board before applying it on a gorgeous piece of olive-wood or any other valuable wood cuttings, in order to gain experience and manual skills with the product.
Hopefully, these brief technical suggestions will help you avoid (or at least reduce) the major “setbacks” that may occur during this beautiful processing: don’t be discouraged if the first test is not perfect, the final result will improve more and more with every attempt.


Here’s an idea – add glitters or pieces of coloured glass:


Good work!

Copyright © ResinPro di Danilo La Porta

Total or partial reproduction by any medium of this content along with the provision to third parties, either free of charge or against payment, is prohibited.

How to build a wood and resin table

How to build a wood and resin table


In this step-by-step procedure we will learn the most famous application that combines an innovative material (epoxy resin) and a traditional one (wood). This application allows the creation of amazing artifacts and can potentially be performed with any material (fabrics, caps, metal, etc.)


1) Once you have chosen the wood you like the most (with a thickness of 2-3 cm [0,78”-1,18”]), sand it with abrasive paper. The finer the grain (300-400), the more the surface will be “closed”, reducing the absorption of the resin and therefore preserving more of the natural colour of wood. On the other hand, if the grain is “coarse” (60-80), the shade of the wood will be darker (according to your taste!)

2) Cut the piece into 4 parts (or as many as you want), then blow it with compressed air (if no soft brush is available) in order to remove dust and sawdust.

3) Let the wood dry in the sun (or during the cold season near a radiator) for 24-48 hours. The wood must avoid contact with water for at least 24 hours.

4) NOW WE ARE READY to start!


5) Create a wooden frame (it will be the shape of the table) 3-4 cm [1,18”-1,57”] high. This frame will be used only as containment and afterwards it will be removed, so don’t waste too much time on it.


6) Get a common packaging nylon or polyethylene sheet and place it inside the frame, making the edges adhere as much as possible (resin does not stick to polyethylene, so it will be easy to remove the table from the mould once it has hardened). You can make use of a double-sided adhesive tape for this. The resin will take on the shape of the nylon, so it’s worth being precise! Place everything on a perfectly flat work surface, making sure the nylon does not have any lacerations (in such case, put a piece of adhesive tape on it).

7) Position the pieces of wood inside the mould as you prefer (you can also incorporate other objects, such as stones and pieces of metal).

8) Mix a limited quantity of resin (A + B) (for example 300 gr [0,66 lb]) and spread it generously on all sides of the wood with a brush. Then turn them on the opposite side (obviously by using gloves) and keep on brushing. Make sure to perfectly soak the most irregular parts (such as the bark). This procedure serves to “seal” the wood, so that when you will dip it in resin, there will be no appearance of bubbles that may be embedded in the resin. After this operation, place the resin-coated pieces in their final position inside the mould. Wait until hardening (minimum 8 hours).

9) Prepare the remaining resin, mix it carefully in a large container and let it rest (allowing the air bubbles to escape) for 10-15 min.

10) Evenly cast the resin up to the desired level. Equip yourself with a hair dryer (or rather a blow dryer) and direct it over the bubbles on the surface to make them burst. In 24 hours, the table is ready to be removed from the mould!


Sidenotes

Nylon is the cheapest solution, but it creates a more irregular surface. To perfectly square the table, you can use sanding paper (or a hacksaw). After the abrading of all irregular parts, the surface will be opaque, but don’t worry! Just apply a thin layer of resin with a brush to make it transparent again!

If instead you decide you want “perfection”, you need to purchase a plexiglass tub as a container. In this way, the resulting table will be already perfect and the procedure will be much faster.


Resin consumption

If the table was made of pure resin (60x60x4), more than 10 kg [22,04 lb] of resin would be required. But since half of the volume is taken up by wood, 6 kg [13,22 lb] were enough.


This was the first table I’ve made, and I think the result was quite good for a beginner (you tell me!), so I guess anyone can be able to do it, as long as you pay close attention to the preparation of the mould and if you are equipped with all the necessary tools. I will soon create another one! Good work!


Copyright © ResinPro Srl

How to make a crystal with a real flower inside?

How to make a crystal with a real flower inside?


Firstly, the flower shall be dried, otherwise the colour changes once it is resin-finished (for example, the rose may turn “green” if it has not dried before).

Afterwards, it is necessary to clean and dry the mould thoroughly. Arrange the flower as you like. Lastly, pour the resin and let it harden.


There are several types of crystals, and if you need to create a mould with the specific shape of your crystal, we recommend to use our casting rubber or silicone putty for making your own copy.


Next step – replicate the crystal in order to be able to use it with the flower. Prepare the base

Prepare the base (for instructions check this video https://m.youtube.com/watch?list=PLbxihmeaTwlpIFiEC2wT_TtscfHChggbu&v=9vX0RahinBo),

put the crystal in the formwork, cast the liquid rubber and after 24 hours the mould with the shape you have created will be ready!


Besides flowers, you can place any object into the crystal. For example, by using Fimo polymer clay and Transparent Epoxy Resin, as our creative Angenia Creations did.


Home
Account
0
£0.00
Favorites
Assistance