 Free shipping on orders over £29,85


← Back to how to make a counter mould in resin?
If you’re looking to create resin surfaces that can handle heat, such as coasters, trays, or kitchen boards, choosing the right moulds and resin is key. Here’s how to achieve truly durable, heat-resistant results.
Selecting the Right Mould and Resin
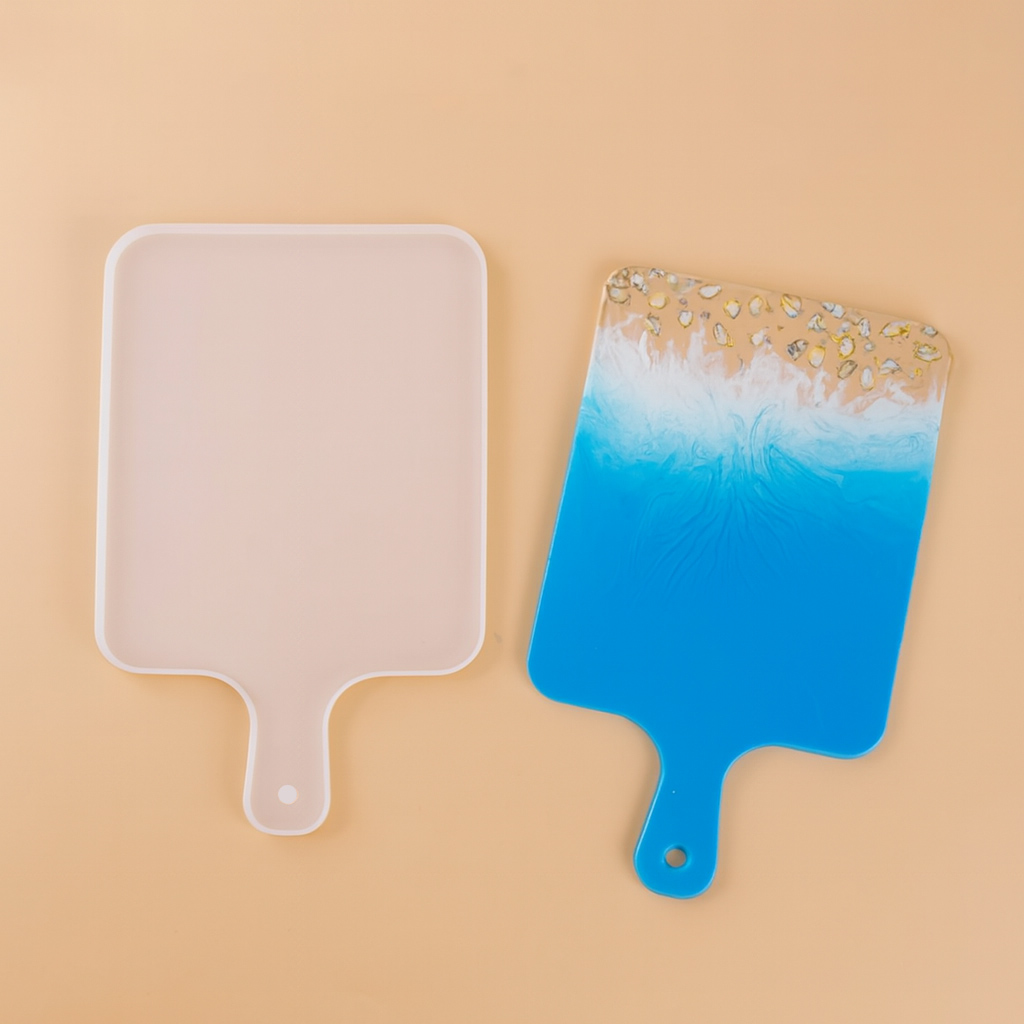
Silicone moulds such as the Rectangular Cutting Board Silicone Mould for Resin Casting are designed to withstand both the heat of curing and everyday use. For your resin project to be heat-resistant, it’s essential to use a specialised heat-resistant resin. These resins, when properly applied and cured, are suitable for items like coasters and trays that may be exposed to high temperatures—some up to 200°C after full cure.
Best Practices for Creating Heat-Resistant Surfaces
To ensure optimal heat resistance, pour a 3mm layer of heat-resistant clear resin into the mould first. Allow this layer to set completely before adding additional decorative or coloured resin layers. Patience is vital: full curing can take up to 72 hours, so avoid placing hot items on your newly finished piece too soon. Always release your cast from the mould within 12 hours post-pouring to prevent unwanted adhesion.
- Choose only compatible, high-quality, heat-resistant resins.
- Adhere strictly to recommended curing times.
- Do not use aggressive solvents on silicone moulds.
When This Matters
Heat resistance is particularly important for everyday objects like coasters, chopping boards, and serving trays, which may come into contact with hot cookware or drinks. Using the right materials and techniques ensures your creations remain durable and attractive for regular use.
Related products
Related guides
With attention to resin selection and process, it’s entirely possible to produce functional, heat-resistant surfaces using quality resin moulds. If you’re keen to explore further, our main guide on how to make a counter mould in resin covers broader techniques and inspiration for your DIY resin projects.