 Free shipping on orders over £29,85

Do you need to sand the surface to treat a resin floor?
Step-by-step guide for flawless resin floor treatments


If you’re considering a resin floor installation, proper surface preparation—including sanding—is essential for durability and finish quality. This guide explains why and how sanding fits into resin floor treatments, outlining each key step and the best practices for every surface type.

What You’ll Need
- “Epoxyprimer” – Universal Water-Based Two-Component Epoxy Floor Primer: A water-based primer promoting adhesion and durability for various substrates in epoxy resin flooring.
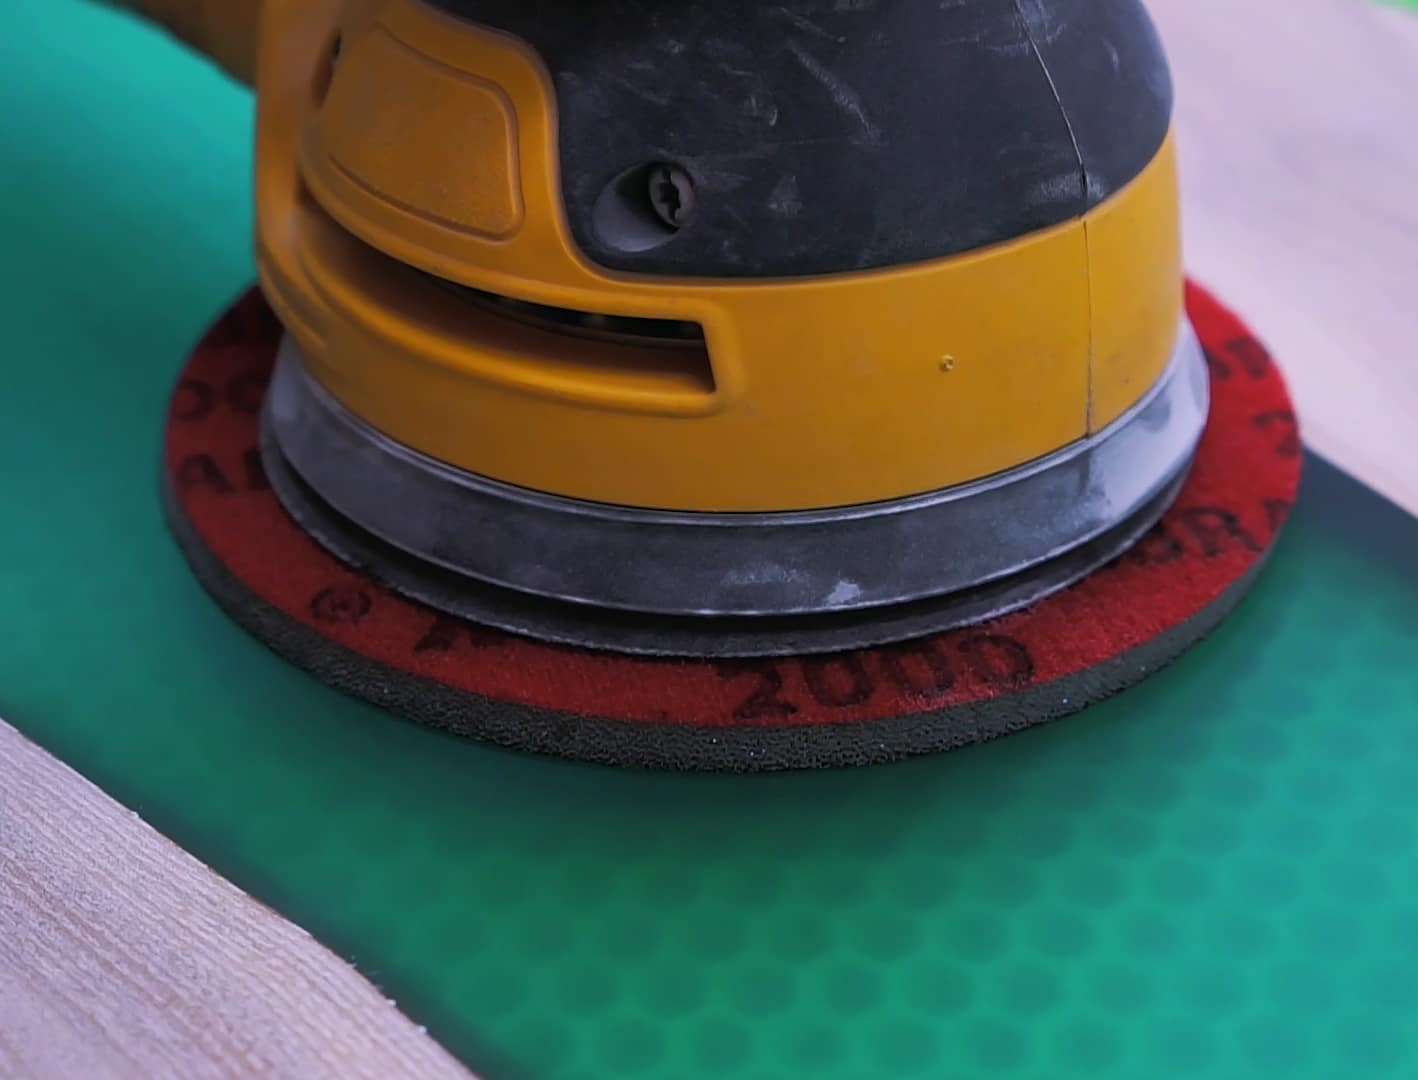
- “Ebonite Abralon” – Sanding Pads 360-4000 Grit for Resin and Wood: Pads designed for detailed sanding and polishing of epoxy resin and wood surfaces.
- Dry Sanding Discs Kit 150mm – Assorted Grits for Resin and Wood: A set of 150mm dry sanding discs in varied grits designed for sanding resin and wood surfaces.
- “EpoxyWood” – Wood Restoration Epoxy Resin for Deep Penetration and Waterproofing: A wood restoration epoxy resin designed for deep penetration and complete waterproofing.
- Vacuum cleaner or broom
- Protective gloves, dust mask, and goggles
- Microfibre cloths

See Surface Preparation in Action
Proper surface prep underpins every successful resin floor project. These images showcase expertly sanded and primed surfaces, setting the stage for smooth and durable resin finishes.
Step 1: Assess the Surface and Remove Debris
Start with a clean baseline for adhesion. Before any sanding, remove existing coatings, paint, or dirt from the floor. Sweeping and vacuuming ensure no debris will get in the way during sanding or resin application. Check for oil or grease, which should be treated with suitable degreasers.
For wooden surfaces, inspect for structural damage or moisture. Concrete or screeds should be dry and stable. This careful assessment prevents issues like bubbling or poor adhesion later in the process.
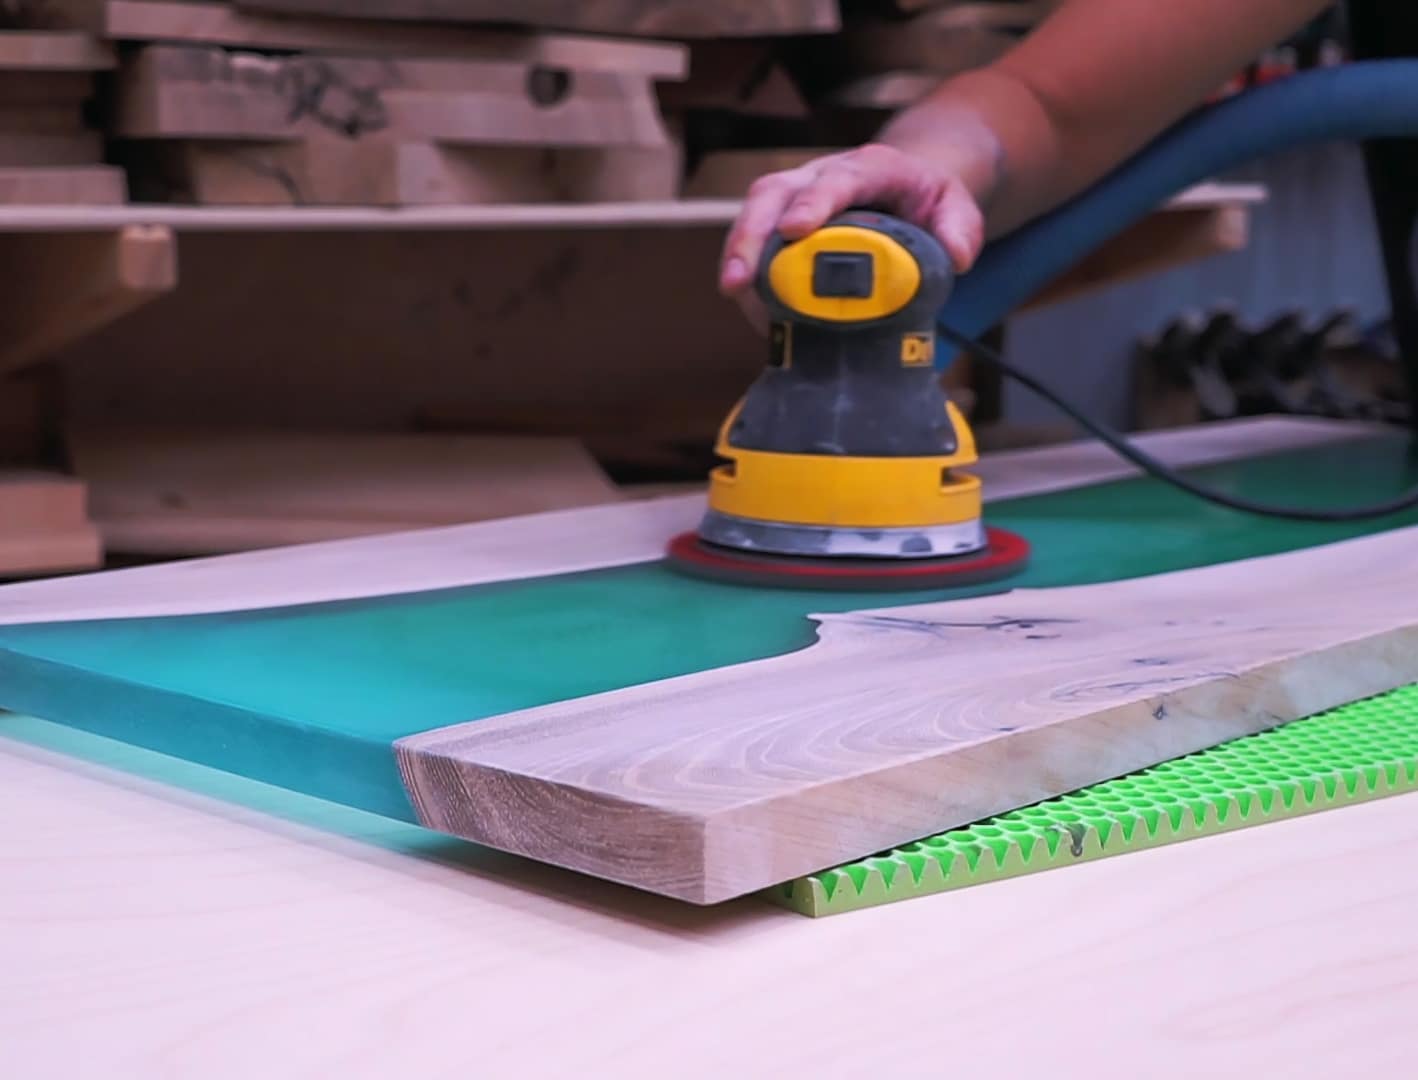
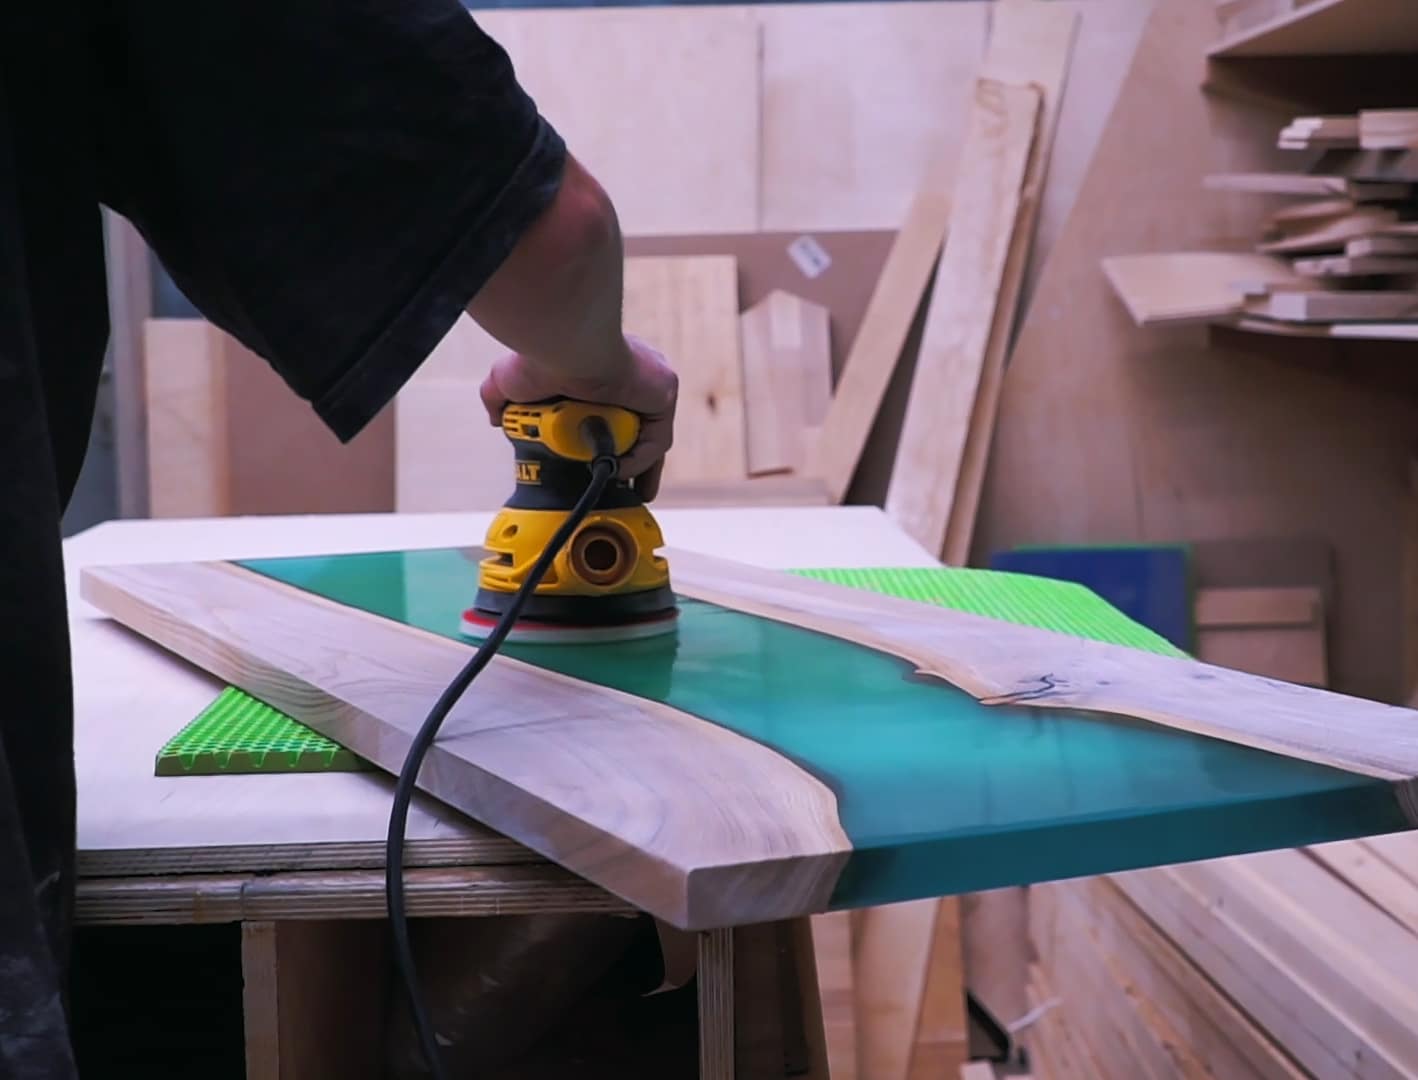
Step 2: Sand the Floor to Create a Mechanical Key
Choose sanding grit based on current surface. For raw concrete or screed, use a medium to coarse grit (such as P80 or P120) from the Dry Sanding Discs Kit 150mm – Assorted Grits for Resin and Wood to even out imperfections and provide enough roughness for the primer and resin to bond effectively.
For already smooth or previously finished resin floors, fine sanding is sufficient. Opt for higher grits (P600 or above) from the same kit or a finishing pad such as the “Ebonite Abralon” – Sanding Pads 360-4000 Grit for Resin and Wood. Sanding ensures mechanical key, which is critical for adhesion. Always move in circular motions and avoid excessive pressure to prevent gouges or uneven areas.
For wooden substrates, sanding is even more important. Sanding opens up the wood grain, enhancing deep penetration when using a restoration resin such as “EpoxyWood” – Wood Restoration Epoxy Resin for Deep Penetration and Waterproofing.
Step 3: Clean Thoroughly After Sanding
Check for a dust-free finish before priming. After sanding, all dust and particles must be removed using a vacuum and a damp microfibre cloth. Even tiny dust residues can affect how primers and resins adhere, causing defects or weak spots in the final floor.
Always allow the surface to fully dry before moving to the next step. Skipping this crucial clean-up can compromise the integrity and longevity of your resin floor treatment.
Step 4: Apply a Suitable Primer
Priming maximises resin bond. The prepared surface is now ready to be primed for resin application. For most substrates—including tiles, screeds, concrete, and wood—a high-quality primer like the “Epoxyprimer” – Universal Water-Based Two-Component Epoxy Floor Primer is recommended. This universal epoxy primer ensures strong adhesion and helps to seal porous surfaces prior to resin pouring.
Follow application guidelines, allowing appropriate curing time (usually 24–48 hours), before proceeding to pour or coat with your chosen resin system. Proper priming reduces the risk of delamination and improves the aesthetic and functional performance of the floor.
Tips, Common Mistakes, and Troubleshooting
Rushing the sanding process or skipping it entirely can lead to peeling, bubbles, or patchy adhesion. Always choose the appropriate grit for each stage—start coarser, progress to finer, and never ignore cleaning between stages. Too much pressure during sanding may damage timber or create uneven patches in resin or concrete. Wear protective gear throughout to avoid inhaling dust or contacting chemicals, and always let each layer dry or cure fully before continuing to the next.

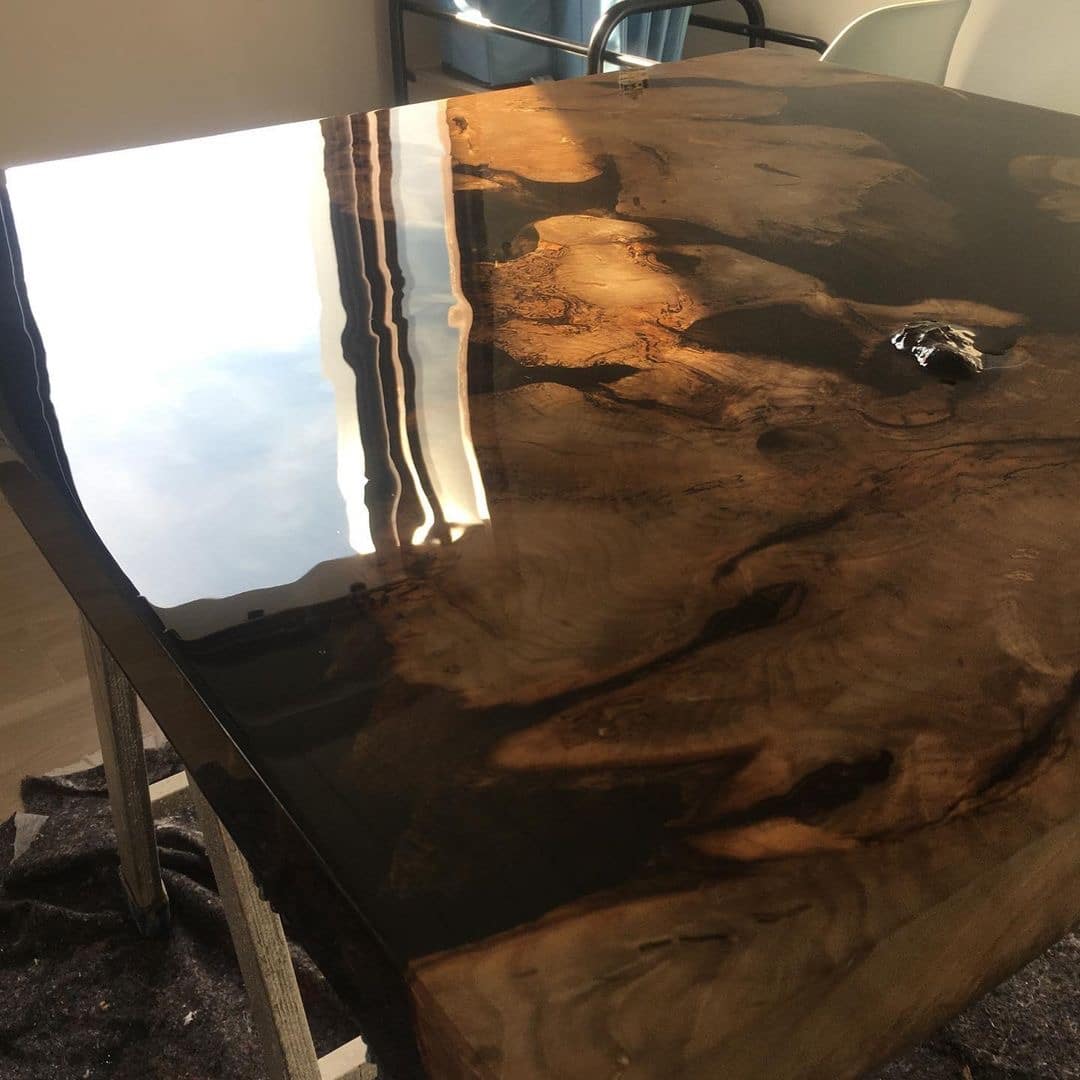
Before and After: Sanding for Resin Floors
Effective sanding makes all the difference. Compare untreated versus sanded substrates—you’ll see instantly why preparation is vital for flawless results when applying resin flooring systems.

- "Epoxyprimer" – Universal Water-Based Two-Component Epoxy Floor PrimerPrice range: £156.45 through £286.45"Epoxyprimer" is a water-based two-component epoxy floor primer designed for use on concrete, timber, and tiles.
- "Ebonite Abralon" – Sanding Pads 360-4000 Grit for Resin and Wood£4.15Ebonite Abralon Sanding Pads offer a sanding solution designed for resin and wood finishing within a surface treatment context.
- Dry Sanding Discs Kit 150mm – Assorted Grits for Resin and Wood£7.45Dry Sanding Discs Kit provides assorted grits for sanding resin and wood, designed for careful finishing suitable to the theme.
 "EpoxyWood" – Wood Restoration Epoxy Resin for Deep Penetration and WaterproofingPrice range: £27.95 through £41.95EpoxyWood is designed for wood restoration with deep penetration and waterproofing, suitable for repairing wooden surfaces in line with surface…
Frequently Asked Questions
Is sanding always necessary before treating a floor with resin?
Sanding is highly recommended for optimal adhesion, though the exact method and grit depend on your substrate.
Which sanding grit should I use for resin floor preparation?
Start with a medium to coarse grit for rough surfaces and finish with finer grits for smoothing before priming.
Can I apply primer or resin without sanding the floor?
Skipping sanding may cause poor adhesion and durability. Sanding is critical for most substrate types before priming.
How long should I wait between sanding and priming?
Once all dust is removed and the surface is dry, you can prime straight away. Avoid significant delays to reduce contamination.
Should you sand between layers of resin or topcoats?
Light sanding between coats can improve adhesion, especially if the prior layer has fully cured before the next application.
How can I avoid bubbles after resin flooring installation?
Thoroughly sanding and cleaning, as well as controlled application, reduces the risk of bubbles forming in the finished floor.