 Free shipping on orders over £29,85


How do you colour two-component resin?
Step-by-step guide for vibrant, lasting resin colours


Adding colour to two-component resin opens up a wide world of creative possibilities for artists and hobbyists. Whether you want bold, opaque shades or subtle, glass-like tints, the process is all about thoughtful preparation and careful technique. This guide explains everything you need to know to achieve professional, lasting colour in your resin creations.
What You’ll Need
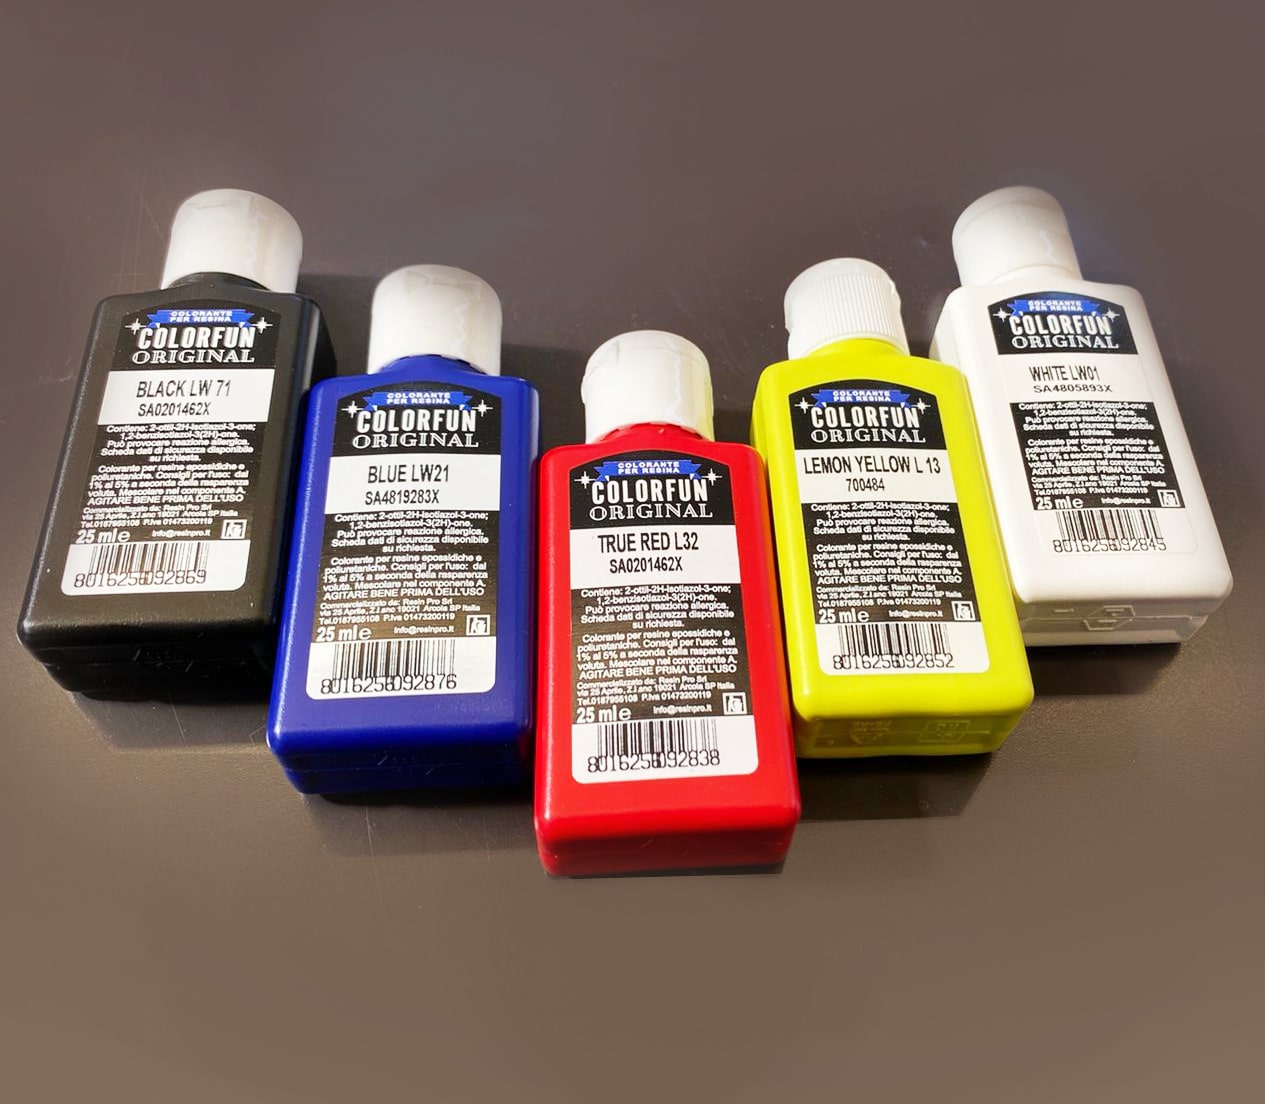
- “Colourfun” – Liquid Epoxy Resin Colourant 25-100ml – High coverage: Liquid epoxy resin colourant for strong, vivid colours and translucent effects in resin art and casting.
- “Colourfun Set” – Liquid Epoxy Resin Colourant Set for Solid Colour Effects: A set of intense, translucent colouring pastes designed for transparent epoxy resin applications.
- “Trasparente” Epoxy Resin Kit 800g + Mica Powder 10g – 10 Colour Variations: An ultra-clear epoxy resin kit designed for various craft, woodworking, restoration, and industrial applications.
- “Magic Crystal” – Transparent Resin Colour 45ml: Transparent resin colour designed to add vivid, glass-like effects to resin projects.
- Mixing cups and stirrers
- Disposable gloves
- Masks or good ventilation for safety
- Clean workspace

Choosing the Right Colourant
Not all colourants are created equal. For two-component resin, select products specifically developed for epoxy systems to ensure vibrant colours and compatibility. Liquid dyes, pigment pastes, and mica powders each offer unique effects—liquid offers translucency, pastes give solid colour, and mica excels at metallic or pearlescent finishes. Experiment with small batches to find your favourite look.
Step 1: Prepare Your Workspace and Safety Gear
Work in a clean, dry, dust-free area to prevent debris from contaminating the resin. Lay down silicone mats or disposable coverings to keep spills contained. Always wear gloves to protect your skin, and opt for a mask or ensure good ventilation as some colourants and resins may emit fumes during mixing. Having all your materials ready in advance creates a smooth workflow and reduces the risk of mistakes.
As different resins and pigments can have varying safety requirements, check any supplied instructions before beginning. Spending a few minutes preparing will help you to avoid sticky surprises and ensure highly professional results.
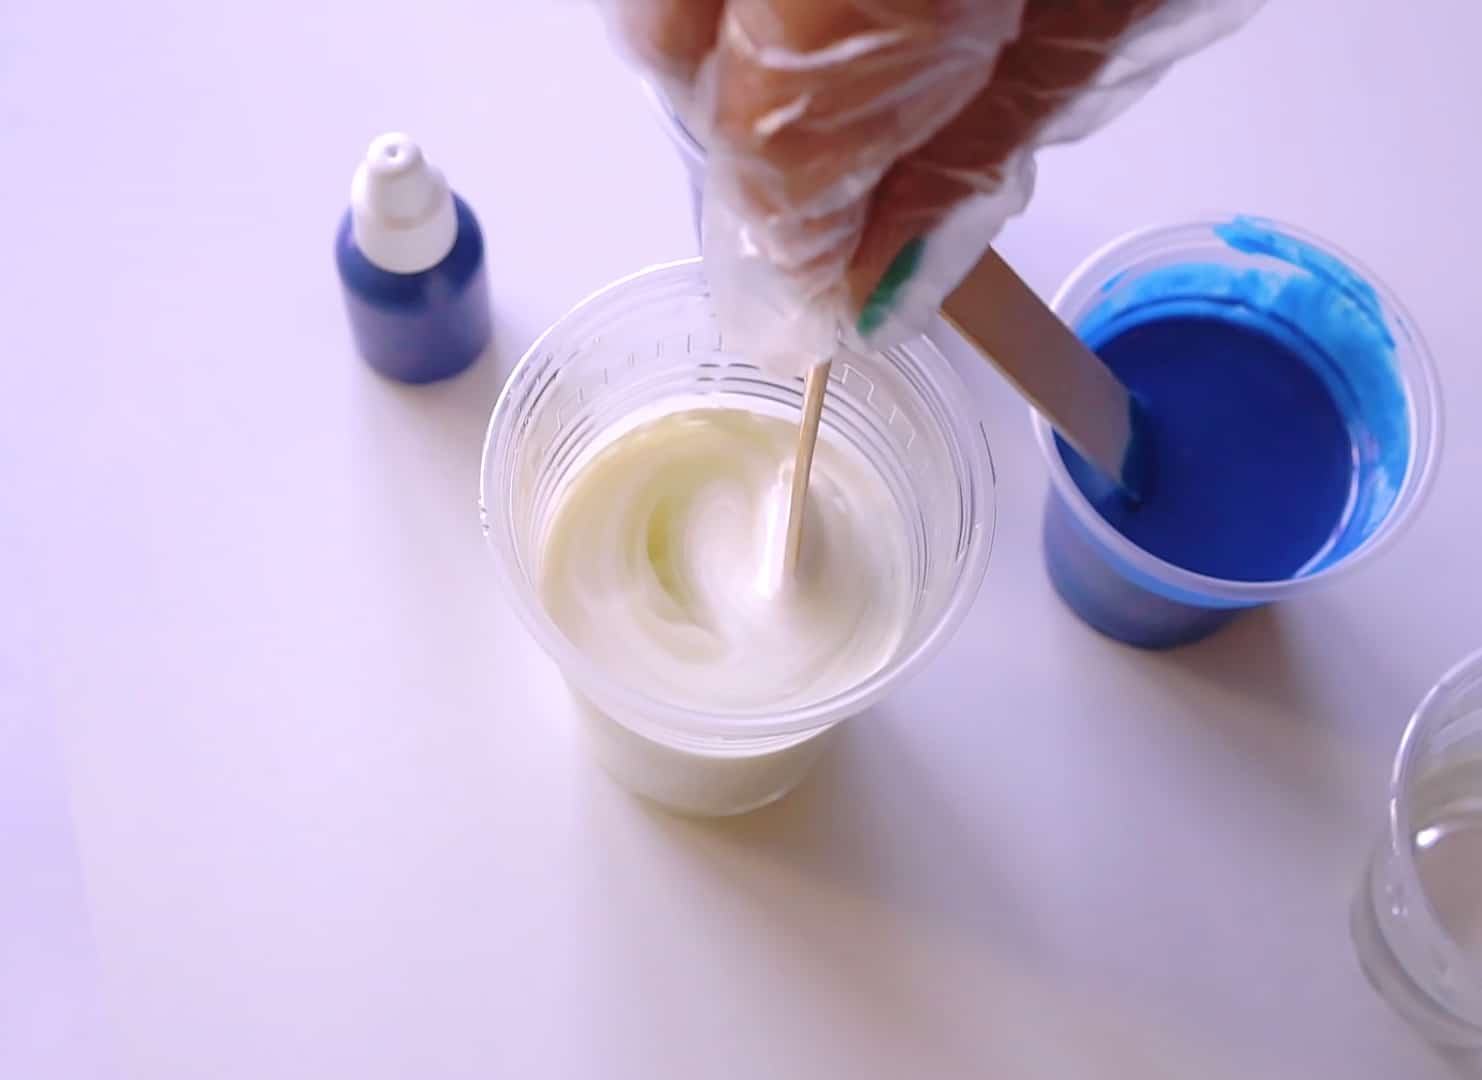
Step 2: Mix the Resin Components Thoroughly
Measure out the required amounts of resin and hardener, following the manufacturer’s guide for precise ratios. Pour both liquids into your mixing cup, then stir steadily for at least three minutes. Scrape the sides and bottom of the container to guarantee a consistent chemical reaction.
A thorough mix at this stage is critical, as any unmixed component can cause cloudiness or uneven curing. Do not add colour at this point—wait until the resin and hardener are fully combined to ensure the colour disperses evenly.
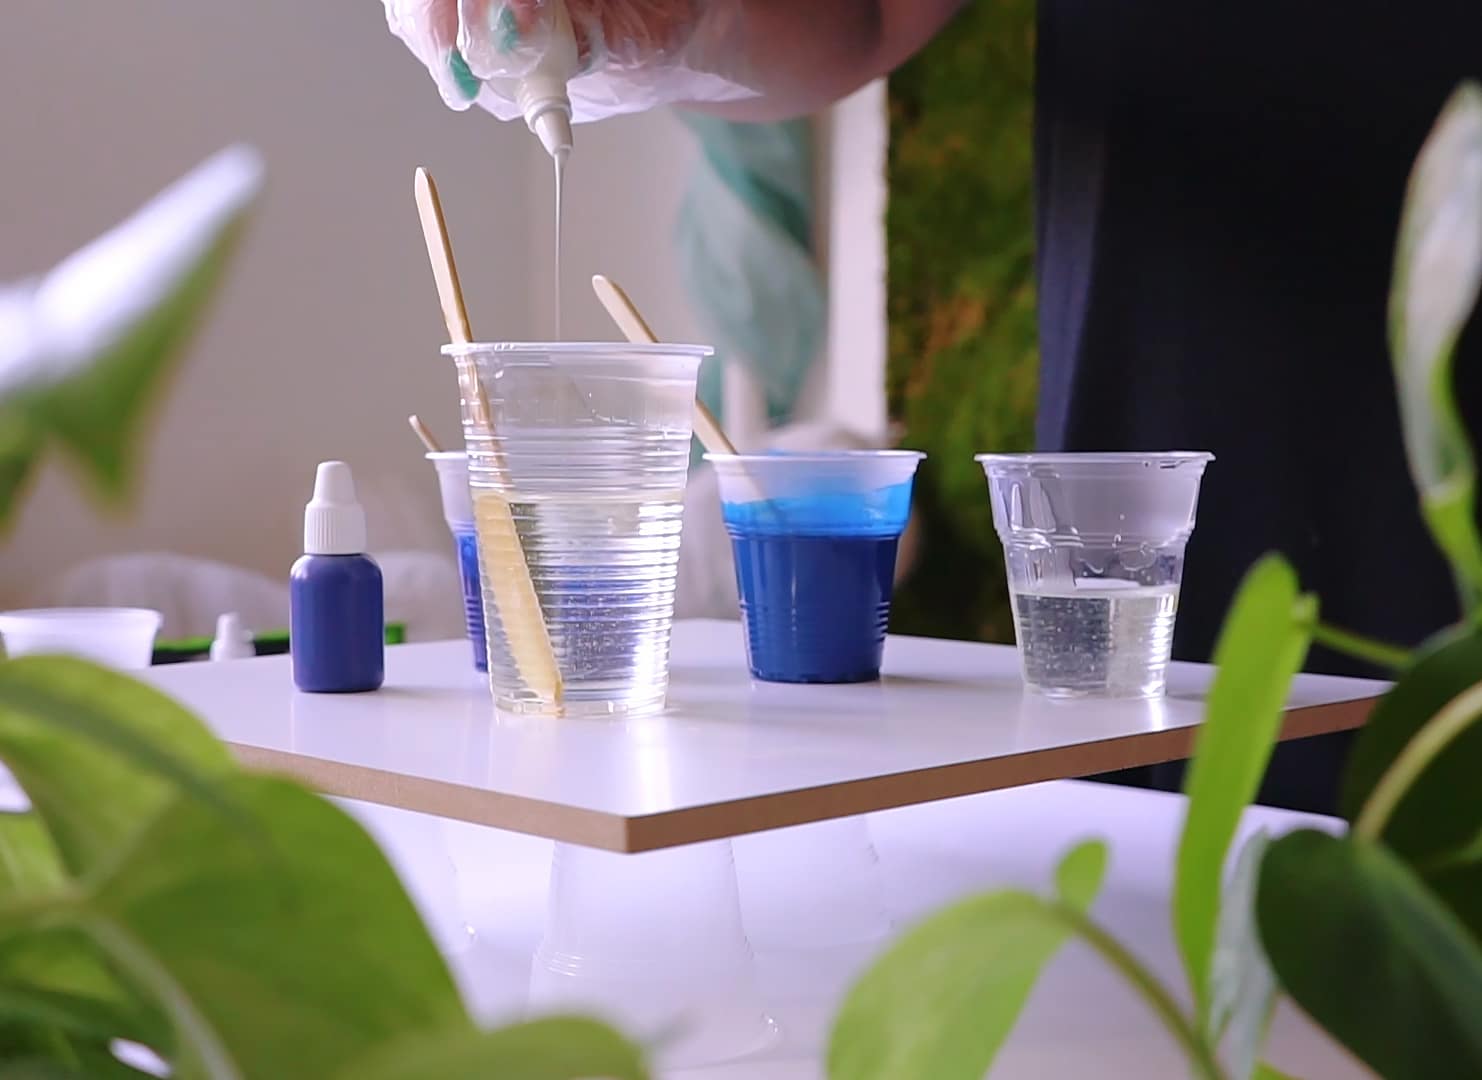
Step 3: Add Colour Carefully, One Drop at a Time
Once your resin is ready, slowly incorporate your chosen colourant. For vibrant, opaque results that still allow for adjustment, begin with a minimal amount and build intensity gradually. Colourfun Liquid Epoxy Resin Colourant offers Highly concentrated formula for intense pigment with minimal drops. Just a few drops can produce deep colours or lovely stained-glass effects, so use sparingly.
For translucent finishes or realistic crystal effects, consider a dedicated transparent formula such as Magic Crystal – Transparent Resin Colour 45ml, which allows Customisable colour intensity from translucent to opaque. Mix thoroughly but gently, ensuring the pigment is evenly distributed without introducing excess bubbles.
Step 4: Test, Adjust and Pour
Before you commit to your main mould or project, test a small amount of coloured resin on a spare piece or disposable cup. This lets you see exactly how the colour appears once the resin spreads and cures. If the hue is too light, add additional colourant drop by drop until you achieve the desired shade.
Once you are satisfied, you can pour the remaining resin into your chosen mould or surface. Work steadily to minimise bubbles and uneven coverage. Some resin kits, such as the “Trasparente” Epoxy Resin Kit with Mica Powder, bring together Crystal clear epoxy resin suitable for beginners and professionals with ready-to-mix metallic pigments, making it easier to create stunning effects without guesswork.

Step 5: Curing and Finishing Touches
Allow the coloured resin to cure in a dust-free space, away from direct sunlight and temperature extremes. Curing times will depend on your resin system and environmental conditions—avoid touching or moving the piece until fully set. Once completely cured, inspect for clarity and completeness of colour dispersal.
If you wish to achieve extra clarity or particular glass-like finishes, products like “Magic Crystal” – Transparent Resin Colour 45ml are designed to ensure your work Maintains absolute glass-like transparency without cloudiness. Finishing can include gentle sanding or a final clear topcoat to protect and enhance the coloured surface.
Tips and Common Mistakes to Avoid
For the best results, always add pigment slowly to prevent oversaturation—which can inhibit curing or cause the colour to appear cloudy. Never exceed the recommended dosage, typically no more than 5% of pigment by weight of the resin. Mixing too vigorously can introduce bubbles; stir gently and methodically.
If aiming for translucent or crystalline effects, always choose colourants formulated for transparency. Avoid generic paints or low-quality dyes, as they may separate or settle, ruining the clarity of your resin project. And finally, patiently allow the resin to cure without disturbance to avoid surface imperfections and maintain flawless colour results.
Troubleshooting Cloudy or Streaky Resin
If your resin turns out cloudy or streaky, double-check your mixing technique and colourant quantity. Incomplete mixing, excess pigment, or non-compatible dyes are the most common culprits. Browse our selection of Dyes and Pigments to find the right options for clarity and durability.
- "Colourfun" – Liquid Epoxy Resin Colourant 25-100ml – High coveragePrice range: £3.65 through £9.85Liquid colourant designed for use with epoxy resin to create vibrant colours and stained glass effects with minimal drops.
- "Colourfun Set" – Liquid Epoxy Resin Colourant Set for Solid Colour EffectsPrice range: £13.45 through £48.15Liquid epoxy resin colourant pastes for intense translucent effects in resin projects, compatible with two-component resin systems.
 "Trasparente" Epoxy Resin Kit 800g + Mica Powder 10g – 10 Colour Variations£19.85"Trasparente" is an ultra clear multipurpose epoxy resin kit suitable for casting and DIY projects with included mica powder.
 "Magic Crystal" – Transparent Resin Colour 45ml£4.65"Magic Crystal" Transparent Resin Colour 45ml delivers clear, intense colour suitable for creating crystal-like resin effects.
Frequently Asked Questions
What colourants are best for resin art?
Liquid epoxy colourants and transparent resin dyes are ideal for strong, even colours and unique effects in resin art.
How do I prevent my coloured resin from going cloudy?
Mix thoroughly, use compatible pigments, and avoid over-saturating the resin for optimal clarity.
How much colourant should I add to my resin?
Generally, no more than 5% pigment by weight. Add small amounts gradually to reach the desired shade.
Which resin kit includes mica powder for colouring?
The "Trasparente" Epoxy Resin Kit 800g comes with Sahara Mica Powder for easy and effective mixing.
Can I mix different types of resin colourants?
Yes, but ensure all colourants are compatible with two-component epoxy resin and test in a small batch first.
What type of resin colour should I use for transparent effects?
Use transparent resin dyes like Magic Crystal to achieve brilliant, glass-like results without cloudiness.
Do I need special safety gear when colouring resin?
It's best to wear gloves and work in a ventilated area, as some resins and pigments may cause irritation.