 Free shipping on orders over £29,85

How do you grout a floor with resin?
A step-by-step guide for robust, seamless resin grout floors


Resin grouts offer exceptional durability, seamless finishes, and resistance to stains or moisture. Whether you are a professional or an enthusiastic DIYer, mastering the right approach to grouting a floor with resin can transform the look and longevity of stone, tile, or aggregate flooring. This guide will help you achieve a flawlessly grouted surface for residential or commercial spaces.

What You’ll Need
- “Magelstick” – Epoxy Mastic for Stone, Metal, and Cement Bonding and Grouting – For grouting joints, repairing, or filling gaps
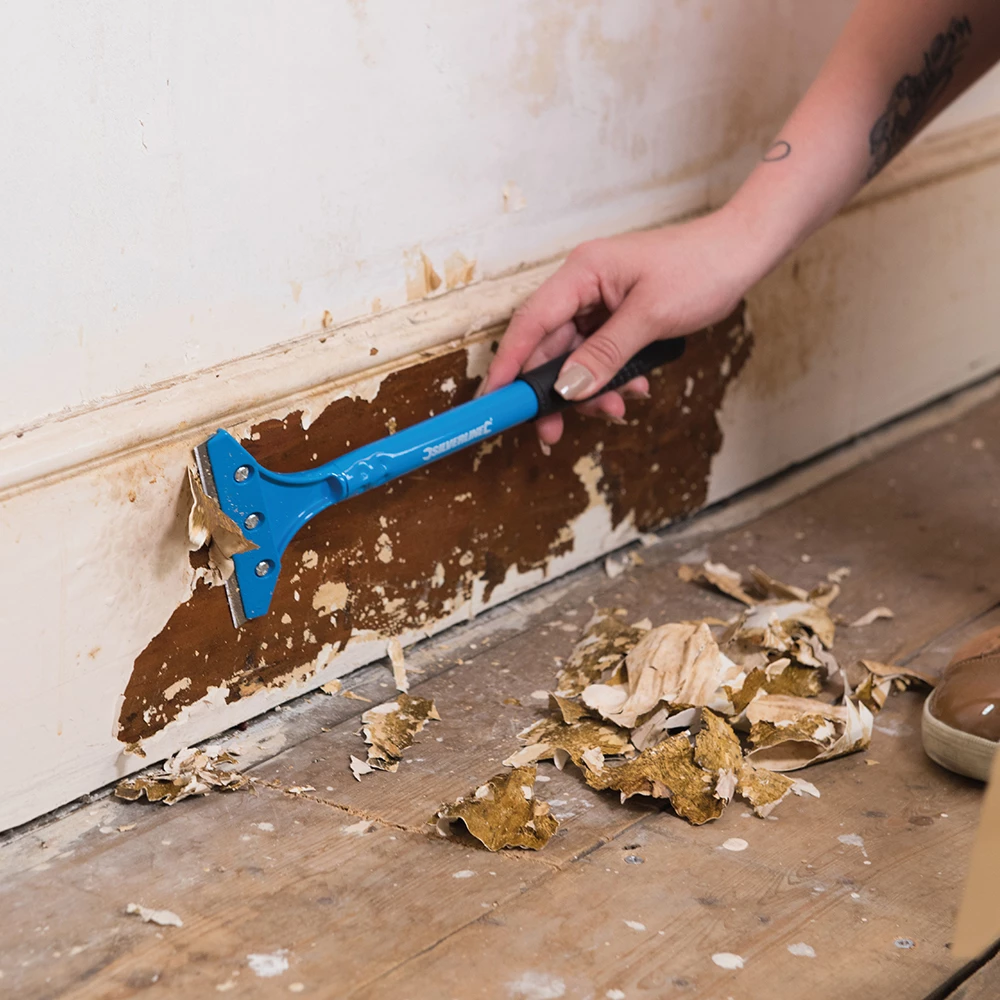
- Heavy Duty Scraper for Paint and Epoxy Resin Removal – For removing existing floor coverings or old grout
- “Epoxyprimer” – Universal Water-Based Two-Component Epoxy Floor Primer – For priming the substrate to ensure optimal resin bonding
- “Trasparente” – Epoxy Binder for Coloured Pebbles and Grits – For decorative or pebble-inlaid resin grouting
- Mixing buckets, trowels/spatulas, masking tape, safety goggles, gloves

Preparing for Resin Floor Grouting
Effective preparation sets the foundation for long-lasting resin grout applications. Always remove all existing grout or coverings thoroughly, fix cracks, and test for moisture. Properly treating your substrate prevents adhesion failures and uneven finishes down the line. Take time at this stage for the best results in the following application steps.
Step 1: Prepare the Floor Surface
Start by thoroughly clearing the area of all furniture and loose items. Use a strong vacuum and sweeping to remove dust, grit, or debris. For renovation projects, a Heavy Duty Scraper for Paint and Epoxy Resin Removal is ideal for lifting off old grout, paint, or tile remnants, ensuring a clean, sound base for resin application.
Inspect the substrate for cracks or hollows. Any significant holes or damage should be patched and levelled before proceeding to priming. Thoroughly clean and dry the subfloor to prevent adhesion or curing issues later in the process.

Step 2: Apply Primer for Secure Bonding
Priming your prepared floor is crucial for strong resin adhesion and a stable, long-lasting result. Choose a reliable floor primer and apply it according to the manufacturer’s instructions—usually with a roller or large brush, working the primer into porous surfaces.
For best results on concrete, screed, timber or ceramic substrates, select the “Epoxyprimer” – Universal Water-Based Two-Component Epoxy Floor Primer. Allow the floor primer to fully cure—typically 24 to 48 hours—before advancing to resin grout application.
Step 3: Mix and Apply Resin Grout or Binder
Once the primer has cured, you are ready to mix and apply your chosen resin grout system. Carefully read mixing ratios and instructions—a precise mix is essential to achieve maximum strength and workability.
If repairing or grouting traditional tiles, cracks, or stonework, an epoxy mastic such as “Magelstick” – Epoxy Mastic for Stone, Metal, and Cement Bonding and Grouting is highly effective. Plan your resin mixing carefully and use mixes in small batches for best results. Work the resin firmly into joints using a grout float, trowel, or spatula, removing excess and ensuring a compact, smooth finish.
If your floor design incorporates decorative aggregates or pebbles, use a binder like “Trasparente” – Epoxy Binder for Coloured Pebbles and Grits by mixing the binder thoroughly with the chosen stones before laying and compacting on the ground. This ensures full encapsulation and a stable, grout-like surface.

Step 4: Finishing, Cleaning, and Curing
Immediately after application, tidy up spills and smooth the joints or exposed areas before the resin sets. Always remove excess resin from the tile or aggregate faces with a damp, lint-free cloth—do not wait until the resin hardens, as removal becomes far more challenging.
Allow the resin grout to cure undisturbed—refer to the specific product’s recommended curing times, which can range from several hours to a full day before light foot traffic is permitted. Avoid washing, scrubbing, or stressing the floor during this period to preserve a seamless, attractive finish.
Tips for Success and Common Mistakes
- Wear gloves and ensure good ventilation—Epoxy resins can irritate skin or produce fumes during mixing and application.
- Thoroughly clean and dry the subfloor—Contamination or moisture can cause bonding issues and lead to failures.
- Allow the floor primer to fully cure before applying resin grout to avoid delamination.
- Plan your resin mixing carefully to avoid waste—resin-based grouts begin to set quickly once mixed.
- Use mixes in small batches for best results and easier application.
- Tidy up spills immediately for easier cleaning and a professional finish.
- Work in manageable sections to control open time and achieve a consistent result across the floor area.

Expert Hints for Flawless Resin Grouting
Temperature and timing are critical—apply resin only above 10°C and within the open time specified for your selected system. If you are new to resin application, start with a small hidden test area before tackling the full floor. Don’t rush the curing period—true durability depends on thorough hardening before regular use.

- "Magelstick" – Epoxy Mastic for Stone, Metal, and Cement Bonding and GroutingMagelstick Epoxy Mastic is designed for bonding and grouting stone, metal and cement, fitting the theme of resin floor grouting.
- Heavy Duty Scraper for Paint and Epoxy Resin Removal£8.95Heavy Duty Scraper is a tool designed for comfortable, controlled removal of paint and floor tiles, suited for practical renovation tasks.
- "Epoxyprimer" – Universal Water-Based Two-Component Epoxy Floor PrimerPrice range: £156.45 through £286.45"Epoxyprimer" is a water-based epoxy floor primer designed to promote adhesion on various floor types, suitable for flooring projects under the theme…
 "Trasparente" – Epoxy Binder for Coloured Pebbles and GritsPrice range: £33.45 through £397.95"Trasparente" is a transparent epoxy binder for coloured pebbles and grits, designed for clear, UV-stable finishes suitable for permeable flooring.
Frequently Asked Questions
Do I need to prime my floor before using resin grout?
Yes. Priming ensures the resin adheres securely and prevents future delamination or failure.
Can resin grout be used on any floor substrate?
Resin grout can be used on many surfaces like concrete, screed, tiles, and timber, but the surface must be prepared and primed correctly.
How long before I can use the floor after resin grouting?
Usually, the floor can be walked on within 24 hours but full hardness is achieved after several days. Always check product-specific curing times.
How do I remove excess resin grout from tiles?
Remove surplus resin immediately after application with a lint-free damp cloth. Once hardened, removal becomes difficult.
What PPE should I use when grouting floors with resin?
Wear gloves, safety goggles, and ensure good ventilation. Epoxy resins can be irritating to skin and eyes.
Can I grout a floor with resin in cold weather?
Most epoxy resins require a minimum temperature of 10°C to cure properly. Avoid application in cooler conditions.
How much resin grout should I mix at a time?
Mix only what you can apply within the working open time. Resin grout sets quickly, so work in small sections.