 Free shipping on orders over £29,85


How do you make a mould for resin?
A step-by-step guide for creating detailed silicone resin moulds


Creating your own mould for resin opens up a world of creative possibilities, allowing you to replicate intricate shapes, embed unique items, and cast perfectly personalised objects for art, jewellery, or homeware. Whether you’re seeking professional results or are making your first DIY mould, this guide will walk you through each stage required to make a precise, reusable mould for resin casting.
What You’ll Need
- “Pure Mould” – Translucent Liquid Silicone Rubber for Mould Making: Translucent, fast-curing silicone for detailed, reusable moulds.
- Master model/object (the shape you wish to replicate)
- Mixing containers and stirrers
- Protective gloves and workspace covering
- Measuring scales or cups
- Boundary box or formwork for containing silicone

Choosing the Right Silicone for Resin Moulds
For precise and reusable resin moulds, platinum-based, addition-cure silicones like “Pure Mould” – Translucent Liquid Silicone Rubber for Mould Making ensure excellent definition with minimal shrinkage. This silicone allows easy monitoring of the curing process thanks to its transparency, and its fast curing time makes it ideal for both simple and intricate projects.
Step 1: Prepare Your Master and Work Area
Start by cleaning your master model thoroughly, ensuring it is free from dust, grease, or fingerprints. Choose a flat, stable work surface and cover it with protective sheeting to guard against spills. Select a well-ventilated area, and gather all the tools and materials you will need before starting. Position your master model in the boundary box or formwork, allowing at least 1 cm clearance on all sides for the silicone mould wall thickness.

Step 2: Mix and Pour Silicone Rubber
Carefully measure equal parts of Part A and Part B silicone by weight or volume, according to the manufacturer’s instructions. For consistent, professional-grade results, choose high-quality, addition-cure silicone for lasting, detailed moulds. Wearing protective gloves, slowly mix the components together in a clean container, stirring gently to avoid introducing air bubbles.
Once fully mixed, pour the silicone rubber in a thin stream from a height into the lowest part of the boundary box. This technique helps displace air, reducing the chance of bubbles forming against your master. Allow the silicone to flow naturally, covering your original entirely and filling the mould box to the desired height.
If you are looking for excellent detail and a clear view of the mould during curing, “Pure Mould” – Translucent Liquid Silicone Rubber for Mould Making is a reliable choice designed specifically for the task.
Step 3: Curing and Demoulding
Allow the silicone mould to cure undisturbed for the recommended time, typically 3–8 hours for fast-curing types, or longer depending on your product. Let the mould fully cure before demoulding for best results. Gently flex the sides of the mould to release the original master, taking care not to tear fine details. If the mould resists, ease removal with a light pull rather than force.
After demoulding, inspect your new silicone mould for any imperfections. It is now ready for direct resin casting or further refinement if necessary.
Step 4: Clean-Up and Storage
Rinse any used tools and containers promptly after use. Avoid using harsh solvents to clean silicone moulds. Instead, wash them with mild soapy water and let them air dry. Store your mould in a cool, dust-free space, away from sunlight or heat sources, to preserve its flexibility and lifespan.

Tips and Common Mistakes to Avoid
- Always mix and pour silicone slowly to prevent air bubbles. Tapping the filled mould box gently on the work surface helps bubbles rise and escape.
- Use mould release agents if your master has a textured finish or is made from porous materials to prevent it sticking.
- Do not demould before full cure, as premature removal can tear or distort the silicone.
- Measure components accurately—incorrect ratios can result in sticky, poorly curing moulds.
Extending the Life of Your Resin Moulds
Let the mould fully cure before demoulding for best results. Proper cleaning and storage are key to long-lasting performance—mild soapy water and careful handling help keep your silicone moulds in top condition for many future resin projects.

- "Pure Mould" – Translucent Liquid Silicone Rubber for Mould MakingPrice range: £22.85 through £158.85"Pure Mould" silicone rubber is a translucent, fast-curing product designed for durable moulds suitable for resins and other materials.
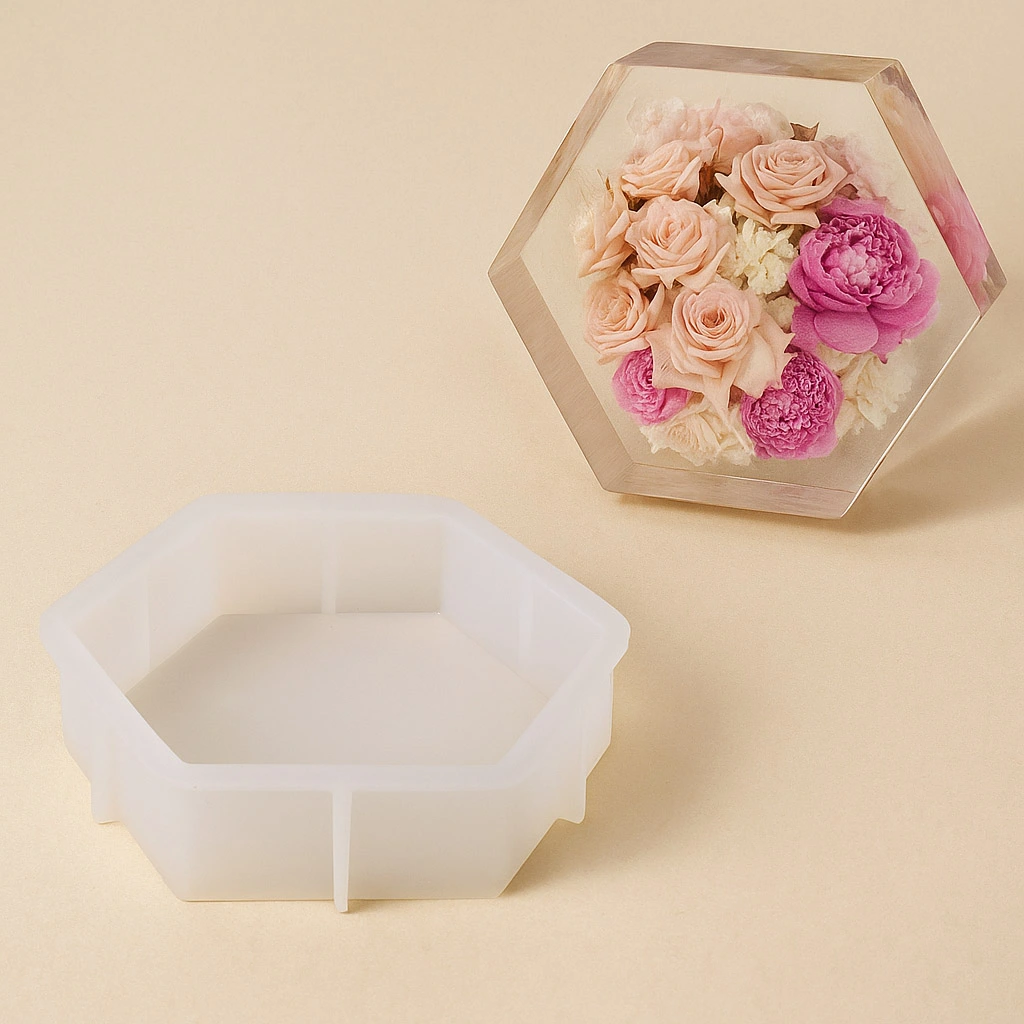 "Silicone Hexagons Mould" – For Creating with Epoxy Resin – 24x21cm£12.85Silicone flexible mould designed for creating coasters and decorative resin items in line with the theme of mould making.
- "Silicone Circle Mould" – For Creating with Epoxy Resin, Ø 20cm£12.85A flexible silicone mould designed for creating decorative epoxy resin objects such as coasters and keepsakes.
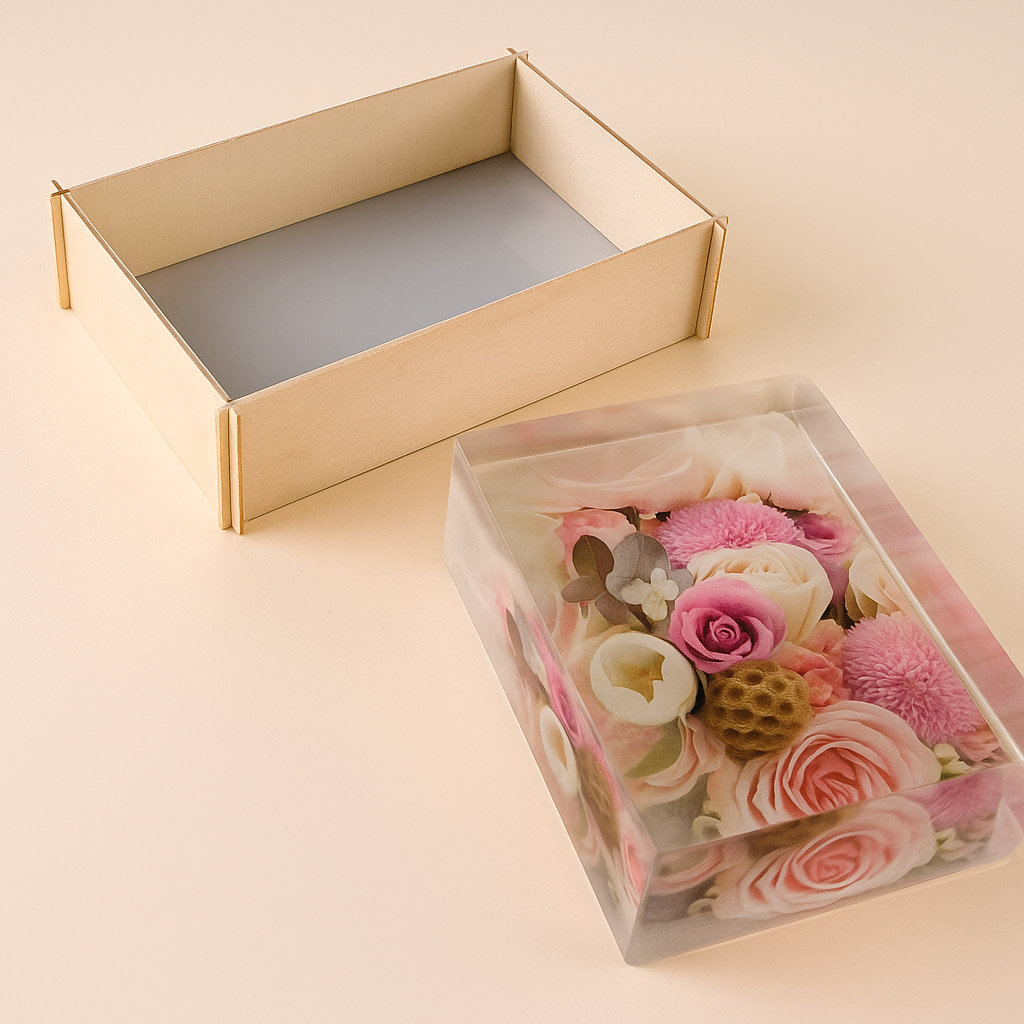 "Rectangular Mould" – Silicone Formwork 19.5×13.5cm£10.85A formwork mould designed for rectangular resin creations, made from professional silicone and chipboard wood dowels.
Frequently Asked Questions
What silicone is best for making resin moulds?
Addition-cure, platinum-based silicones are best for detailed, reusable moulds used with resin.
How long does silicone mould take to cure?
Cure time depends on the silicone type; fast-curing products usually set in 3–8 hours.
What's the best way to release resin from a mould?
Let the resin fully set, then gently flex and ease the mould to release your piece without force.
How do I prevent air bubbles in silicone moulds?
Mix silicone slowly and pour it in a thin stream to help bubbles escape; tapping the mould box also helps.
Can I reuse homemade silicone moulds for resin?
Yes, quality silicone moulds can be reused many times if cleaned and stored correctly.
Do I need a mould release for complex shapes?
A mould release is recommended for textured, porous, or intricate objects to ensure easy removal.