 Free shipping on orders over £29,85


How Do You Work with Epoxy Resin Tutorial?
A complete beginner’s guide to safe and creative resin projects


Whether you are an aspiring artist or a DIY enthusiast, working with epoxy resin opens the door to endless creative possibilities. In this tutorial, you’ll learn how to safely prepare, mix, pour, and finish epoxy resin projects, setting strong foundations for coasters, trays, art boards and more.
What You’ll Need
- Resin Class – 3D Effects Coasters Masterclass, 120 Minutes – A guided course if you’re new to resin techniques.
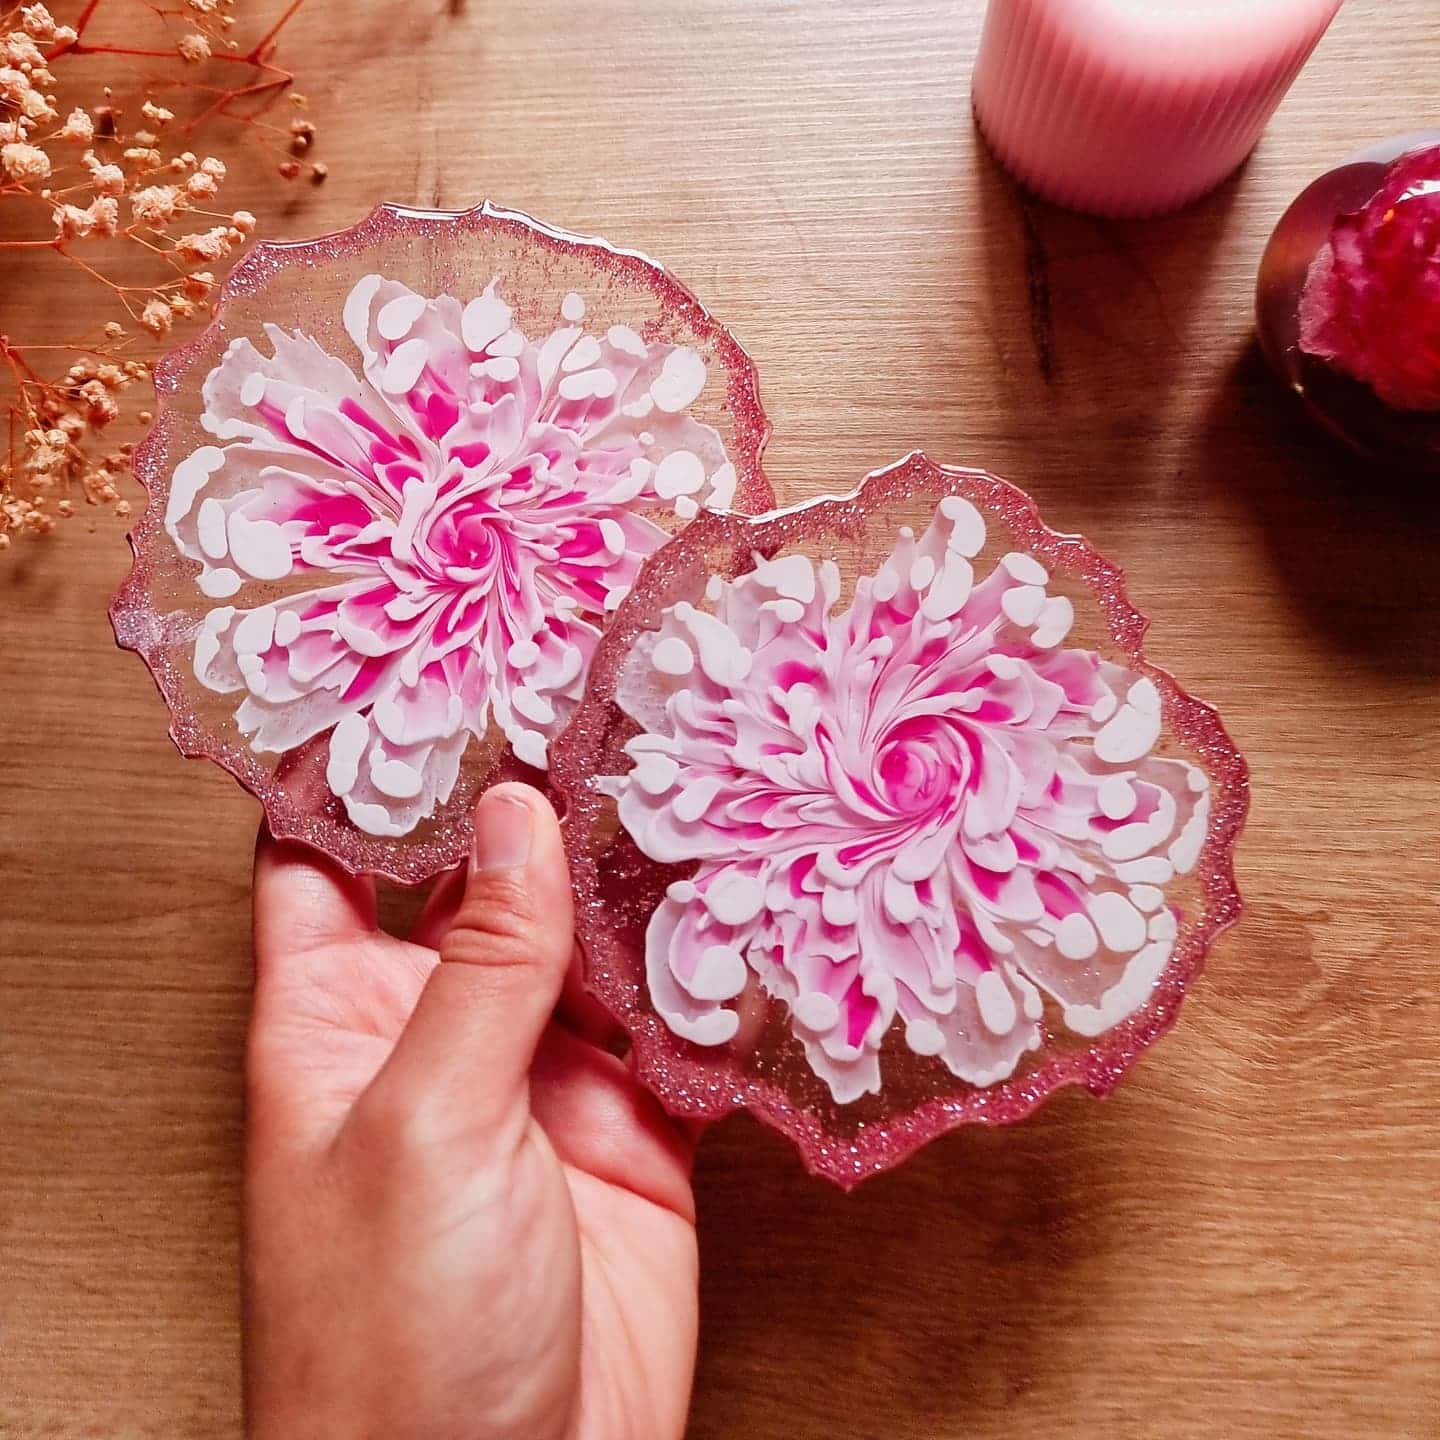
- Free Step-by-Step Lesson “Kiwi Coasters” by Natalia Natirum – Video guide for creating realistic fruit-like coasters.
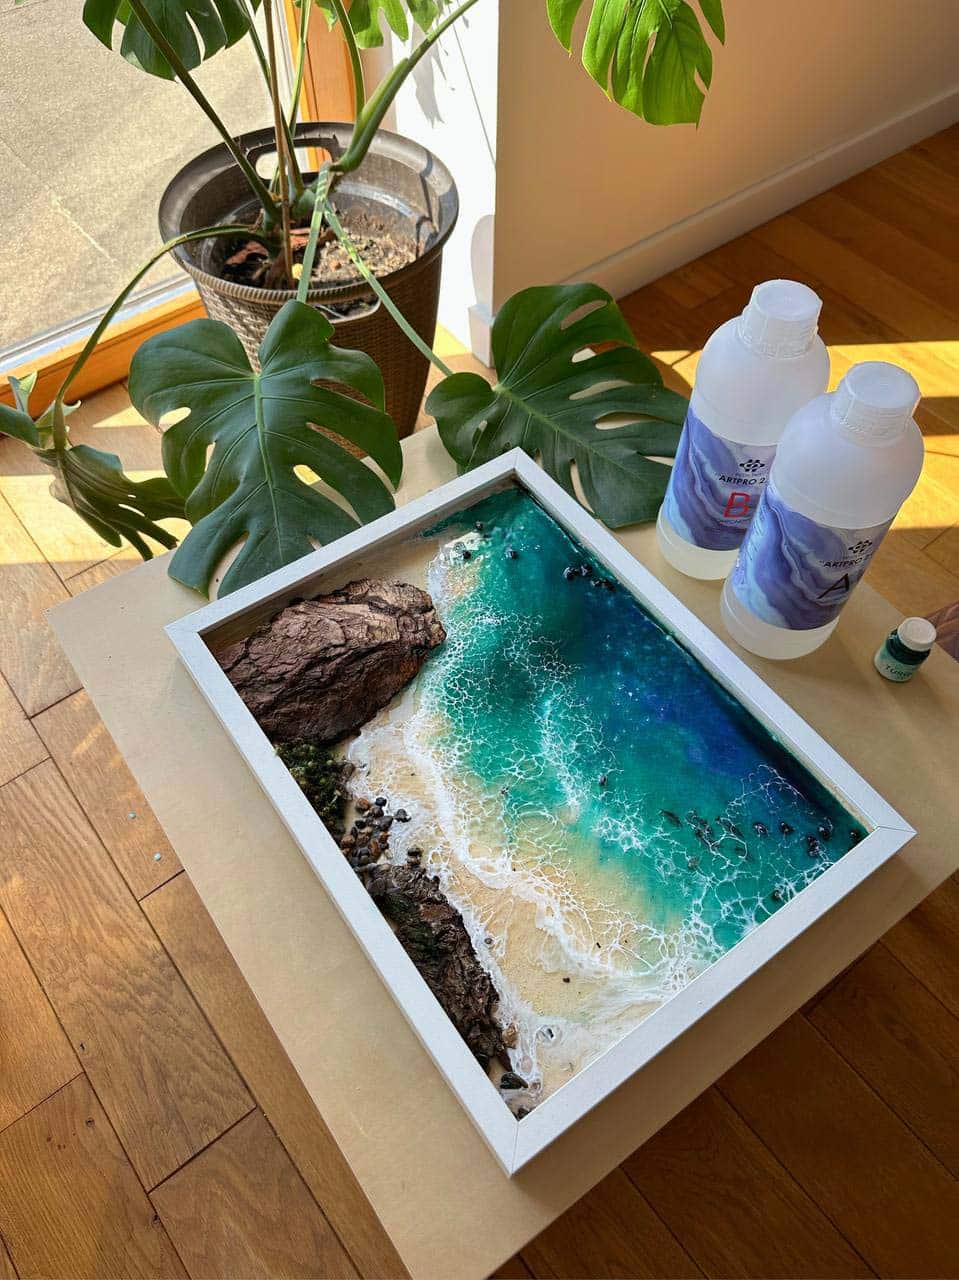
- Free Step-by-Step Resin Ocean Art Lesson by Natalia Natirum – Instruction on ocean-themed resin art and techniques.
- Free Step-by-Step Lesson – “Pomegranate Trays” by Natalia Natirum – For beginners exploring resin cast trays.
- Epoxy resin and matching hardener according to your chosen project.
- Mixing cups, stirring sticks, and silicone or plastic moulds.
- Pigments, dyes, or decorative inclusions (if desired).
- Protective gloves, face mask, and apron.
- Covered workspace and good ventilation.

See Epoxy Resin Art in Action
Discover inspiring projects by watching free video tutorials such as Kiwi Coasters or follow a live resin masterclass to develop hands-on skills with expert guidance.
Step 1: Prepare Your Workspace and Safety Kit
Always prepare your workspace before handling resin. Cover surfaces with plastic sheeting or disposable tablecloths to catch drips. Gather all your tools and materials in advance to avoid interruptions while working.
Wear nitrile gloves, a protective mask, and an apron. Adequate ventilation is essential—open windows or use a fan. Preparation will not only protect your health but also avoid accidental spills.
If you’re looking for a structured introduction to safe setup and basic practices, the Resin Class – 3D Effects Coasters Masterclass, 120 Minutes provides a guided walk-through.


Step 2: Measure and Mix Your Epoxy Resin
Mix resin and hardener thoroughly for the best results. Carefully read the manufacturer instructions for the recommended ratios (often equal parts, but always check your chosen resin). Pour the required amounts into your mixing cup, taking care to avoid splashes.
Mix slowly and scrape the sides and bottom of the container. Continue stirring until the mixture goes clear and streak-free. If you plan to add dyes or pigments, now’s the time, blending completely for consistent colour. Many artists find step-by-step videos helpful at this stage—see the Free Step-by-Step Lesson “Kiwi Coasters” by Natalia Natirum for practical guidance.
Step 3: Pouring and Decorative Effects
Once mixed, move promptly to pouring as resin has a limited working time. Slowly pour into your clean and dry mould, working from one spot to avoid trapping air bubbles. If creating layers, allow each to partially cure before pouring the next for best effect.
Choose moulds and decorations to fit your vision. You can include pigments, glitter, metallic flakes, and found objects. For beginners keen on mastering effects like marbling, cells, or realistic designs, tutorials such as the Free Step-by-Step Resin Ocean Art Lesson by Natalia Natirum are invaluable.

Step 4: Demoulding and Shaping
Wait for the resin to reach full or partial cure—always follow recommended curing times, which vary with product and temperature. Gently flex silicone moulds to release your piece. If you want to shape or curve the resin (for instance, to make a bowl), do so when the resin has partially set but is still pliable. For advice on timing and hands-on shaping, refer to the Resin Class – 3D Effects Coasters Masterclass, 120 Minutes.
After removing, lay pieces on a flat surface until they have hardened completely. If adding a glossy finish, do this after full cure for best shine.
Tips and Common Mistakes
Wear protective equipment and work in a ventilated area at all times. Avoid mixing too quickly, which traps bubbles—slow, steady action is key. Don’t unmould too soon, as this can warp or mark your piece. Clean up any spills immediately, as cured resin is very difficult to remove.
Allow full curing time for lasting results. Patience will reward you with durable, beautiful creations. For in-depth troubleshooting and finishing touches, step-by-step video lessons such as the Free Step-by-Step Lesson – “Pomegranate Trays” by Natalia Natirum can reinforce confidence.
Transform Your Skills Today
Ready to take your resin craft to the next level? Try a focused lesson from our masterclass range, or browse themed tutorials for unique project ideas and careful troubleshooting advice.

- Resin Class – 3D Effects Coasters Masterclass, 120 MinutesThis course covers working with resin to create coasters and bowls, including techniques for colouring and shaping resin art pieces.
- Free Step-by-Step Lesson "Kiwi Coasters" by Natalia NatirumOriginal price was: £99.00.£0.00Current price is: £0.00.Free video tutorial showing how to create resin coasters resembling kiwi, provided for the How Do You Work with Epoxy Resin Tutorial? theme.
- Free Step-by-Step Resin Ocean Art Lesson by Natalia NatirumOriginal price was: £99.00.£0.00Current price is: £0.00.Free video tutorial on creating Resin Ocean Art by Natalia Natirum, suitable for the 'How Do You Work with Epoxy Resin Tutorial?' theme.
- Free Step-by-Step Lesson – "Pomegranate Trays" by Natalia NatirumOriginal price was: £99.00.£0.00Current price is: £0.00.Free video tutorial explaining the process of creating resin pomegranate trays as part of a tutorial theme.
Frequently Asked Questions
What type of resin should I use for art projects?
Choose a resin specified for artistic use, such as 'Art Pro' medium viscosity. It’s easier to work with for casting, colouring, and achieving clear or pigmented effects.
How do I get rid of bubbles in epoxy resin?
Stir gently to minimise bubbles and use a heat gun or torch to remove those rising to the surface. Pour slowly to avoid trapping air.
What safety precautions should be taken with epoxy resin?
Always wear gloves, a mask, and work in a ventilated area to avoid skin contact and fumes. Cover your work surfaces to protect them.
How long does epoxy resin take to cure?
Full curing varies by type, usually 24–72 hours. Always consult your product's instructions for precise timing.
Can beginners learn epoxy resin skills?
Absolutely. There are courses and video tutorials aimed at first-timers, guiding you through basics and creative techniques step by step.
How can I colour or decorate epoxy resin?
You can add approved pigments, dyes, or glitter directly to the mixed resin before pouring. Always mix thoroughly for even effects.