 Free shipping on orders over £29,85

How to colour resin?
Step-by-step guide for vibrant and artistic resin colouring


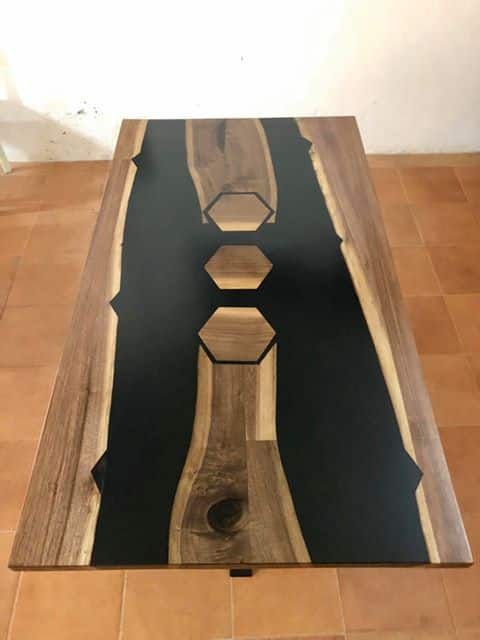
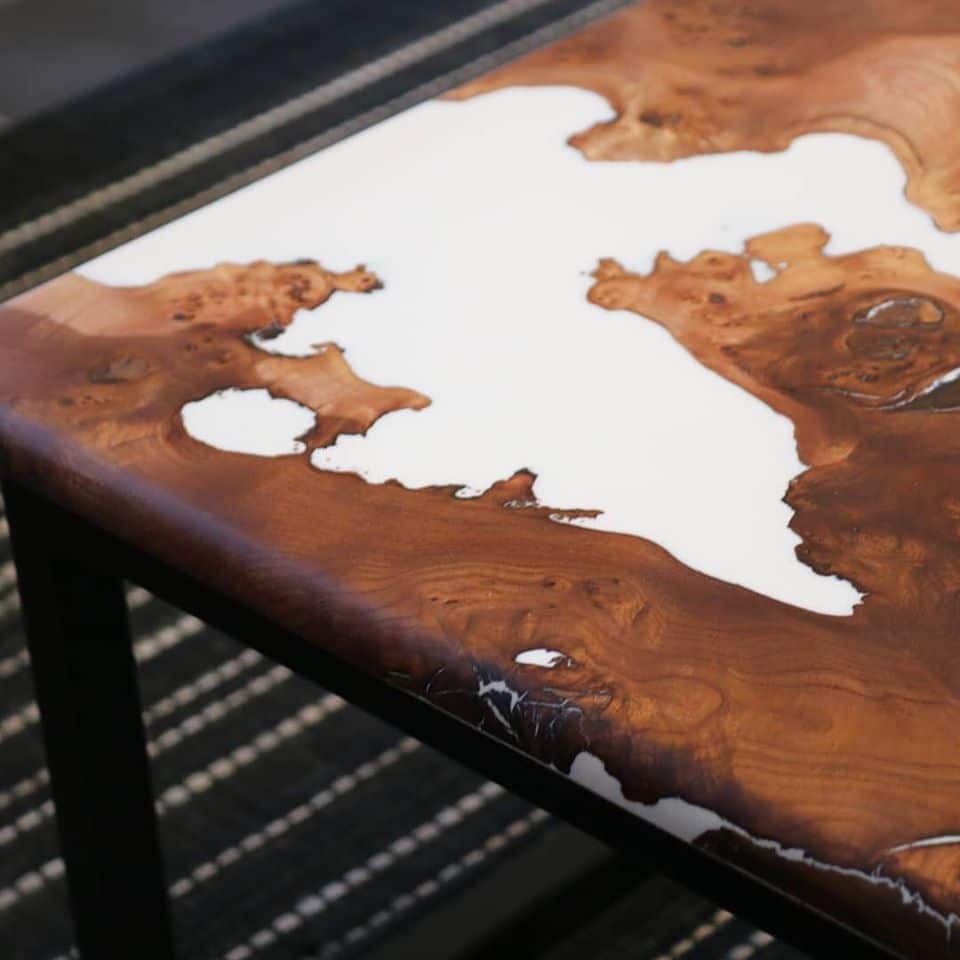
Colouring resin opens up endless creative possibilities for artists and makers, from jewellery and coasters to vivid river tables and decorative castings. Getting a flawless result means choosing the right types of resin colourants, understanding the mixing process, and following key steps for rich, even colour. This guide will take you through everything you need to know to colour epoxy resin beautifully and with confidence.
What You’ll Need
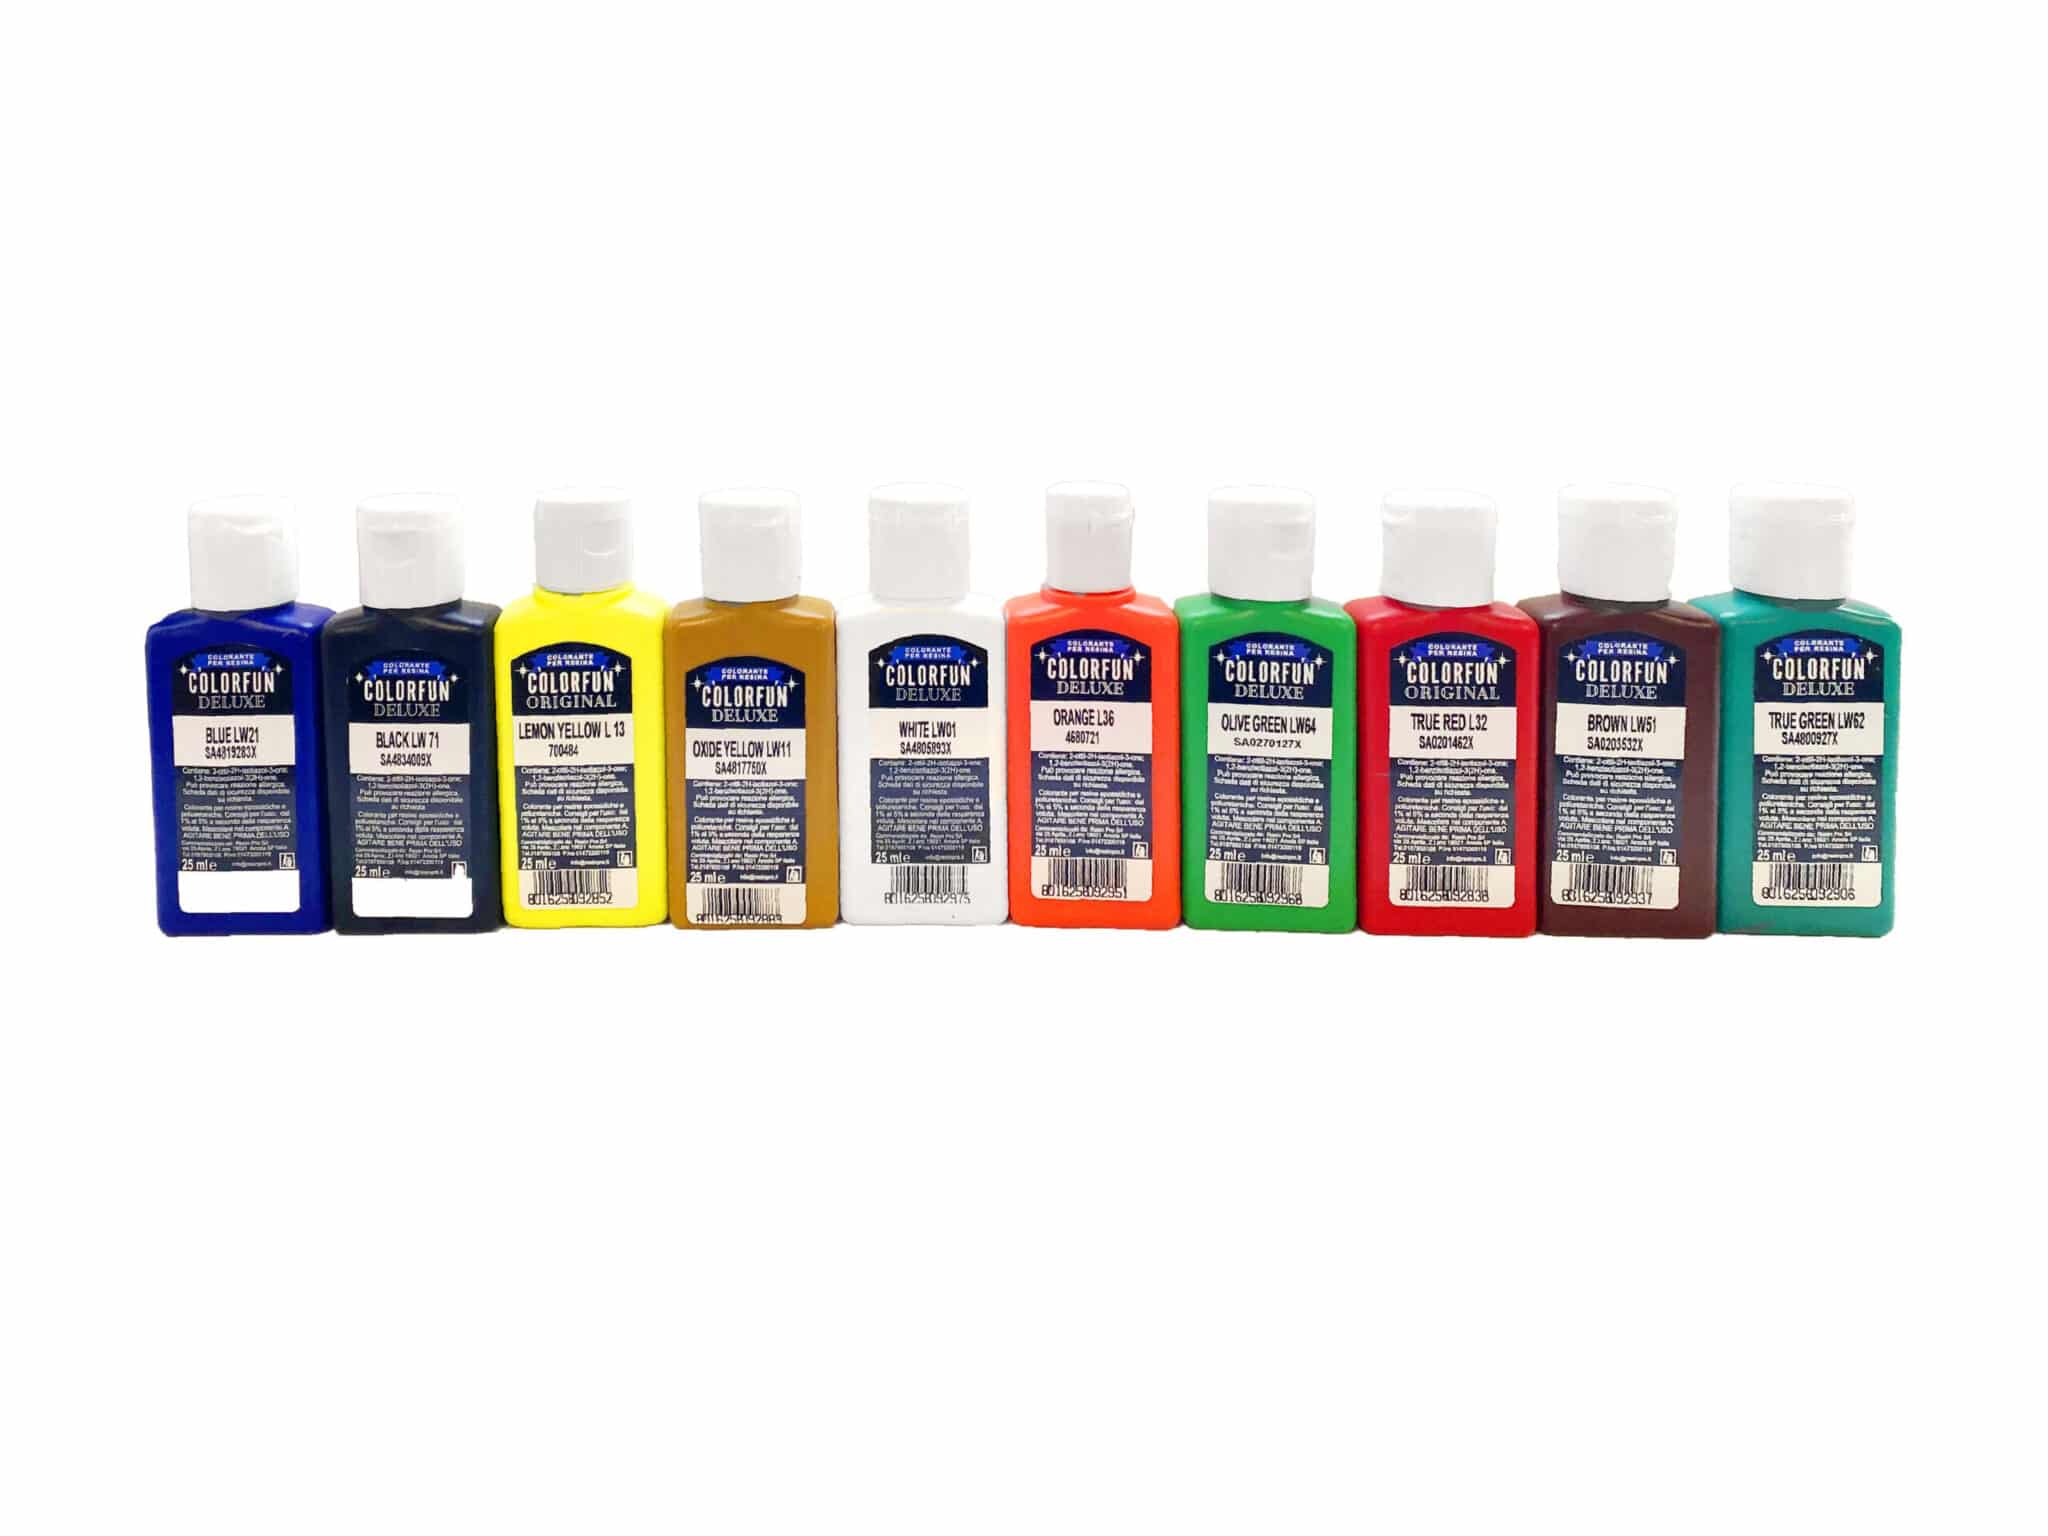
- “Colourfun Set” – Liquid Epoxy Resin Colourant Set for Solid Colour Effects: Paste-based colourants for intense, translucent effects.
- “Trasparente” Epoxy Resin Kit 800g + Mica Powder 10g – 10 Colour Variations: All-in-one clear resin kit with shimmering mica powders.
- “Magic Crystal” – Transparent Resin Colour 45ml: Transparent dye for glass-like resin projects and jewellery.
- Free Step-by-Step Lesson “Kiwi Coasters” by Natalia Natirum: Tips and visual guidance for mastering resin colouring techniques.
- Measuring cups and mixing sticks
- Protective gloves and a clean workspace

Inspiration and Materials in Action
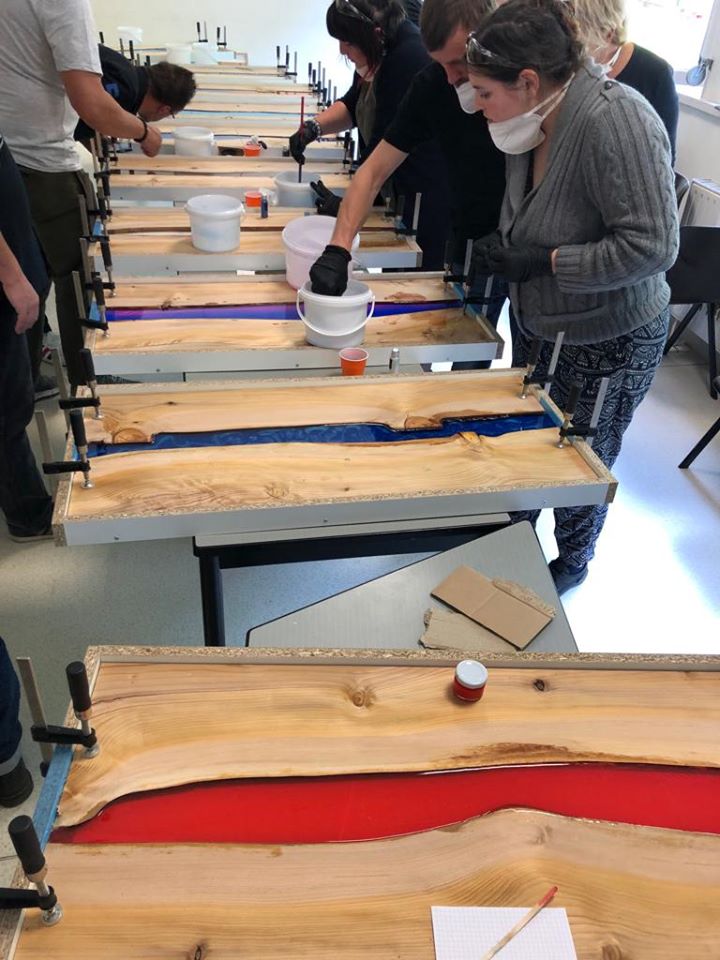
Explore resin colouring ideas and practical tips in action by watching tutorials like the Free Step-by-Step Lesson “Kiwi Coasters” by Natalia Natirum. These resources visually demonstrate colour mixing, mould pouring, and creative design possibilities for resin artists at every level.
Step 1: Choose the Right Resin and Colourant
Choose the right resin for your project. For most decorative and casting tasks, select a clear epoxy system suited to your application—high transparency and minimal odour are ideal for art and jewellery. Then, decide what type of colourant suits your needs. Paste-based pigment sets like the Colourfun Set are perfect for bold, opaque effects, while mica powders in kits such as Trasparente Epoxy Resin Kit 800g + Mica Powder 10g – 10 Colour Variations offer shimmer and depth. For true transparency, opt for products like Magic Crystal – Transparent Resin Colour 45ml, which preserve the inherent clarity of the resin.
Refer to Free Step-by-Step Lesson “Kiwi Coasters” for inspiration and technique visuals before starting.
Step 2: Prepare Your Workspace
Cover all surfaces with disposable plastic or paper and ensure good ventilation. Put on gloves to protect your hands from both resin and pigments. Measure out your resin and hardener precisely according to manufacturer instructions—it is especially crucial for even, repeatable curing and colour development.
Keep all pigment containers and mixing tools close by, making it easier to work efficiently and cleanly.
Step 3: Mix Your Chosen Colourant into Resin
Mix colour slowly and evenly into resin for a streak-free finish. Once your resin and hardener are thoroughly blended, add a small amount of your chosen pigment or dye. Paste colourants like those from the Colourfun Set provide strong colour, so start with just a drop or two per 100g resin. Mica powder from the Trasparente Epoxy Resin Kit should be sprinkled in gradually. Stir gently to minimise the introduction of bubbles.
Test colours before casting by checking a drop on white paper or a scrap mould—remember, resin appears darker when wet and cures to a lighter, more radiant colour.
Step 4: Pour and Cure Coloured Resin
Once your coloured resin is ready, pour it slowly into your prepared mould or onto your project surface. Tap or gently vibrate the mould to help bubbles escape. When using transparent dyes (like Magic Crystal – Transparent Resin Colour 45ml), thin layers will accentuate clarity and depth. Opaque colourants or mica may take more pigment to cover.
Allow to cure in a dust-free, level area, following the correct time for your resin type. Do not move or disturb the piece until it is fully set.
Tips and Common Mistakes When Colouring Resin
- Experiment with different colourants for unique effects—combine pastes, mica, and transparent dyes to tailor the final look.
- Use transparent colourants for glass-like clarity in jewellery or decorative art.
- Avoid overloading with pigment, as this can hinder resin curing and turn transparent designs cloudy.
- Keep tools and surfaces clean to prevent accidental colour contamination and streaks in your pour.
Achieve Consistent Colour and Professional Results
Practice on small test pieces before larger projects to master your technique. For additional guidance, refer to colour charts included with products like the Colourfun Set and experiment with layering or swirling pigment for dimensional effects. Patient, careful mixing and pouring are key for consistent, vibrant colour every time.
- Free Step-by-Step Lesson "Kiwi Coasters" by Natalia NatirumOriginal price was: £99.00.£0.00Current price is: £0.00.Video tutorial on creating resin kiwi coasters, suitable for those exploring how to colour resin.
- "Colourfun Set" – Liquid Epoxy Resin Colourant Set for Solid Colour EffectsPrice range: £13.45 through £48.15The Colourfun Set provides intense, translucent pastes designed for colouring transparent epoxy resin with even coverage.
 "Trasparente" Epoxy Resin Kit 800g + Mica Powder 10g – 10 Colour Variations£19.85This kit combines ultra clear epoxy resin with mica powder, suitable for castings, table making, and DIY projects in the context of colouring resin.
 "Magic Crystal" – Transparent Resin Colour 45ml£4.65"Magic Crystal" Transparent Resin Colour offers vibrant, glass-like clarity suitable for creating coloured resin effects.
Frequently Asked Questions
What kind of colourant should I use for resin?
Choose colourants specifically designed for epoxy resin, such as liquid dyes, mica powders, or paste pigments for safe and reliable colouring.
How do I achieve transparent coloured resin?
Use transparent resin dyes like Magic Crystal, adding a few drops at a time to maintain clarity while tinting your project.
How can I avoid bubbles or cloudiness?
Mix resin and pigment slowly, avoid over-mixing or adding too much pigment, and work in a dust-free space to reduce imperfections.
Are there safety tips when colouring resin?
Always wear gloves, work in a ventilated area, and use resin-safe pigments to ensure both safety and the best results.
When should I use mica powder vs liquid dye?
Mica provides shimmer or metallic effects; liquid dyes are best for even, transparent, or intense solid colouring in larger or finer projects.
How can I test and match resin colours?
Mix a small batch and test a drop on white paper to preview hue; adjust incrementally until you achieve your desired colour.