 Free shipping on orders over £29,85

How to create a metallic effect with epoxy resin?
Step-by-step methods for achieving shimmering metallic results

Creating a striking metallic effect on your epoxy resin artwork unlocks dynamic possibilities for artists, crafters, and anyone looking to add modern shine to handmade objects. Whether you’re crafting resin coasters, coating a wooden tabletop, or working on mixed media art, mastering this technique offers a sophisticated, professional finish with unique reflective qualities tailored to your vision.

What You’ll Need
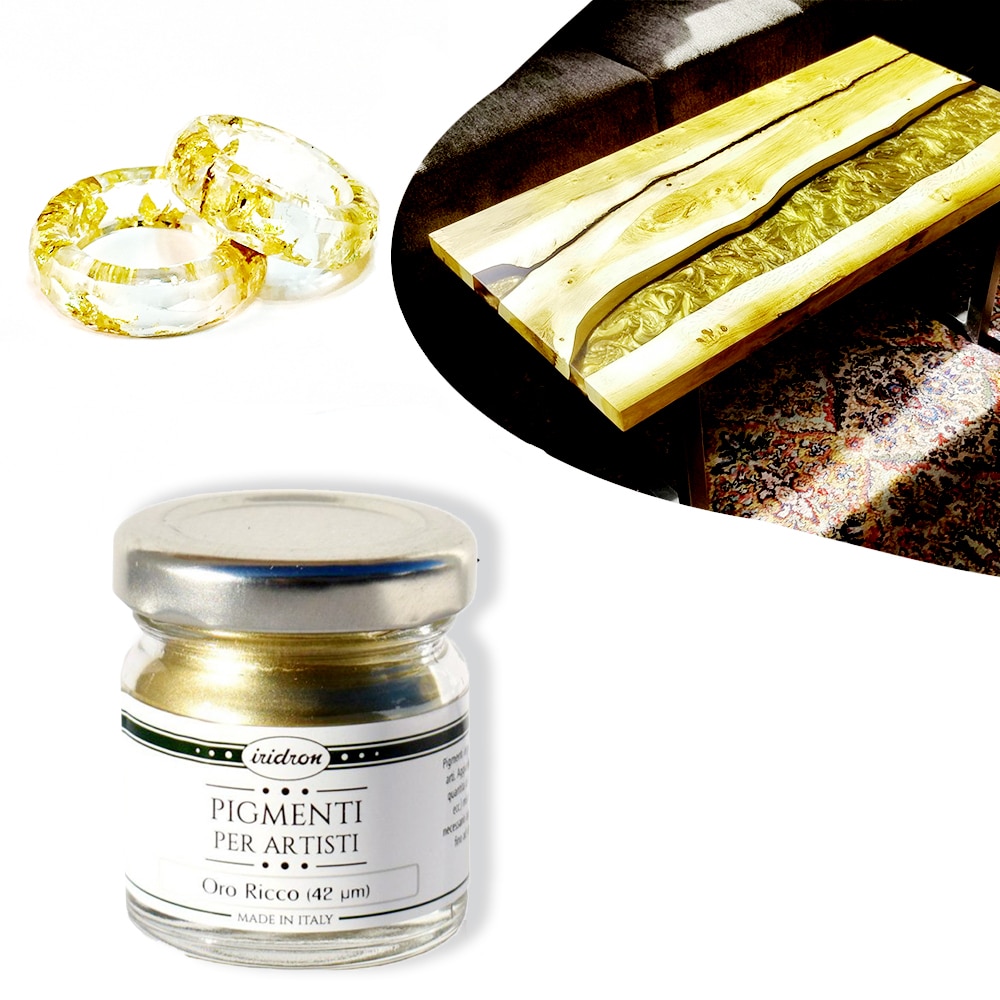
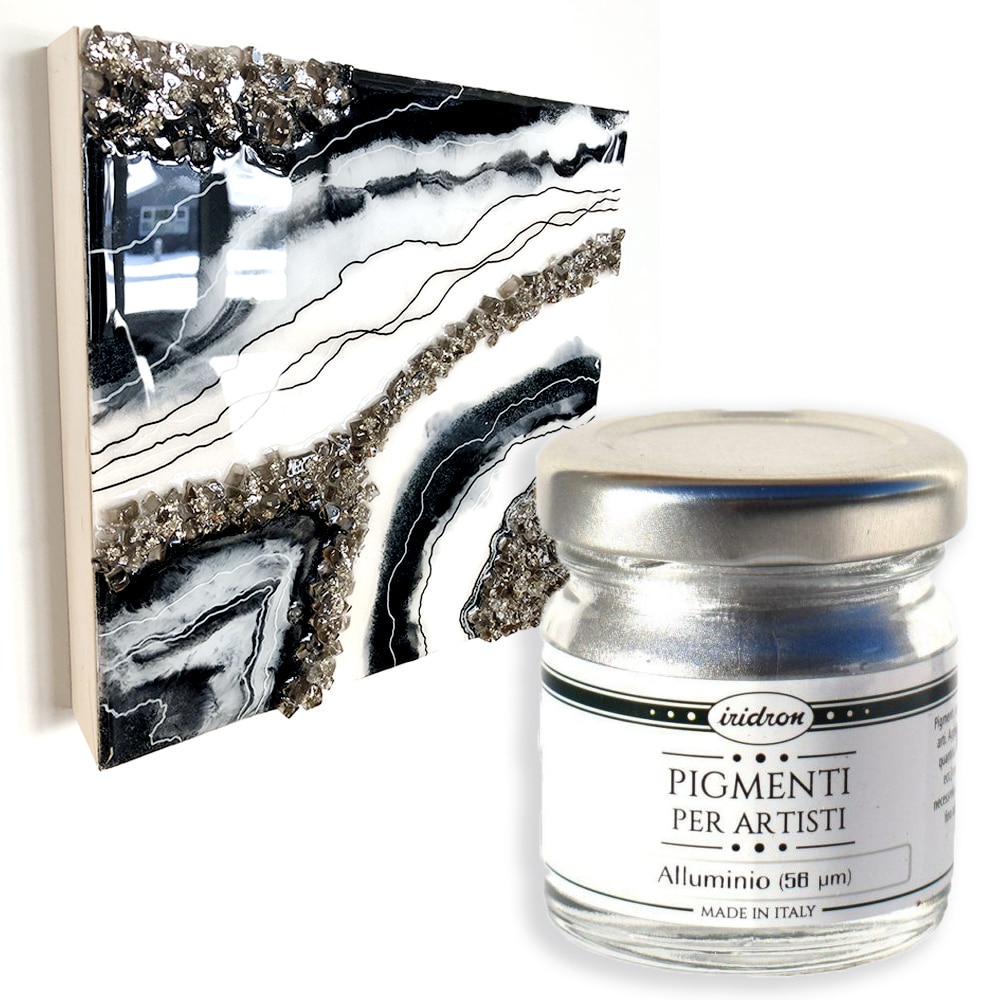
- “Iridron” – High-gloss Floating Metallic Pigments for Art, Resin, and Restoration: High-gloss floating pigments for flawless metallic finishes.
- “Alto Brillo” – High-Gloss Floating Metallic Pigments 50ml: Add rich shimmer with vibrant colour options.
- “Argento/Gold/Rame” – Floating Metallic Pigment – 20ml: For subtle golden streaks and delicate metallic details.
- “Divolo Porporina” – Liquid Bronze Metallic Pigment 50ml: Achieve a seamlessly blended bronze finish in resin designs.
- Epoxy resin system (clear, art-grade recommended)
- Mixing cups, stirrers, and protective gloves
- Flat workspace with plastic protection
- Respirator mask (for safety in enclosed spaces)

Visual Inspiration: Stunning Metallic Resin Projects
Explore close-up images of resin artworks showcasing different metallic effects. Notice the sharp gold lines achieved with floating pigments and the soft, blended bronze created using liquid pigments. These visual references offer ideas for your next project and help you compare the subtle variations possible with each pigment type.
Step 1: Prepare Your Workspace and Resin
For best results, always work in a dust-free and well-ventilated area. Cover surfaces with plastic sheeting to protect against spills, and assemble all your tools within easy reach. Set out your mixing containers, gloves, and pigment options so you can work efficiently while the resin remains workable.
Carefully measure and mix your epoxy resin according to the manufacturer’s guidelines to avoid sticky or soft finishes later. Allow it to sit briefly after mixing to release any air bubbles.


Step 2: Add Metallic Pigment to the Resin
Once your resin is mixed and bubble-free, it’s time to introduce the metallic pigment. Choose your desired floating or liquid metallic pigment and add a small amount at first—you can always increase for stronger impact. For instance, to achieve a bold reflective look, try “Iridron” – High-gloss Floating Metallic Pigments for Art, Resin, and Restoration for a classic surface sheen, or use “Argento/Gold/Rame” – Floating Metallic Pigment – 20ml for distinctive golden streaks within your pour.
Gently fold the pigment into the resin, taking care not to over-stir—over-mixing the pigment can cause it to lose its floating quality, which is what creates those signature mirror-like or streaked effects. Mix until the colour disperses but still maintains a sense of movement and depth.
Step 3: Pour and Manipulate for Special Effects
With the resin coloured, pour it onto your prepared surface. Pouring slowly and in stages gives you better control over where pigments float or sink, and enables you to deliberately create swirls or lacing effects. If you wish to emphasise particular metallic lines, try layering contrasting colours or even gently blowing through a straw to move the pigment across the resin’s surface.
Using products like “Divolo Porporina” – Liquid Bronze Metallic Pigment 50ml lets you brush or drop vivid bronze accents that blend seamlessly with the resin for a professional, custom outcome. Manipulate the resin gently while it’s still workable—once it begins to set, movement will be limited.


Step 4: Allow to Cure and Finish
After achieving your desired metallic effect, protect the piece from dust and maintain a stable temperature. Allow full curing for a persistent metallic finish; any disturbance while the resin is setting may distort the metallic pattern. Once fully cured, assess whether you’d like to add an additional clear coat or embed further metallic highlights.
If working with floating metallic pigments like those in the metallic pigments category, you can optionally apply a thin pigmented layer to accentuate edges or details after the main pour has set.
Tips, Common Mistakes, and Troubleshooting
Wear gloves and a respirator mask to ensure safety, especially when working with resin in enclosed spaces. Blend pigments gently and stop stirring once the floating effect is visible. Avoid over-pouring as deep layers may increase the risk of the pigment settling rather than floating. If you notice uneven spreading, carefully tilt the piece or use a hairdryer on a low setting for subtle adjustments.
Should your metallic effect lack sharpness or shine, increase the pigment dose gradually or switch to a different type of pigment for a more pronounced look. Always read manufacturer’s guidelines when combining pigments and modern resins for the best, most stable results.

Behind the Scenes: Mixing and Pouring Techniques
See detailed shots of the mixing process, from stirring metallic pigments into resin to pouring and tilting for dramatic surface movement. Observe how gentle agitation of the resin influences the final metallic pattern and how careful layering produces multidimensional effects.
- "Iridron" – High-gloss Floating Metallic Pigments for Art, Resin, and RestorationPrice range: £6.45 through £16.45Iridron pigments provide a high-gloss metallic finish with a floating effect, suitable for resin and restoration projects.
- “Alto Brillo” – High-Gloss Floating Metallic Pigments 50ml£8.95“Alto Brillo” pigments provide a high-gloss metallic finish and are suitable for various artistic and decorative resin projects.
 “Argento/Gold/Rame” – Floating Metallic Pigment – 20mlA floating metallic pigment designed for resin art and various decorative crafts within the 'How to create a metallic effect with epoxy resin?' theme.
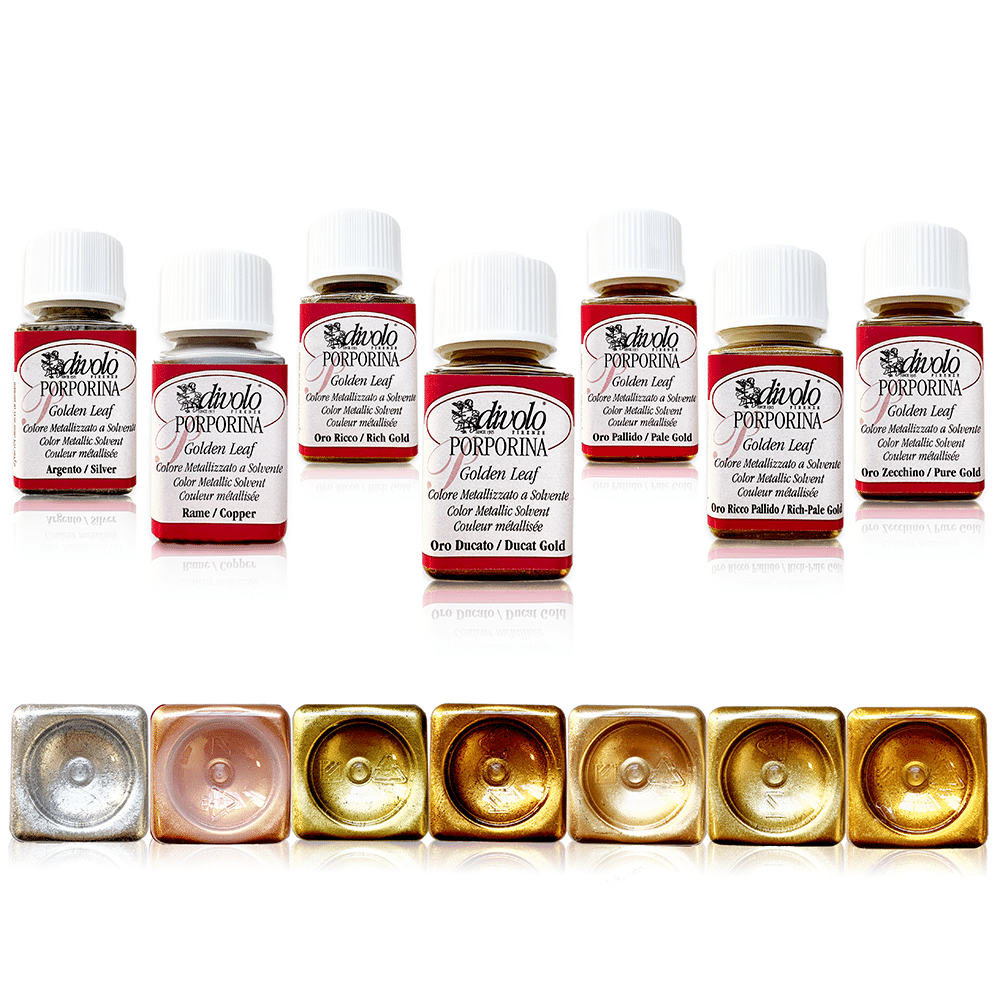 "Divolo Porporina" – Liquid Bronze Metallic Pigment 50ml£7.95This 50ml liquid bronze pigment is designed for resin crafts, suitable for achieving a metallic finish in epoxy projects.
Frequently Asked Questions
What is the best pigment for a metallic effect in resin art?
High-gloss floating metallic pigments are preferred for mirror-like finishes, while liquid bronze pigments deliver strong colour and depth.
Can you mix different metallic pigments in resin?
Yes, combining several metallic pigments can achieve custom colours and layered effects, but avoid over-mixing for best results.
How much metallic pigment should I add to epoxy resin?
Start with a small amount, then gradually increase until the desired intensity is reached, keeping in mind that too much can affect resin curing.
Why is my metallic effect not floating?
The pigment may have been over-mixed or too much was used, causing it to sink. Gentle folding after adding the pigment preserves the floating effect.
Can you use metallic pigments on fully cured resin?
Yes, apply metallic pigments with a varnish or clear resin coat over fully cured epoxy for additional highlights or effects.
Is metallic effect resin art safe to make at home?
Yes, as long as you follow safety precautions such as wearing gloves, a respirator, and working in a well-ventilated space.
What are the best surfaces for metallic resin pours?
Smooth, sealed surfaces like wood, acrylic panels, and canvas boards provide ideal bases for metallic resin effects.