 Free shipping on orders over £29,85


how to inject resin
Detailed injection guide for crisp resin details and creative reliefs

Injecting resin is a versatile technique popular among artists and crafters for achieving crisp details, filling intricate moulds, or creating one-of-a-kind decorative effects. Whether you’re designing complex 3D reliefs, moulding tiny components, or crafting cell patterns in fluid artwork, mastering resin injection allows you to elevate your creative projects. This guide is suitable for beginners and experienced makers alike who want consistent, professional outcomes when working with resin.
What You’ll Need
- “One-2-One” – Epoxy Resin for Handcraft, 1:1 Mixing Ratio – ideal for jewellery, clear casting, and medium viscosity projects
- “IWhite” – Polyurethane Casting Resin – White, Fast-Curing Two-Part System – best for fast, detailed casting with a fluid finish
- “Fairy Wings” – UV Resin for Volumetric Reliefs, Dual Colour, 30ml – perfect for ultra-fine raised designs and polymer clay work
- “Resi-Blast” – Cell Effect Additive for Resin Art, 25ml – to add decorative cell patterns in creative artworks
- Mixing cups and stirrers
- Syringes, pipettes, or squeeze bottles for controlled injection
- Moulds or a prepared project surface
- Protective gloves, apron, and safety glasses
- UV lamp if using UV-curing resin
- Paper towels and cleaning supplies for spills

Essential Tools for Resin Injection Success
Invest in quality syringes, pipettes, or squeeze bottles for precise resin placement. Clean mixing tools prevent contamination and ensure sharp, clear outcomes, especially when creating detailed resin reliefs and artistic effects.
Step 1: Prepare Your Workspace and Tools
Always work in a well-ventilated space and wear suitable gloves. Cover surfaces with a protective layer to guard against spills and drips. Arrange your mixing tools, syringes, and moulds or surfaces nearby for easy access. If using UV resin, ensure you have your curing lamp ready. Having everything in place prevents hurried movements, which can lead to accidents or errors once you’ve mixed your resin components.
Before starting, check all your materials for cleanliness. Any dust or oil on your tools or workspace can affect the clarity and finish of your final piece. Keeping everything clean is essential for crisp results, especially with fine details and thin reliefs.
Step 2: Mix the Resin Carefully
Mix the resin accurately using the correct ratio as specified by your chosen product. For example, the “One-2-One” – Epoxy Resin for Handcraft, 1:1 Mixing Ratio makes this step straightforward, while some polyurethanes such as “IWhite” – Polyurethane Casting Resin require combining two components. Measure parts according to the instructions and stir slowly, scraping the sides and base of your mixing container. This minimises air bubbles and ensures full blending. For UV systems like “Fairy Wings” – UV Resin for Volumetric Reliefs, no mixing is needed, so you can use them straight from the bottle.
Be patient and thorough—poorly mixed resin may remain tacky or weaken the finished piece. Timings vary: some resins set fast, so work efficiently after combining the parts.
Step 3: Inject Resin into the Mould or Relief
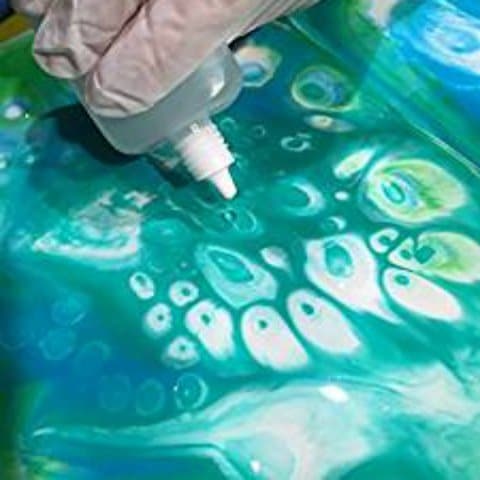
Load your mixed resin into a syringe, pipette, or squeeze bottle for accurate placement. Position the tip at the lowest point of your mould or design area. For even filling, maintain steady pressure and work slowly. This helps avoid trapping air bubbles and reduces mess. If making multiple layers or intricate 3D reliefs—especially with thin formulations—inject gradually and allow the resin to settle before adding more.
For creative effects in fluid art, use a product like “Resi-Blast” – Cell Effect Additive for Resin Art, 25ml by injecting small drops onto the wet resin surface to form decorative cells. For raised designs on polymer clay, apply “Fairy Wings” – UV Resin for Volumetric Reliefs directly to build up delicate patterns before curing.

Step 4: Cure or Set the Resin
Let the resin cure undisturbed as per product instructions. Let the resin cure undisturbed as per instructions for best results. For UV resins, use a lamp to harden layers in minutes. Polyurethanes such as “IWhite” often cure within half an hour, while most epoxies may take several hours to become fully set.
Avoid moving or touching your project during the initial curing period. If the piece must be removed from a mould, wait until the resin is completely set to avoid distortion or fingerprints.

Tips, Common Mistakes, and Troubleshooting
Work with small batches to manage pot life and reduce waste, especially with fast-curing formulas. Always inject slowly to minimise air bubbles and avoid overfilling, which can distort surface details or flow into unwanted areas. If bubbles appear, use a toothpick or gentle tapping to coax them out before curing. For fine lines or reliefs, practice even pressure with syringes or bottles to form crisp patterns. Clean your tools promptly before the resin sets for reuse in future projects.
Do a small test piece if trying an unfamiliar product, as cure times and viscosity may vary. Remember, patience and attention to detail are key for a successful resin injection result.
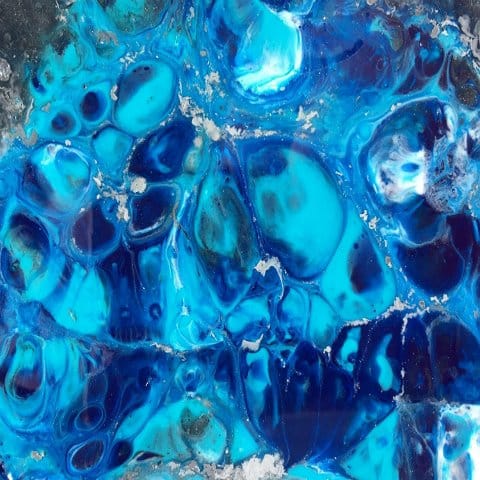
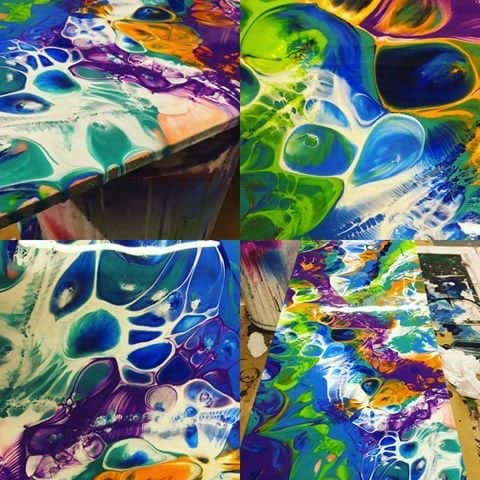
Real Project Examples: Resin Injection in Action
See how artists use injection to form crisp geometric shapes, flowing 3D lines, and mesmerising cell effects. Creative control over resin placement is key to achieving unique finishes or lifelike castings.
- "Resi-Blast" – Cell Effect Additive for Resin Art, 25ml£20.50"Resi-Blast" is a 25ml additive designed for resin art, suitable for creating cell effects in epoxy projects using simple drop application.
- "Fairy Wings" – UV Resin for Volumetric Reliefs, Dual Colour, 30mlOriginal price was: £15.15.£2.85Current price is: £2.85."Fairy Wings" is a UV resin suitable for detailed volumetric reliefs with dual colours, designed for crafting intricate 3D patterns.
- "One-2-One" – Epoxy Resin for Handcraft, 1:1 Mixing RatioPrice range: £14.85 through £56.85"One-2-One" is a medium viscosity epoxy resin suitable for beginners and experienced crafters, using a simple 1:1 mixing ratio.
 “IWhite” – Polyurethane Casting Resin – White, Fast-Curing Two-Part SystemPrice range: £22.85 through £34.85IWHITE is a fast-curing, fluid two-part polyurethane resin suitable for detailed moulding and prototyping.
Frequently Asked Questions
Which resins work best for injection into moulds or detailed reliefs?
Medium viscosity epoxy and fluid polyurethane resins are ideal. Choose products with clear mixing ratios and good flow for easy injection.
How can I prevent air bubbles from forming during resin injection?
Inject slowly and steadily. Use fine-tipped tools, avoid over-agitating, and allow resin to settle so bubbles rise out before curing.
How long should I wait for injected resin to cure?
Cure times vary: UV resin can set within minutes, polyurethane resins in 30 minutes, and some epoxies may take several hours.
What precautions should I take when working with resin injection?
Wear gloves and eye protection. Work in a ventilated area and protect surfaces to prevent spills or skin contact.
How can I use Resi-Blast to create decorative cells in my resin art?
Inject or drip Resi-Blast onto the wet resin surface and watch as it forms unique cell patterns during the curing process.
What if my injected resin stays sticky or soft after curing?
Incorrect mixing ratios or under-mixing are common causes. Always follow the product's recommended instructions very carefully.