 Free shipping on orders over £29,85


How to mix resin and phosphorescent powder?
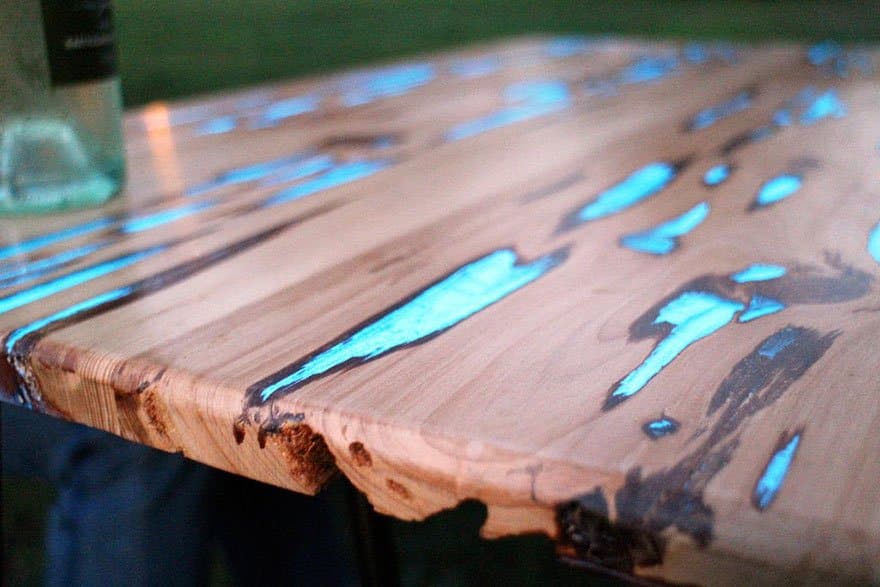
Make your creations glow using resin with phosphorescent pigments
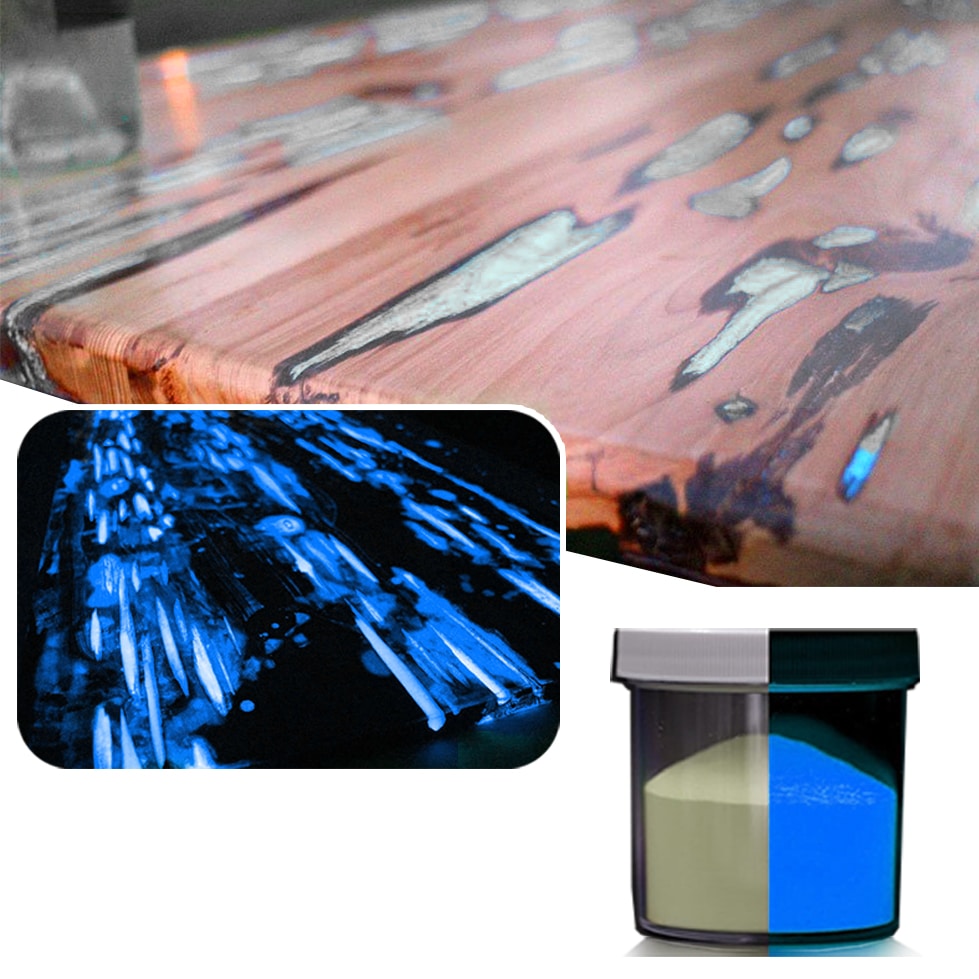

Creating resin projects with phosphorescent powder allows you to make art, jewellery, and crafts that glow in the dark. This guide will show you how to combine these two materials for impressive, lasting luminous effects, whether you are crafting decorative panels, coasters, or detailed ornaments. Follow each step for optimal glow and a smooth resin finish.
What You’ll Need
- Phosphorescent Pigment – Glow-in-the-Dark Additive for Resin, Paint, and Varnish
- “Art Pro Deluxe” – Ultra-High Viscosity Epoxy Resin for Artists or “Art Pro” – Clear Epoxy Resin for Artists and Surface Coating or “One-2-One” – Epoxy Resin for Handcraft, 1:1 Mixing Ratio
- Disposable mixing cups and wooden sticks
- Nitrile gloves and a dust mask
- Protective cover for your workspace
- Project moulds or bases (silicone or plastic recommended)
Essential Materials for Mixing Resin and Glow Powder
Choose clear, artist-quality resin and high-grade phosphorescent pigment for the best luminous effect. Protective gear such as gloves and masks is important, as is using disposable utensils for easy clean-up. Select silicone moulds or suitable bases to ensure quick release and a flawless finish.

Step 1: Measure and Mix Your Resin
Use a clean, dry mixing cup and stick to ensure there is no contamination that might affect clarity or curing. Accurately measure your resin and hardener according to your product’s instructions—a precise 1:1 ratio for One-2-One – Epoxy Resin for Handcraft, 1:1 Mixing Ratio, or 3:2 by weight for the Art Pro – Clear Epoxy Resin for Artists and Surface Coating. Mix slowly for 2–3 minutes, scraping the sides and bottom to ensure full blending without introducing excess air bubbles.
Step 2: Add Phosphorescent Powder to Resin
Always add pigment to the mixed resin—not before combining resin and hardener. Once your resin and hardener are thoroughly blended, sprinkle in the phosphorescent powder. Begin with a ratio of 5–10% by weight for a medium glow. Mix slowly and thoroughly for even glow, ensuring no dry clumps remain. Too much powder can limit curing or create grainy textures—start with less and test opacity before adding more.
If you are aiming for high precision (such as lines or layered effects), use the Art Pro Deluxe – Ultra-High Viscosity Epoxy Resin for Artists, which helps keep the pigment from settling quickly and is less likely to bleed between colours.
Step 3: Pour and Set Your Project
Once mixed, pour your phosphorescent resin into your prepared moulds or onto your base. Pour carefully to avoid disturbing the settled powder and to maintain layer clarity. Let the resin self-level and settle—if you see bubbles, pop them with a toothpick or use a light heat gun for a few seconds. Allow your piece to cure undisturbed for the full recommended time based on your resin (usually 12–24 hours for surface projects).

Step 4: Finish and Protect the Surface
After curing, demould your piece or remove masking. If desired, lightly sand any sharp edges or uneven spots, but avoid over-sanding the glowing surface. Seal your work to protect the glow finish, especially for items that might be handled often—an extra clear resin coat or suitable non-yellowing varnish helps preserve brilliance and protects against scratches.

Tips and Common Mistakes
Work in a dust-free, dry area to prevent debris in your resin. Measure all components with care—incorrect ratios cause improper curing. Don’t use too much phosphorescent powder or it may settle and clump. Mix at a steady pace and avoid vigorous, quick stirring that creates bubbles. Wear gloves and a dust mask to protect from powders and resin contact. If your glow looks patchy, remix thoroughly or experiment with pigment concentration. For layered designs, pour in stages to prevent pigment migration between layers.
Expert Advice for Long-Lasting Luminous Effects
Store your finished glow-in-the-dark items away from direct sunlight to prevent fading. If your project is for outdoor use, apply a UV-resistant top coat. Test pigment levels with a small batch first to achieve your preferred brightness without compromising resin clarity.

- Phosphorescent Pigment – Glow-in-the-Dark Additive for Resin, Paint, and VarnishPrice range: £7.75 through £12.85Phosphorescent Pigment is a photoluminescent additive suitable for use in resins, paints, or varnishes with a theme of mixing resin and…
- "Art Pro Deluxe" – Ultra-High Viscosity Epoxy Resin for ArtistsPrice range: £33.85 through £287.85Art Pro Deluxe offers ultra-high viscosity for controlled resin art and a clear, scratch-resistant finish suitable for precise artistic use.
 "Art Pro" – Clear Epoxy Resin for Artists and Surface CoatingPrice range: £31.15 through £388.85"Art Pro" clear epoxy resin provides high-gloss, scratch-resistant coatings suitable for artists and crafters under the theme How to mix resin and…
 "One-2-One" – Epoxy Resin for Handcraft, 1:1 Mixing RatioPrice range: £14.85 through £56.85"One-2-One" epoxy resin is a medium viscosity, non-toxic resin with an easy 1:1 mixing ratio suited for handcraft projects and decorative uses.
Frequently Asked Questions
What is the most important step for even glow?
Ensure you mix the phosphorescent powder thoroughly into the resin after blending resin and hardener, avoiding dry clumps.
How much phosphorescent powder should I use?
Typically, 5–10% by weight achieves a medium to strong glow. Always test a small sample to adjust brightness.
How do I stop the powder from settling before curing?
Use a thicker, high-viscosity resin and mix gently to keep the particles suspended throughout the curing period.
Can I mix glow-in-the-dark powder into any resin type?
Most clear epoxy resins are suitable as long as they fully cure and are transparent. Always verify compatibility before starting.
Should I seal my glow-in-the-dark resin creation?
Sealing with a clear topcoat or extra resin layer protects the surface, preserves brightness, and prevents scratches.
Is it possible to create layered effects with phosphorescent powders?
Yes, pour in multiple stages and allow each layer to partially cure to achieve defined, luminous layered results without mixing.