 Free shipping on orders over £29,85


How to polish two-component resin
Step-by-step to achieve a flawless resin gloss finish


Polishing two-component resin is the final step to unveil the full brilliance of your epoxy creations—whether jewellery, tables, or inlays. This guide explains each stage, from sanding through to the perfect high-gloss finish. With clear steps and expert advice, you can transform dull surfaces into vibrant showpieces, ensuring your resin projects reflect light beautifully and resist everyday wear.
What You’ll Need
- “Ebonite Abralon” – Sanding Pads 360-4000 Grit for Resin and Wood: For effective wet or dry sanding across grit levels.
- “Epoxy Polish” – Epoxy Resin Polishing System: Ideal for finishing clear and coloured resin projects to a mirror-like sheen.
- “Carbon Polish” – Polishing System for Dark and Black Surfaces, 250ml: Recommended for deep-coloured, black, or carbon resin finishes.
- 1200W Polisher for Sanding and Buffing – Variable Speed, D-Handle: For consistent, professional results on larger surfaces.
- Clean, dry microfibre cloths for residue removal.
- Spray bottle with water (for wet sanding).
- Protective gloves, dust mask, and safety goggles.

Essential Preparation for Perfect Resin Shine
Setting your workspace and choosing the right tools are crucial first steps. Lay out protective coverings and keep dust to a minimum. Before starting, inspect your resin piece and gather all necessary abrasives and polishing compounds for a smooth workflow.

Step 1: Prepare the Surface with Careful Sanding
Begin by ensuring your resin piece is fully cured and free from dust. Place it on a stable, protected surface. For flat or broad areas, use sanding pads in ascending grit order—start with coarse and gradually move to finer pads. Wet sanding is best, using water to reduce heat and prevent clogging.
Carefully sand out all surface imperfections, keeping the motion even to avoid creating dips. For this, “Ebonite Abralon” – Sanding Pads 360-4000 Grit for Resin and Wood are particularly effective. Continue with finer grits until the surface feels smooth and only a matte haze remains. Dry the piece thoroughly before moving on.
Step 2: Apply the Right Polish for a Mirror-Like Finish
Choose a polish suited to your resin’s colour and type. For clear or light resins, use a specialised polishing cream. If your project is black, dark, or carbon-rich, opt for a formula designed for such finishes to avoid white residue or streaks.
Apply a small amount of polish to the surface. For the best gloss, use a microfibre pad or gentle rotary polisher. Spread polish evenly, working in slow, overlapping strokes. On dark resin, “Carbon Polish” – Polishing System for Dark and Black Surfaces, 250ml delivers pristine results, while clear projects benefit from “Epoxy Polish” – Epoxy Resin Polishing System.
Step 3: Buff and Reveal the Shine
Continue polishing until the surface becomes glossy and swirl-free. For large or professional projects, a rotary tool with adjustable speed—such as the 1200W Polisher for Sanding and Buffing – Variable Speed, D-Handle—ensures even pressure and consistent lustre.
Wipe away residue regularly with a clean microfibre cloth. If necessary, reapply polish and repeat until you achieve your desired level of sheen. Inspect under good lighting to check for any missed spots or hazing.

Step 4: Clean Up and Protect Your Finish
When satisfied with the polish, thoroughly clean the resin surface to remove all compound. Use a soft, slightly damp cloth and dry immediately. Avoid touching with bare hands to prevent fingerprints. If the piece will be handled frequently, consider applying a gentle wax or sealant for extra protection.
Tips, Common Mistakes, and Troubleshooting
Use progressive sanding before polishing: Skipping grits leaves faint scratches that will show through the final gloss. Be patient in sanding prep.
Choose the right polish for the resin colour: Using generic polishes on dark or black resin can leave visible white marks. Select a formula matched to your project.
Clean thoroughly between each polishing stage: Residue or leftover grit can scratch the next finish layer. Always wipe down with a clean microfibre cloth.
Work in a dust-free, ventilated environment: This avoids trapped particles or hazing and maintains your health during sanding and buffing.
Pro Results: Common Questions on Resin Polishing
Why does my resin still look dull after polishing? Often, either a step in sanding was skipped or not worked through thoroughly enough. Always follow a full sanding progression before attempting to polish for ultimate clarity and shine.

- "Epoxy Polish" – Epoxy Resin Polishing SystemPrice range: £17.85 through £44.85Epoxy Polish is a resin polishing system designed to restore gloss and remove scratches efficiently.
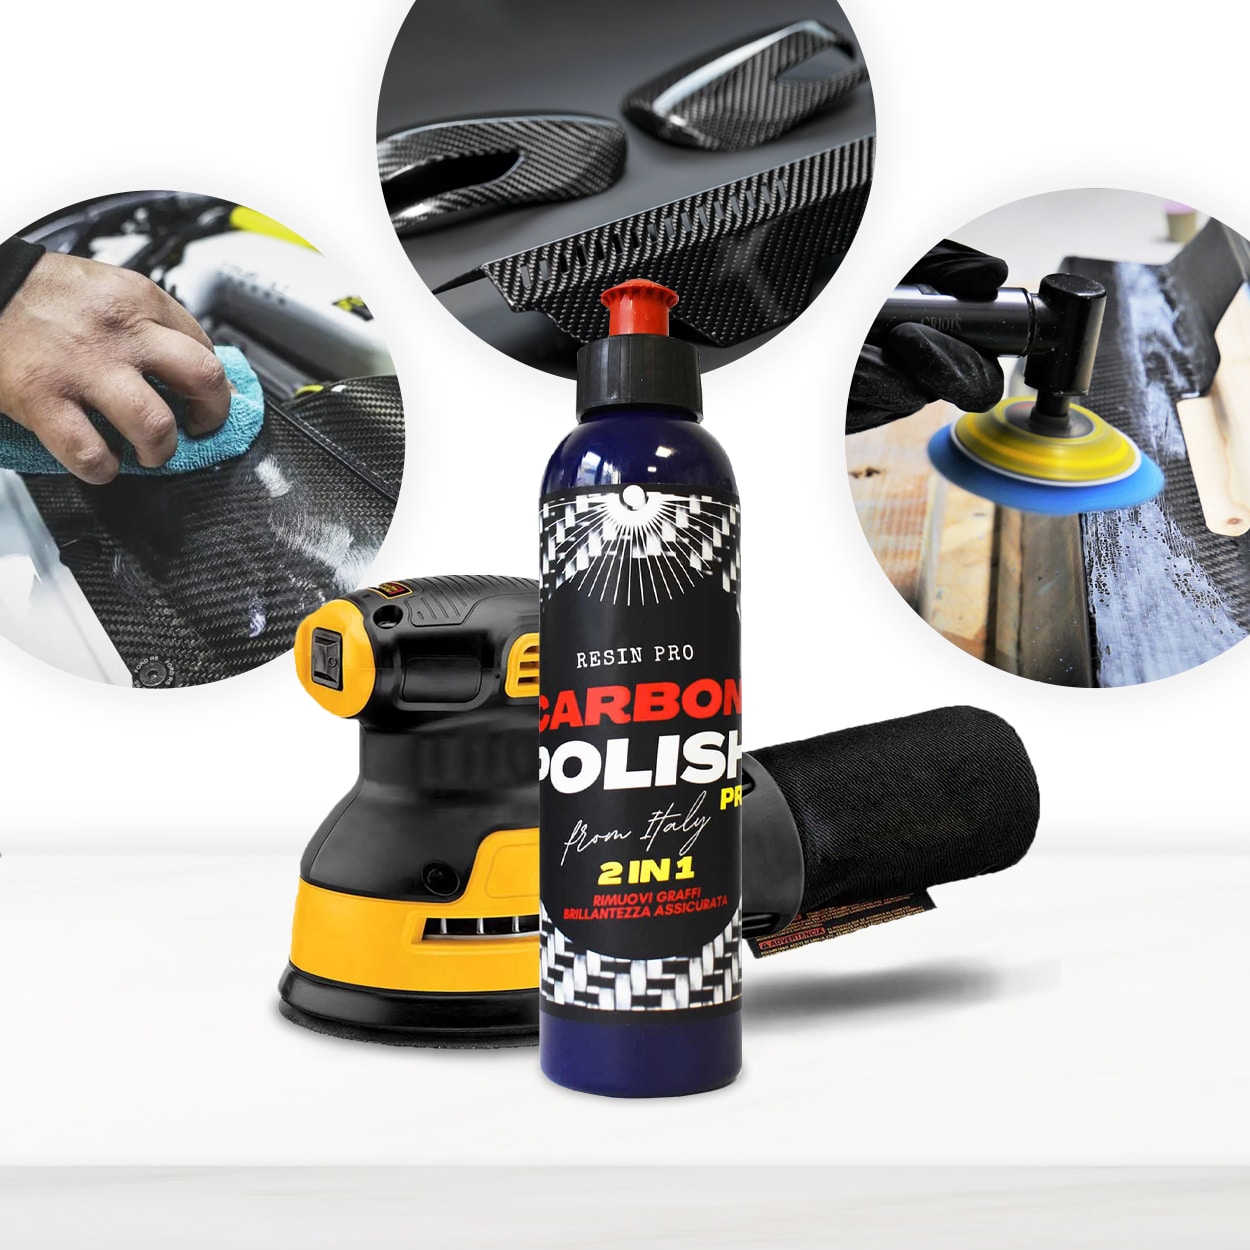 "Carbon Polish" – Polishing System for Dark and Black Surfaces, 250mlPrice range: £17.85 through £44.85Carbon Polish Black is designed for polishing dark or black epoxy resin surfaces, providing an easy application and a finish free of white residue.
 "Ebonite Abralon" – Sanding Pads 360-4000 Grit for Resin and Wood£3.95Ebonite Abralon Sanding Pads offer precise sanding with grits from 360 to 4000, suitable for resin and wood polishing.
 1200W Polisher for Sanding and Buffing – Variable Speed, D-Handle£85.95The 1200W Polisher provides variable speed control and a sturdy D-handle, suitable for sanding and polishing epoxy resin projects.
Frequently Asked Questions
Can you polish resin without a polishing machine?
It is possible, but manual polishing is more labour-intensive and may not achieve the same high-gloss finish as using a rotary polisher.
Which grit sizes are best for sanding resin before polishing?
Start with 360–600 for removing imperfections, then move through 1000, 2000, and up to 4000 for best results.
Do I need specialised polish for black or dark resin?
Yes, dedicated dark-surface polish prevents white residue, ensuring a flawless mirror effect on black or carbon resin pieces.
Are there health or safety concerns when polishing resin?
Wear a dust mask, goggles, and gloves; work in a well-ventilated area to minimise dust and compound exposure.
Can polishing remove all scratches and imperfections from resin?
Only minor surface scratches can be polished out; deep ones require thorough sanding with coarser grits beforehand.
What is the best method to avoid swirls or streaks in resin polishing?
Use a clean, soft pad for each stage, maintain even pressure, and select anti-hologram compounds where possible.