 Free shipping on orders over £29,85


How to pour colour into resin for floors?
Giving your floors a seamless coloured resin finish can transform any interior or exterior space with a truly bespoke effect. This guide provides the step-by-step process to pour colour into resin for floors, whether you want a sleek solid look or a subtle translucent style. If you’re renovating, crafting, or installing a new resin floor, you’ll discover the key actions for eye-catching, professional results.
Achieve vibrant coloured resin floors for unique, lasting results


What You’ll Need
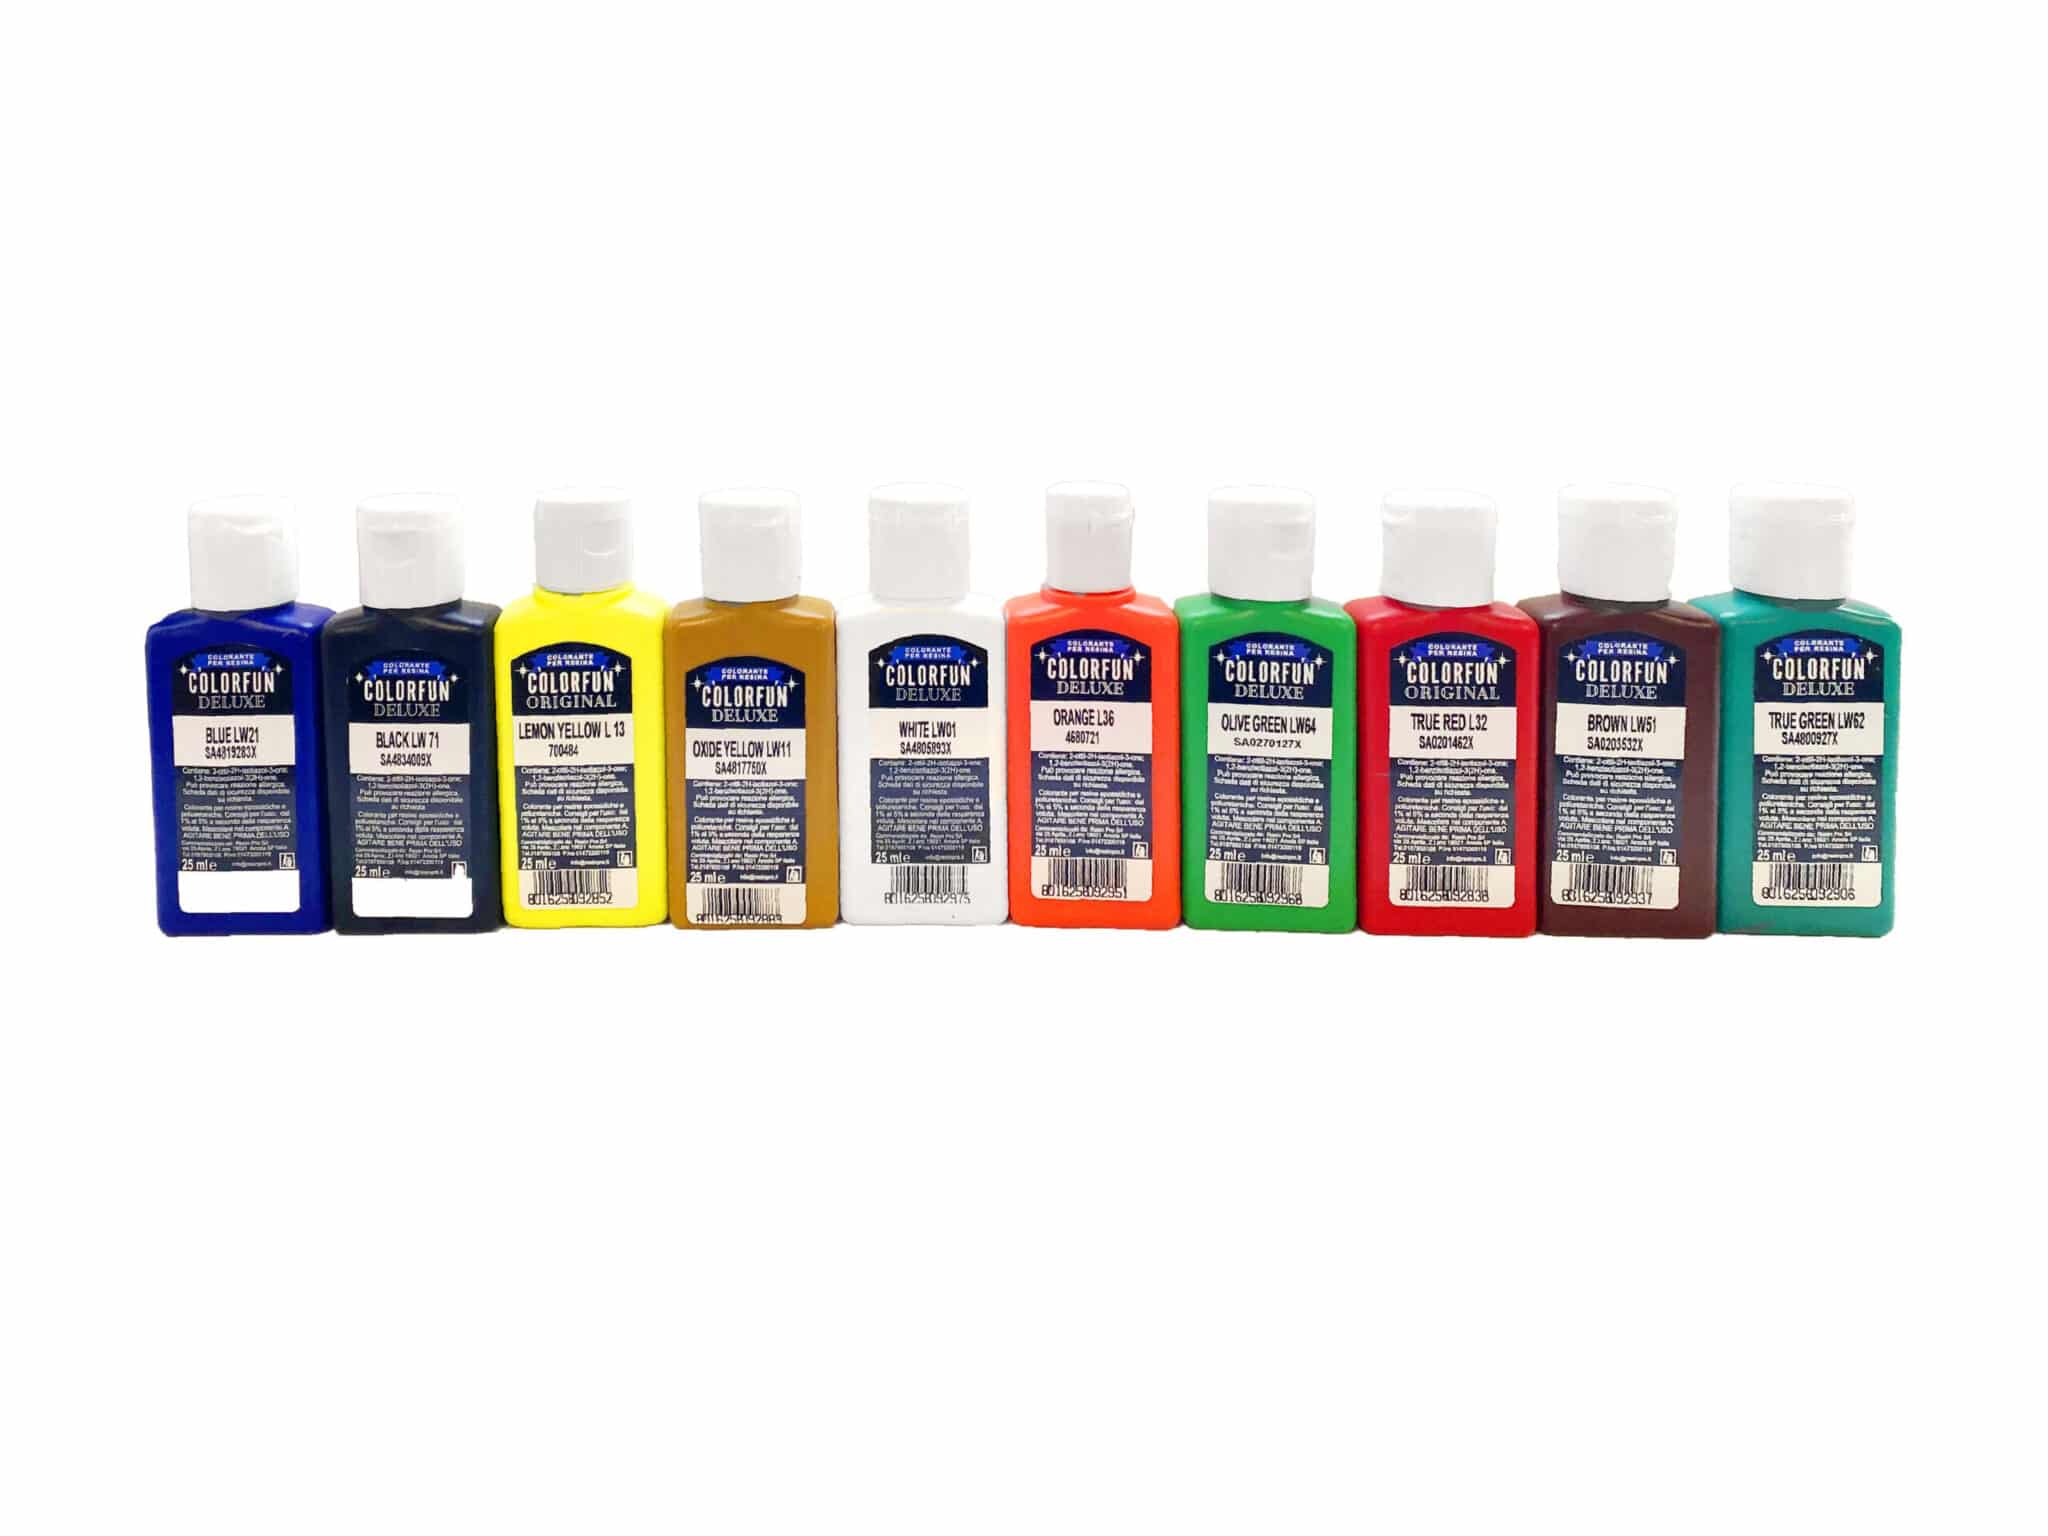
- “Colourfun Set” – Liquid Epoxy Resin Colourant Set for Solid Colour Effects: A set of intense, blendable colour pastes for transparent or solid coloured floors
- “Colourfun” – Liquid Epoxy Resin Colourant 25-100ml – High coverage: Highly concentrated liquid colourants for custom floor designs
- “Trasparente” – Epoxy Binder for Coloured Pebbles and Grits: UV-resistant clear binder ideal for embedding coloured pebbles or grits in decorative floors
- “Flowstone” – Complete Permeable Floor Kit with Pebbles and Resin: Everything needed for creating durable, draining pebble resin surfaces
- Mixing containers, stirrers, spatula
- Protective gloves and mask
- Measuring scales
- Tape or edge barriers
- Squeegee and trowel (for spreading)
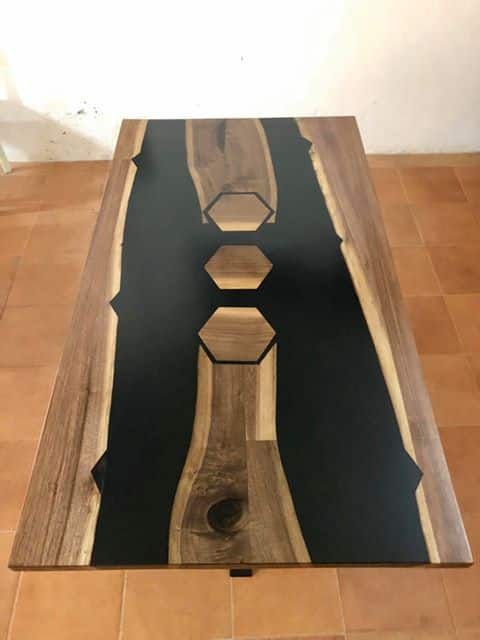
Visual Inspiration: Coloured Resin Floors
See the striking results that coloured resin techniques can achieve, from smooth solid effects to dynamic, marble-like blends. Browse our Dyes and Pigments collection to find your perfect shade for floors.
Step 1: Prepare the Substrate
Begin by thoroughly cleaning the floor, removing dust, debris, and any previous coatings. The surface should be dry, smooth, and free from contamination for the resin to adhere properly. If working on concrete, check for moisture content and repair any cracks or holes—otherwise, surface imperfections may show through after resin application. For best results, seal highly absorbent floors with a suitable primer and allow to cure according to manufacturer guidance before proceeding.
Edge masking tape can be used to clearly define the application area and stop resin flow at room boundaries.
Step 2: Mix the Resin and Colourant
Carefully follow the mixing ratio instructions for your chosen epoxy resin or epoxy binder. Only after both resin and hardener are fully combined should you introduce your colourant. Add your chosen pigment—such as a paste from the Colourfun Set or a few drops from the Colourfun liquid colourant—into the resin mixture. Start with a small amount; these pigments are highly concentrated, so a little goes a long way.
Stir very slowly and thoroughly, scraping the edges and bottom of your mixing container. Always mix pigments thoroughly to prevent streaks or uneven colouring. If you plan to experiment with colour blends, test in a small batch first to achieve the right hue and opacity before scaling up for the floor.
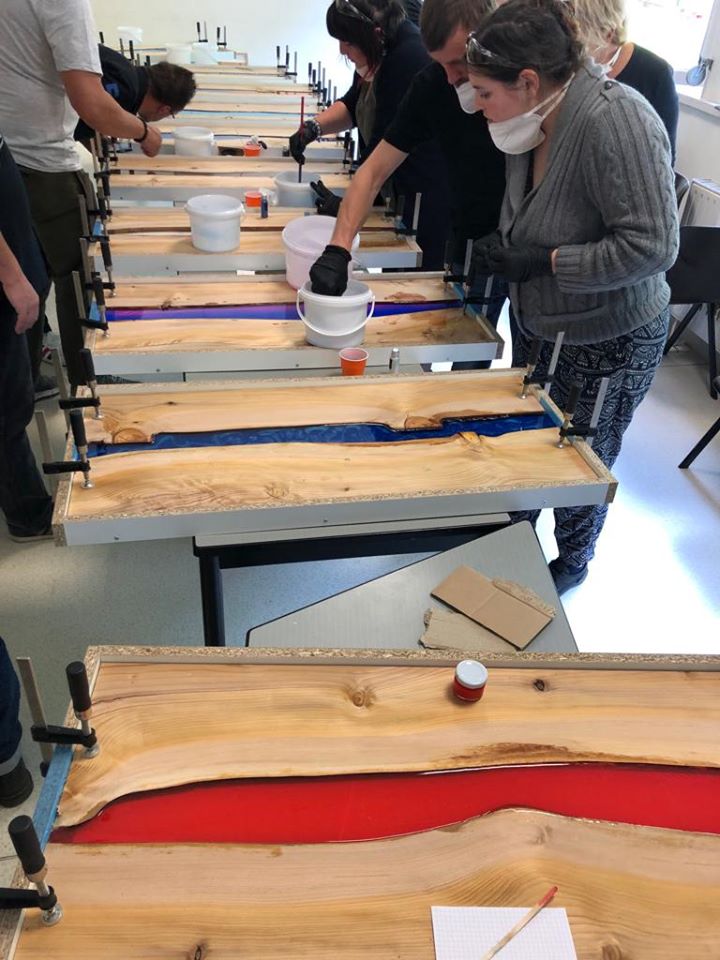
Step 3: Pour and Spread the Coloured Resin
When your colour is fully integrated, pour the resin gently onto the floor—beginning near the centre and working outwards. Use a squeegee or notched trowel to spread it evenly, controlling pour thickness to meet your design or coverage requirements. For styles with embedded aggregates, mix the clear binder (e.g. Trasparente – Epoxy Binder for Coloured Pebbles and Grits) or choose a complete permeable kit like Flowstone and ensure the aggregates are homogeneously coated before laying on the substrate.
Work efficiently—resin begins to cure within a set pot time. Avoid overworking or excessive spreading which can create bubbles or dullness.
Step 4: Curing and Aftercare
Allow the floor to cure as per resin guidelines, maintaining a stable, dust-free environment. The duration depends on temperature and humidity. Protect the area from traffic and cover if needed to avoid contamination while curing. For especially UV-exposed floors or exterior areas, ensure your binder is UV-resistant—like Trasparente—to preserve colour vibrancy. Once cured, gently remove masking tape, and your coloured resin floor is ready for use!

Tips and Common Mistakes
- Work in a well-ventilated area and wear protective equipment at all times.
- Do not exceed the recommended pigment quantity (usually 5% of resin mass) to avoid affecting curing or resin clarity.
- Test your colour in a small batch first to verify shade and transparency.
- Avoid high humidity or very low/high temperatures when pouring resin for best results.
- For large areas, mix the resin and colourant in smaller batches to prevent premature curing.
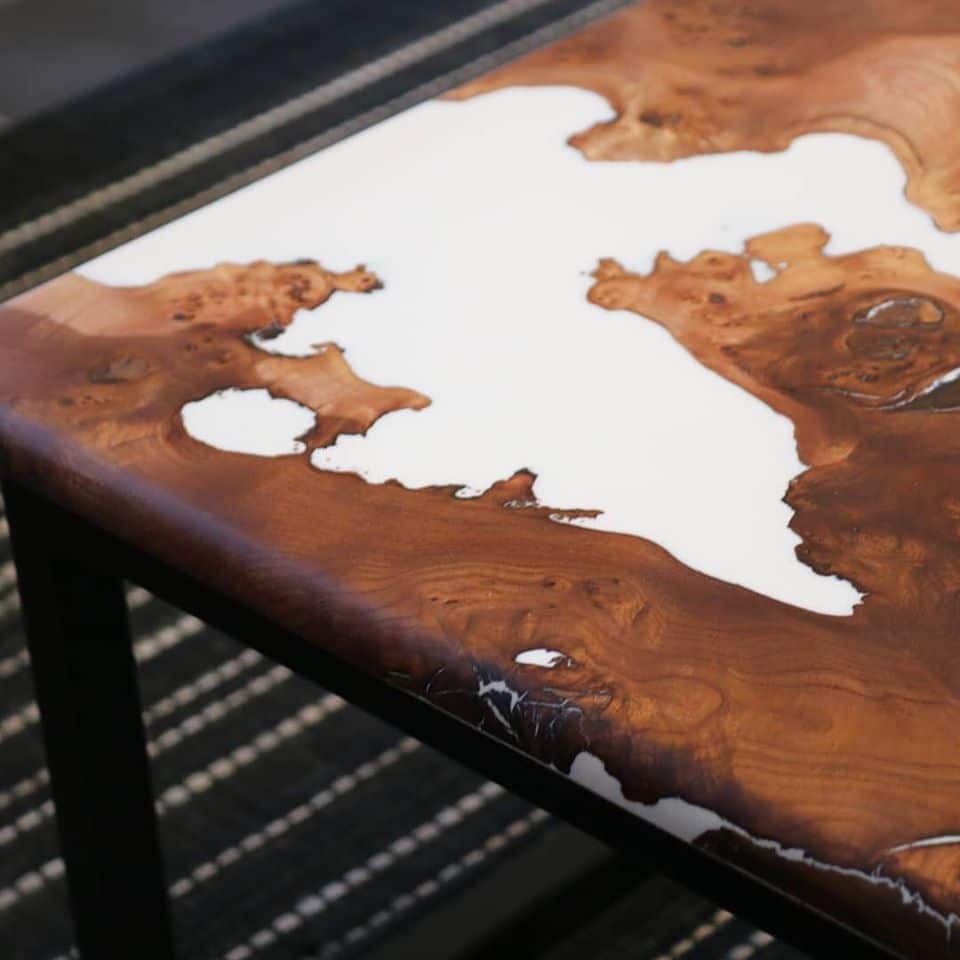
Real-World Project Gallery
Explore completed floors using Trasparente binder or textured designs made with Flowstone. Each finish demonstrates the depth and versatility of coloured resin solutions.
- "Colourfun Set" – Liquid Epoxy Resin Colourant Set for Solid Colour EffectsPrice range: £13.45 through £48.15"Colourfun Set" offers concentrated translucent colour pastes designed for transparent epoxy resin projects in floor themes.
- "Flowstone" – Complete Permeable Floor Kit with Pebbles and ResinPrice range: £42.85 through £3,389.85"Flowstone" offers a durable, permeable pebble and resin system for driveways and patios, with clear instructions supporting the theme.
 "Trasparente" – Epoxy Binder for Coloured Pebbles and GritsPrice range: £31.85 through £948.85"Trasparente" is a transparent epoxy binder designed for coloured pebbles and grits, offering UV resistance and a bubble-free finish suitable for…
 "Colourfun" – Liquid Epoxy Resin Colourant 25-100ml – High coveragePrice range: £3.65 through £9.85Colourfun liquid colourant delivers intense pigments, compatible with Resin Pro resins for consistent mixing and various opacity effects.
Frequently Asked Questions
What is the best pigment for resin floors?
Highly concentrated epoxy-compatible liquid or paste pigments work best, such as Colourfun sets, ensuring even distribution and vibrant results.
How much colourant should I add to resin for floors?
Do not exceed 5% pigment by mass of resin, or you may affect curing and finish quality. Always check individual product guidelines.
Why does my resin floor colour look streaky or uneven?
Uneven mixing or excessive pigment can cause colour streaking. Mix thoroughly and measure pigment accurately to avoid this.
Are coloured resin floors suitable for outdoor use?
Yes, but you must use a UV-resistant resin or binder, such as Trasparente, to avoid yellowing and fading in outdoor conditions.
How do I achieve consistent colour in my resin floor?
Mix pigments slowly and thoroughly, working in small batches if needed. Test colour and mix ratios before full application.
How long does it take for coloured resin floors to cure?
Resin floors typically cure within 24-72 hours, but timing varies by temperature, humidity, and product used. Prevent foot traffic until fully cured.