 Free shipping on orders over £29,85


How to sand and polish coloured epoxy resin?
Guide to achieving a flawless, glossy finish on resin art


Finishing coloured epoxy resin to a smooth, glossy perfection can transform any project, whether it’s art, jewellery, tabletops, or casting work. This guide breaks down every step required to sand and polish your resin surface, revealing vibrant colour and eye-catching shine while avoiding common mishaps. Perfect for beginners and those refining their craft alike.
What You’ll Need
- “Ebonite Abralon” – Sanding Pads 360-4000 Grit for Resin and Wood
- Dry Sanding Discs Kit 150mm – Assorted Grits for Resin and Wood
- 150mm Sanding Paper Discs – Assorted Grits for Resin & Wood Finishing, 10pcs
- “Epoxy Polish” – Epoxy Resin Polishing System
- Appropriate polishing pads or pad holder (hand or rotary)
- Clean, lint-free microfibre cloths
- Personal protective equipment (mask and safety glasses)

Essential Tools for Resin Finishing
Using sanding pads and polishing systems designed for resin ensures you achieve a smooth, professional look with vibrant clarity. Selecting grits and materials specifically suited to coloured epoxy prevents damage and maximises shine.

Step 1: Prepare your Workspace and Resin Surface
Work in a clean, dust-free space to minimise contaminants that could scratch your resin during sanding or polishing. Ensure the coloured epoxy resin is completely cured—usually 5 to 7 days, depending on product and climate. Remove any loose debris or rough edges with gentle scraping or by wiping the surface.
Inspect for surface imperfections like dust nibs, high spots, or trapped air bubbles. Consider levelling sharp drips with a coarse grit sanding disc if your project has run-off edges.
Step 2: Sand the Resin with Correct Grits
Choose the correct grit progression for an even finish. Start sanding dry with a coarse option like p80 or p120 from your Dry Sanding Discs Kit 150mm to remove major imperfections.
Move stepwise through higher grits—p180, p320, up to p600—replacing each disc as needed. Switch to “Ebonite Abralon” – Sanding Pads 360-4000 Grit for Resin and Wood for finer, controlled sanding, particularly at 1000 grit and beyond. For best results, alternate directions during each pass and frequently wipe the surface to check progress.
Wet sanding with the Abralon pads can reduce clogging and heat build-up for a smoother, satin effect—use this approach for deeper clarity, especially on large or flat pieces.
Step 3: Polish for a Glossy, Vibrant Finish
Once the surface is evenly sanded with the finest grit (2000–4000), it’s time to polish. Apply a small amount of “Epoxy Polish” – Epoxy Resin Polishing System directly onto the surface. Use a microfibre cloth for small projects, or a polishing pad/rotary tool for larger items. Work in overlapping circles and gentle pressure, reapplying polish as required until the resin takes on a glassy sheen.
Wipe off excess and buff gently to finish. For particularly deep scratches or stubborn matt areas, re-sand locally before a repeat polish. Inspect closely under good lighting to catch any overlooked dullness.

Step 4: Final Touches and Clean-up
Remove any residue left from sanding or polishing with a clean, dry cloth. Allow resin to fully cure before finishing—polishing too early can introduce smearing or haze. Check edges and corners, ensuring all surfaces transition smoothly and look consistent.
Final dust removal is essential before displaying or sealing the project. Store all tools for reuse and ventilate your work area to disperse any lingering fine particles.

Tips, Common Mistakes and Troubleshooting
- Check for resin surface imperfections early in the process. Addressing these before progressing avoids unnecessary work.
- Never rush grit transitions—skipping grits can result in visible scratches or patchy gloss.
- Poor curing or excessive heat during sanding can cloud the resin—work gently, especially with powered tools.
- Experiment with scrap pieces first if you’re unsure how aggressive your sanding or polishing should be.
- Keep all sanded residue and dust away from your final polish to avoid dulling.
Project Inspiration: Coloured Resin Finishes
Explore the creative potential of perfectly polished resin—from vivid jewellery pieces to show-stopping furniture. Sanding and polishing bring out the depth and brilliance in every coloured project.

- "Epoxy Polish" – Epoxy Resin Polishing SystemPrice range: £17.85 through £44.85"Epoxy Polish" provides a polishing system designed to restore a glossy finish to resin projects.
- "Ebonite Abralon" – Sanding Pads 360-4000 Grit for Resin and Wood£3.95Ebonite Abralon Sanding Pads are designed for detailed finishing on epoxy resin and wood, suited to precise sanding tasks.
 Dry Sanding Discs Kit 150mm – Assorted Grits for Resin and Wood£6.85Dry Sanding Discs Kit provides assorted grit discs sized at 150mm, suitable for sanding coloured epoxy resin and wood surfaces.
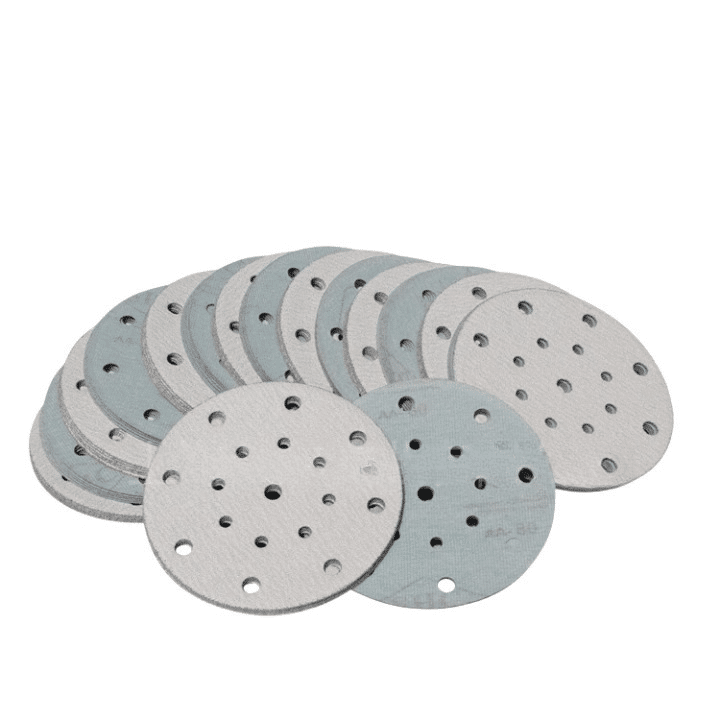 150mm Sanding Paper Discs – Assorted Grits for Resin & Wood Finishing, 10pcs£8.85Sanding paper discs designed for resin and wood finishing, suitable for various crafting stages.
Frequently Asked Questions
Which sandpaper or sanding pad grits should I use for the best resin results?
Begin with a coarse grit such as p80 or p120 for rough shaping, followed by finer grits up to p4000 for a flawless finish.
Do I need a polishing machine or can I polish resin by hand?
You can polish by hand using microfibre cloths and appropriate polishing cream, though rotary tools speed up the process and improve results on large items.
Why is my coloured resin staying cloudy after polishing?
Cloudiness typically means sanding or polishing was incomplete. Re-sand with a finer grit and repolish, ensuring the resin is fully cured before finishing.
How long should epoxy resin cure before I sand or polish it?
Wait at least 5 to 7 days for full cure to prevent smearing, clouding, or tacky surfaces during finishing steps.
What causes visible scratches even after sanding and polishing epoxy resin?
Skipping grit levels or leaving coarse scratches unaddressed may cause visible marks. Always progress through each grit stage in sequence.
Should I wet sand coloured epoxy resin or is dry sanding enough?
Wet sanding with soft pads can help reduce clogging and improve finish, but dry sanding is also effective with the correct discs and progression.