 Free shipping on orders over £29,85

How to spread epoxy resin?
Achieve smooth, uniform resin finishes on any project


Perfectly spreading epoxy resin is essential for achieving a professional finish on artwork, furniture, or craft projects. Whether you’re creating a glossy tabletop or a piece of resin art, mastering this skill ensures your final result is free from ripples, bubbles, and uneven patches. This step-by-step guide will walk you through the key techniques for even resin application, whatever your project size.

What You’ll Need
- Tooth Shaped Spatula for Epoxy Resin Application — For smooth, uniform spreading over flat surfaces.
- Resin & Paint Application Rollers – Short-Pile, Large, and Sponge Types — For broad or detailed coverage, ideal for larger areas.
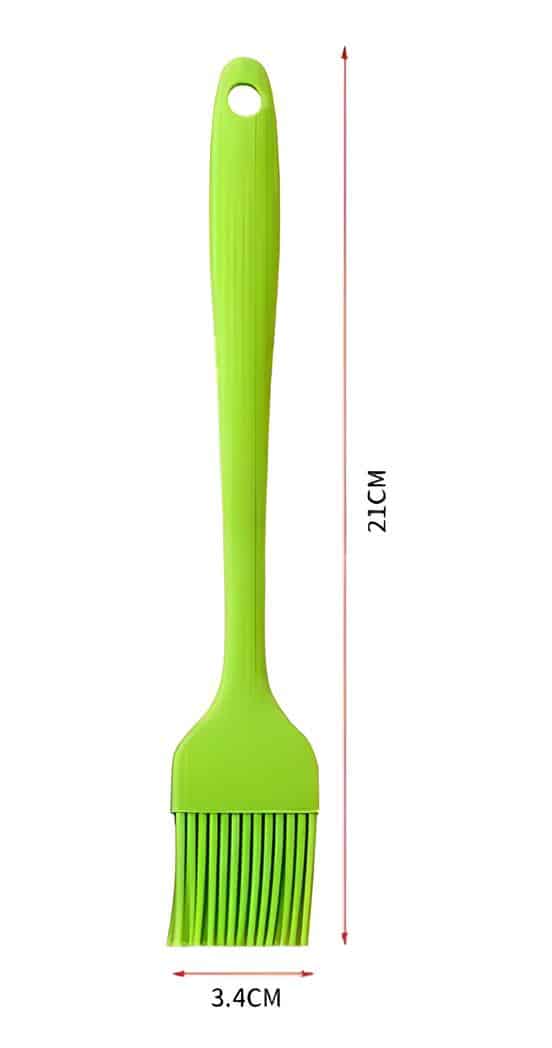
- Reusable Silicone Resin Brush for Epoxy Art and Wood Applications — For precise resin manipulation in art and woodworking.
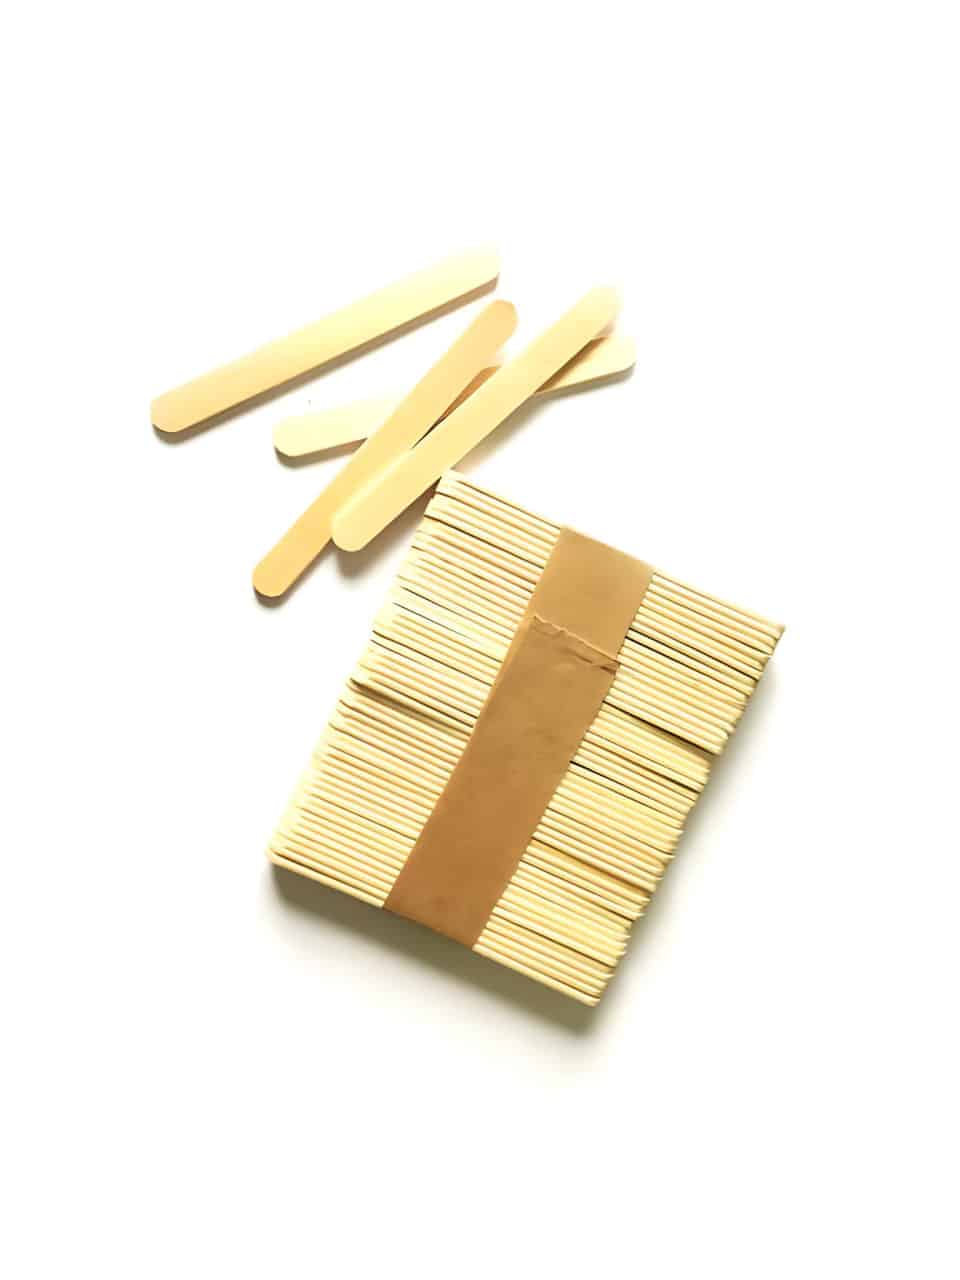
- Wooden Spatula for Epoxy Resin Mixing – 90x10mm & 114x15mm, Pack of 50 — For initial mixing and small-area spreading.
- Protective gloves and apron
- Mixing cups and a level workspace

Visual Guide: Epoxy Spreading Tools in Action
See close-ups of spreading tools and techniques, from spatula work on tables to roller methods for floors. Observe the importance of tool selection for different project types and detail levels.
Step 1: Prepare Your Surface and Workspace
Before beginning, ensure all surfaces are completely clean, dry, and dust-free. Any debris or contamination will compromise the final result. Work in a well-ventilated area with a level tabletop to prevent resin from pooling at one end. Cover adjacent surfaces and flooring with protective sheeting to safeguard against accidental drips.
Clean all surfaces thoroughly before you begin to help the resin adhere properly and avoid imperfections in the finished product.

Step 2: Mix the Epoxy Resin Carefully
Read and follow the manufacturer’s instructions for measuring and mixing your epoxy resin. Inaccurate mixing can lead to soft spots or surface tackiness. Pour both resin and hardener into a mixing cup and spend several minutes stirring slowly to minimise the introduction of air bubbles.
For small batches or craft projects, a Wooden Spatula for Epoxy Resin Mixing – 90x10mm & 114x15mm, Pack of 50 offers excellent control while blending.
Step 3: Pour and Spread the Epoxy Resin Evenly
After mixing, pour the resin onto the centre of your surface, allowing gravity to help distribute it outward. For tables, trays, and flat art boards, use a Tooth Shaped Spatula for Epoxy Resin Application to achieve a uniform coating. Glide the notched edge through the resin, keeping the tool angled slightly to maintain a steady flow across the surface.
For larger areas or floors, Resin & Paint Application Rollers – Short-Pile, Large, and Sponge Types allow you to cover bigger spaces quickly while maintaining an even thickness. Always use long, overlapping strokes to avoid visible lines and streaks. When working on intricate edges or adding highlights, the Reusable Silicone Resin Brush for Epoxy Art and Wood Applications is ideal for fine control and accuracy.
Step 4: Level, Finish, and Allow to Cure
Once you have finished spreading, survey your work from different angles to catch any missed areas or excess pools of resin. The resin will naturally self-level to some extent, but make adjustments as needed using your chosen tools. Eliminate bubbles by lightly passing a heat gun or torch above the surface, taking care not to scorch the resin.
Work in thin layers rather than thick ones to ensure a smooth cure and prevent issues such as yellowing or cracking. Always follow the resin manufacturer’s recommendations for curing times and environmental conditions.
Tips and Troubleshooting for Smooth Epoxy Spreading
Keep your working environment dust-free to prevent imperfections in the finish. Spreading too quickly or neglecting to level the resin may result in streaks, uneven coverage, or trapped bubbles. If possible, use a dedicated resin room or cover your workpiece loosely until curing is complete.
Allow sufficient curing time between layers when working with multiple pours. Rushing this step can cause surface defects, sticky areas, or weak bonds between layers. Patience and careful technique will yield the best possible results.
Results Gallery: Perfectly Level Epoxy Surfaces
Discover real-life examples of flawless resin projects, showcasing smooth, even finishes on wood, art, and more. Note techniques that avoid air bubbles and surface defects.

- Tooth Shaped Spatula for Epoxy Resin Application£3.45The Tooth Shaped Spatula offers precise tooth-shaped spreading, suitable for smooth application on large and small surfaces.
- Resin & Paint Application Rollers – Short-Pile, Large, and Sponge TypesPrice range: £3.62 through £5.09These rollers are designed for precise and uniform application on epoxy resin surfaces, suitable for various project sizes.
- Reusable Silicone Resin Brush for Epoxy Art and Wood Applications£3.62The Reusable Silicone Resin Brush is designed for precision in epoxy resin projects and is easy to clean and eco-friendly.
- Wooden Spatula for Epoxy Resin Mixing – 90x10mm & 114x15mm, Pack of 50Price range: £2.05 through £7.45Wooden spatulas designed for mixing epoxy resin, offered in two sizes suitable for detailed and larger projects.
Frequently Asked Questions
What is the best tool for spreading epoxy resin?
A tooth shaped spatula or a specialised roller is ideal for achieving even, uniform layers across surfaces.
How can I prevent bubbles while spreading epoxy?
Mix the resin slowly, use spreading tools gently, and pass a heat gun above the surface to remove trapped air.
Why is it important to use thin layers?
Thin layers cure more consistently, reduce the risk of defects, and help avoid yellowing or cracking of epoxy resin.
Are brushes suitable for spreading epoxy resin?
Silicone resin brushes are ideal for precision work, touch-ups, and smaller resin art or wood projects.
How should I prepare my surface before applying resin?
Ensure the surface is clean, dry, and level to help the resin flow correctly and adhere without imperfections.
How long should I wait between layers of resin?
Allow each layer to fully cure as specified by the resin manufacturer before applying further coats or sanding.