 Free shipping on orders over £29,85


← Back to how to make a resin sphere
Stuck resin spheres can be disappointing after all your effort. Thankfully, it’s easy to avoid this common pitfall with the right preparation and techniques for effortless demoulding.
Choose the Right Mould and Release Agent
Opting for a high-quality silicone mould is the first step to successful resin sphere casting. Silicone is naturally non-stick, making it a preferred material for resin projects. However, even with premium moulds, a light application of a dedicated mould release spray is sometimes helpful, especially if you’re using the mould for the first time or casting highly detailed shapes.
- Ensure the mould is clean and free from any previous residue or dust.
- Apply a thin, even layer of mould release spray and allow it to dry before pouring your resin.
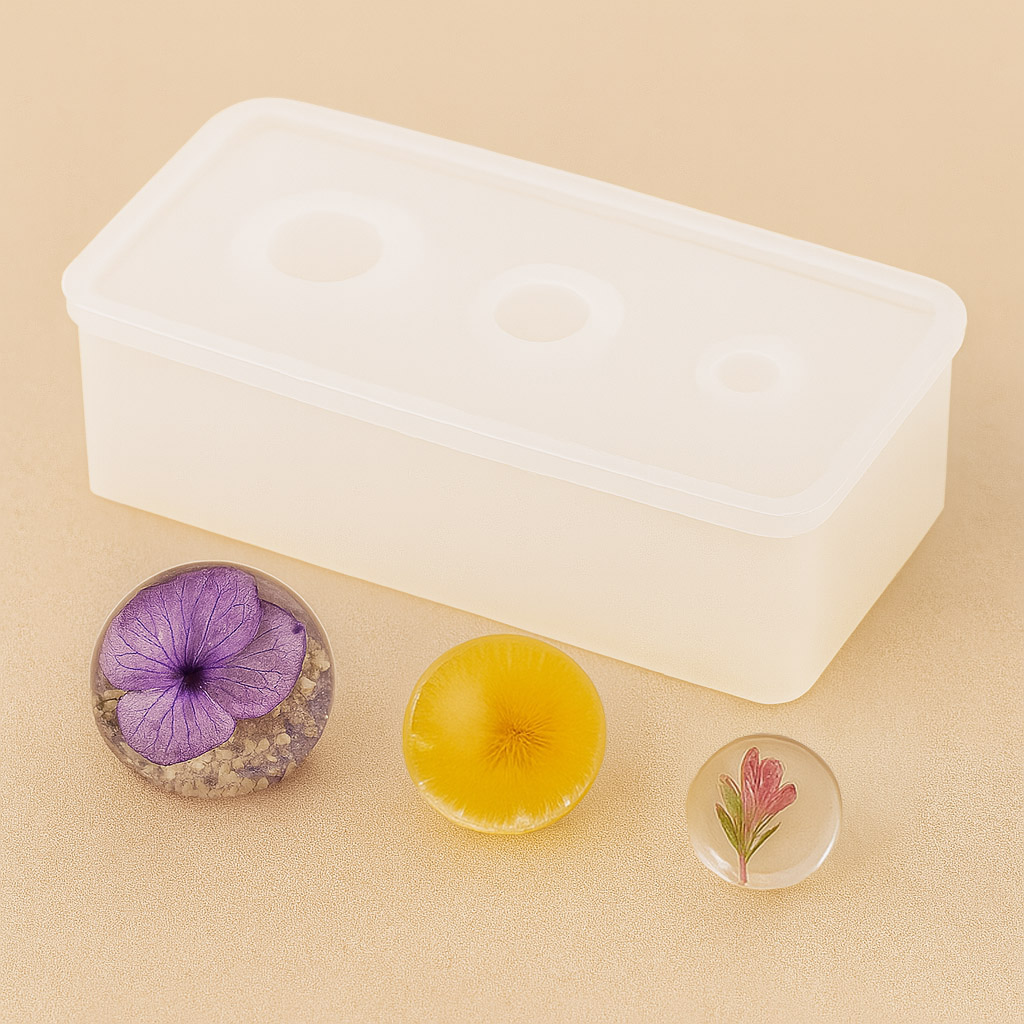
If you need sizes for jewellery or craft spheres, the “3 Sphere” Silicone Mould features three cavities (1 cm, 1.5 cm, and 2.5 cm), and is designed for easy release.
Timing: Demould Promptly for Best Results
Leaving your resin in the mould too long increases the risk of sticking, as curing resin can cling more tightly as it fully hardens. For small spheres, removal within 12 hours of pouring is generally recommended. It’s best to demould once the resin has initially set but isn’t yet brittle—this helps the finished sphere pop out with minimal effort and preserves the smooth, polished mould finish for future casts.
When Careful Demoulding Matters Most
These tips are particularly important if you want to create professional-looking jewellery pieces or display items without visible seams or surface blemishes. A gentle approach and prompt demoulding preserve both the sphere and your mould for multiple future uses.
Related products
Related guides
By carefully selecting your materials and following proper mould release and demoulding timing, you’ll ensure consistently smooth and stunning resin spheres. For more tips on sphere casting and related techniques, visit our main guide on making resin spheres.