 Free shipping on orders over £29,85

← Back to How to create a 3D effect painting using resin?
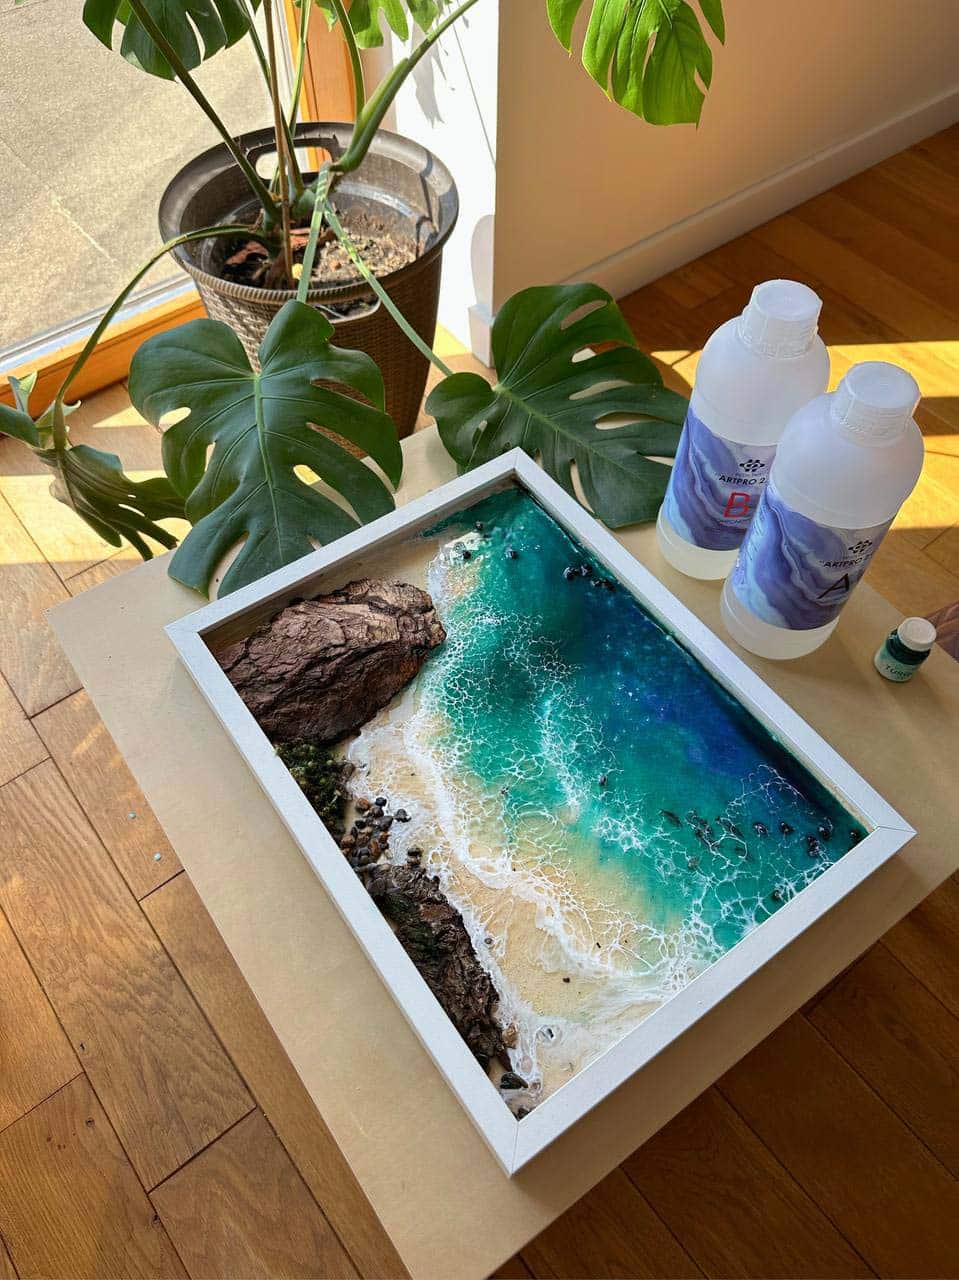

Creating a 3D effect painting with resin is all about building up layers thoughtfully. Pouring your resin in thin, controlled layers is a fundamental technique that ensures crisp depth and clarity in your finished artwork.
Why Layering Thinly Matters
Working with thin layers offers greater control over how colours and elements interact. It helps prevent unwanted colour blending, maintaining sharp distinction between each layer. Thicker pours can cause designs to merge or lose definition, especially if you’re aiming for precise 3D effects such as realistic waves or geometric patterns. Choosing a resin with an appropriate viscosity, like Art Pro Deluxe, helps further regulate flow and keeps lines crisp.


Practical Tips for Building Layers
- Allow each resin layer to partially cure before adding the next for clean separation.
- Plan your colour placement before you begin, as layering allows you to create depth with strategic positioning of pigments, inclusions or decorative elements.
- Use a level surface to avoid unwanted drifting between layers.
- Work in a dust-free area to keep each layer as clear as possible.
If you’re new to resin layering, follow a guided approach as outlined in the Free Step-by-Step Resin Ocean Art Lesson by Natalia Natirum.
When This Matters Most
Thin, controlled layering is especially important when your 3D resin painting relies on maintaining distinct shapes, like in ocean scenes, abstract geometric pieces, or when embedding small objects that should appear to “float” within the artwork. For delicate projects or intricate coaster designs further guidance can be found in the 3D Effects Coasters Masterclass.

Related products
Related guides
Mastering the art of layering resin is a game-changer for achieving professional-looking 3D effects. For more guidance and inspiration, explore our tutorials and resources on creating a 3D effect painting using resin.