 Free shipping on orders over £29,85

How to create a 3D effect painting using resin?
Step-by-step guide for layered resin art with depth.

Creating a 3D effect painting with resin allows artists to achieve stunning depth, texture and vibrancy that elevates any artwork. This guide covers each step, from surface preparation to layering techniques, so you can produce visually mesmerising pieces at home. Whether you are a hobbyist seeking a new challenge or an artist looking to expand your skills, this method brings resin art into a whole new dimension.

What You’ll Need
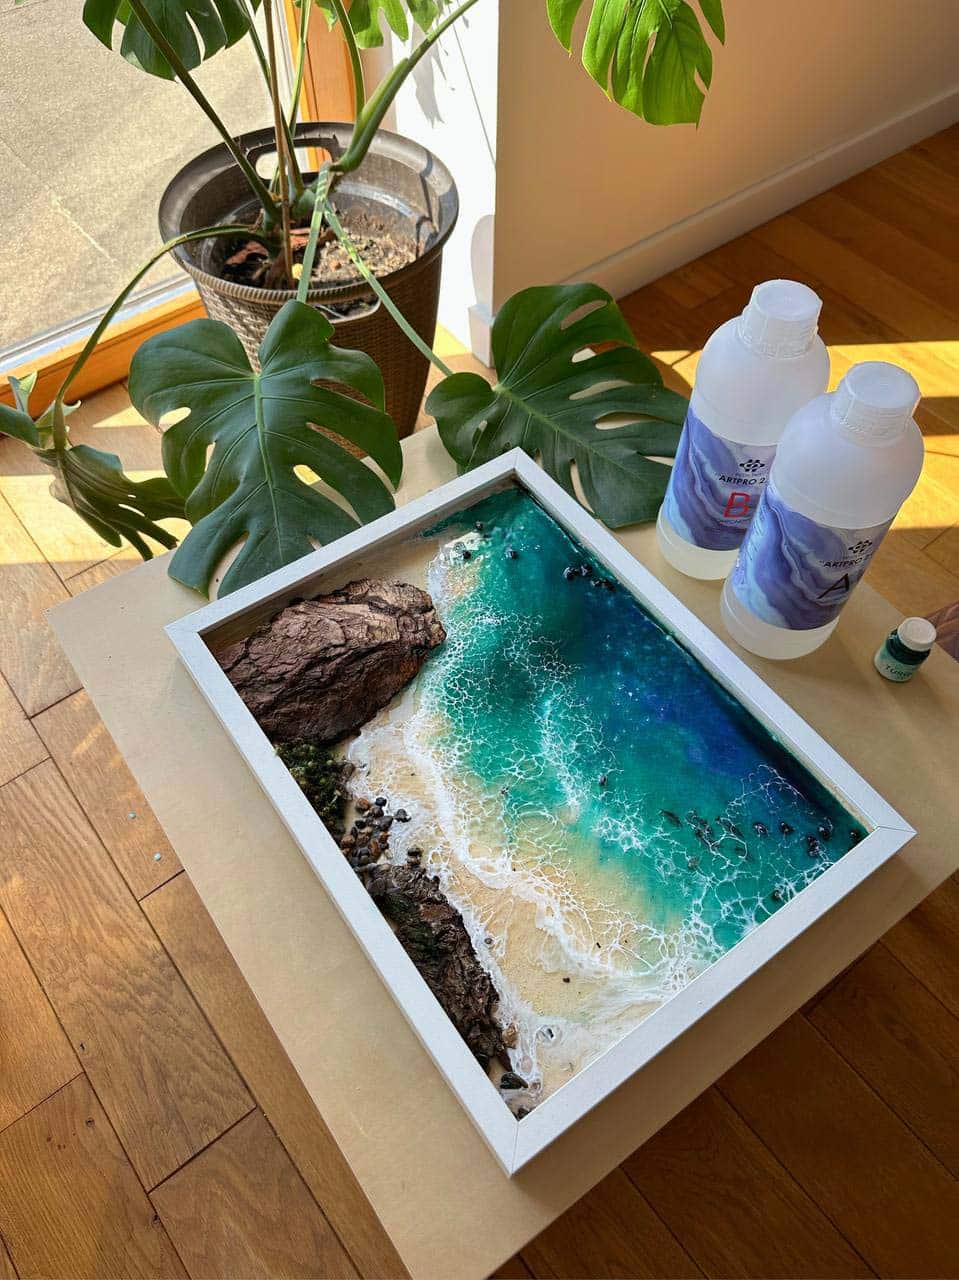
- “Art Pro Deluxe” – Ultra-High Viscosity Epoxy Resin for Artists — for crisp lines and high clarity in layered works
- “Fairy Wings” – UV Resin for Volumetric Reliefs, Dual Colour, 30ml — for fine 3D patterns or elevated surface details
- Gloves, protective mask, and apron
- Mixing containers and wooden stirrers
- Flat, dust-free painting surface (e.g. MDF board, canvas board)
- Resin-compatible pigments, dyes, or texture elements (optional for colour effects)
- UV lamp (if using UV resin for relief work)

See 3D Resin Techniques in Motion
Watch live demonstrations or tutorials to visualise the process behind layered resin art. Video lessons provide insights into mixing, pouring and creating depth. Try the Free Step-by-Step Resin Ocean Art Lesson by Natalia Natirum for inspiration and practical guidance.
Step 1: Prepare Your Workspace and Surface
Begin by selecting a well-ventilated area and protecting it from spills and dust. Wear appropriate protective gear such as nitrile gloves and a mask to ensure safety from resin fumes and skin contact. Make sure your painting surface is completely clean, dry, and level. Tape off the back and sides of your board if you wish to avoid drips. It is also helpful to raise your surface slightly to allow resin overflow without sticking to your table.
Step 2: Mix the Resin Thoroughly
Following the manufacturer’s instructions, measure out the correct ratio of resin and hardener. Mix the resin thoroughly, scraping the sides and bottom of your container to ensure a uniform mixture. Working time can be limited with some resins, so plan your colour mixes and steps ahead. For sharp, controlled lines in your 3D work, a product like Art Pro Deluxe – Ultra-High Viscosity Epoxy Resin for Artists is especially effective, as it resists colour bleed and helps maintain crisp boundaries between layers.
Step 3: Build 3D Layers with Resin Pouring
This is where the 3D effect takes shape. Pour the resin in thin, controlled layers to build dimension. You can use clear layers for depth, interspersed with layers coloured using compatible pigments or paints for extra vibrancy. Manipulate the resin using palette knives or heat tools to achieve the texture or movement you desire. To create detailed reliefs, apply small amounts of Fairy Wings – UV Resin for Volumetric Reliefs for accentuated details, then cure under a UV lamp for rapid, raised effects.


Step 4: Cure, Finish and Protect Your Artwork
Each layer of resin needs to set before adding the next—allow each resin layer to cure fully before applying the next to prevent cloudiness or chemical interference. Once your 3D painting has reached the visual effect you desire, leave the final layer to harden in a dust-free, safe environment. Remove any masking tape, clean up drip edges, and consider a final clear coat for extra gloss and protection.
Tips for Success & Common Pitfalls
Use a high-viscosity resin for more defined 3D lines and to prevent blending of coloured layers. Work efficiently but without rushing during pour stages to avoid air bubbles and unevenness. Not all colourants are compatible with every resin—test small sections beforehand. Store leftover resin in tightly sealed containers and always clean your workspace promptly to preserve tool longevity. Practice makes perfect—experiment with different pigments, pouring tools, and layer thicknesses to master the 3D effect.

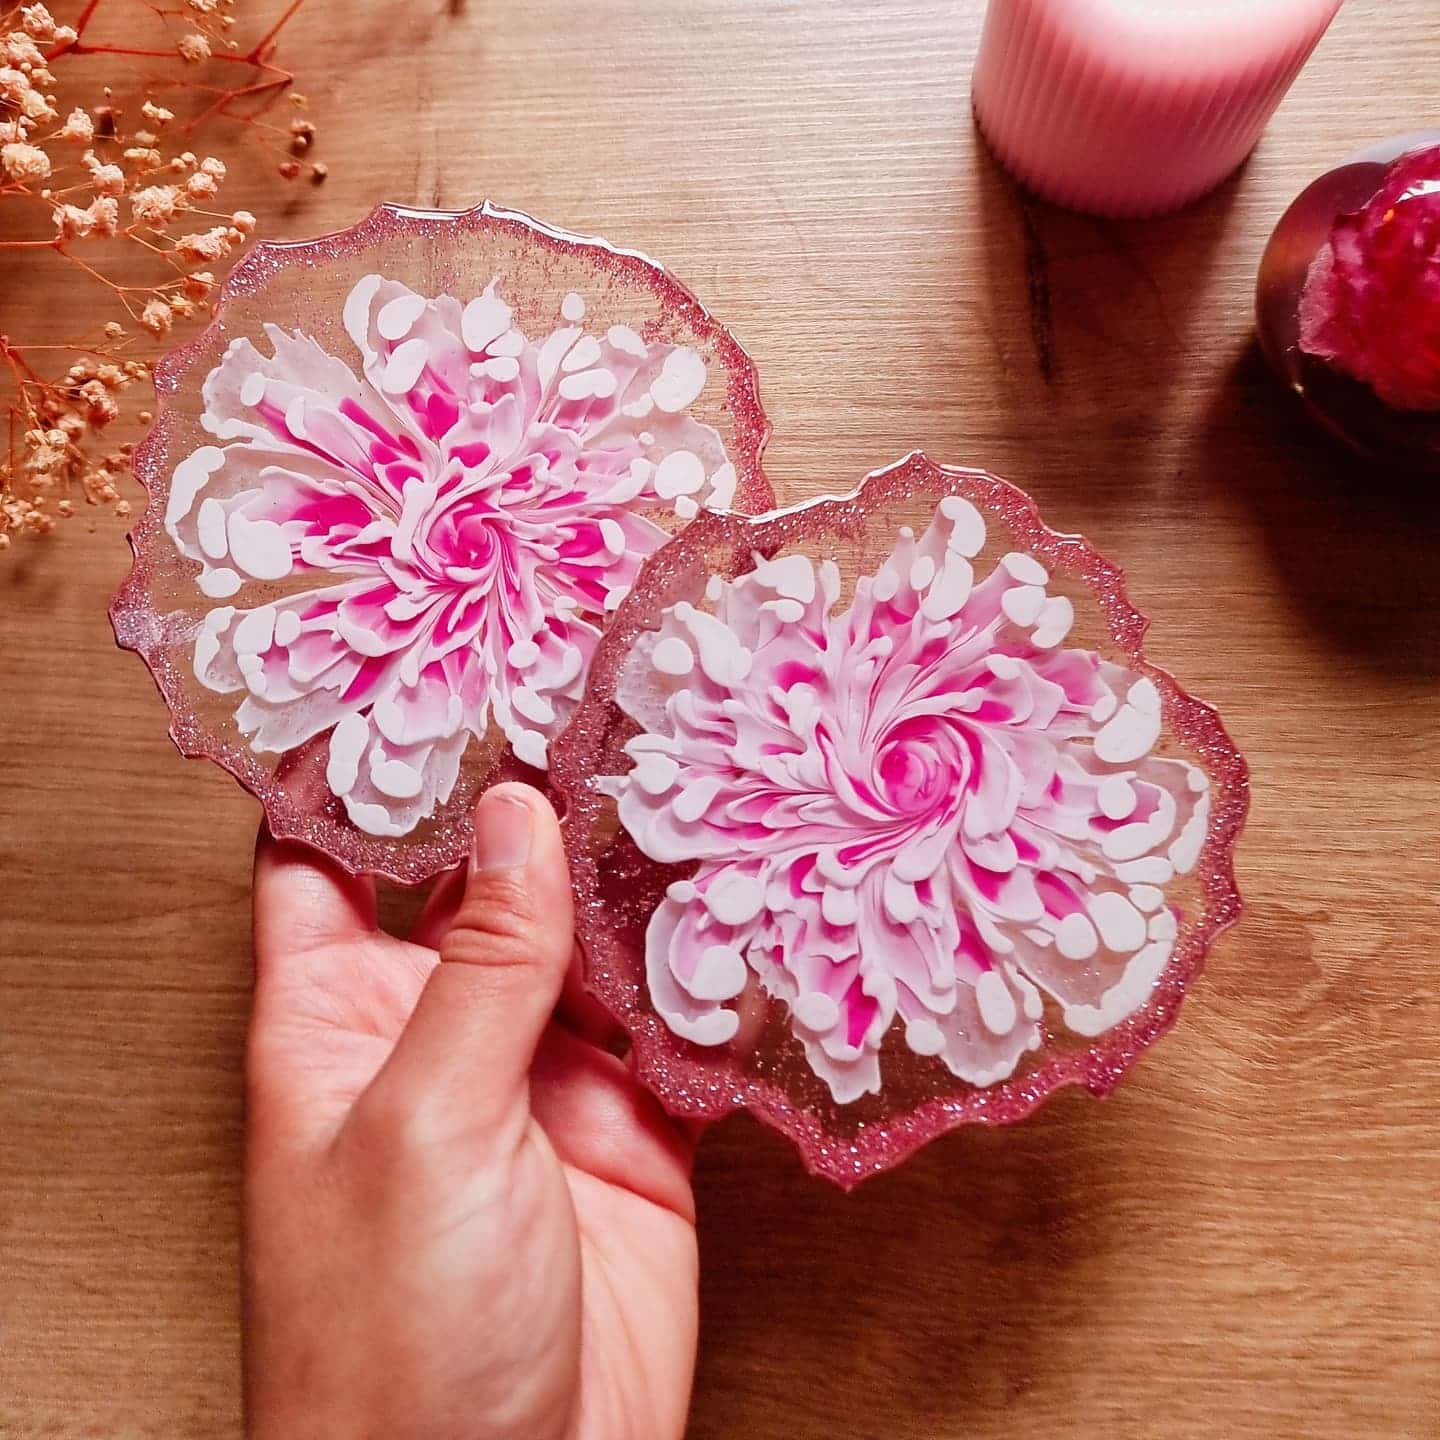
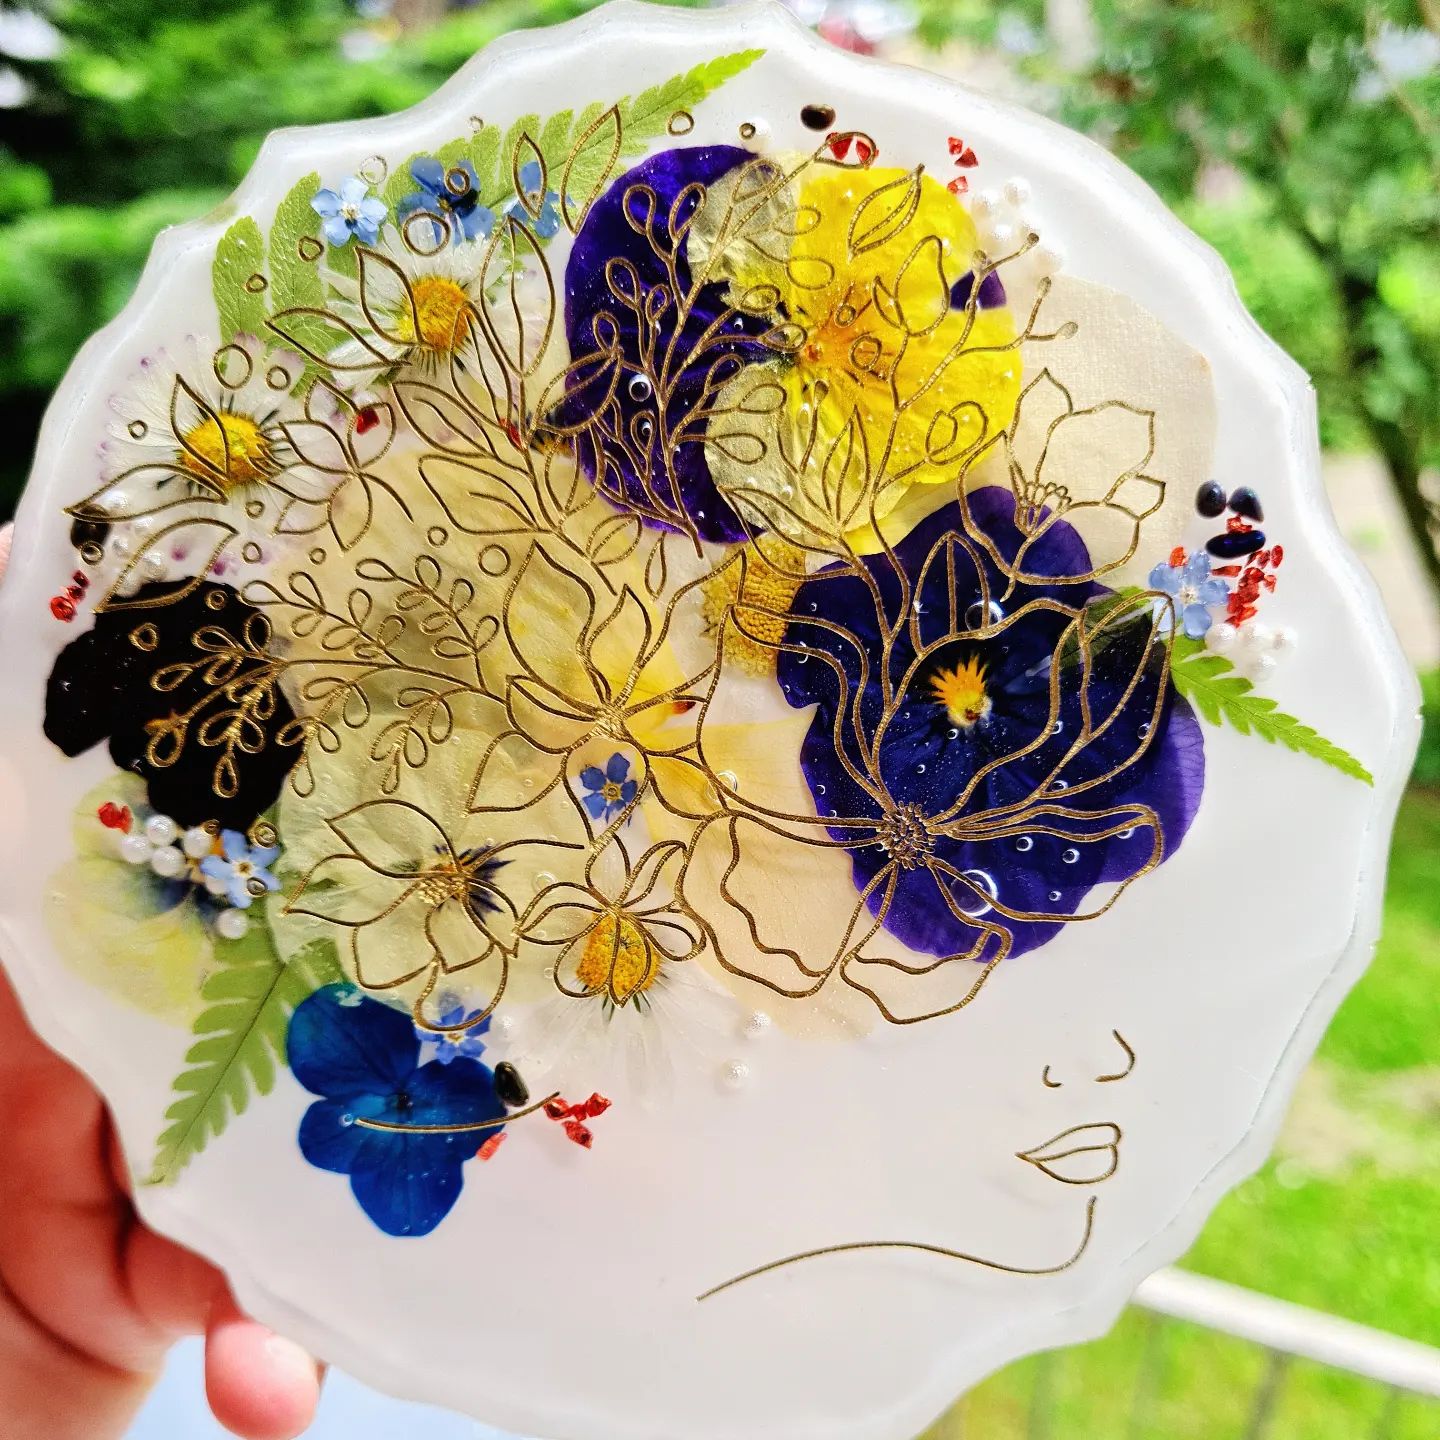
Examples of Striking 3D Resin Artwork
Explore finished resin paintings and coasters that showcase powerful 3D effects. Notice the interplay of colour, clarity, and relief to gather ideas for your own creations. Classes like the Resin Class – 3D Effects Coasters Masterclass, 120 Minutes can help refine your approach to achieving layered depth.

- Free Step-by-Step Resin Ocean Art Lesson by Natalia NatirumOriginal price was: £99.00.£0.00Current price is: £0.00.This free lesson explains creating Resin Ocean Art using resin and specific materials, fitting the 3D effect painting theme.
- Resin Class – 3D Effects Coasters Masterclass, 120 MinutesThis course teaches how to create functional art pieces like coasters and bowls using resin, fitting the theme of 3D effect painting.
- "Art Pro Deluxe" – Ultra-High Viscosity Epoxy Resin for ArtistsPrice range: £35.95 through £302.45"Art Pro Deluxe" resin has an ultra-high viscosity for detailed resin art and produces a crystal-clear, scratch-resistant finish suitable for precise…
 "Fairy Wings" – UV Resin for Volumetric Reliefs, Dual Colour, 30mlOriginal price was: £15.15.£2.85Current price is: £2.85."Fairy Wings" UV Resin is a ready-to-use acrylic gel suitable for detailed 3D patterns, fitting the theme of creating 3D effect paintings.
Frequently Asked Questions
Can I achieve 3D effects on any surface?
For best results, use non-porous, flat boards such as MDF or primed canvas designed for resin art.
Should I use high or low viscosity resin?
High-viscosity resin is preferred for sharp lines and defined 3D effects, while lower viscosity is suitable for base pours.
How long should I cure between resin layers?
Cure times vary by product but typically range from several hours to overnight for full hardness before adding layers.
What are common mistakes in 3D resin painting?
Insufficient mixing, adding layers too early, or using incompatible pigments can disrupt clarity. Patience is key.
How do I get rid of air bubbles in resin?
Use a heat gun or torch lightly over the surface immediately after pouring to help bubbles rise and burst.
Can I add embellishments to resin 3D art?
Yes, embed objects like shells or glitter between layers to enhance the dimensional effect of your painting.
Is UV resin suitable for full-size paintings?
UV resin is best for detailed relief or accent layers; for full panels, use conventional epoxy resin.