 Free shipping on orders over £29,85


How to colour polyurethane resin?
Step-by-step guide for seamless, vibrant resin colouring


Adding colour to polyurethane resin opens up endless possibilities for creative makers, model builders, and crafters. This guide covers how to achieve consistent, vibrant results safely and reliably, helping you avoid common colouring pitfalls. Whether you’re crafting miniatures, jewellery, or functional parts, you’ll learn the best practices for tinting and finishing polyurethane resin.
What You’ll Need
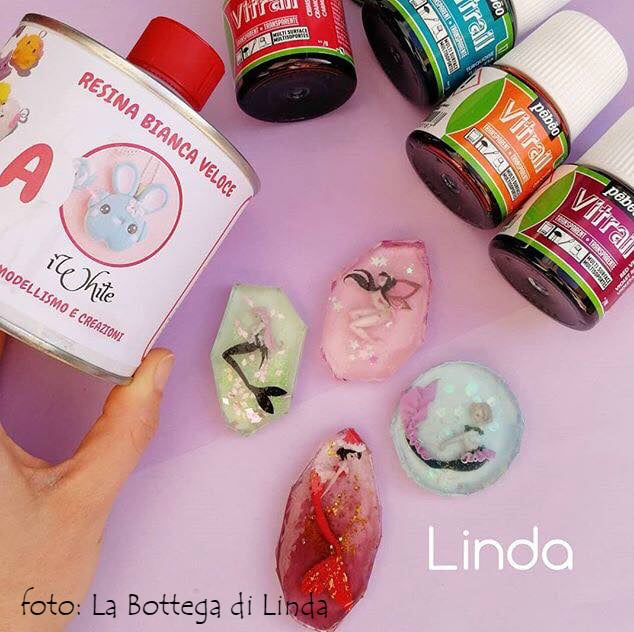
- “IWhite” – Polyurethane Casting Resin – White, Fast-Curing Two-Part System: Ideal for precise replica casting and craft models.
- “Sahara Space” – Interference Metallic Pigment, 10g: Offers a selection of metallic shades, suitable for both subtle and bold effects.
- “Be Flex” – Transparent Polyurethane Doming Resin – Scratch-Resistant: Useful as a clear topcoat or for doming coloured resin items.
- Disposable mixing cups
- Mixing sticks or spatulas
- Protective gloves and apron
- Clean workspace with adequate ventilation

Visual Inspiration: Colourful Polyurethane Resin Projects
Explore creative possibilities with coloured polyurethane resin—from shimmering metallic effects to bold opaque hues. Use Sahara Space Metallic Pigments for unique sparkle in your next casting or decorative project.
Step 1: Prepare Your Workspace and Safety Gear
Begin by organising your materials and ensuring your workspace is clean, dust-free, and well-ventilated. Polyurethane resins cure quickly, so have all tools and pigments ready before you start mixing. Don latex or nitrile gloves and consider wearing an apron to protect your clothing. Having your materials pre-measured and within reach reduces the risk of rushing or making errors once the resin has been mixed.

Step 2: Measure and Mix the Resin Components
Accurate measurement is critical for successful curing. Follow the instructions for your chosen resin precisely – for example, the “IWhite” – Polyurethane Casting Resin – White, Fast-Curing Two-Part System requires mixing equal amounts of part A and part B. Use clean, dry containers for both parts. Mix slowly and thoroughly with a spatula, scraping the sides and bottom to ensure uniformity and avoid introducing excessive air bubbles. This creates an even base for adding colour.
Step 3: Add Pigment to the Mixed Resin
Once your resin components are blended, it’s time to introduce your chosen pigment. For solid, opaque finishes, coloured polyurethane resins like “IWhite” can be tinted with compatible pigment pastes or powders. Metallic pigments such as “Sahara Space” – Interference Metallic Pigment offer shimmering effects. Begin by adding a small amount—typically no more than 5% by mass of the total resin mix. Mix colour thoroughly to prevent streaks. If you want a translucent, jewel-like look, use a smaller quantity; for opaque or bold colours, gradually add more pigment, mixing between additions. Add pigment gradually for control, as over-saturating can impede curing or affect clarity.
Step 4: Cast, Doming, and Finishing Techniques
With the pigmented resin ready, pour or cast it into your prepared mould or shape. Take care to minimise air bubbles—pour slowly and tap the mould gently if needed. Smooth any surface imperfections while the resin is still workable. For projects that require a glossy, protective finish or a domed effect (such as badges or stickers), once curing is complete you can apply a coating of “Be Flex” – Transparent Polyurethane Doming Resin – Scratch-Resistant. This adds a flexible, durable surface, ideal for curved or exterior-facing applications. Always allow the initial coloured resin to fully cure before adding any topcoat.
Step 5: Curing and Post-Processing
Carefully observe the curing times stated for your resin system—most polyurethane resins set rapidly, so work efficiently. Avoid moving the workpiece or exposing it to dust during the initial cure period. After full hardening, you can sand or further decorate the resin surface, or even paint details if desired. Mica and metallic pigments will develop their final appearance once the resin is fully cured. Observe curing times carefully for best clarity and durability.
Tips and Troubleshooting
To avoid cloudy or unevenly coloured resin, always use suitable pigments for polyurethane and mix thoroughly before pouring. If air bubbles appear, tap or gently warm the mould to bring them to the surface. Too much pigment or the wrong type may affect the resin’s structure or inhibit curing—so always test unfamiliar brands on a small scale first. Store pigments and part-used resins in tightly closed containers, away from humidity and direct sunlight, to maintain their properties.
Showcase: Expert Resin Finishing Techniques
Achieve flawless doming and eye-catching finishes by applying Be Flex Transparent Doming Resin as a flexible, high-gloss coat over any coloured surface.

- “IWhite” – Polyurethane Casting Resin – White, Fast-Curing Two-Part SystemPrice range: £22.85 through £34.85IWHITE is a fast-curing polyurethane resin suitable for detailed moulding and rapid prototyping with colourable and paintable options.
- "Be Flex" – Transparent Polyurethane Doming Resin – Scratch-ResistantPrice range: £21.85 through £77.85Be Flex offers a flexible, scratch-resistant transparent finish ideal for stickers and labels, supporting clear 3D effects on curved surfaces.
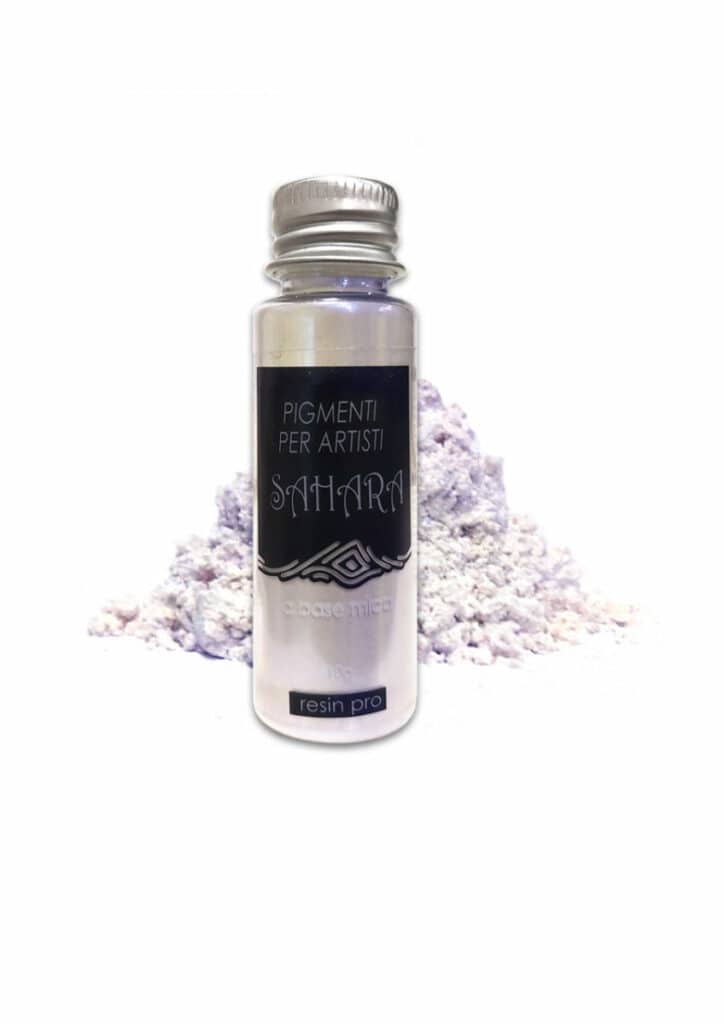 "Sahara Space" – Interference Metallic Pigment, 10g£3.45Metallic interference pigments available in four colours, designed for use in epoxy jewellery and resin art.
 "Trasparente" Epoxy Resin Kit 800g + Mica Powder 10g – 10 Colour Variations£19.85"Trasparente" is an ultra clear epoxy resin kit suitable for castings and table making, with included mica powder for colouring.
Frequently Asked Questions
Can any pigment be used in polyurethane resin?
Not all pigments are suitable—use only those compatible with polyurethane, such as interference metallic powders and specialised resin colourants.
Will adding pigment affect the resin curing time?
If excess pigment is added, it can slow curing or impact final hardness. Stick to recommended ratios for best results.
Can resin be painted after curing?
Yes, cured polyurethane resin can be painted with acrylics or coated with doming resin for a glossy effect.
How do I achieve metallic or pearl effects in resin?
Use interference or mica pigments, mixing gently for an even metallic or pearlescent finish in your poured resin.
What should I do if bubbles appear in my coloured resin?
Tap or warm the mould to release air bubbles before curing completes for a clearer end result.
How much pigment should I add to polyurethane resin?
Generally, add no more than 5% pigment by mass. Excess pigment may disrupt the resin structure.
Can I use epoxy-specific pigments in polyurethane resin?
Some mica and metallic pigments can be used, but always check compatibility and test before your main project.